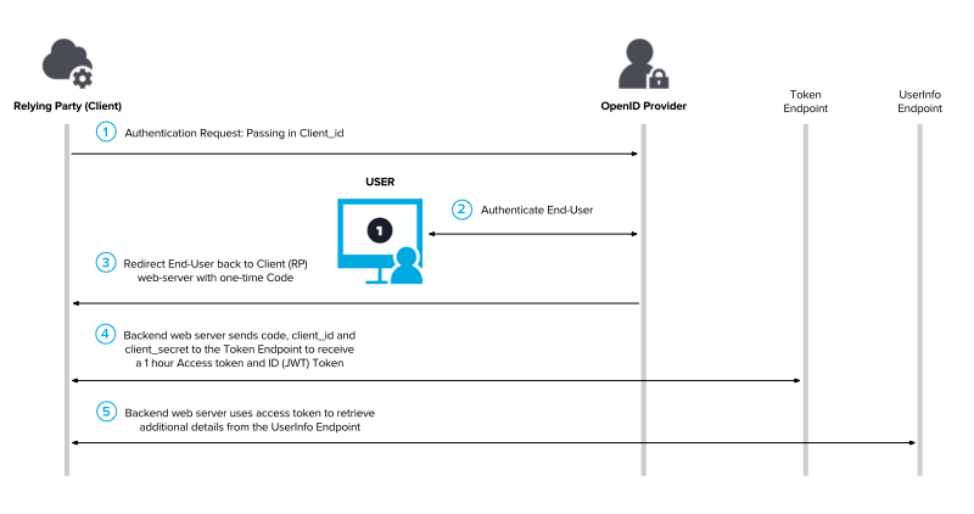
OIDC (OpenID Connect) is an authentication and authorization protocol based on the OAuth 2.0 protocol. It extends OAuth 2.0 to provide a standardized way for identities to enable users to authenticate with third-party applications and authorize those applications to access protected resources.
Raysync oidc authentication implements back-end communication with IDP. Its function is similar to the traditional OAuth process, and it interacts with the Raysync web application to obtain the access token through the traditional OAuth access token method. During this process, the IDP provider does not send user details, but a special one-time code that Raysync Web Services can exchange for an OAuth access token. In addition to the one-time code, this exchange needs to include the client ID and client secret, just like the traditional OAuth 2.0 flow. This token is invisible through the browser and enables Raysync services to authenticate between IDP services.
If you already have your own enterprise management system, you can log in to Raysync using your enterprise management system account.
1. OKTA Login
1.1 Create OKTA app
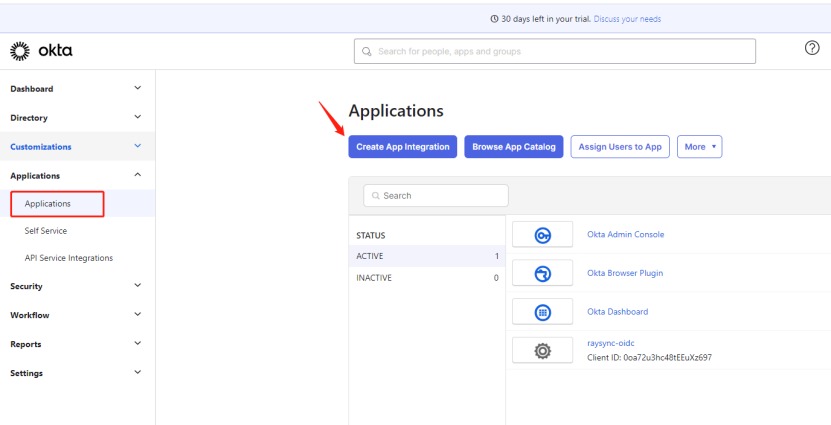
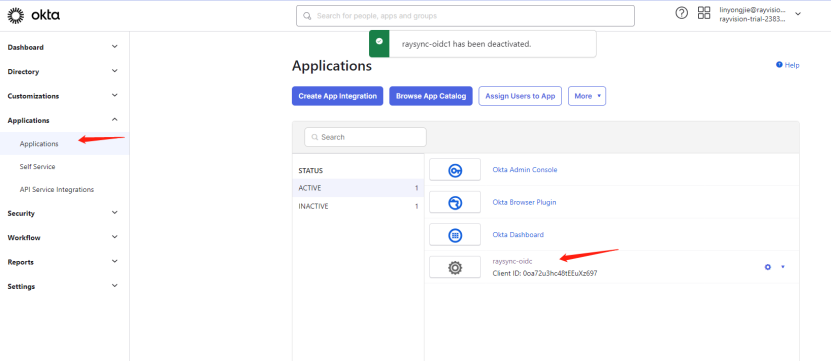
1) Log in to your okta management page, find Applications in the left menu bar, and click Create APP Integration
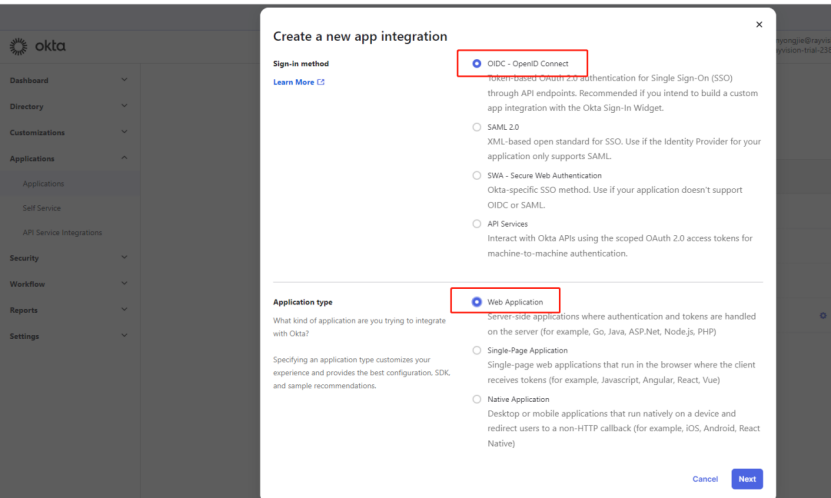
2) On the pop-up page, select Sign-in method: OIDC - OpenID Connect, and select Application type: Web Application. After completing the selection, click Next
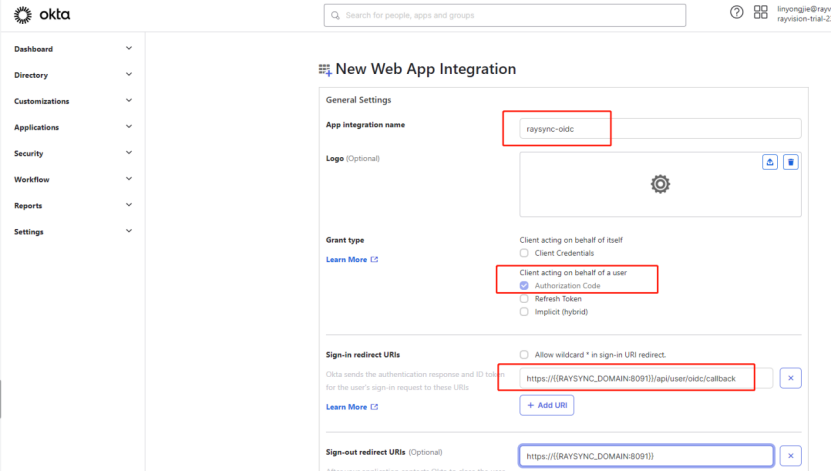
3) Fill in the application information, please make sure the address is accurate
| Function | Description |
|---|---|
| App integration name | App integration name |
| Client acting on behalf of a user | Authorization Code |
| Sign-in redirect URIs |
redirect URIs:Your Raysync user portal url + /api/user/oidc/callback. For example: https://{{RAYSYNC_DOMAIN:8091}}/api/user/oidc/callback |
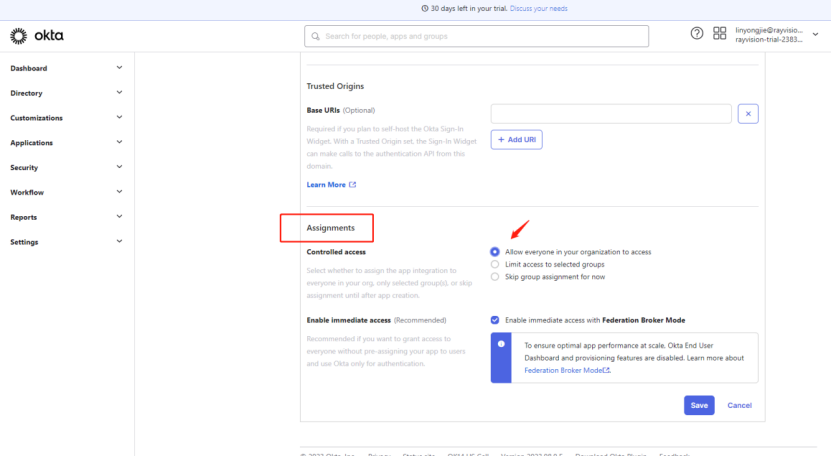
4) Set the Assignments. The default selection is as follows. All users running okta. Click Save after completing the selection.
1.2 Get OKTA application information
1) Click on the created APP
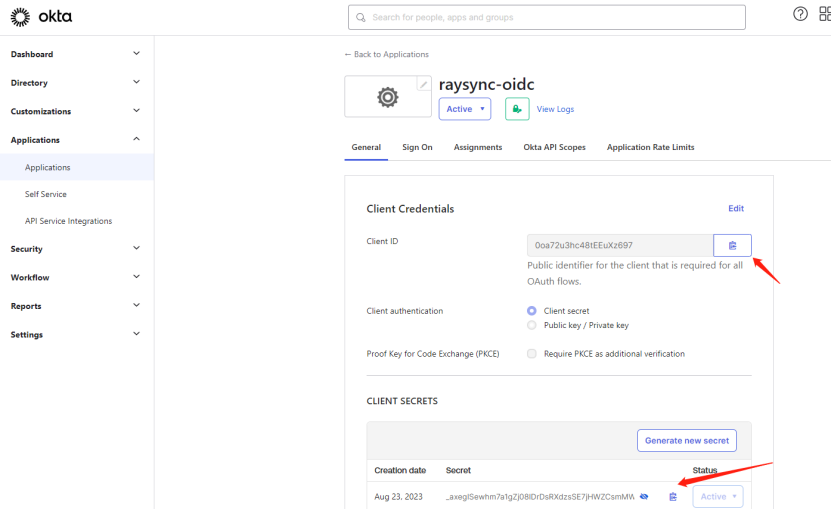
2)Get the Client ID、Client Secret
3) In the left menu bar, select API under Security and enter

4) Click on the picture to enter the configuration information of okta
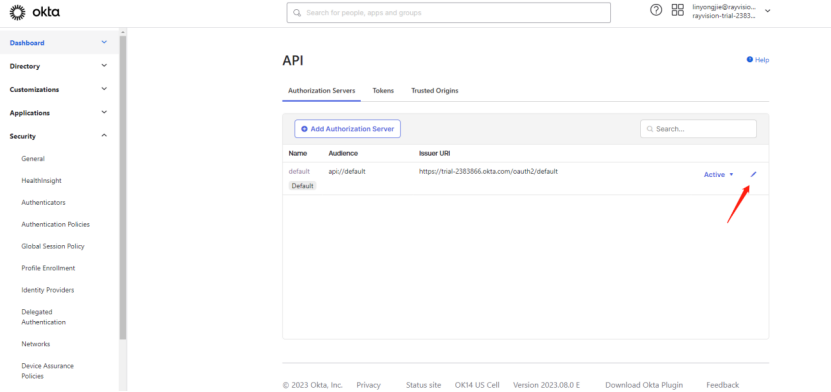
5) Get the Issuer
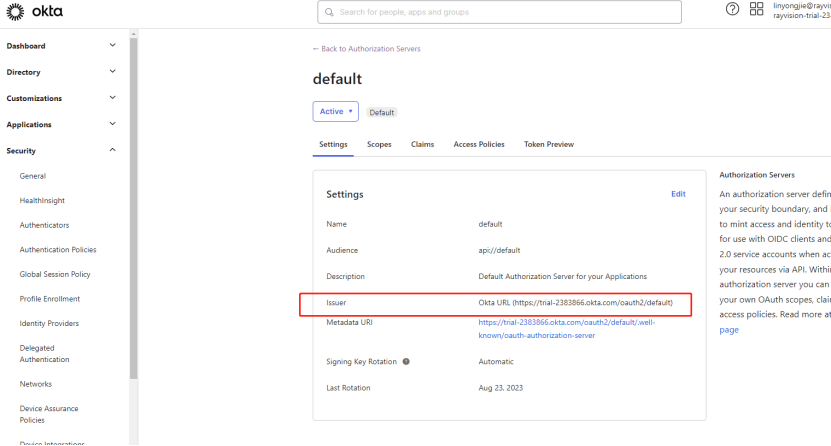
6) According to the issuer, obtain the configuration information address of idp. The conversion address is such as: {{issuer}}/.well-known/openid-configuration. After the conversion is completed, enter the address in the browser.

7) From the json information obtained in step 6, obtain authorization_endpoint, token_endpoint, userinfo_endpoint
1.3 Fill in OKTA APP information into Raysync
Fill in the above information into the oidc authentication configuration of the Raysync admin portal and click Save
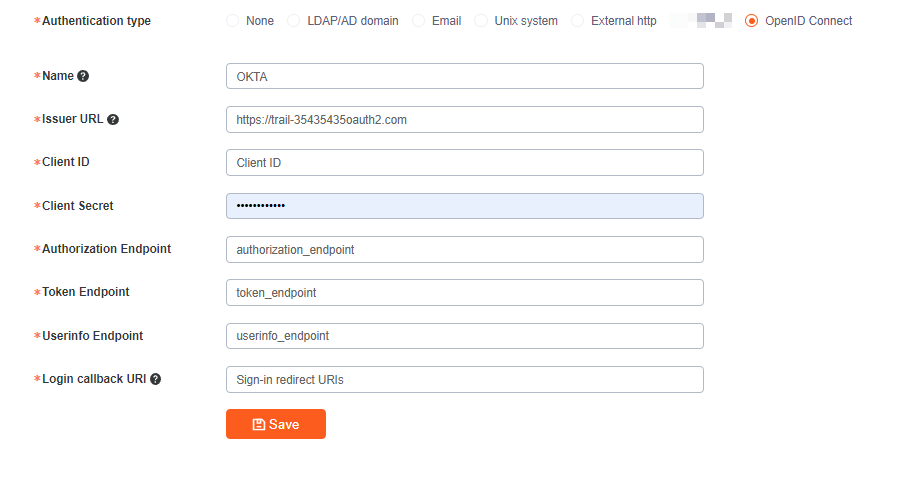
Click Test Connection. If you successfully jump to OKTA's login page, the configuration is successful. After successful configuration, users can use their OKTA account to log in to Raysync user portal.
2. OneLogin Login
2. 1 Create OneLogin app
1) Login into your management page, click on the upper navigation bar , Applications > Add App
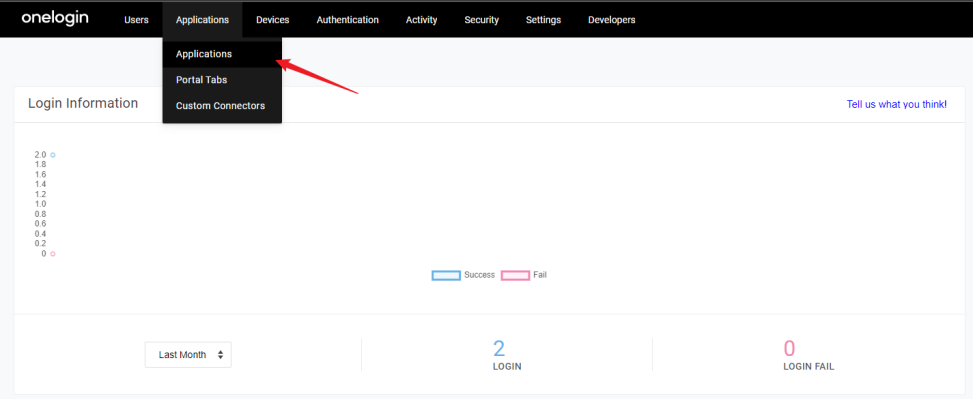

2) Search for "OpenId Connect" or "oidc" and select Open Connect (OIDC)

3) Enter a name for the application and click Save
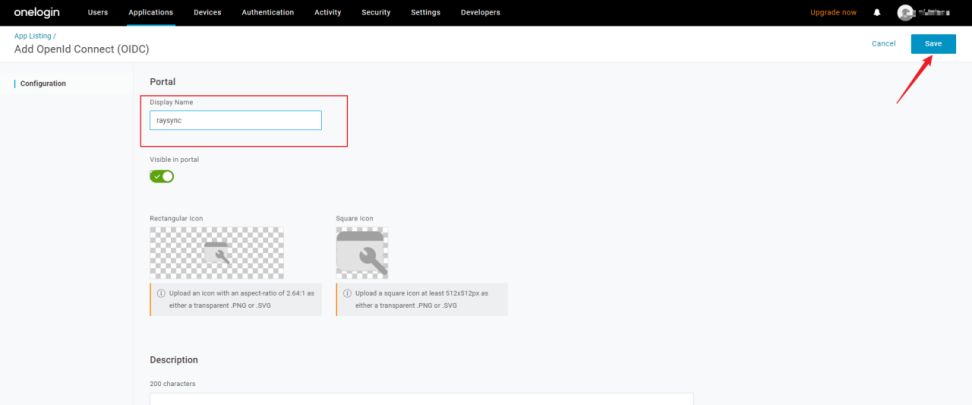
4) In the Configuration tab, configure the application information, make sure the address is accurate, and click Save
| Function | Description |
|---|---|
| Login Url |
Your Raysync user portal url |
| Redirect URI's |
Your Raysync user portal url + api/user/oidc/callback |
| Post Logout Redirect URI's |
Your Raysync user portal url |

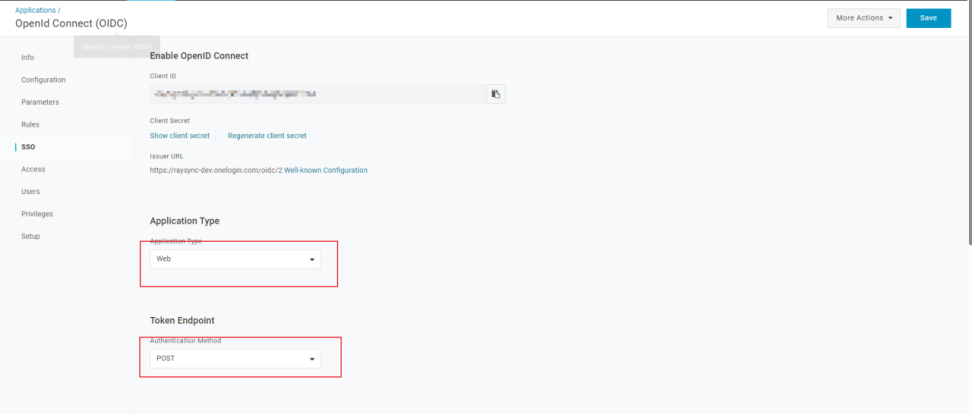
5) In the SSO tab, select Web for Application Type; select POST as the token endpoint for Authentication Method, and click Save
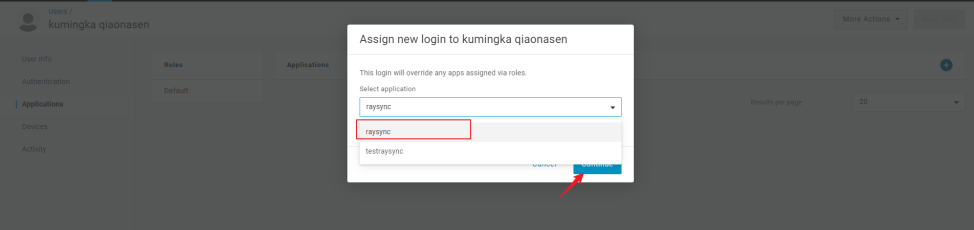
6) Add users to the application
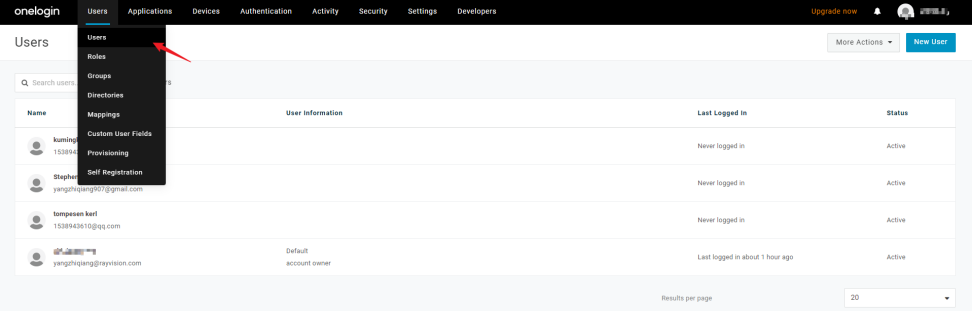
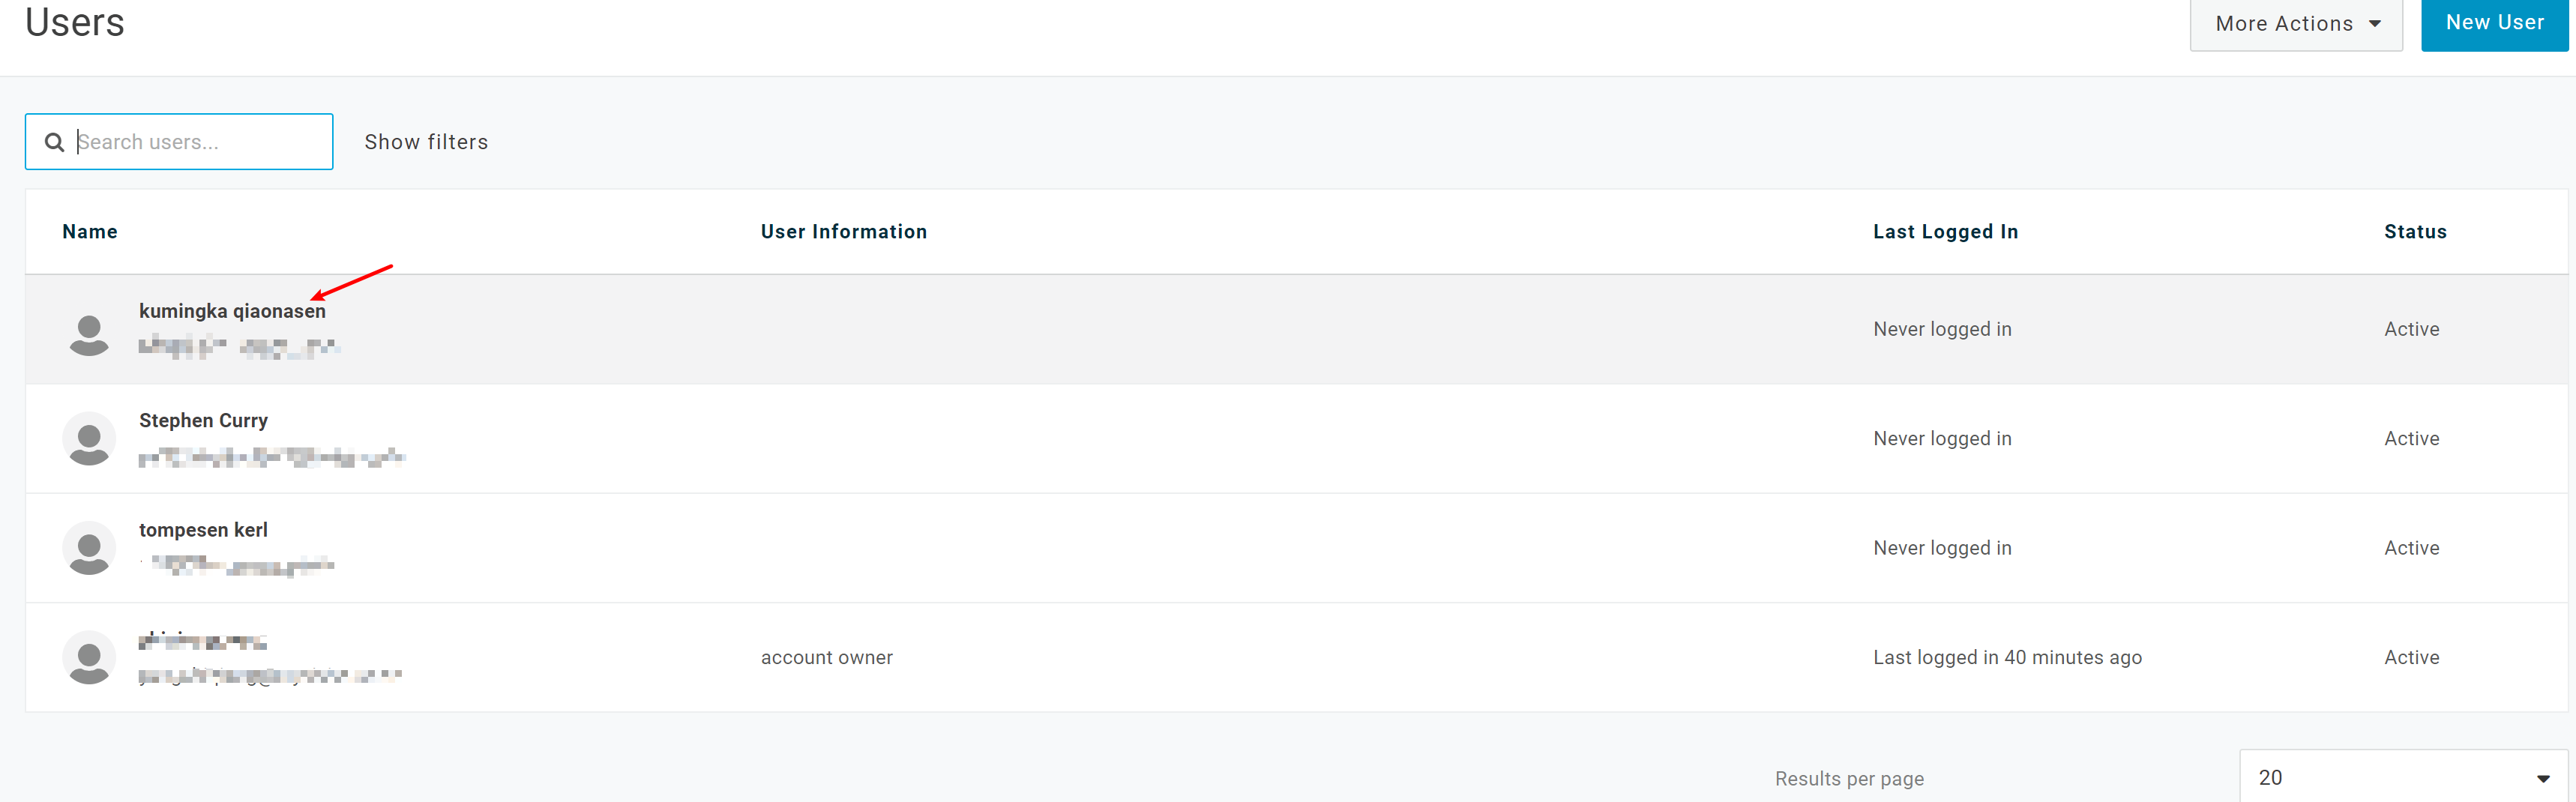
Click the navigation bar Users > Users, then select a user and click to enter
Click Application and add
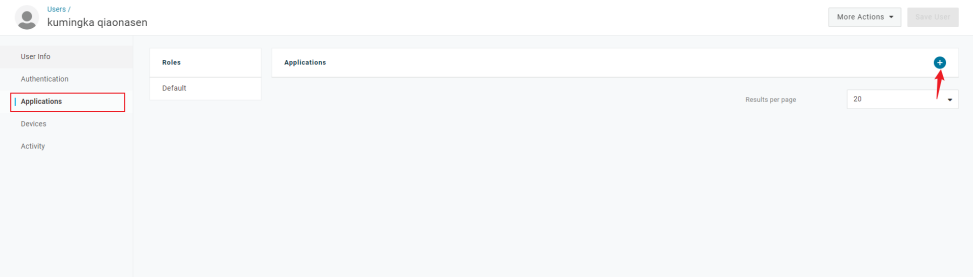
Select the application you want to add and click Save
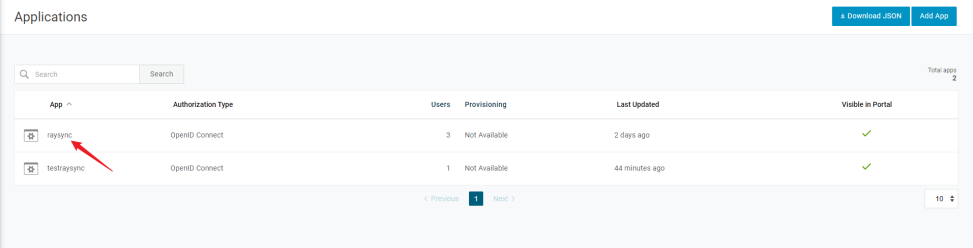
2.2 Get OneLogin application information
1) Click to enter the app
2) Click SSO , get Client ID and Client Secret

3) Get IssuerURL
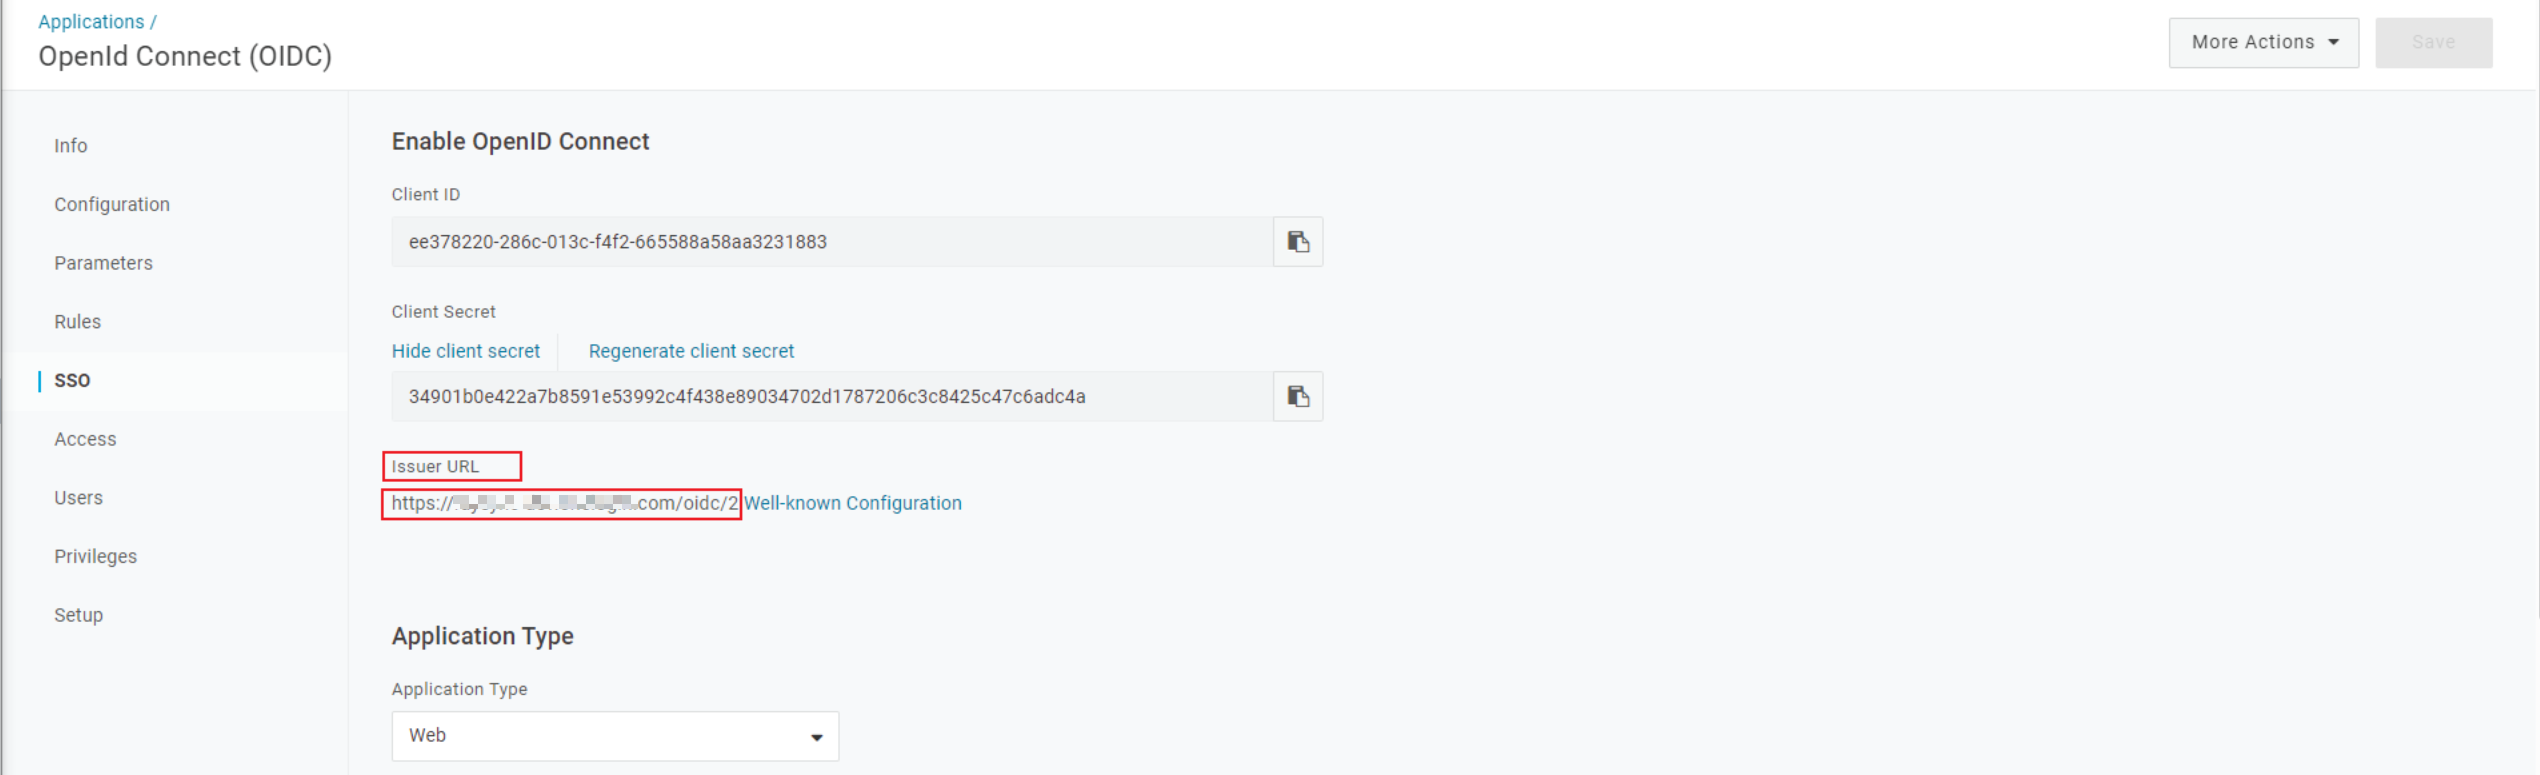
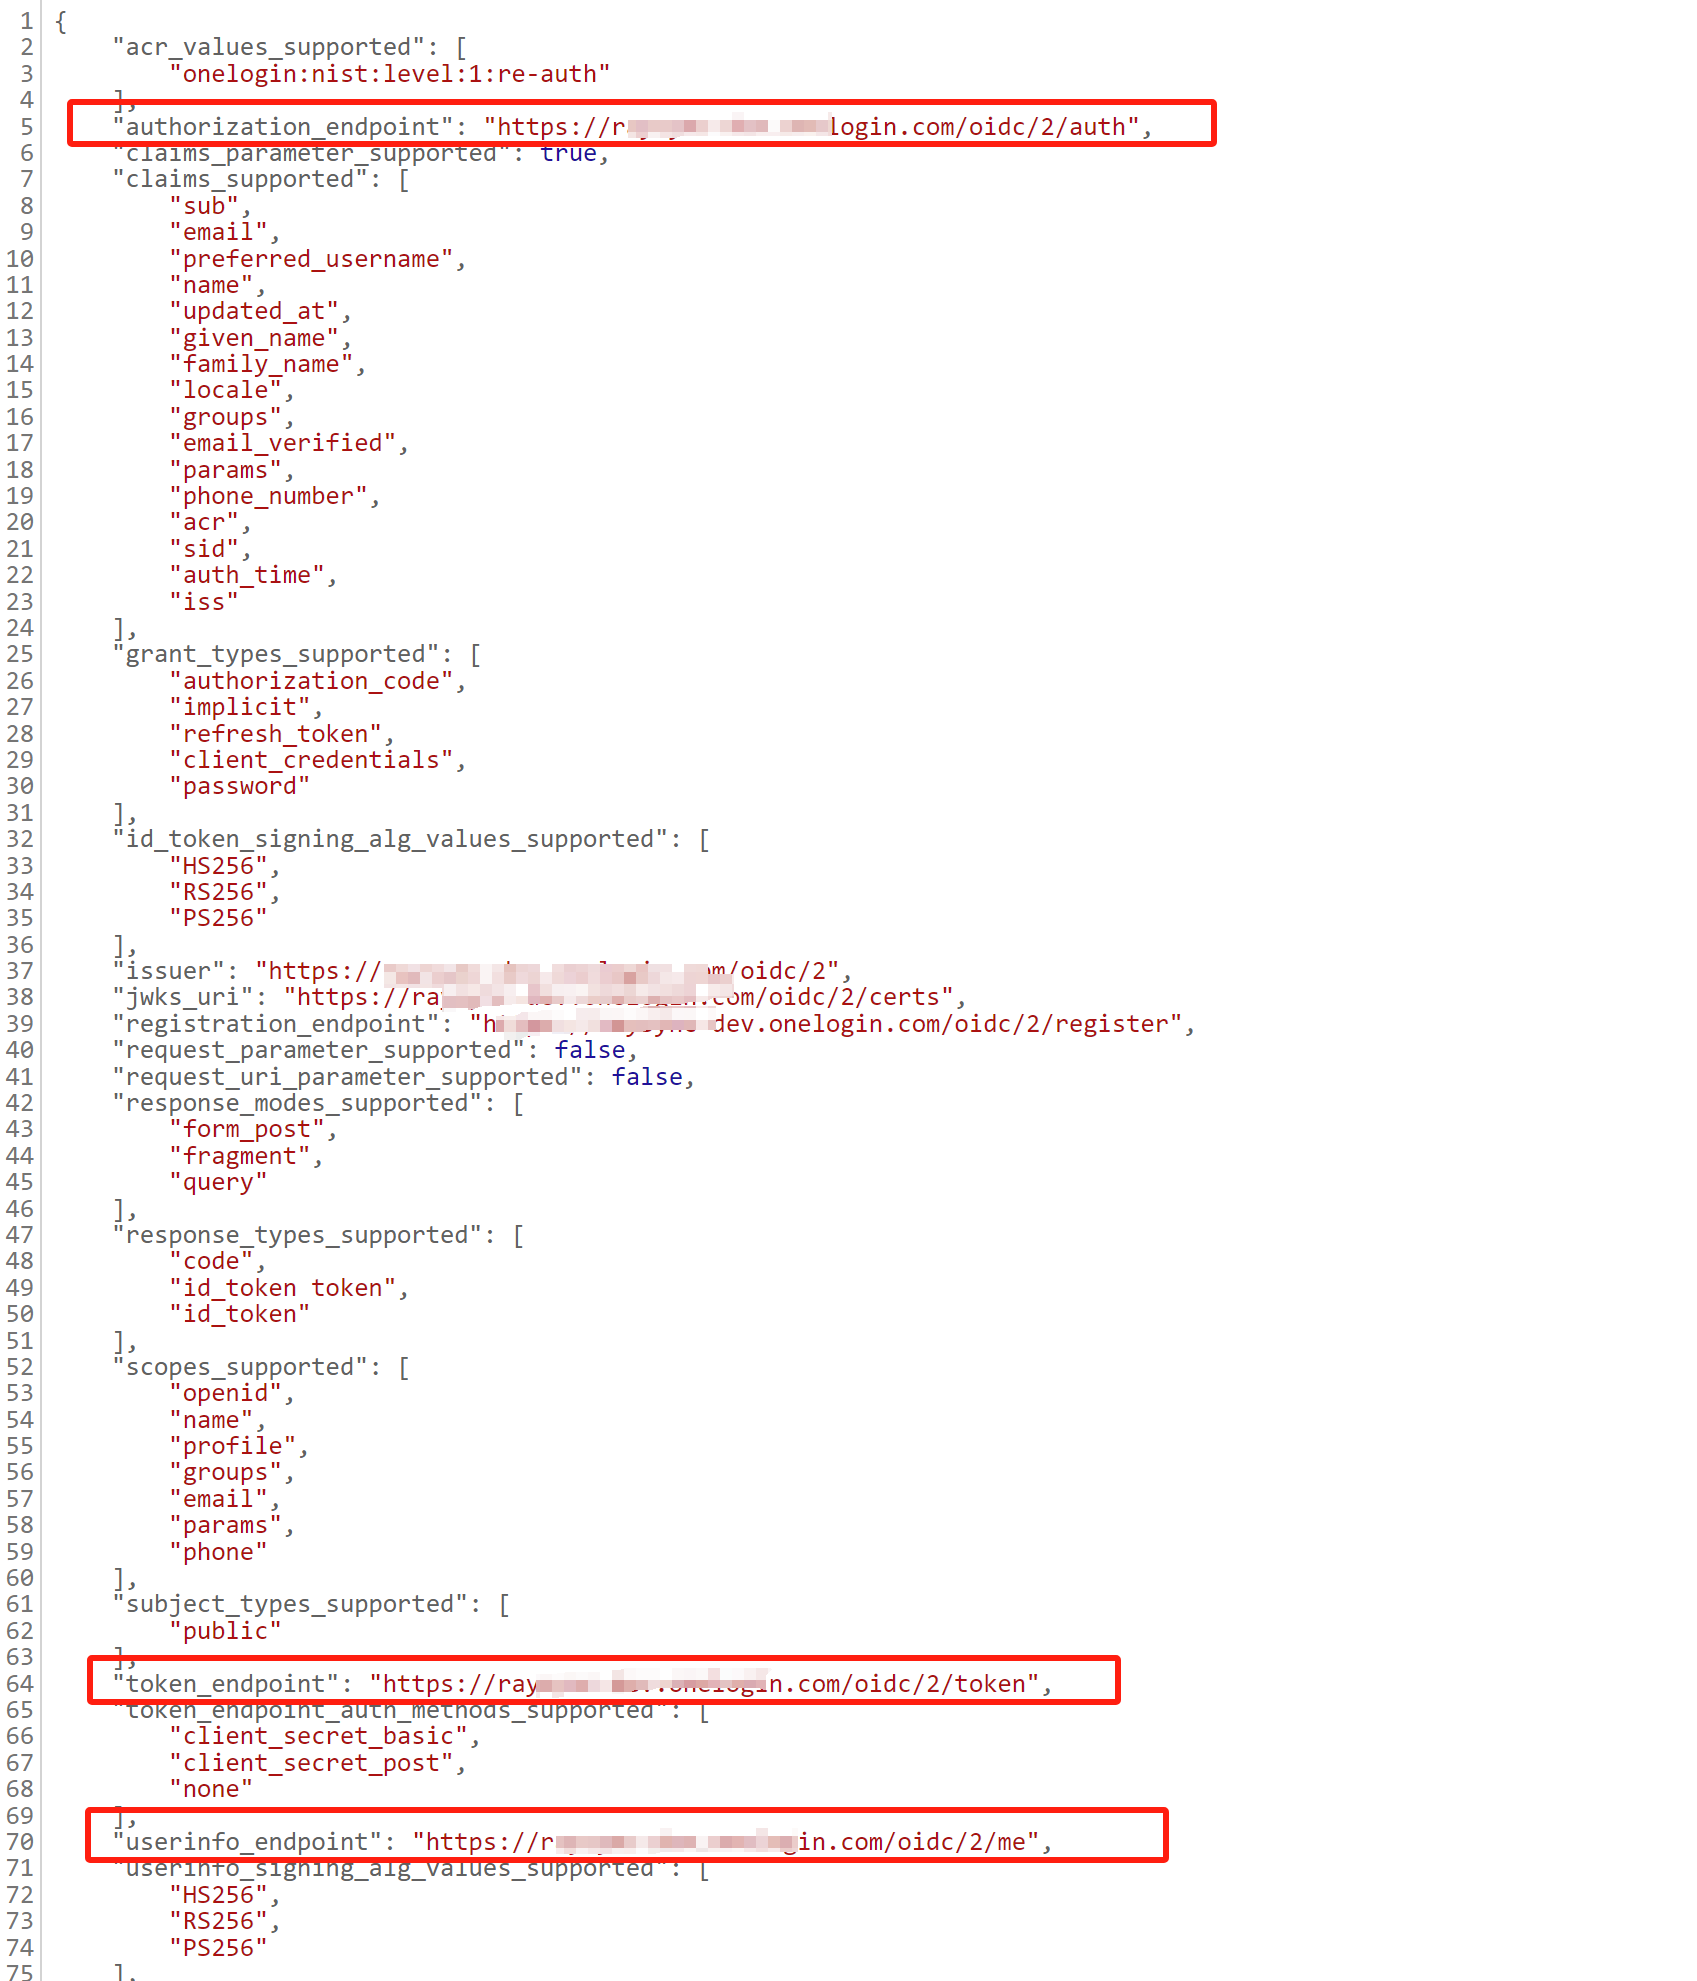
Click "Well-known Configuration" to get authorization_endpoint, token_endpoint, userinfo_endpoint
2.3 Fill in the OneLogin APP information into Raysync
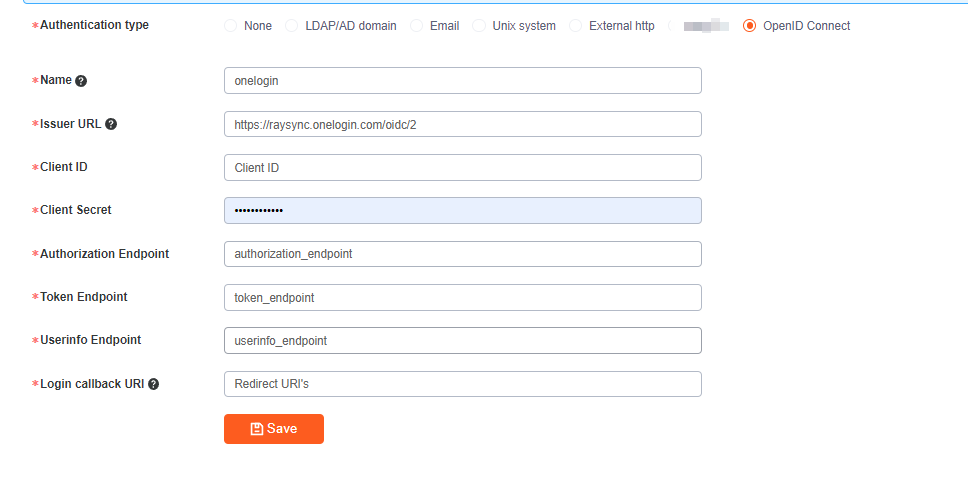
After saving, click Test Connection. If you jump to the Onelogin login page, the configuration is successful. After successful configuration, users can use their Onelogin account to log in to Raysync user portal.
3 Google Login
3.1 Create Google credentials
1) Log in to google console https://console.cloud.google.com
2) Click API & Services

3) Click Credentials > Create Credentials

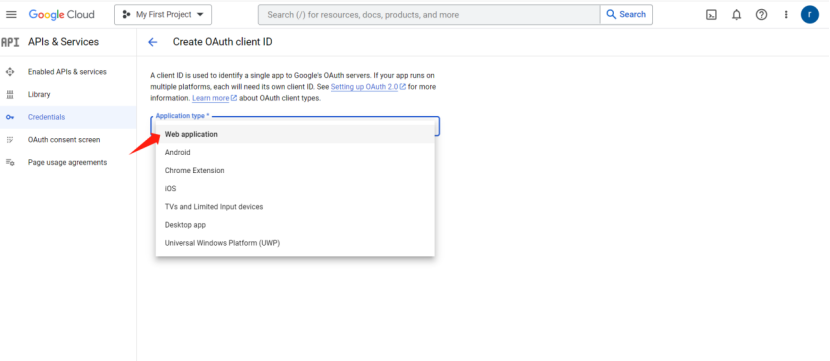
4) Select OAuth client ID

5) Select application type: Web application
6) Fill in Authorized JavaScript origins and Authorized redirect URIs


| Function | Description |
|---|---|
| Authorized JavaScript origins |
For example: https://raysync.io:8091
For example: https://raysync.io:9091 |
| Authorized redirect URIs |
For example: https://raysync.io:8091/api/user/oidc/callback
For example: https://raysync.io:9091/api/admin/oidc/callback |
Click Create
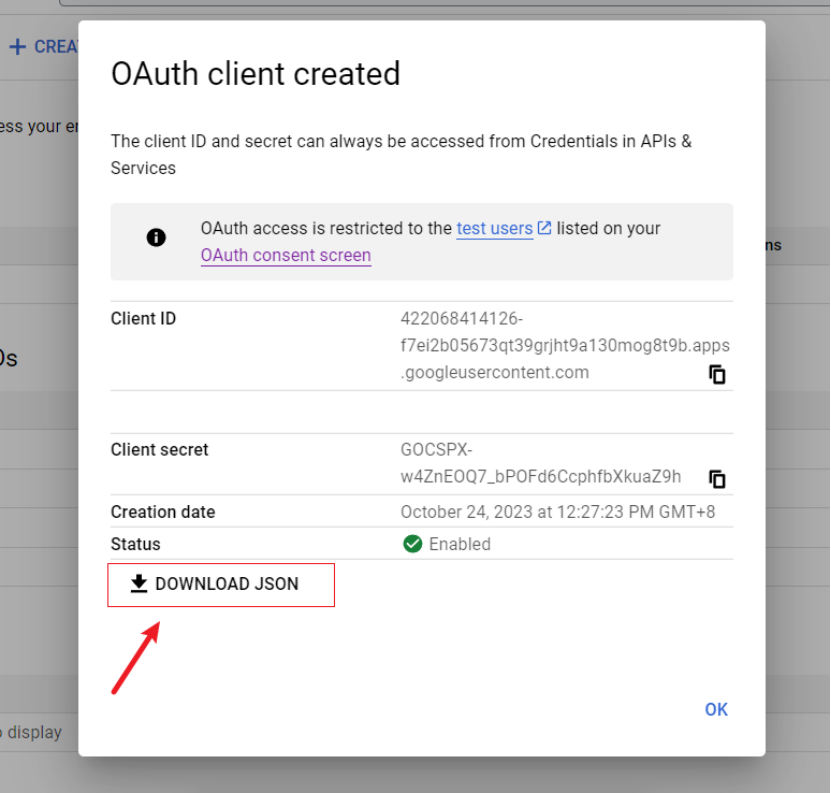
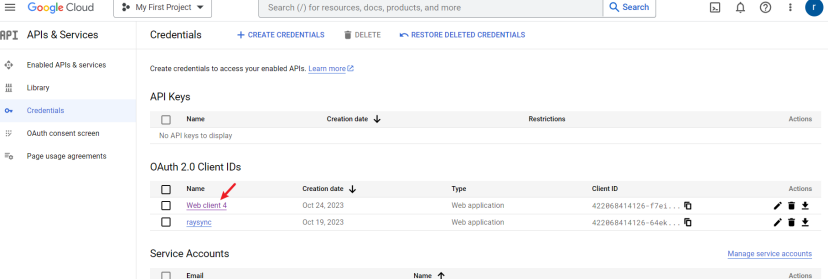
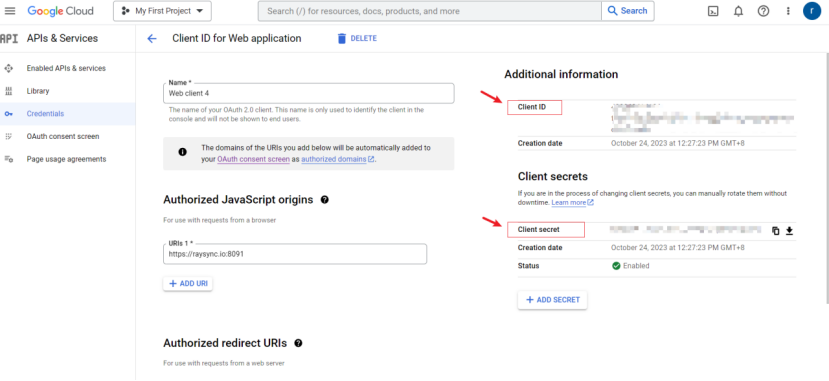
7) Download json file or click to enter your Client to obtain your Client ID and Client secret
3.2 Fill in Google credentials information into Raysync
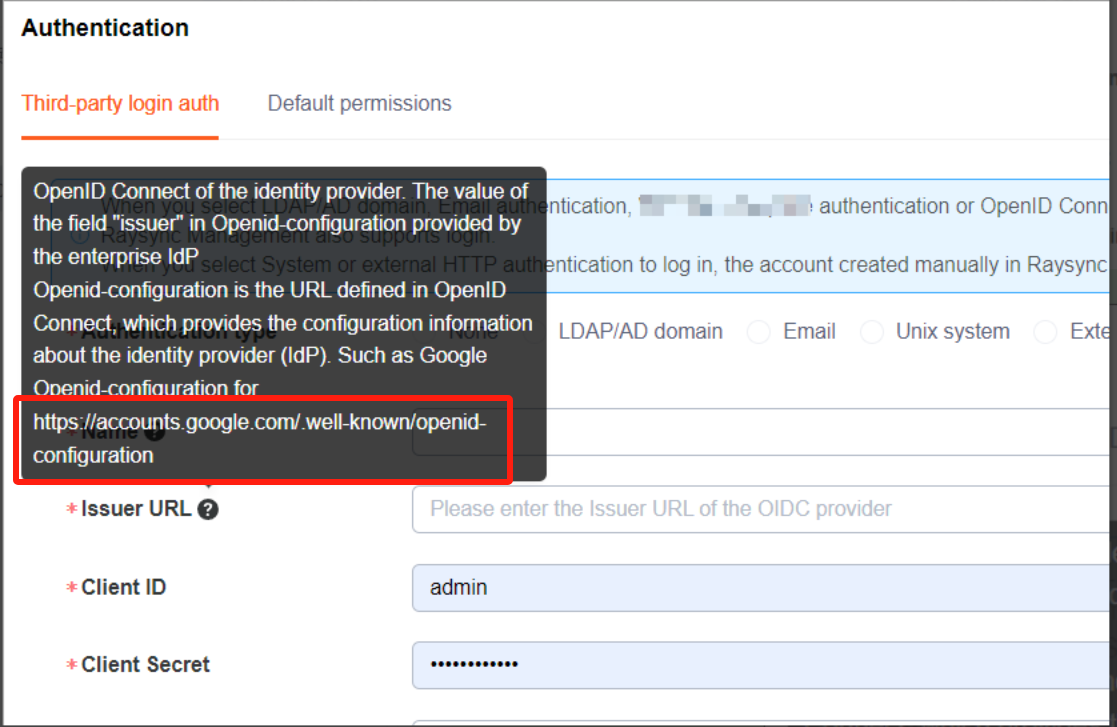
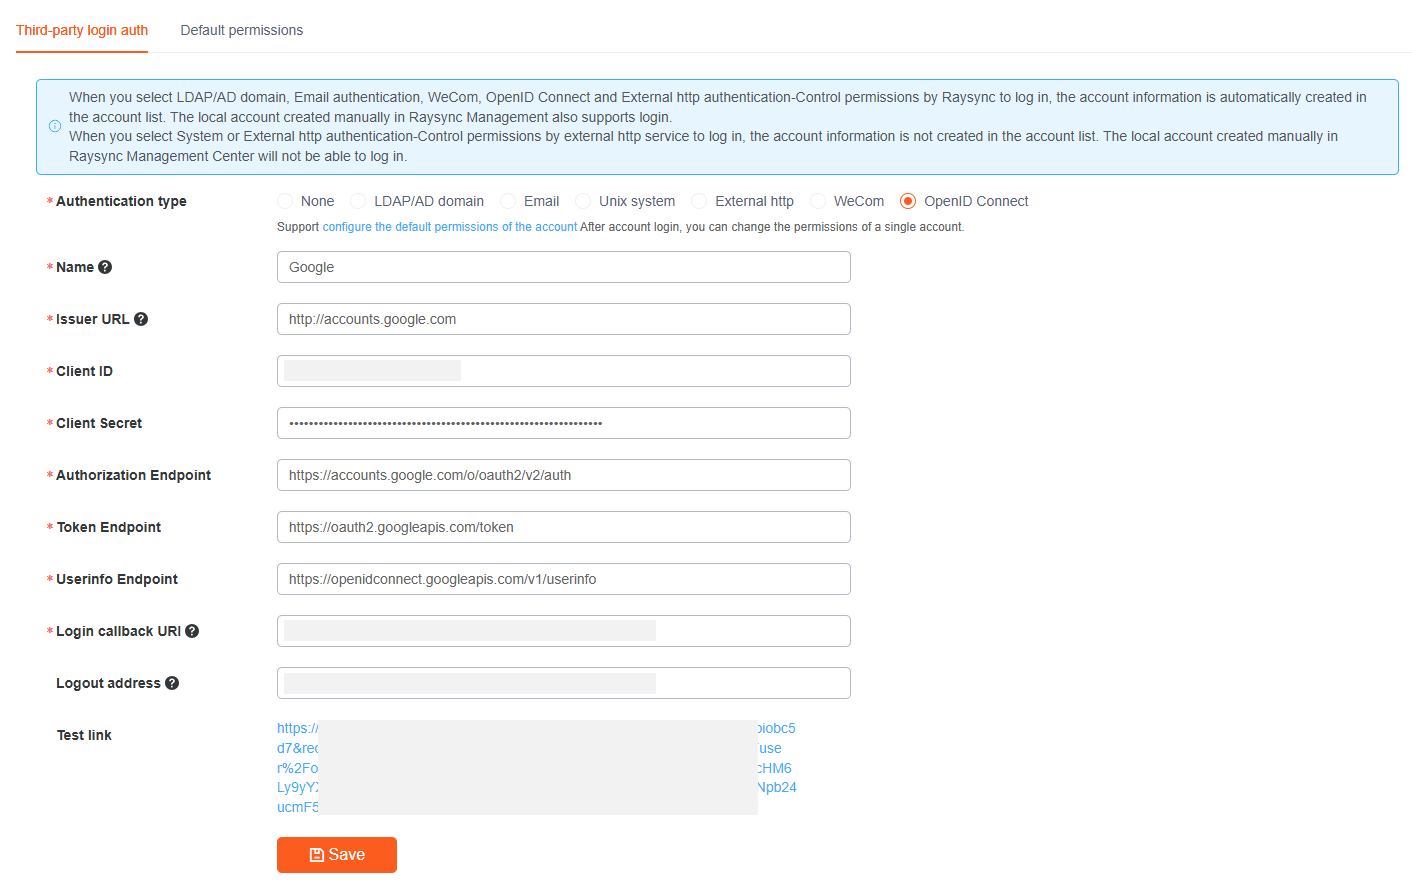
Log in to the Raysync admin portal , User--User integration--Third-party login auth--OpenID Connect
1) Open the help document
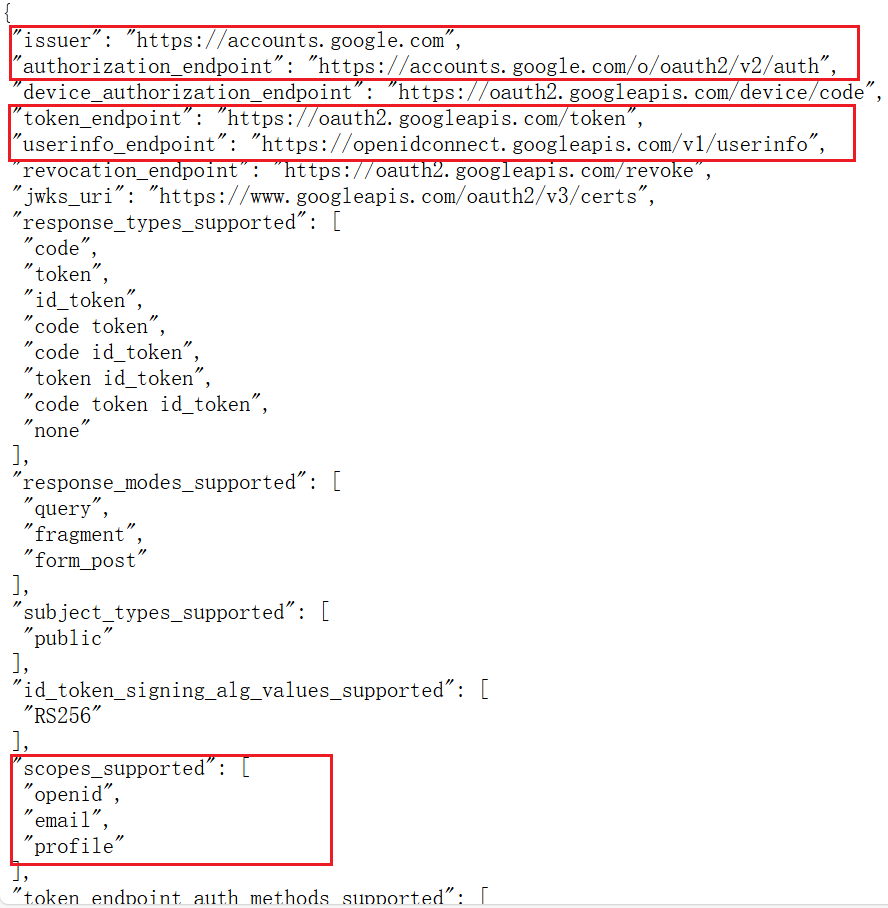
https://accounts.google.com/.well-known/openid-configuration
Get Issuer URL、Authorization Endpoint、Token Endpoint 、Userinfo Endpoint
| Function | Description |
|---|---|
| scope |
OIDC scope values define the permissions an application can request to access administrator information and resources during authentication. For example: openid email profile |
| Login callback URI |
For example: https://raysync.io:8091/api/user/oidc/callback
For example: https://raysync.io:9091/api/admin/oidc/callback |
2) Fill in the configuration information and save
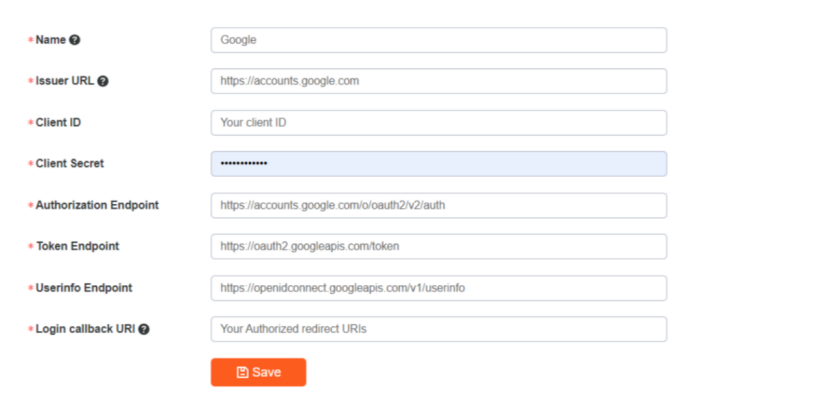
4) Click Test Connection
If you jump to the Google login page, the configuration is successful.
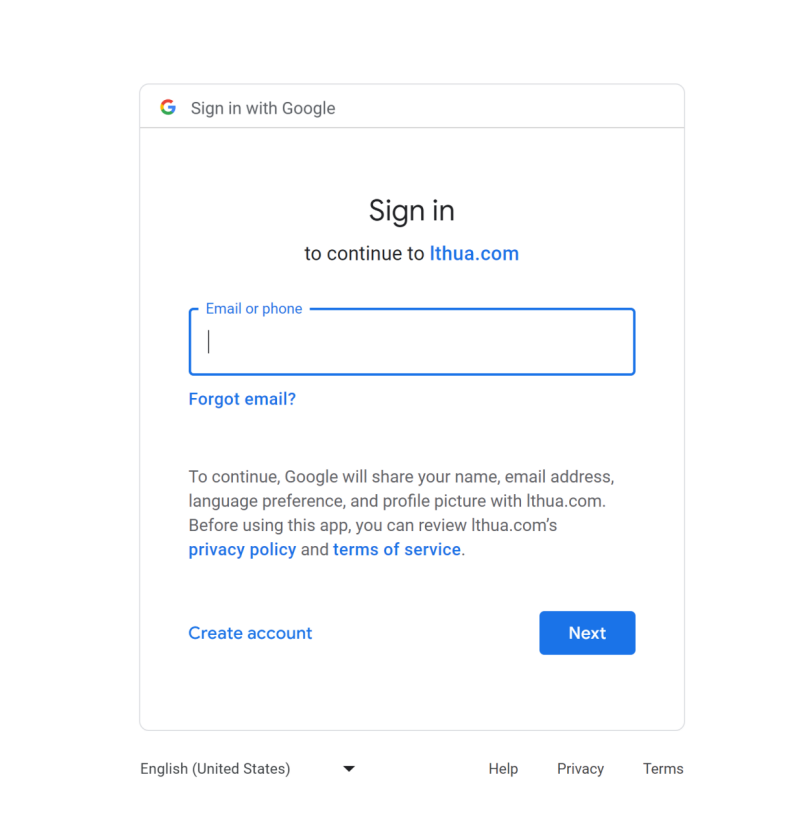
After successful configuration, users can use their Google account to log in to Raysync user portal.
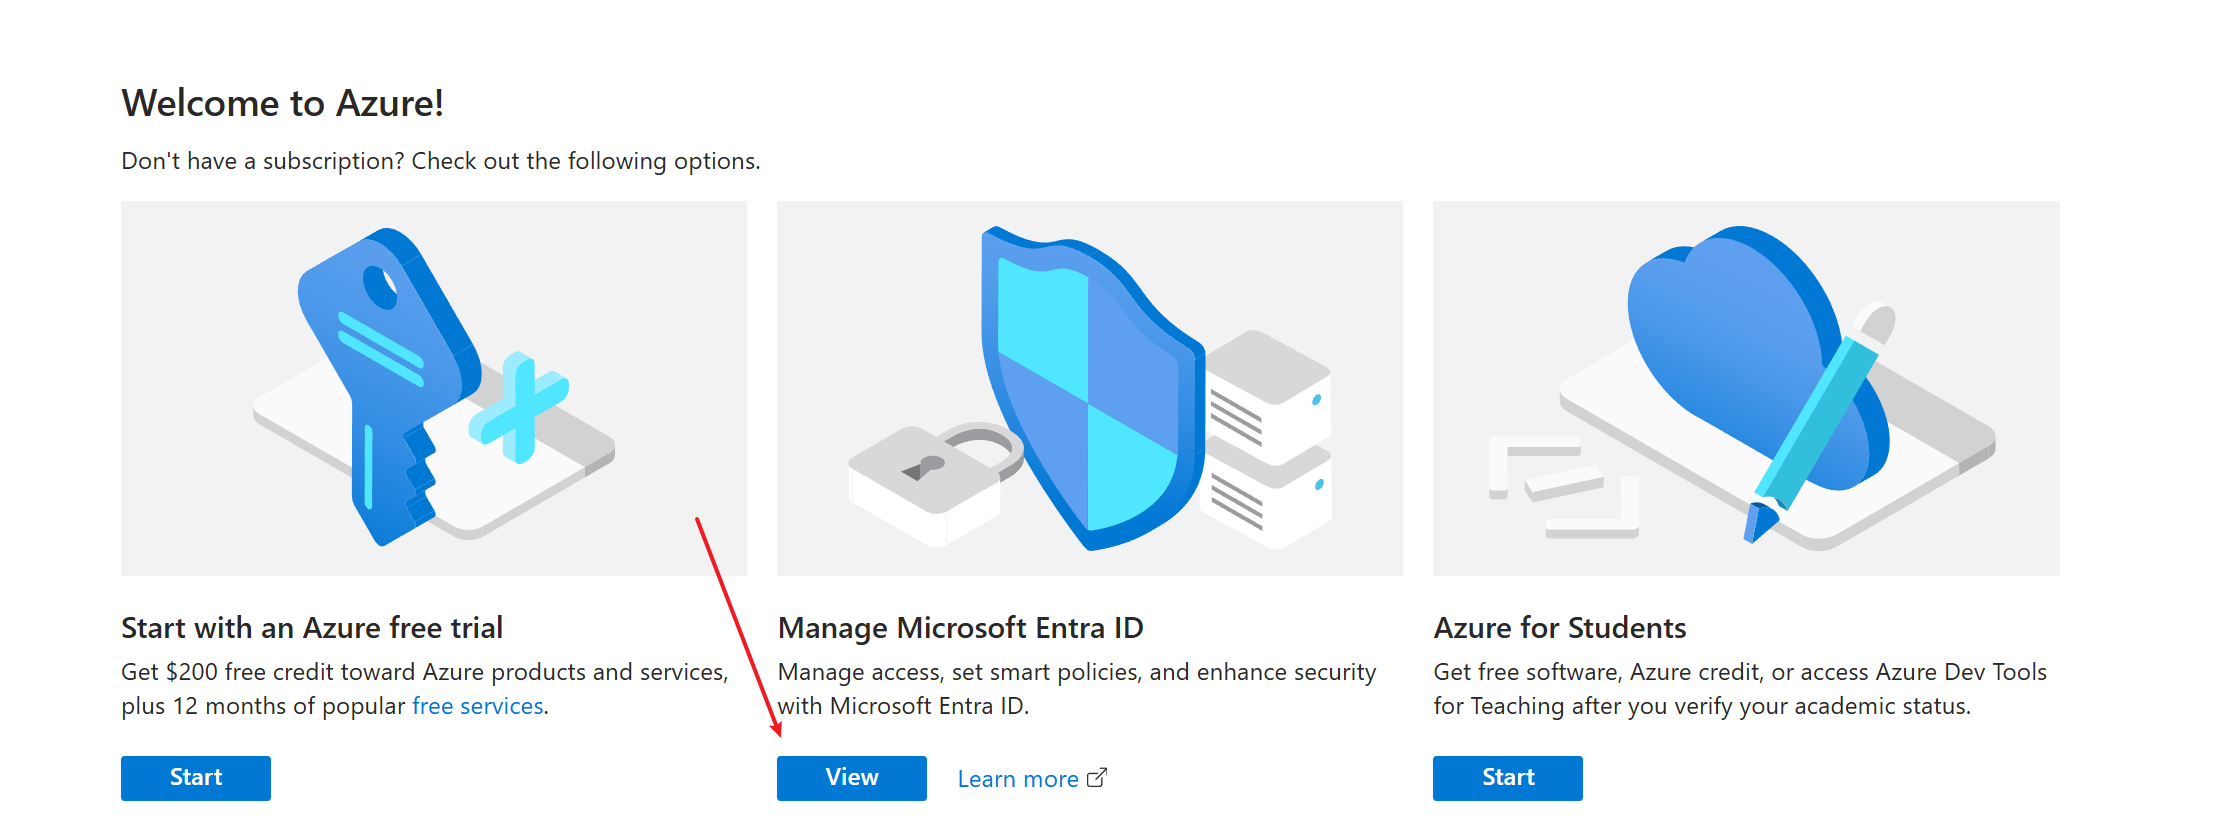
4 Microsoft Entra ID(Azure AD)
4.1 Step 1 : Create a new application
a. Access the Home - Microsoft Azure and click on Mnnage Microsoft Entra ID.
b. On the overview page, click App registrations > New registration.
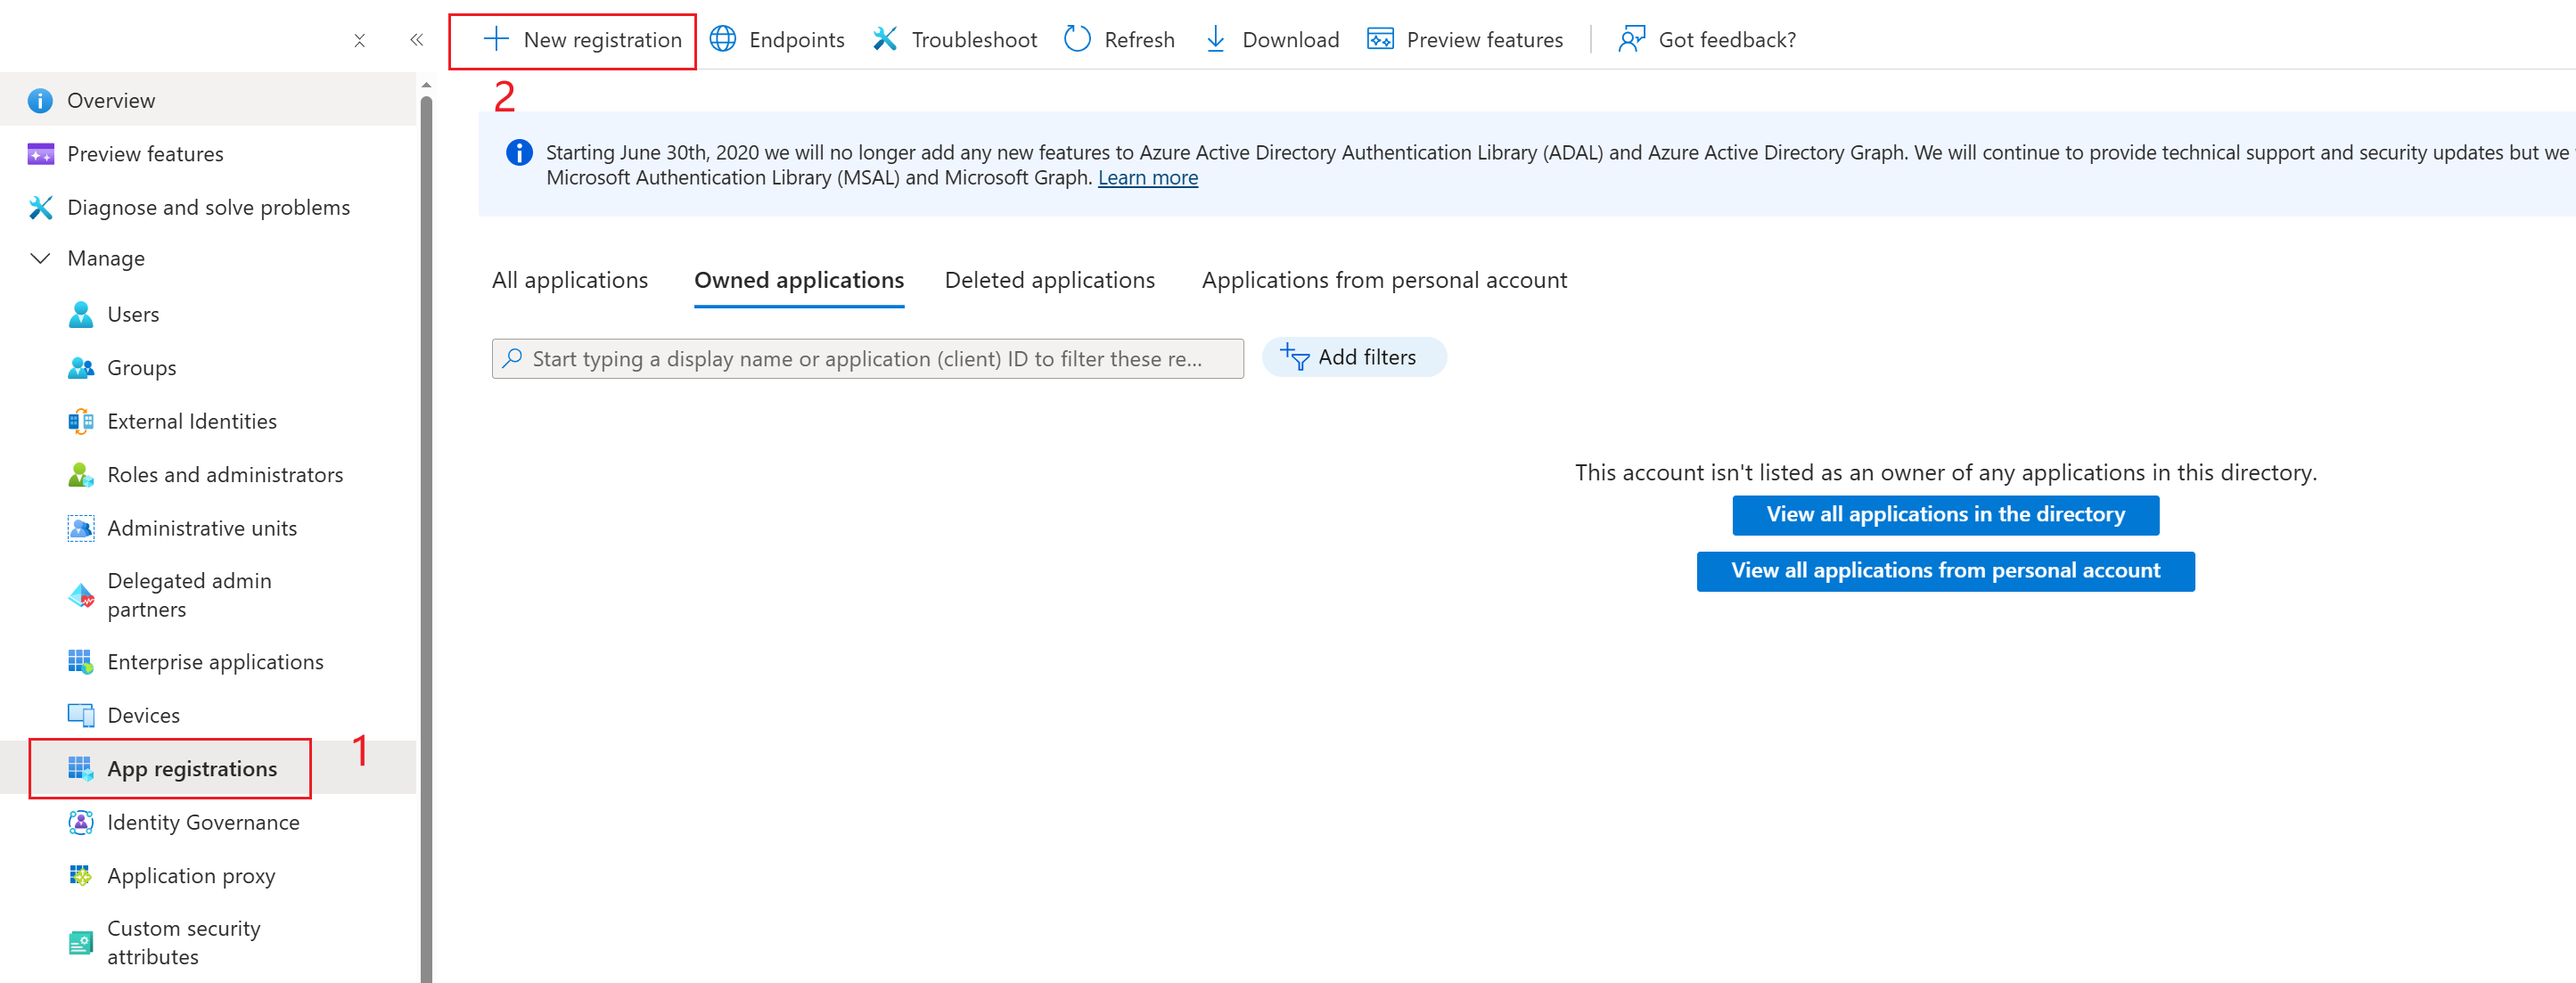
c. On the Application registration page, enter a name, select the account type, which determines Who can use this application or access this API, and choose "Web" for the redirect URI. Click "Register" to create a new application. 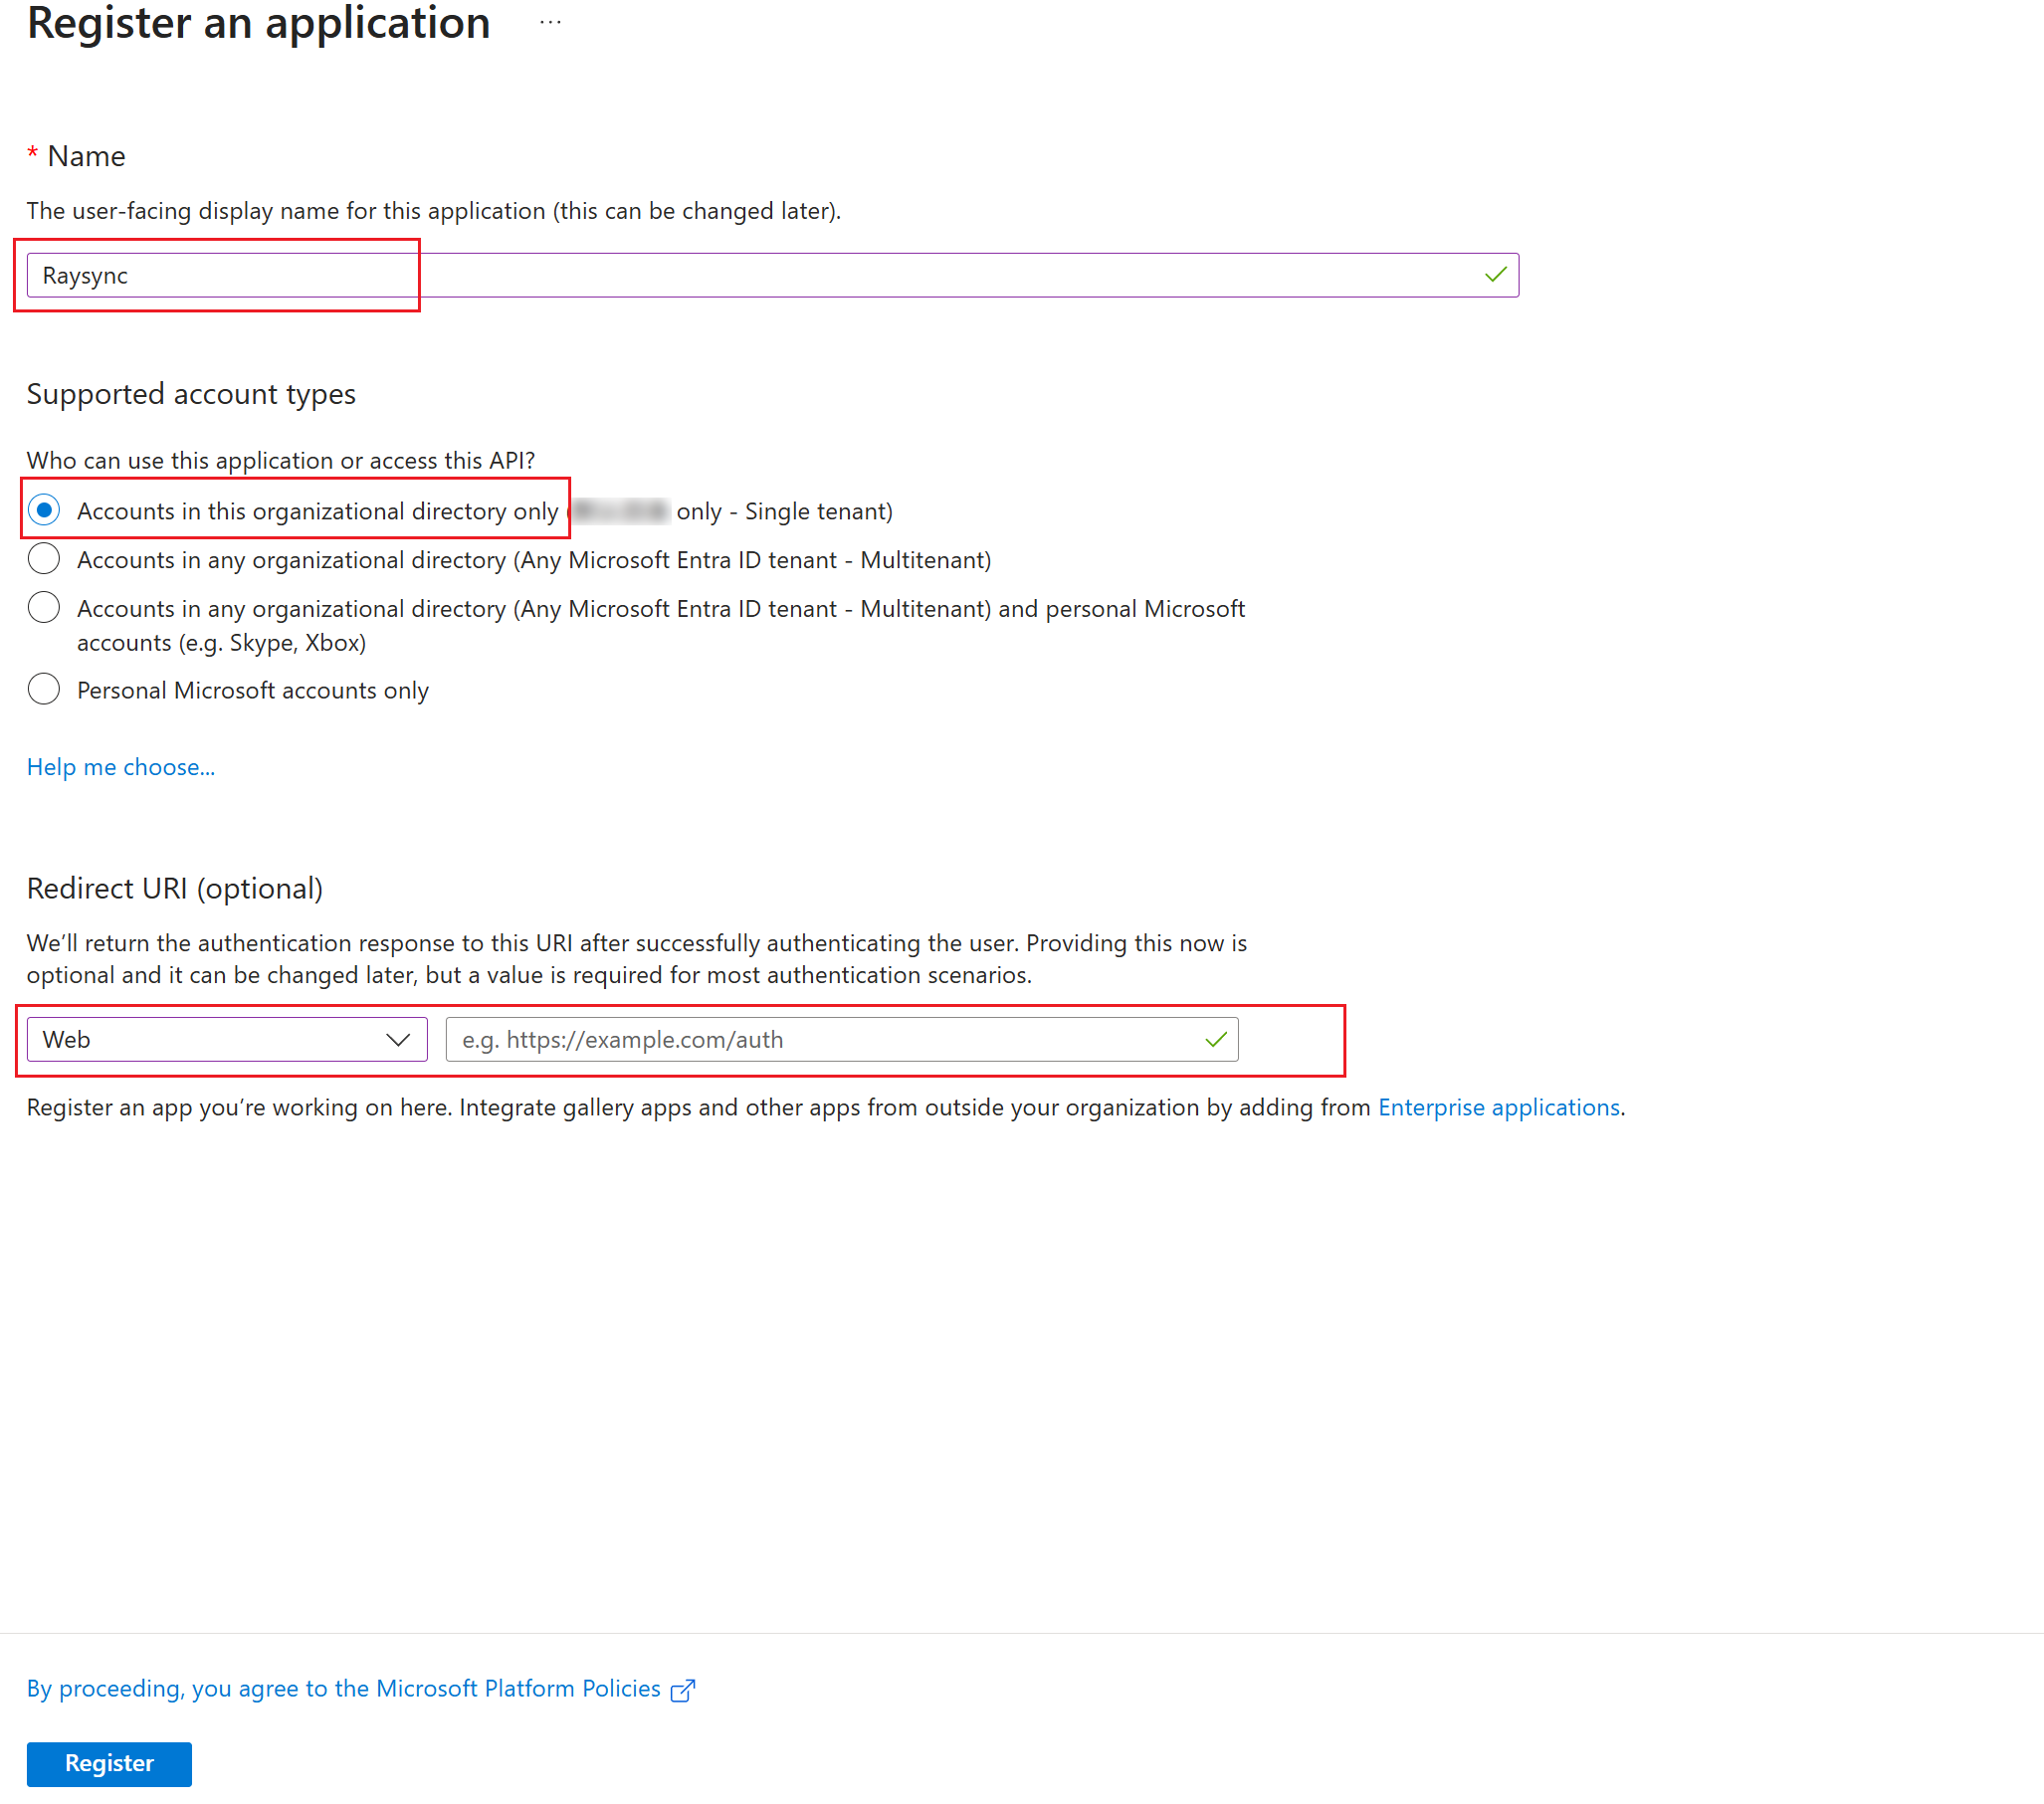
The Redirect URI is the Raysync authorization callback Redirect URI obtained in Step 3.
