Raysync client supports direct transfer between user and client, data does not upload on the server, the server only carries out data traffic transit. User A is online, user A provides his own transfer ID , other users can connect to user A through the transfer ID or Email, and the data is transferred directly to user A's computer without uploading on the server's disk.
1. Core Process
Enable peer-to-peer → Obtain device ID → Add remote device → Establish connection → Select file → Send/Receive.
2. Page Overview
Access the "Peer to Peer" section in the left-hand menu to view the peer-to-peer transfer page.
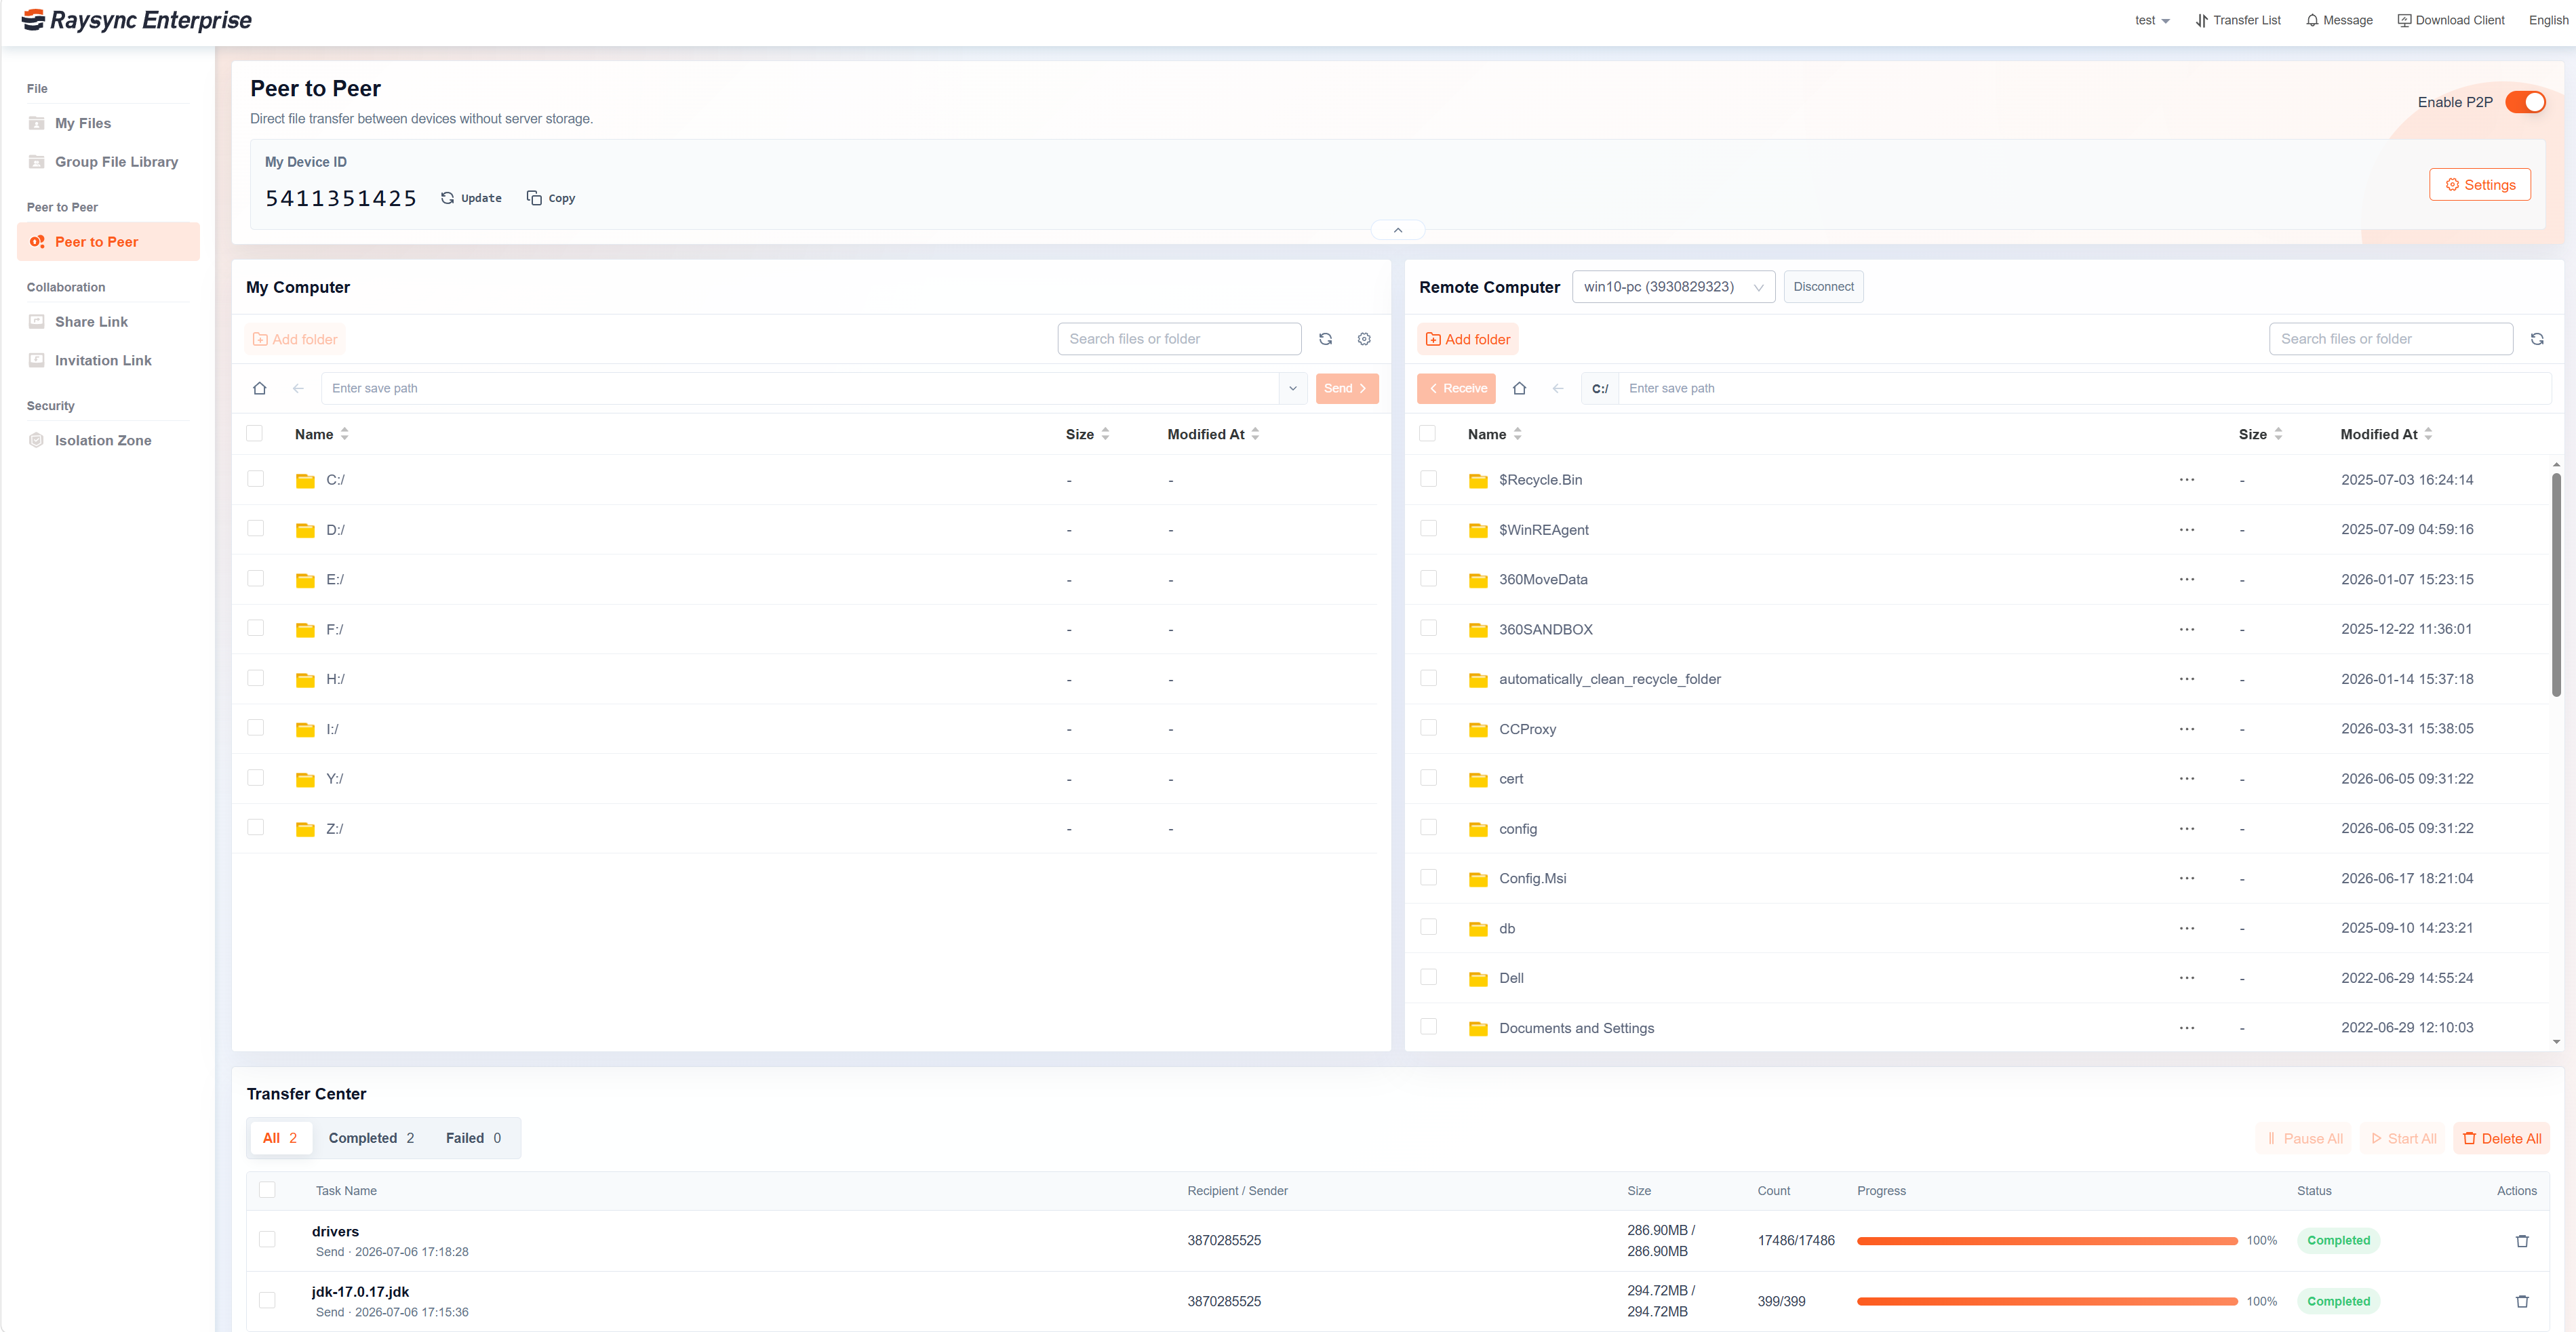
| Area | Description |
|---|---|
| My Device ID | Enable Peer to Peer transfer, view, update, copy the local Device ID, set the P2P permission and the save path when receiving file. |
| My Computer | Browse local files, create loacl folder, and select files or folders to send, rename or delete. |
| Remote Computer | Select, add, and connect to a remote device, and select the remote file or folder to receive, delete or rename, create remote folder . Based on the permissions set by the remote device. |
| Tranfer Center | View the task information |
3. Enable Peer to Peer transfer
Allow this device to use P2P connections to transfer files directly with other devices.
Prerequisites
- The administrator has configured the peer-to-peer transfer service IP.
-
You are runing the Raysync client and the client must be version v8.1.8.7 or higher.
-
The current network can access the service normally.
Steps
-
Click "Peer to Peer" in the left menu.
-
Locate the "Enable P2P" toggle switch in the upper‑right corner of the page.
-
Click the switch to turn it on. Once enabled, the page will display your local device ID and the local file list, and you will be able to connect to remote devices.
Notes
-
If the switch cannot be turned on, please check your network connection and login status first.
-
Do not disable the P2P feature during transfers, as this may interrupt the connection.
4. View, Refresh, and Copy Device ID

Prerequisites
The P2P feature has been enabled.
Steps
-
Locate "My Device ID" at the top of the page.
-
Click "Copy" to copy the device ID to your clipboard. Share it with your partner.
-
To regenerate a new device ID, click "Update".
Notes
-
After refreshing the device ID, the old ID may no longer work. Please notify the other party of the new ID promptly.
-
Do not expose your device ID to unauthorized personnel to prevent connection requests from unknown devices.
5. P2P Permission Configuration

Prerequisites
-
The P2P feature has been enabled. When enabled, the permissions [Allow receive files from others] and [Allow others to view file list] are turned on by default. You can adjust these based on your actual usage needs.
Permission Descriptions
| Setting | Description | Recommendation |
|---|---|---|
| Allow receive files from others | Allows other devices to send files to this device. | Enable when you need to receive files. Enabled by default when P2P is turned on. Disable when not receiving external files. |
| Save path when receiving files | Sets the default location for saving received files. | Choose a directory with sufficient space and easy access, such as a dedicated receiving folder. |
| Allow others to view file list | Allows connected remote devices to view the file list under the open path on this device. | Grants permission to browse files, but does not allow others to fetch them. Enabled by default when P2P is turned on. |
| Allow others to fetch files | Allows connected remote devices to download files from this device. | Enable only for trusted devices. |
| Allow others to delete file | Allows connected remote devices to delete files on this device. | High‑risk permission — not recommended unless absolutely necessary. |
| Allow others to rename file | Allows connected remote devices to rename files on this device. | Enable when collaboration is needed for file organization; disable once complete. |
| Allow others to create folder | Allows connected remote devices to create folders on this device. | Enable when the other party needs to save files in an organized manner. |
Notes
-
Deleting and renaming files are high‑risk operations. It is recommended to enable them only temporarily for trusted devices.
-
If you only need to receive files without exposing your file list, simply enable “Allow receive files from others” and configure the save path.
-
Do not set the save path to system directories or important data folders to avoid accidental impact on local files.
-
After permission changes, connected remote devices must reconnect for the new permissions to take effect.
6. Add a Remote Device
Prerequisites
-
You have obtained the remote device ID / Email and the remote device has enabled [Allow receive files from others] permissions.
-
Both devices have the P2P feature enabled and are online.
Steps
-
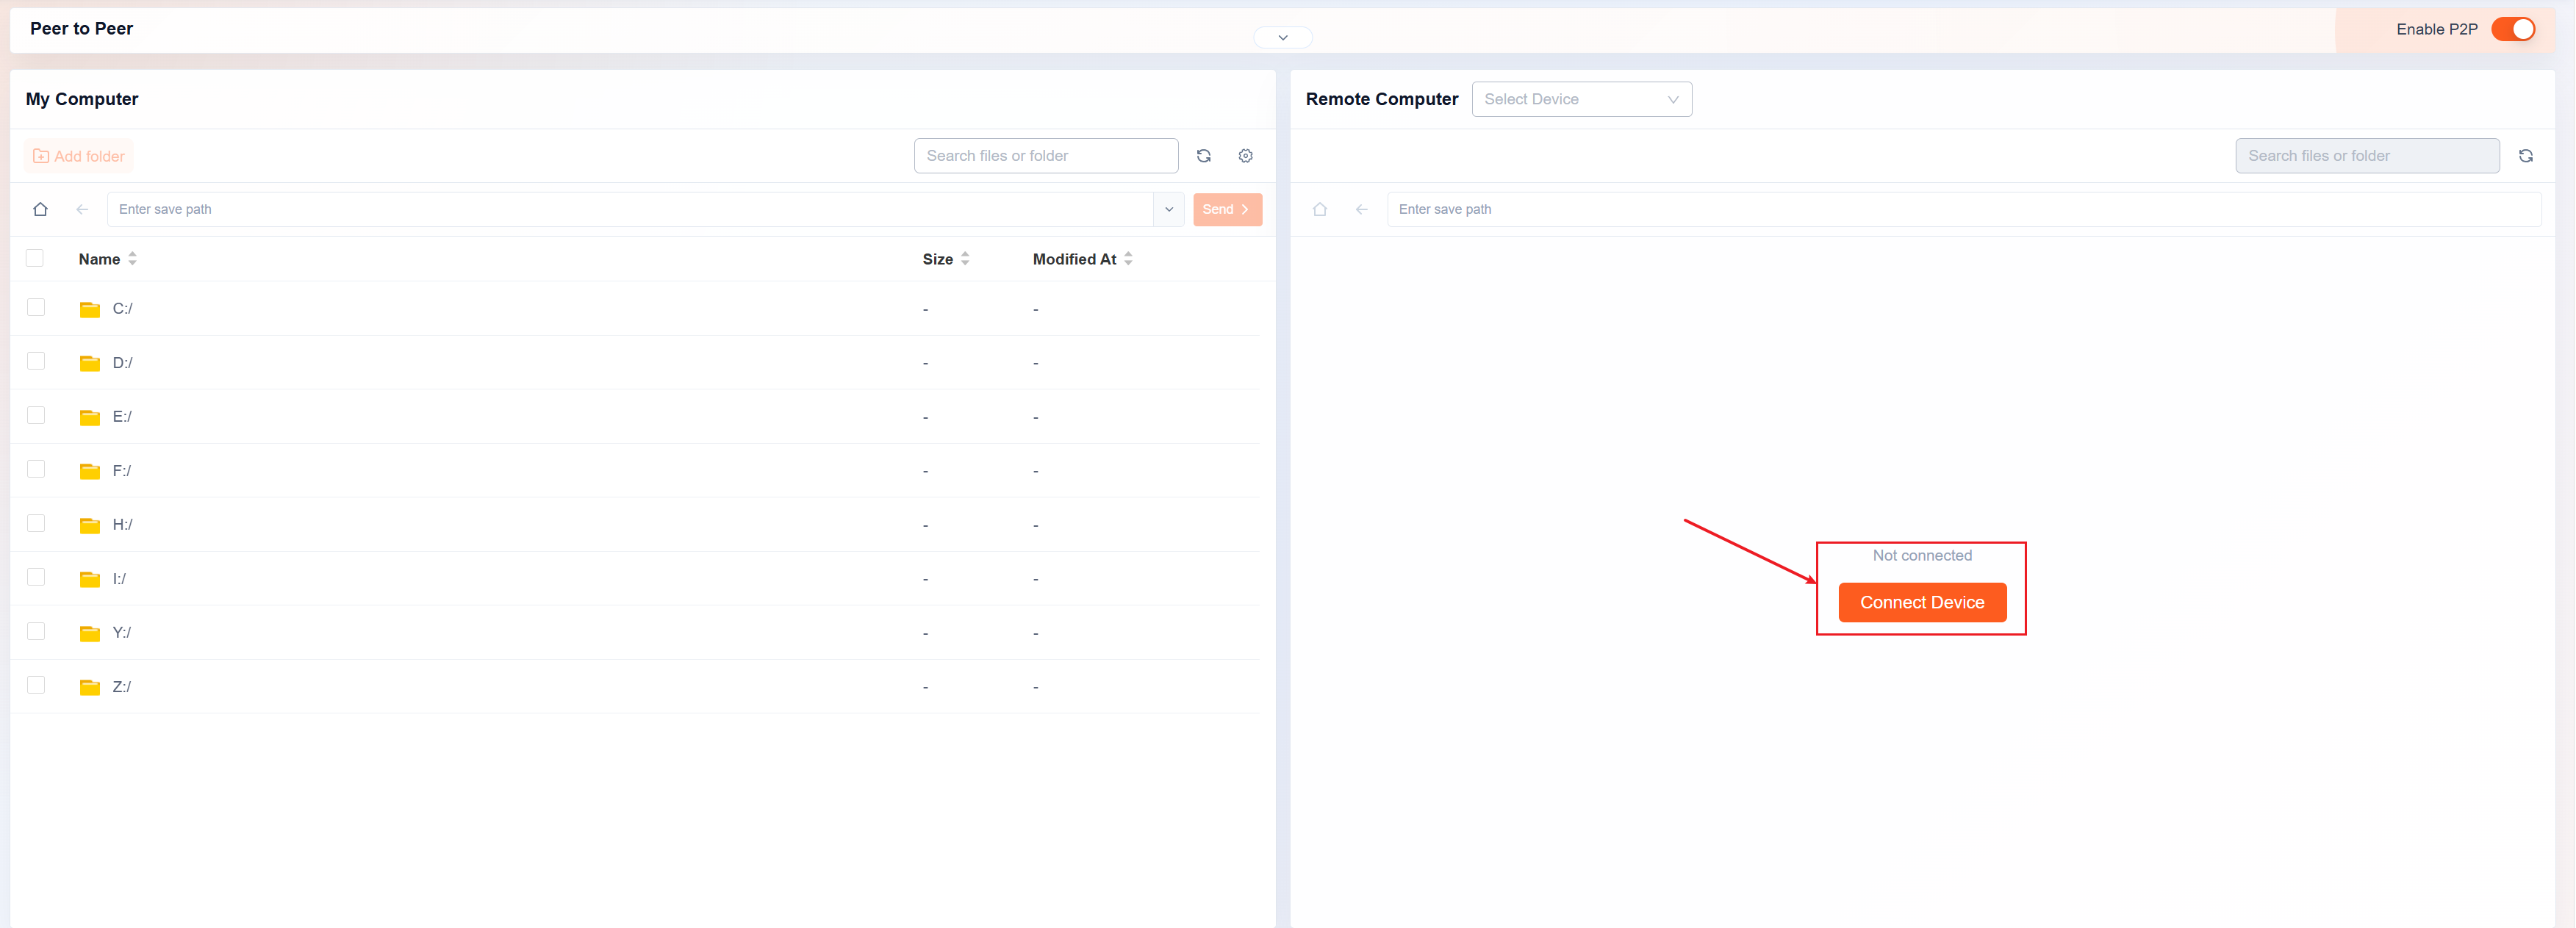
In the "Remote Computer" section, click "Connect Device".
-
In the pop‑up dialog, enter the remote device ID / email . You may optionally enter a device name.
-
Confirm the device information and click "Connect". Once connected, the remote device will appear in the device dropdown list, and the file area will display the remote device's file list.
Notes
If the connection fails, do not click the Connect button repeatedly. First, check whether the remote device is online.
7. Send Files to remote device
Prerequisites
-
You have successfully connected to the remote device.
-
The remote side has enabled the [Allow receive files from others] permission.
-
The remote computer has sufficient storage space to save the files.
Steps
-
In the “My Computer” section, select the files or folders you want to send. To quickly locate items, use the search box to enter the file or folder name.
-
In the “Remote Computer” section, choose or enter the destination path.
-
After confirming the files and destination path are correct, click “Send”, or simply drag and drop the selected items to the designated area in the Remote Computer section.
-
Once the task is created, you can check the progress in the task list. After the transfer is complete, the files will appear in the specified path on the remote computer.
Notes
-
When sending large files, keep both clients online.
-
Do not move or delete the source files on your local device during the transfer.
8. Receive Files from remote device
Prerequisites
-
You have successfully connected to the remote device.
-
The remote side has enabled the [Allow others to fetch files] permission.
-
Your local computer has sufficient storage space to save the files.
Steps
-
In the “Remote Computer” section, select the files or folders you want to receive.
-
In the “Remote Computer” section, click “Receive”, or simply drag and drop the selected items to a directory in My Computer.
-
Once the task is created, you can check the progress in the task list. After the transfer is complete, the files will appear on your local computer.
9. Connection Management
Prerequisites
-
At least one remote device has been added.
Steps
-
Click the dropdown list to the right of “Remote Computer” to view the device names, device IDs, and statuses of previously connected devices.
-
To reconnect, select the target device and click the Connect button.
-
To remove a device you no longer use, select it and click the Delete button (or the corresponding removal option).
-
To add a new device, click the “Add new device” button.
10. View Task List

After a task is successfully created, you can view the task information in the following locations:
-
Web portal: Check the “Transfer Center” at the bottom of the page to view task name, transfer direction, sender/receiver ID, file size, file count, transfer progress, and task status.
-
Plugin client: The same Peer-to-peer tasks created in the webpage can also be found in the plugin's peer-to-peer task interface.
-
Desktop client: View task details in the “Task List”.
Note:
- The web portal does not display specific failure details. To view the failure reason, please check the detailed information in the client.
- Scheduled task information can only be viewed in the client.
11. Task Transfer Settings
Configure whether tasks are sent on a schedule and whether files are moved from the source to the target location after transfer is complete. This setting applies only to sending tasks and does not affect receiving tasks.
Steps
-
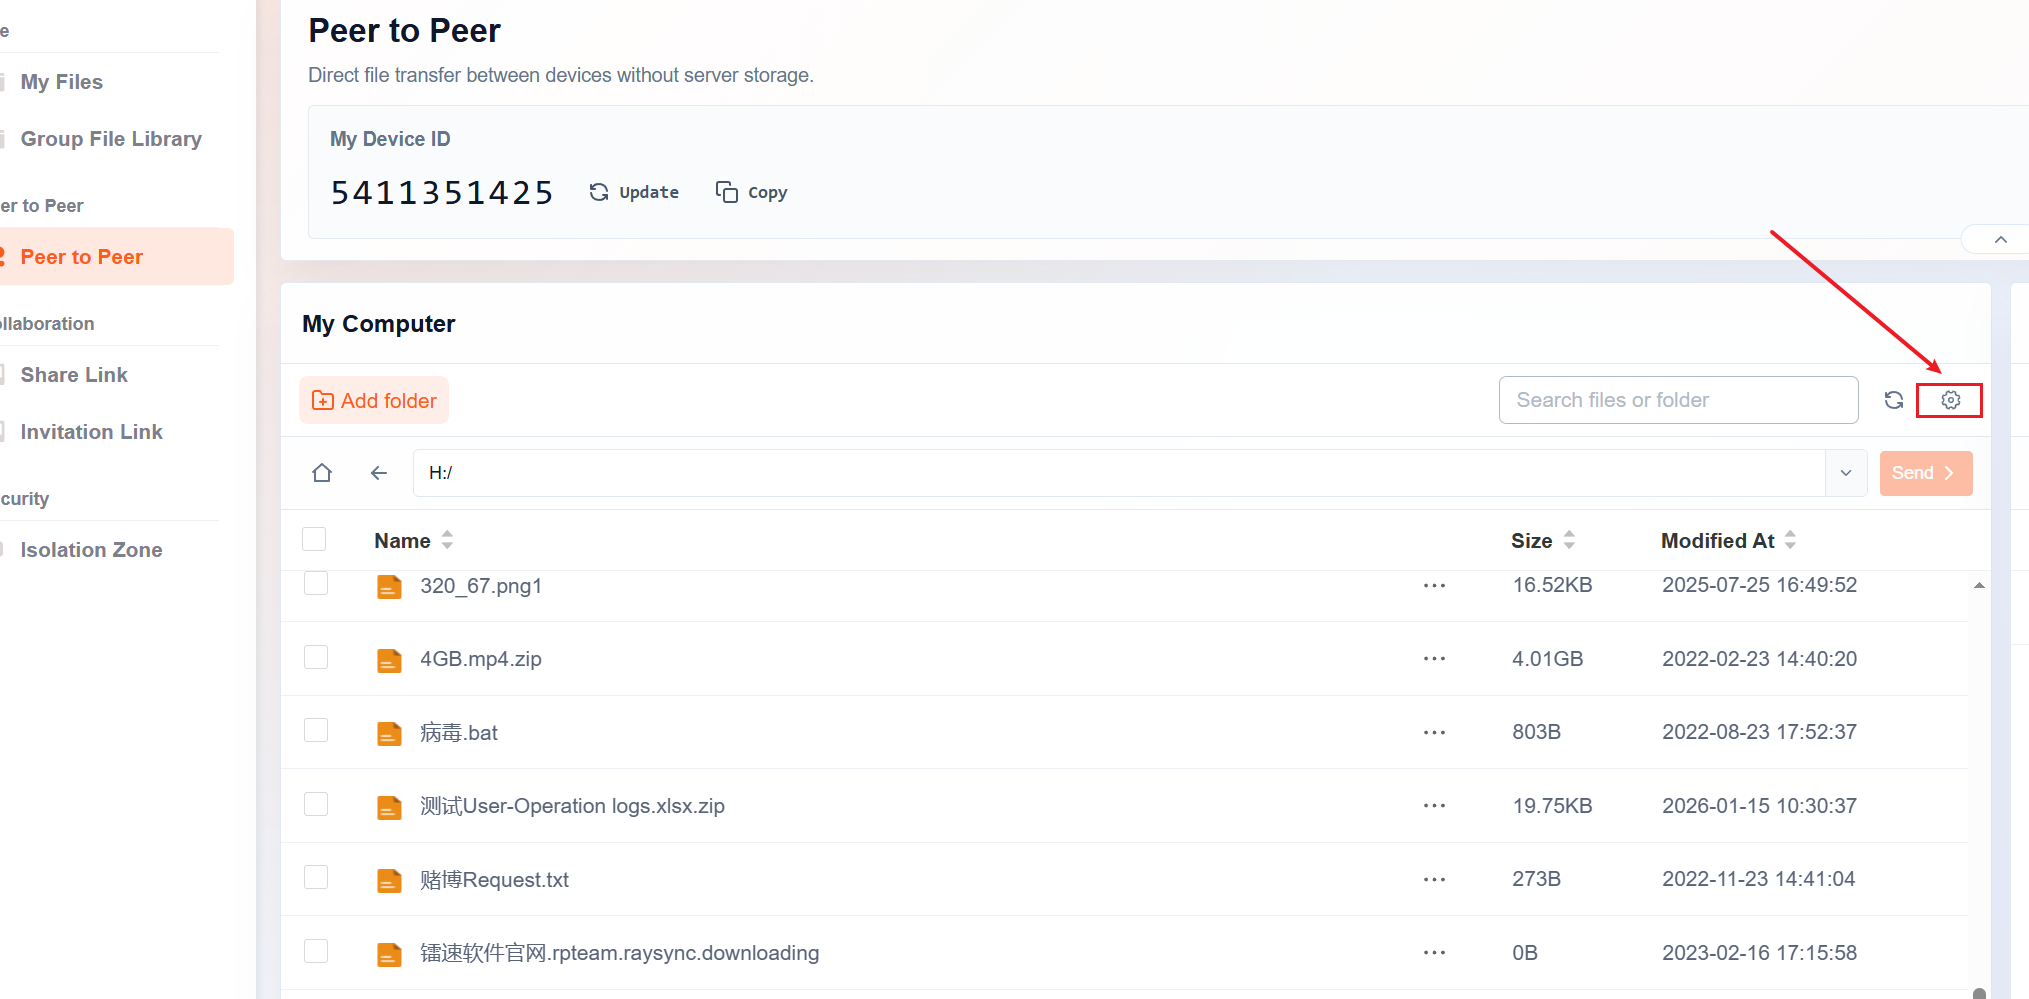
Click the settings button in the “My Computer” section.
-
Select the desired scheduled sync frequency or toggle “Move from source to target” on/off based on your scenario.
-
After confirming the settings, click “Save”.
-
Select the directory and click “Send”. Newly created tasks will be executed according to the saved configuration.
Settings Description
| Setting | Description |
|---|---|
| Scheduled Sending |
Enables scheduled sending. When enabled, tasks are sent at a specified time or interval.
|
| Move from source to target | Moves files from the source to the target location after transfer; files are no longer kept at the source. |
Notes
-
When scheduled sending is enabled, ensure both clients are online and the remote device is reachable at the scheduled time.
-
When using the “Every” interval, do not set the interval too short to avoid excessive task frequency affecting computer and network performance.