The administrator can actively create transmission tasks in the Raysync admin portal, create upload tasks synchronously uploaded from the client node machine to the server, or download tasks synchronously downloaded from the server to each client, and view the task transmission details and transmission logs issued by the server. Node data in each area can be transferred to uniform transmission and dispatch.
1. The client configures the default server
Before creating a server to issue tasks, all client devices need to start the client and log in to the default server.
Step 1. Start the Raysync client
On the client side, download and install, and start the Raysync client.
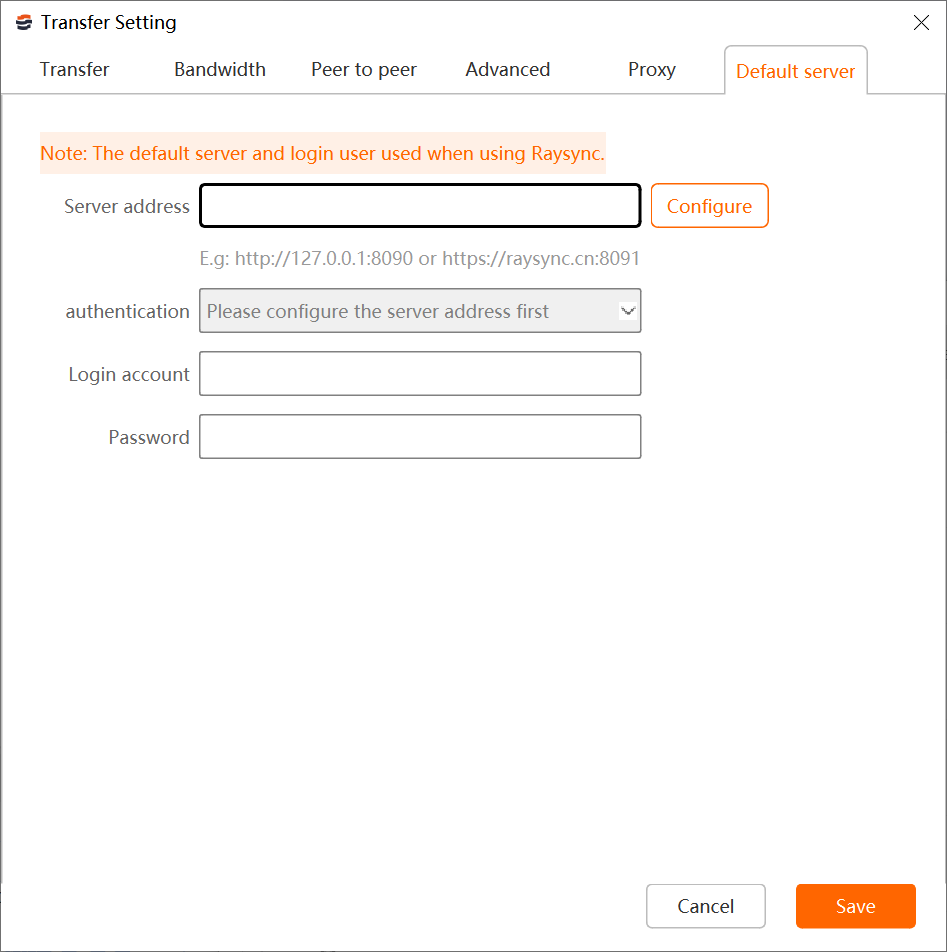
Step 2. Configure the default server
Right click the client icon in the client to be transmitted, click [Settings] - [Default server], and enter the default server IP address (the server address to create the task), login account and password.
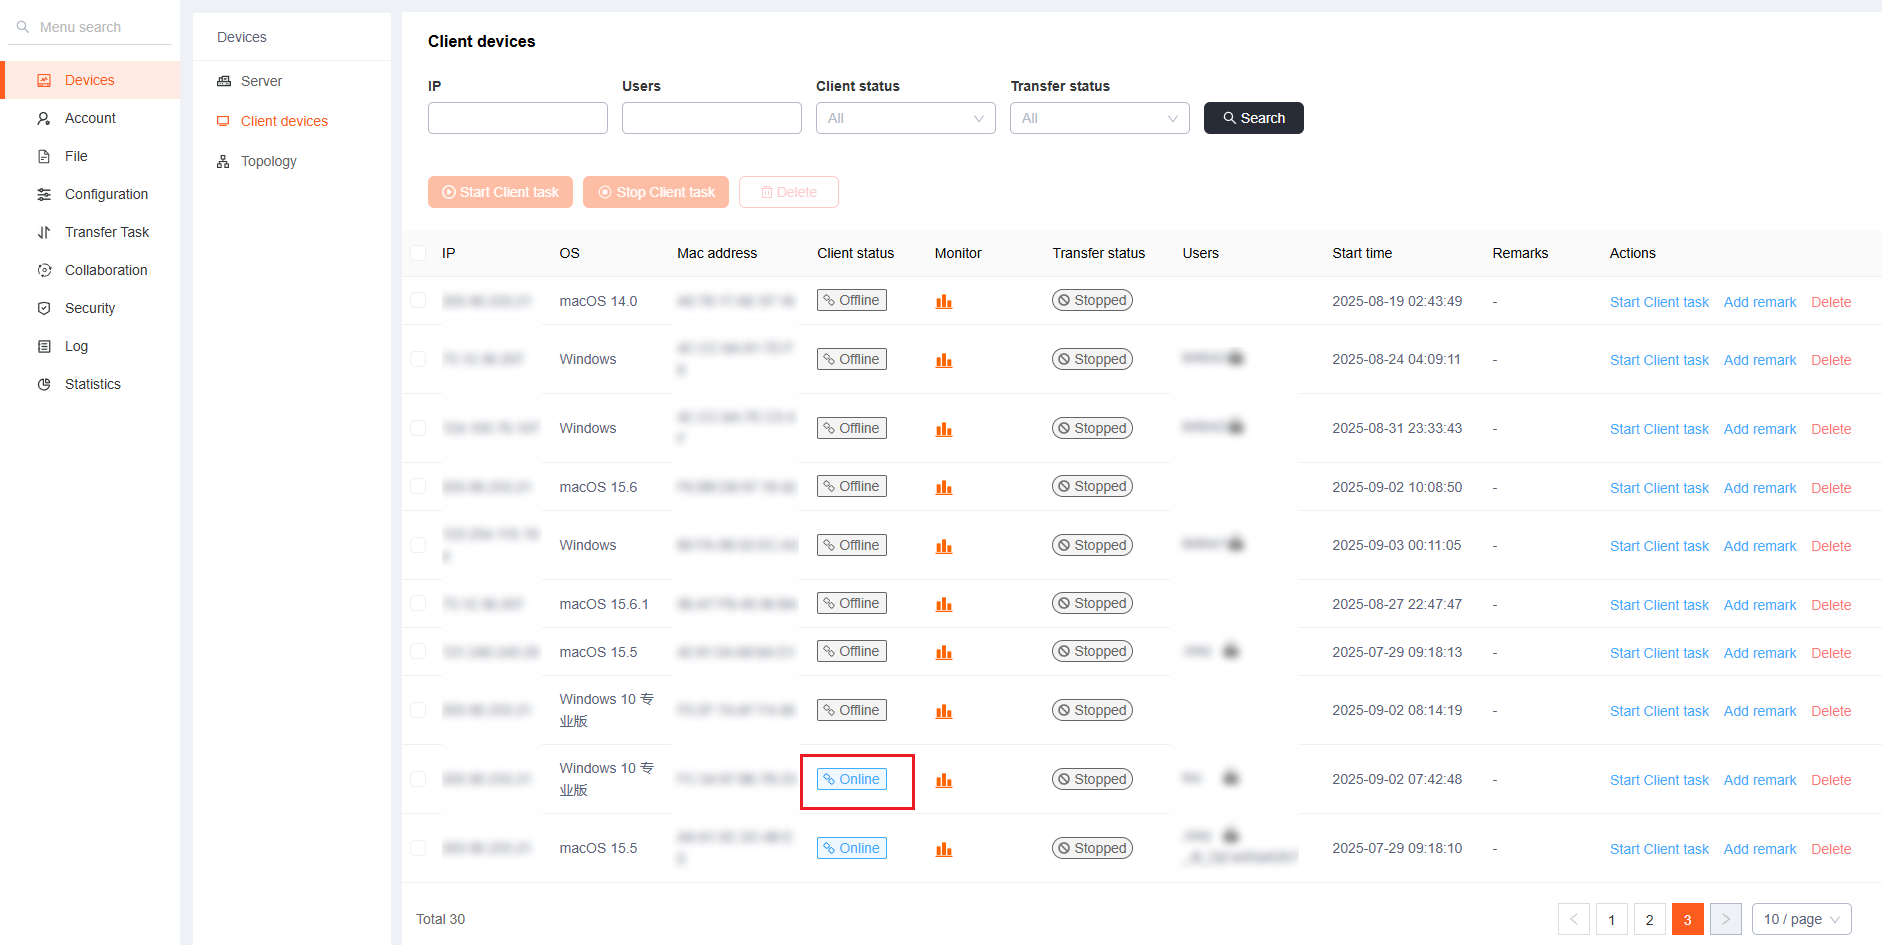
Step 3. Check the client connection status
Log in to the Admin portal.
Check whether the client connects to the service successfully. Click [Devices] - [Client devices] to check whether the node machine status is normal. Only the client node machine status is [Online], the transmission task issued by the server can be executed normally.
2. Create server task
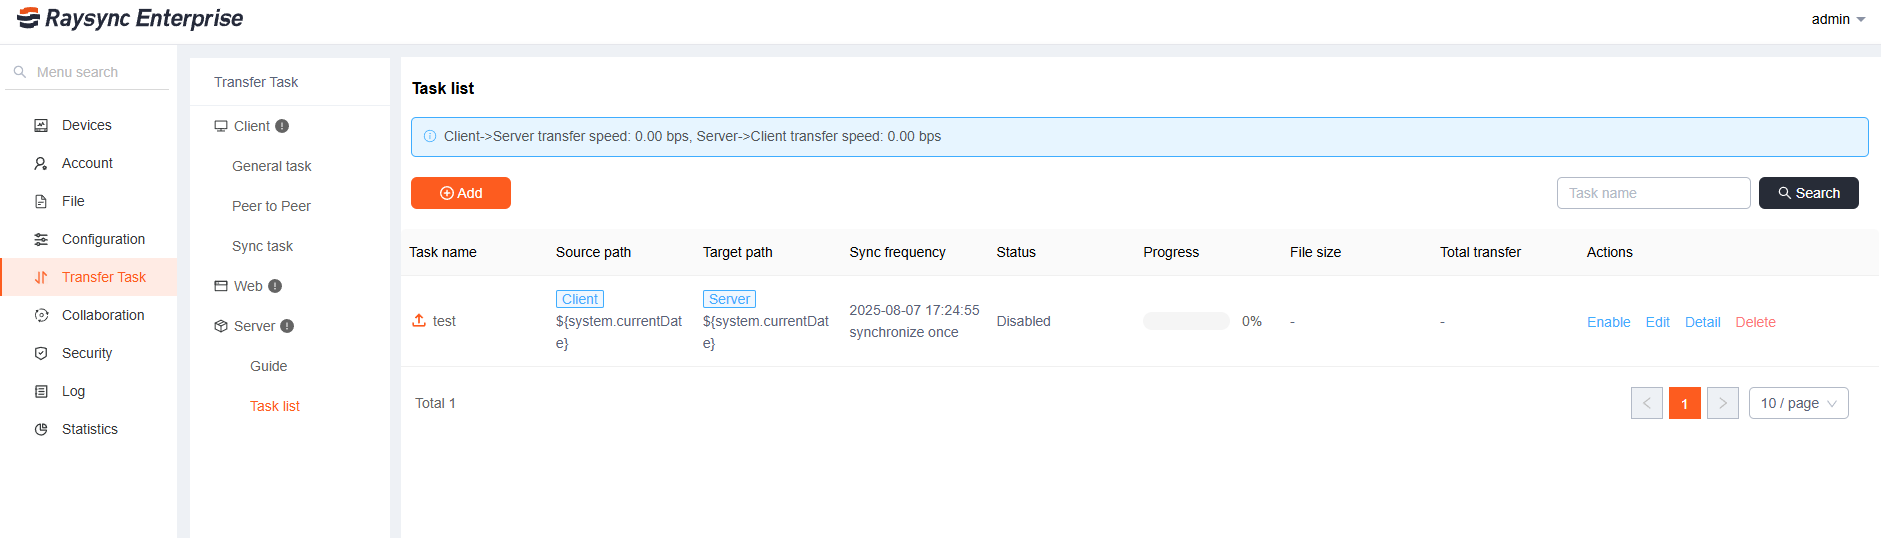
Create a server task
Click [Transfer Tasks]-Server[Task list]-[Add] on the Admin portal,and fill in the task name, source path, and target path, select the synchronization frequency, and click Save to create it successfully.
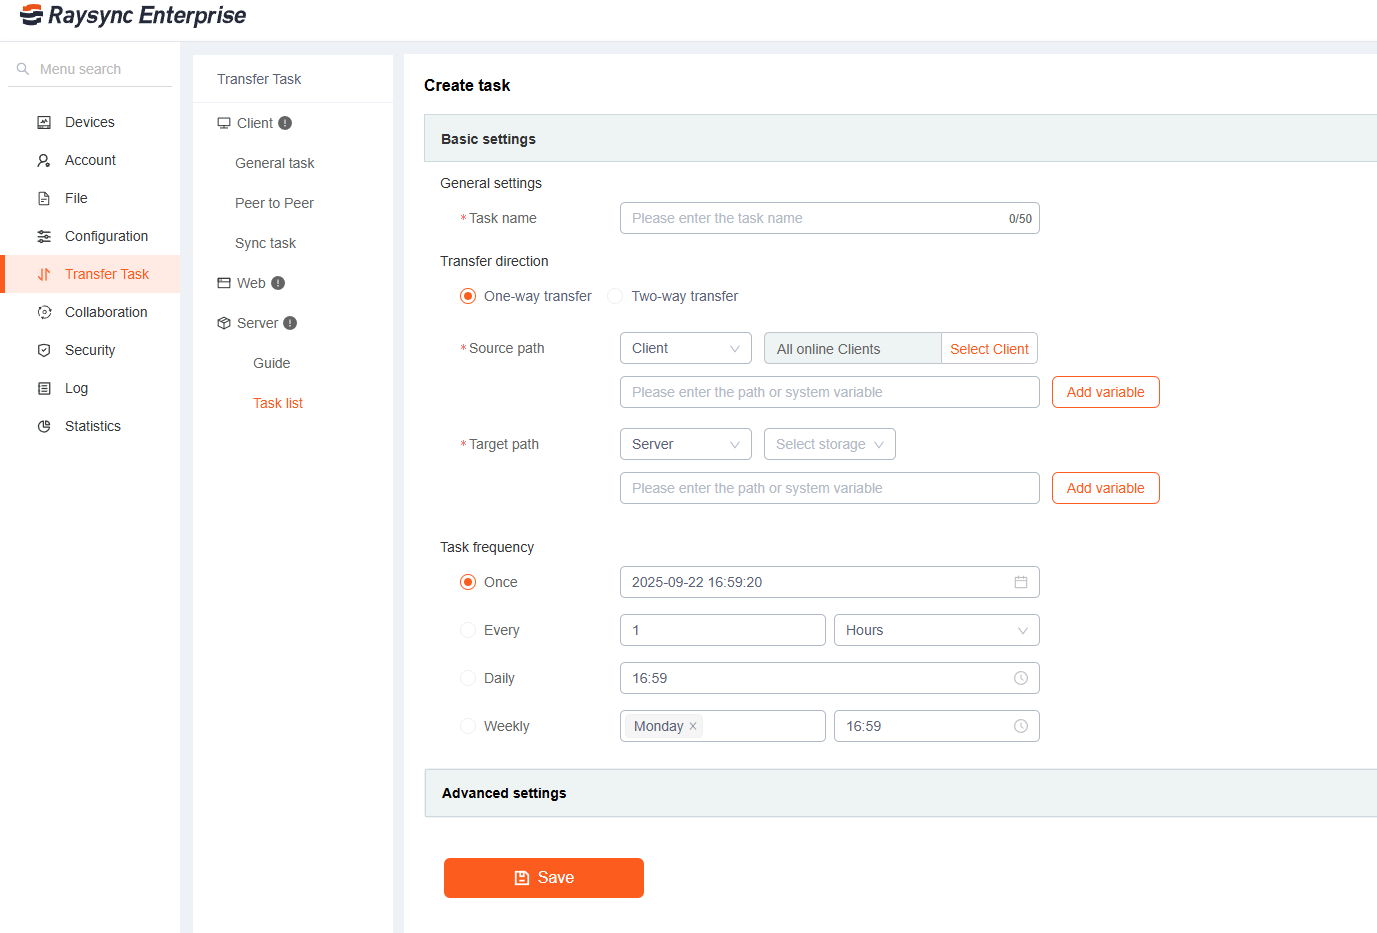
| Parameter | Description |
|---|---|
| Task name | Server task name |
| Source path |
When the source path is the client, it is uploaded from the client of each node machine to the server; When the source path is the server, it is downloaded from the server to each client node locally. You can specify an online client node. If no online client node is specified, all online client nodes are default. Path supports using variables.
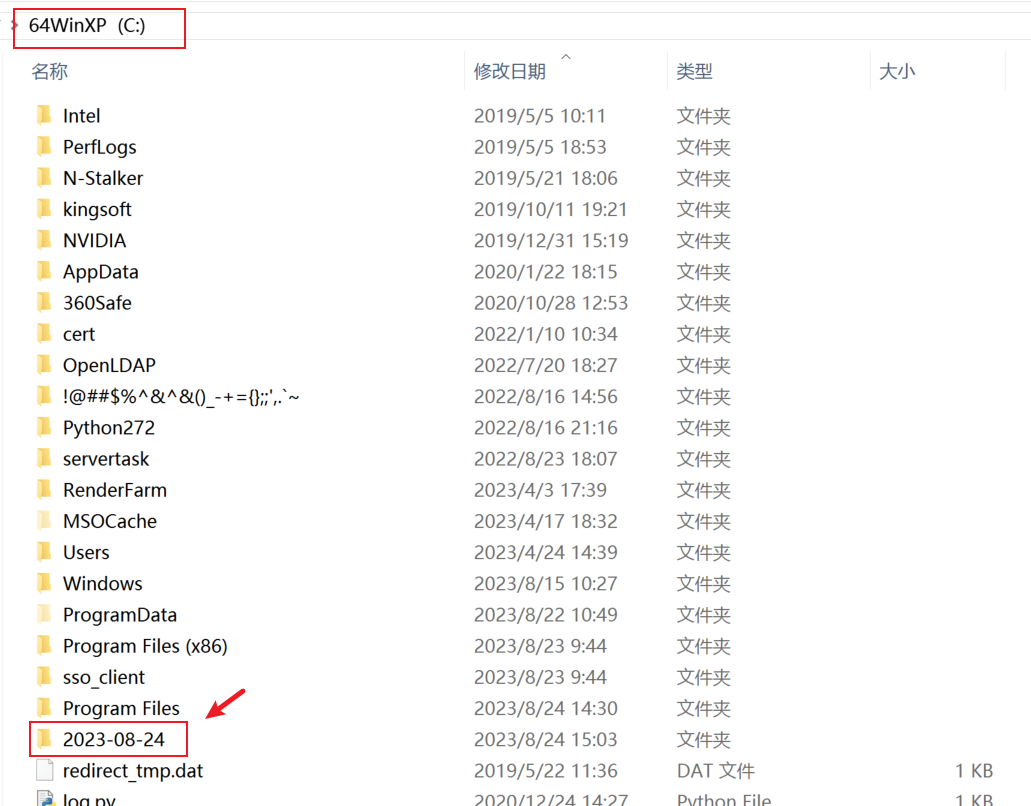
For example: if the source path is set as the Client " C:\${system.currentDate} ", after the task is created, the system will transfer all folders named with the current client's system date in the C drive of the selected client .
|
| Target path | If the target path is the client, then it is downloaded from the server to each client node locally; When the target path is the server, it is uploaded from each node client to the server. Path supports using variables |
| Task frequency |
- Transfer Only Once: the transfer task will not be executed after it is executed once; - Execute transmission once every xx seconds/minutes/hour; - Execute the transmission at xx: xx every day; - Execute the transfer at xx: xx every week |
2.1 Transfer from Client → Server (Upload Task)
1. Click [Add] and enter the task name.
2. Set Source path to Client: Enter the local file/directory path to be uploaded.
3. Set Target path to Server: Select the target Space and Storage, then enter the corresponding path.
Example: The storage [Default] path = /opt/Raysync . If server task path = / ; real upload to = /opt/Raysync ; if path = /test ; real upload to= /opt/Raysync/test .
4. Configure other optional parameters and click [Save].
2.2 Transfer from Server → Client (Download Task)
1. Click [Add] and enter the task name.
2. Set Source path to Server: Select the Storage, enter the server file/directory corresponding path to be downloaded.
Example: The storage [Default] path = /opt/Raysync. If server task path = / ; real download to = /opt/Raysync ; if path =test; real download to = /opt/Raysync/test
3. Set Target path to Client: Enter the local client path for file storage.
4. Configure other optional parameters and click [Save].
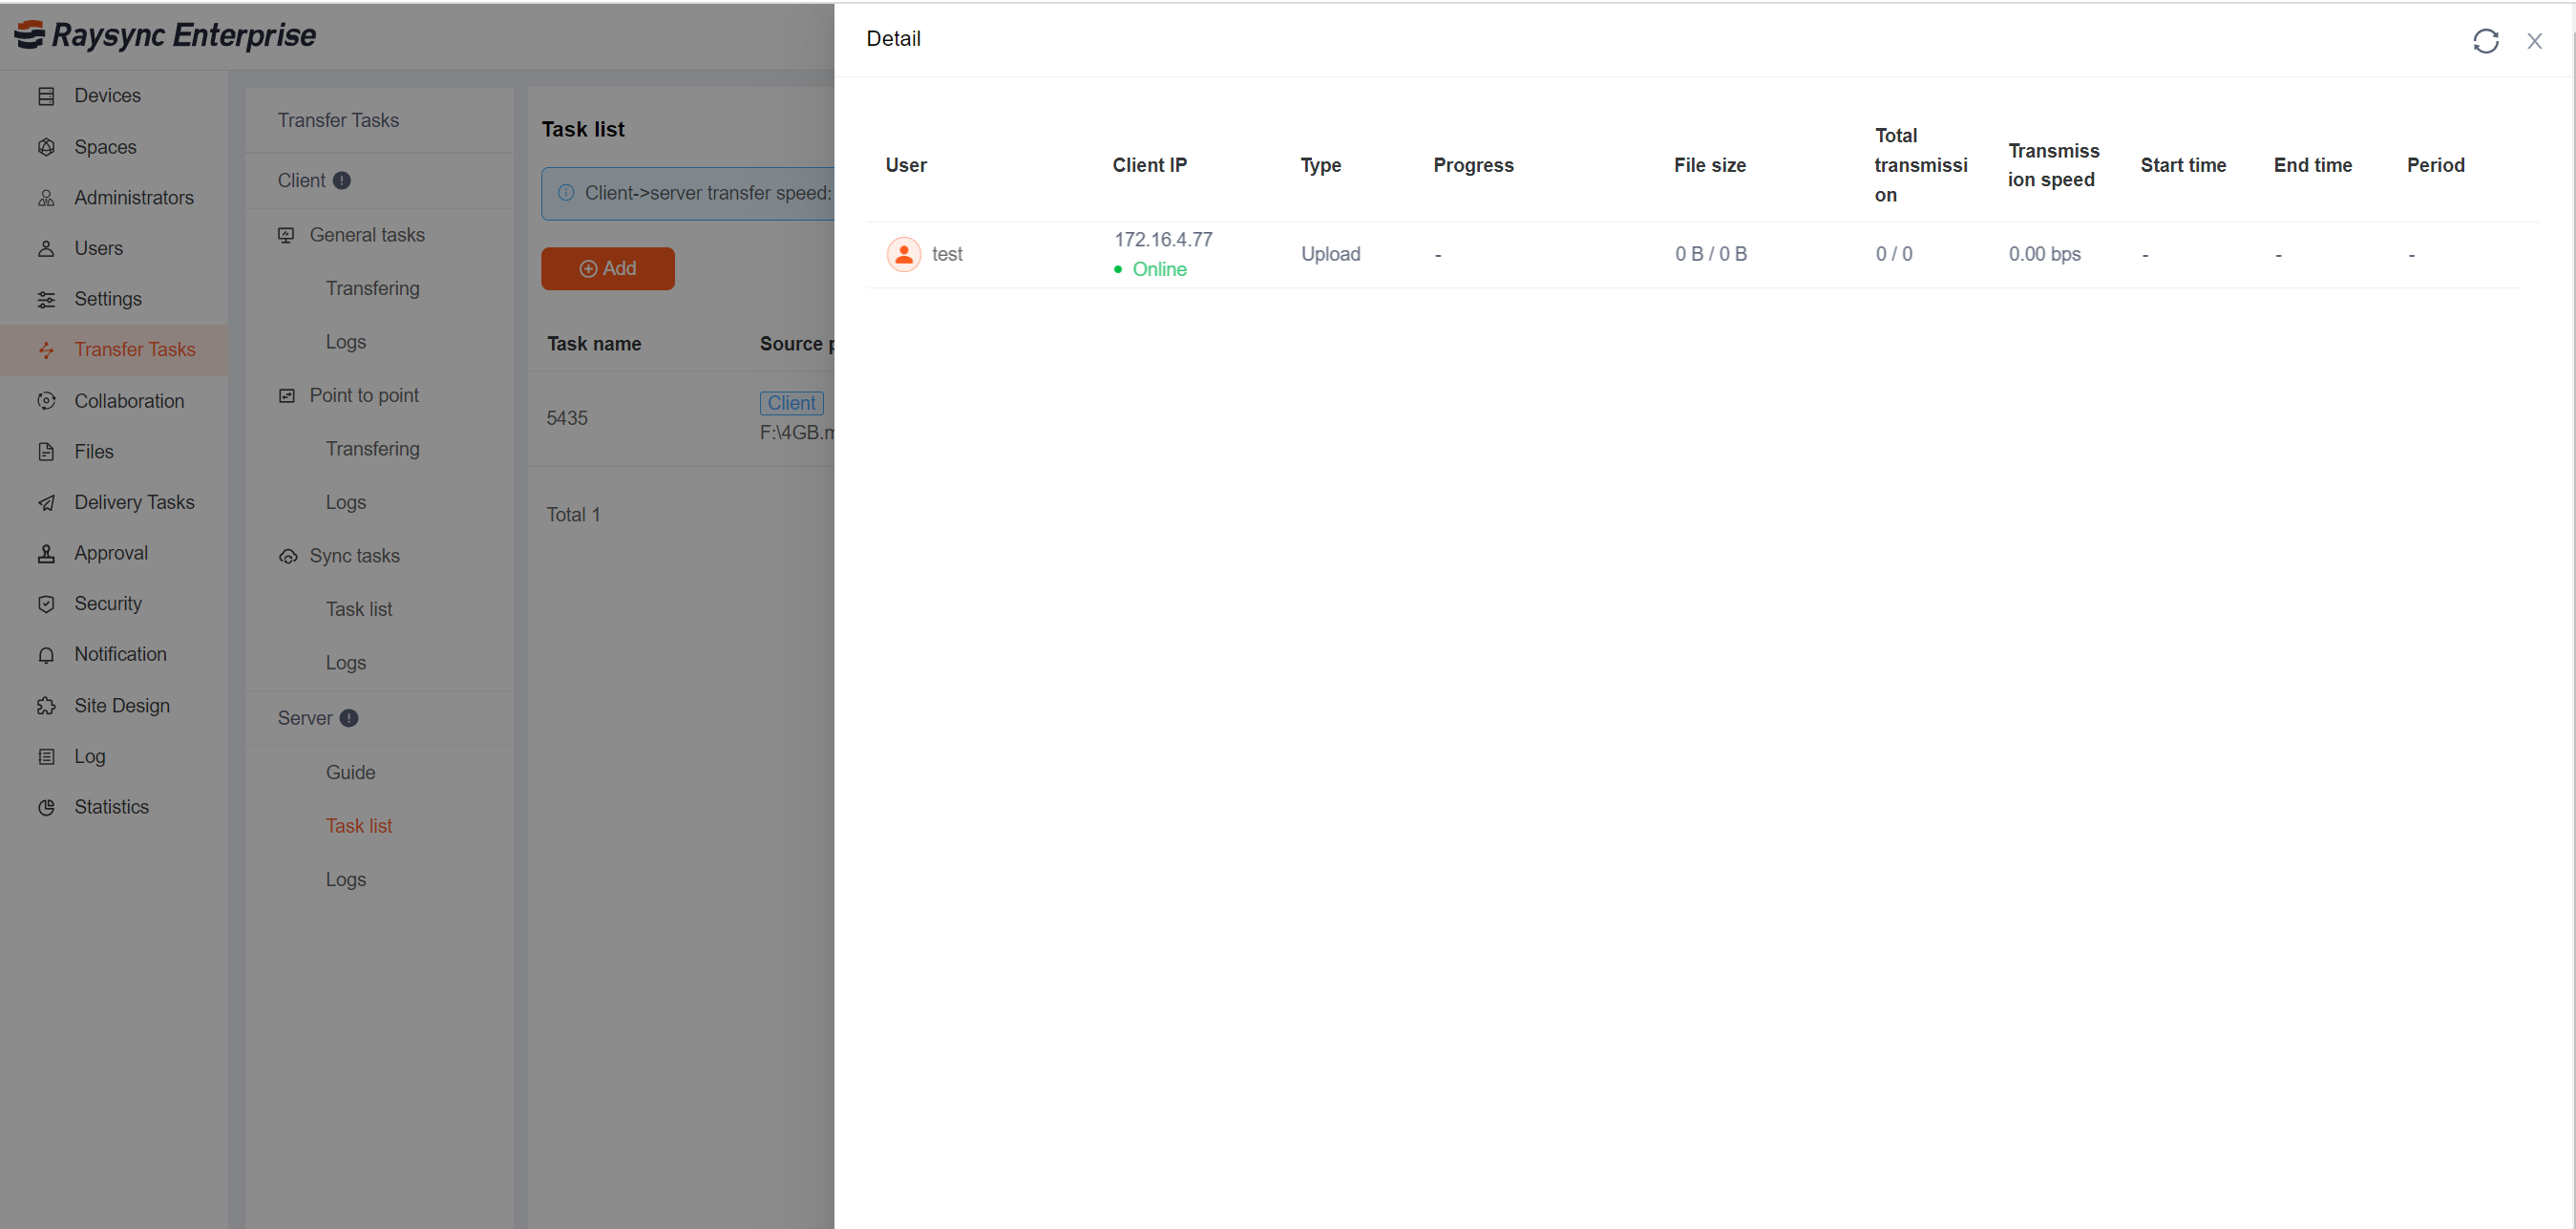
3. Task monitoring
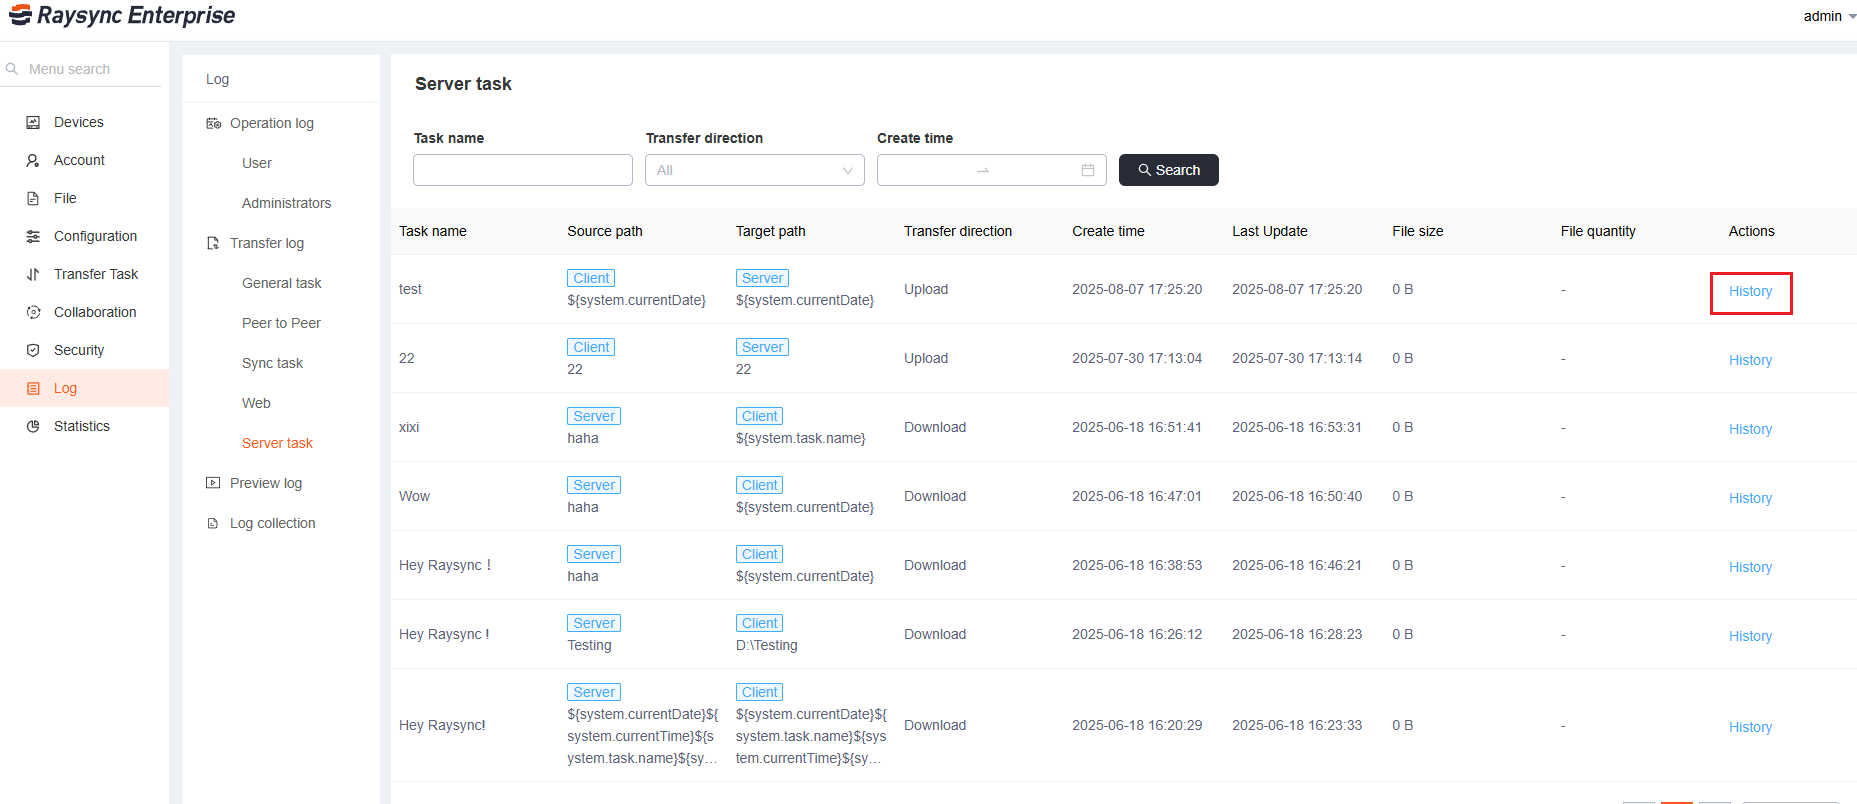
After the task is created successfully, you can monitor the transmission status of the task, edit and delete the task.
Click View Log to view the task transmission status of each client node.
After each transmission, you can view the transmission record in the [Log] - [Server task]