1. Antivirus
Support antivirus after uploading files. Raysync mainly uses ClamAV (Clam AntiVirus) virus scanning tool to scan the uploaded files and will move the infected files to Isolation Zone.
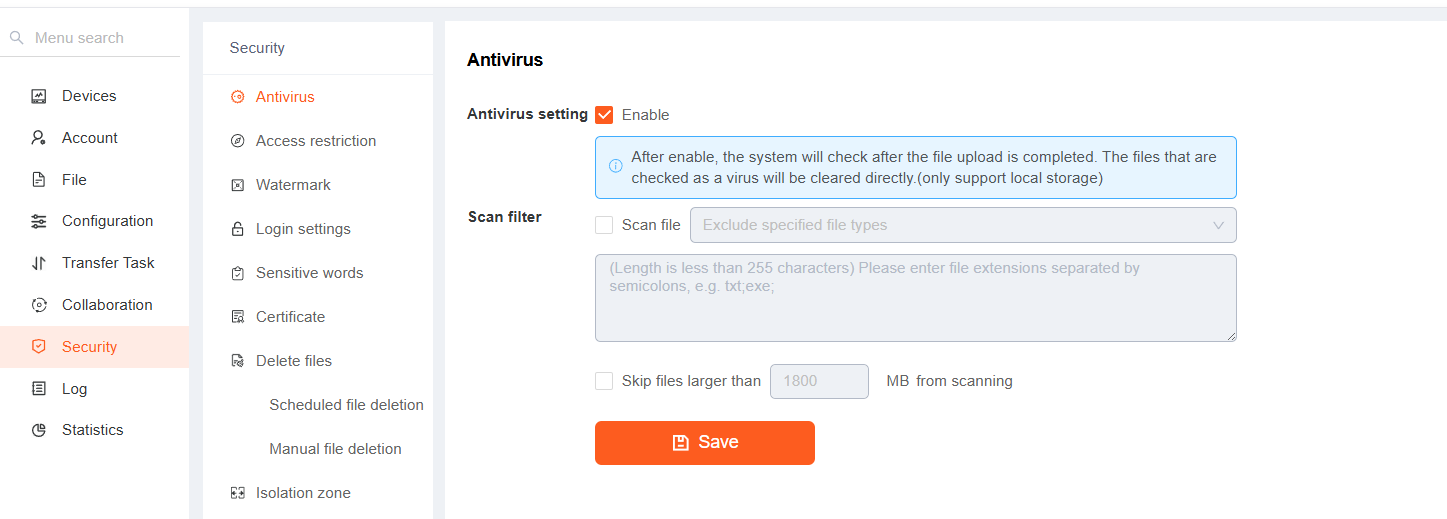
Click Security - Antivirus to enable the antivirus configuration. Restart the Raysync server for changes to take effect.
1.1 Configure the File-type Filter
The Scan file option controls which file types are submitted for antivirus scanning.
1. Enable Scan file.
2. Select one of the following filter modes:
- Exclude specified file types: Scans all supported files except the file types entered in the filter field.
- Scan specified file types only: Scans only the file types entered in the filter field.
3. Enter the required file types in the text box.
4. Separate multiple file types with semicolons.
5. Click Save.
Example: Exclude specified file types. To scan uploaded files but exclude text and image files, select Exclude specified file types and enter: txt;jpg;png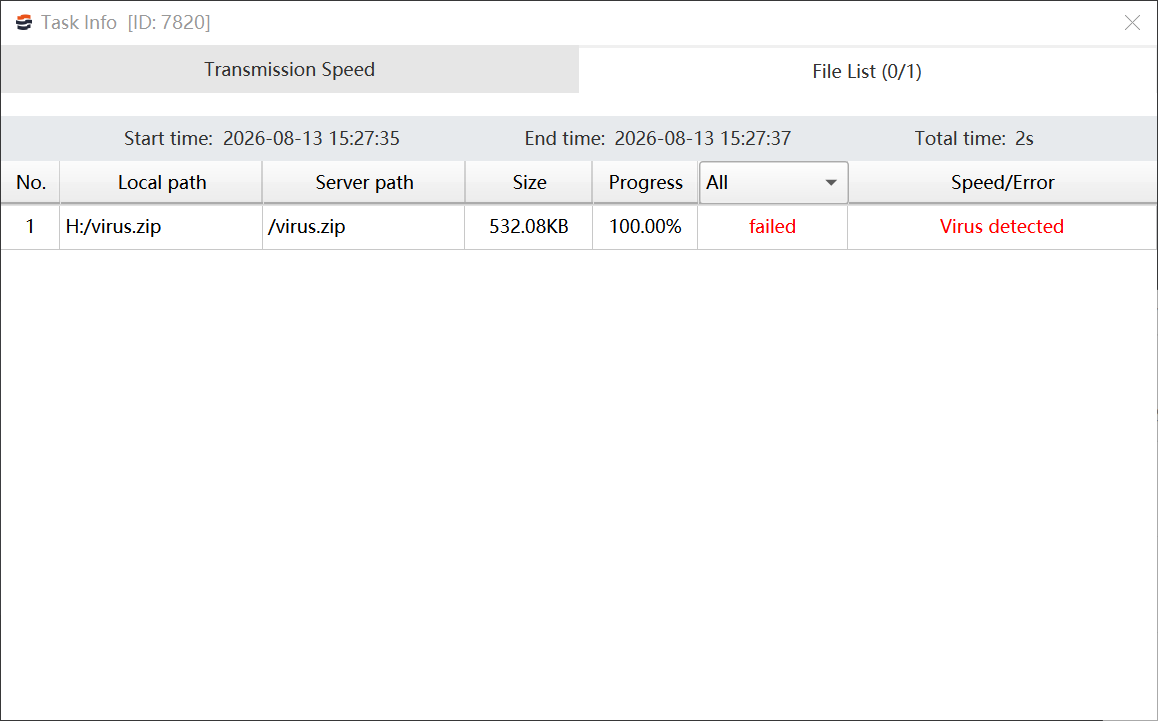
1.2 Configure the File-size Filter
The file-size filter allows the system to skip antivirus scanning for files larger than a specified size.
1. Enable Skip files larger than.
2. Enter the maximum file size in the input field.
3. The value is measured in MB.
4. Click Save.
For example, if the value is set to 1800, files larger than 1800 MB are not submitted for antivirus scanning.
1.3 Notes
- The maximum size for antivirus files is 1.8GB. Files larger than 1.8GB may fail to upload, requiring configuration file size filtering.
- Antivirus scanning currently supports local storage only.
- Scanning starts after the file upload is complete.
- Files detected as infected are cleared automatically to isolation zone.
- Separate multiple file types with semicolons.
- Ensure that the antivirus service is available and operating normally before enabling the feature.
2. Access Restrictions
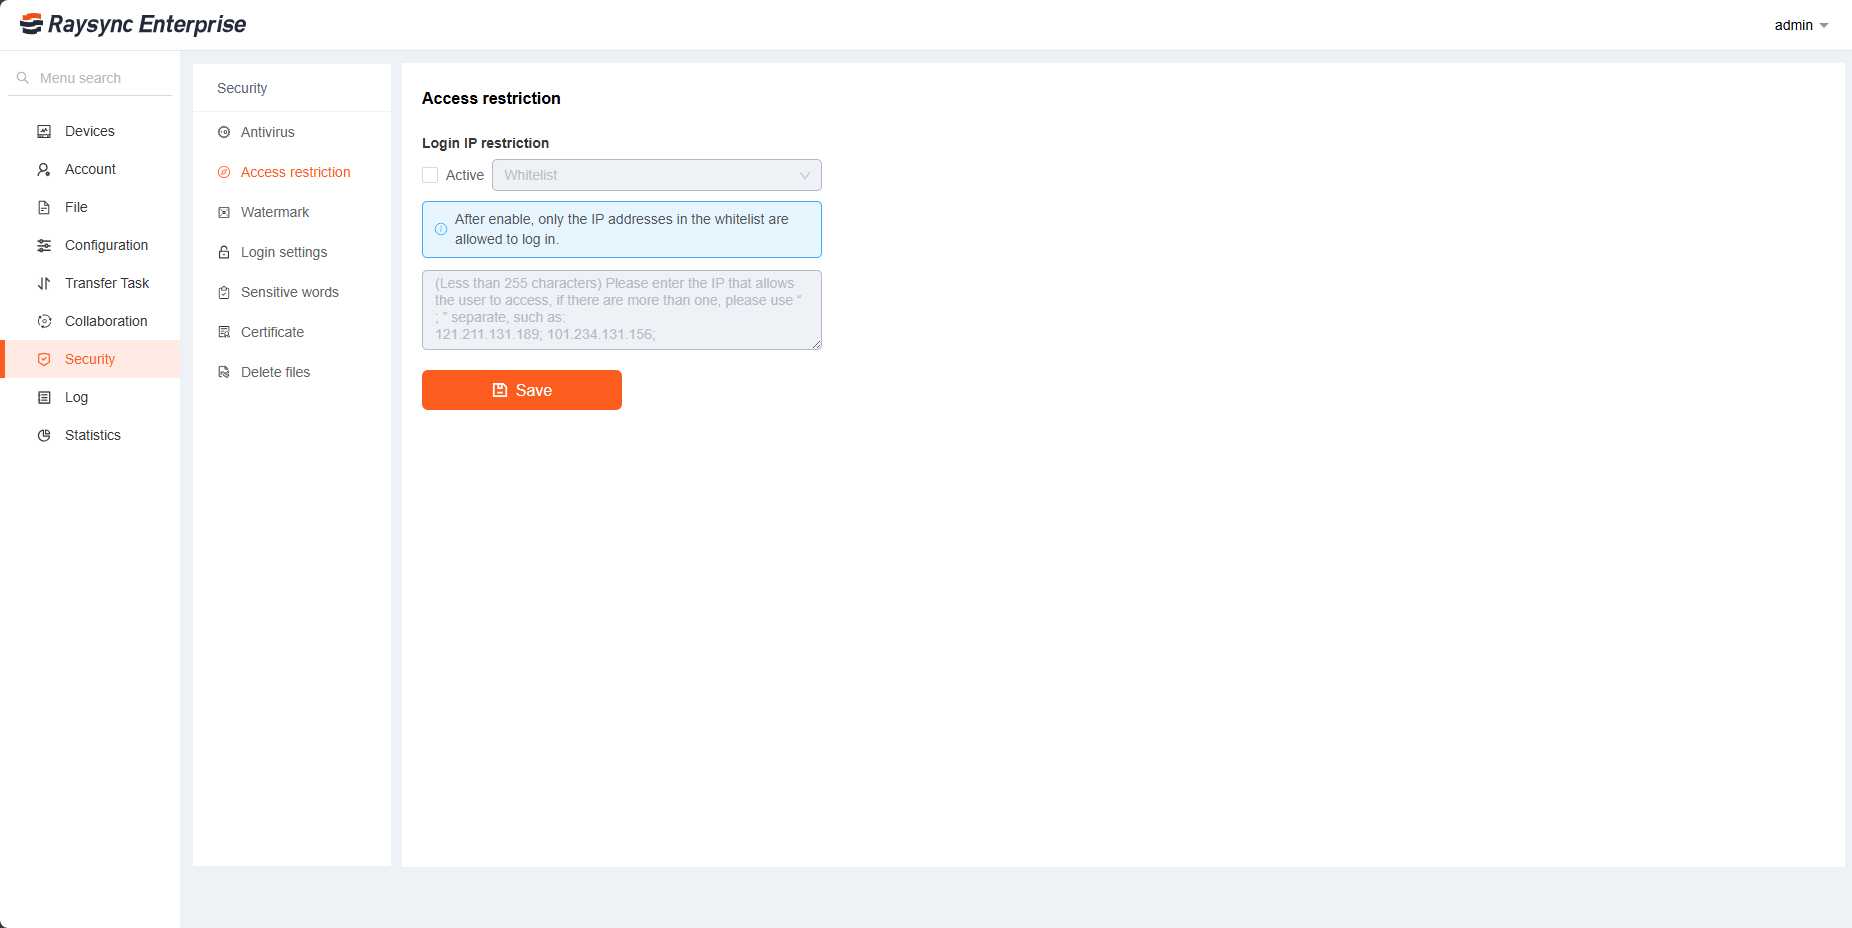
Used for foreground user login restrictions. Set a white list, the IP addresses in the white list are allowed to log in to the front desk; set a black list, the IP addresses in the black list cannot log in to the front desk. Click Security - Access Restriction, select whitelist or blacklist, enter ip or ip range (such as 10.80.90.1-100), and click Save to take effect.
3. Watermark Settings
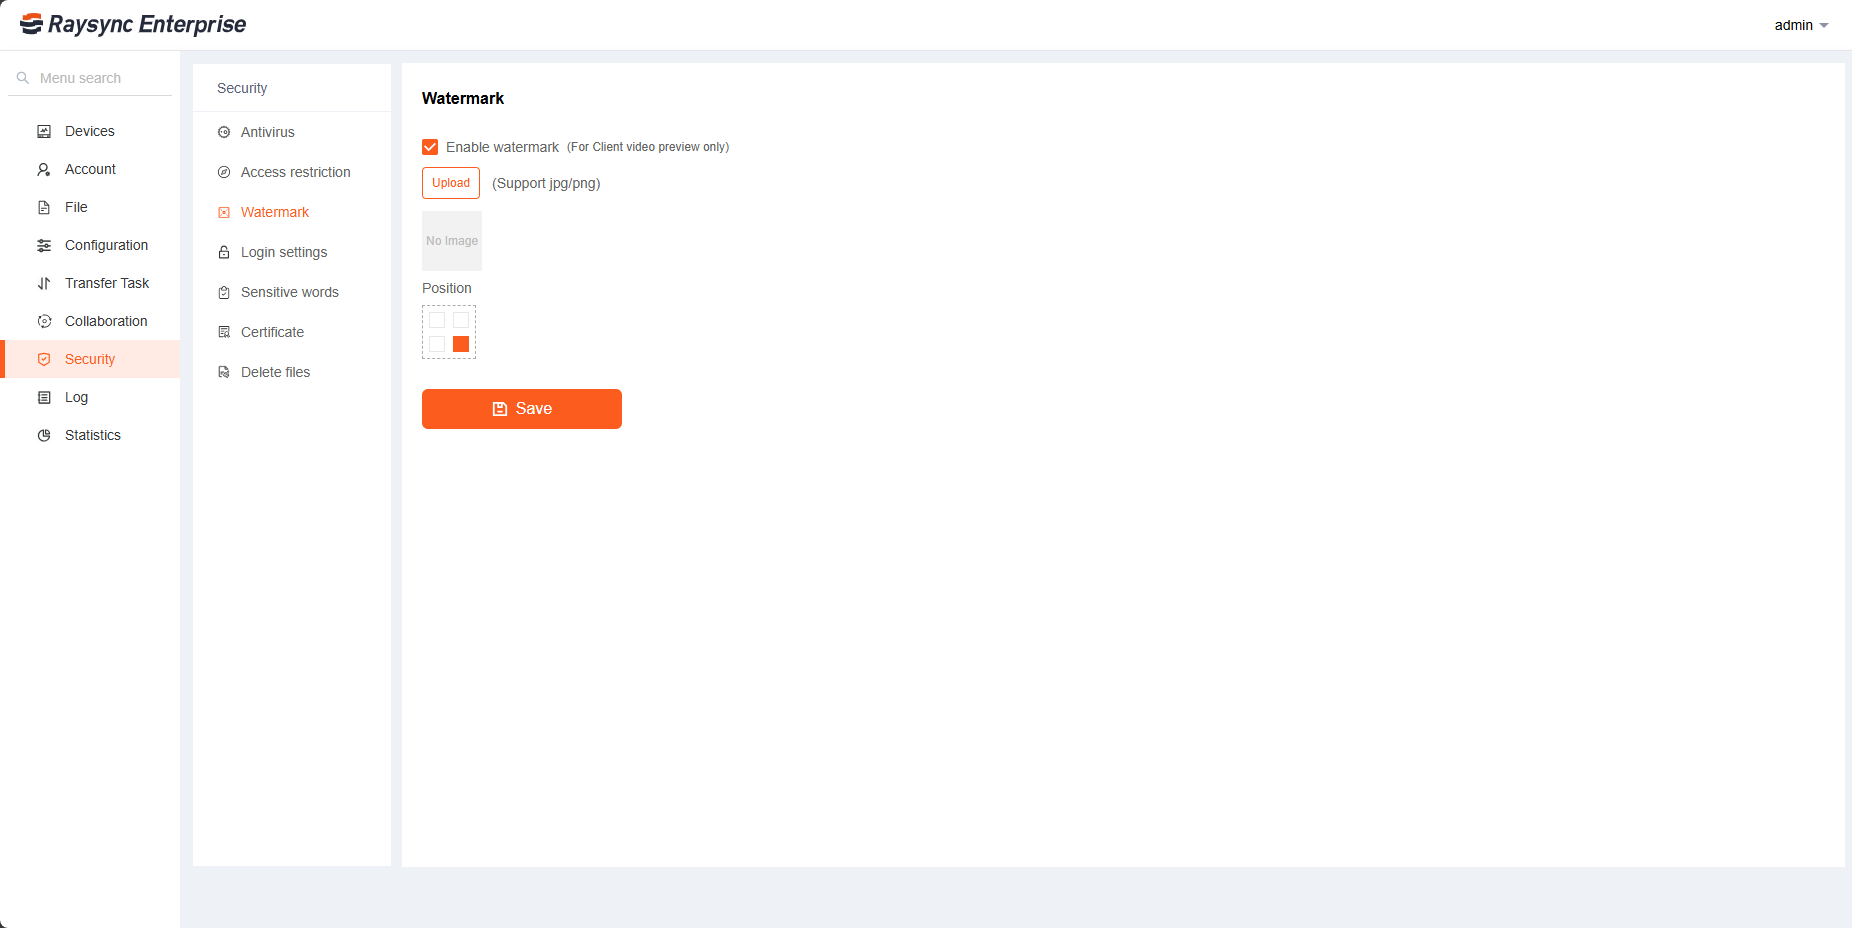
Used to configure video online preview watermark configuration. Click Enable watermark, upload the watermark image, select the location, and click Save.
4. Login Settings
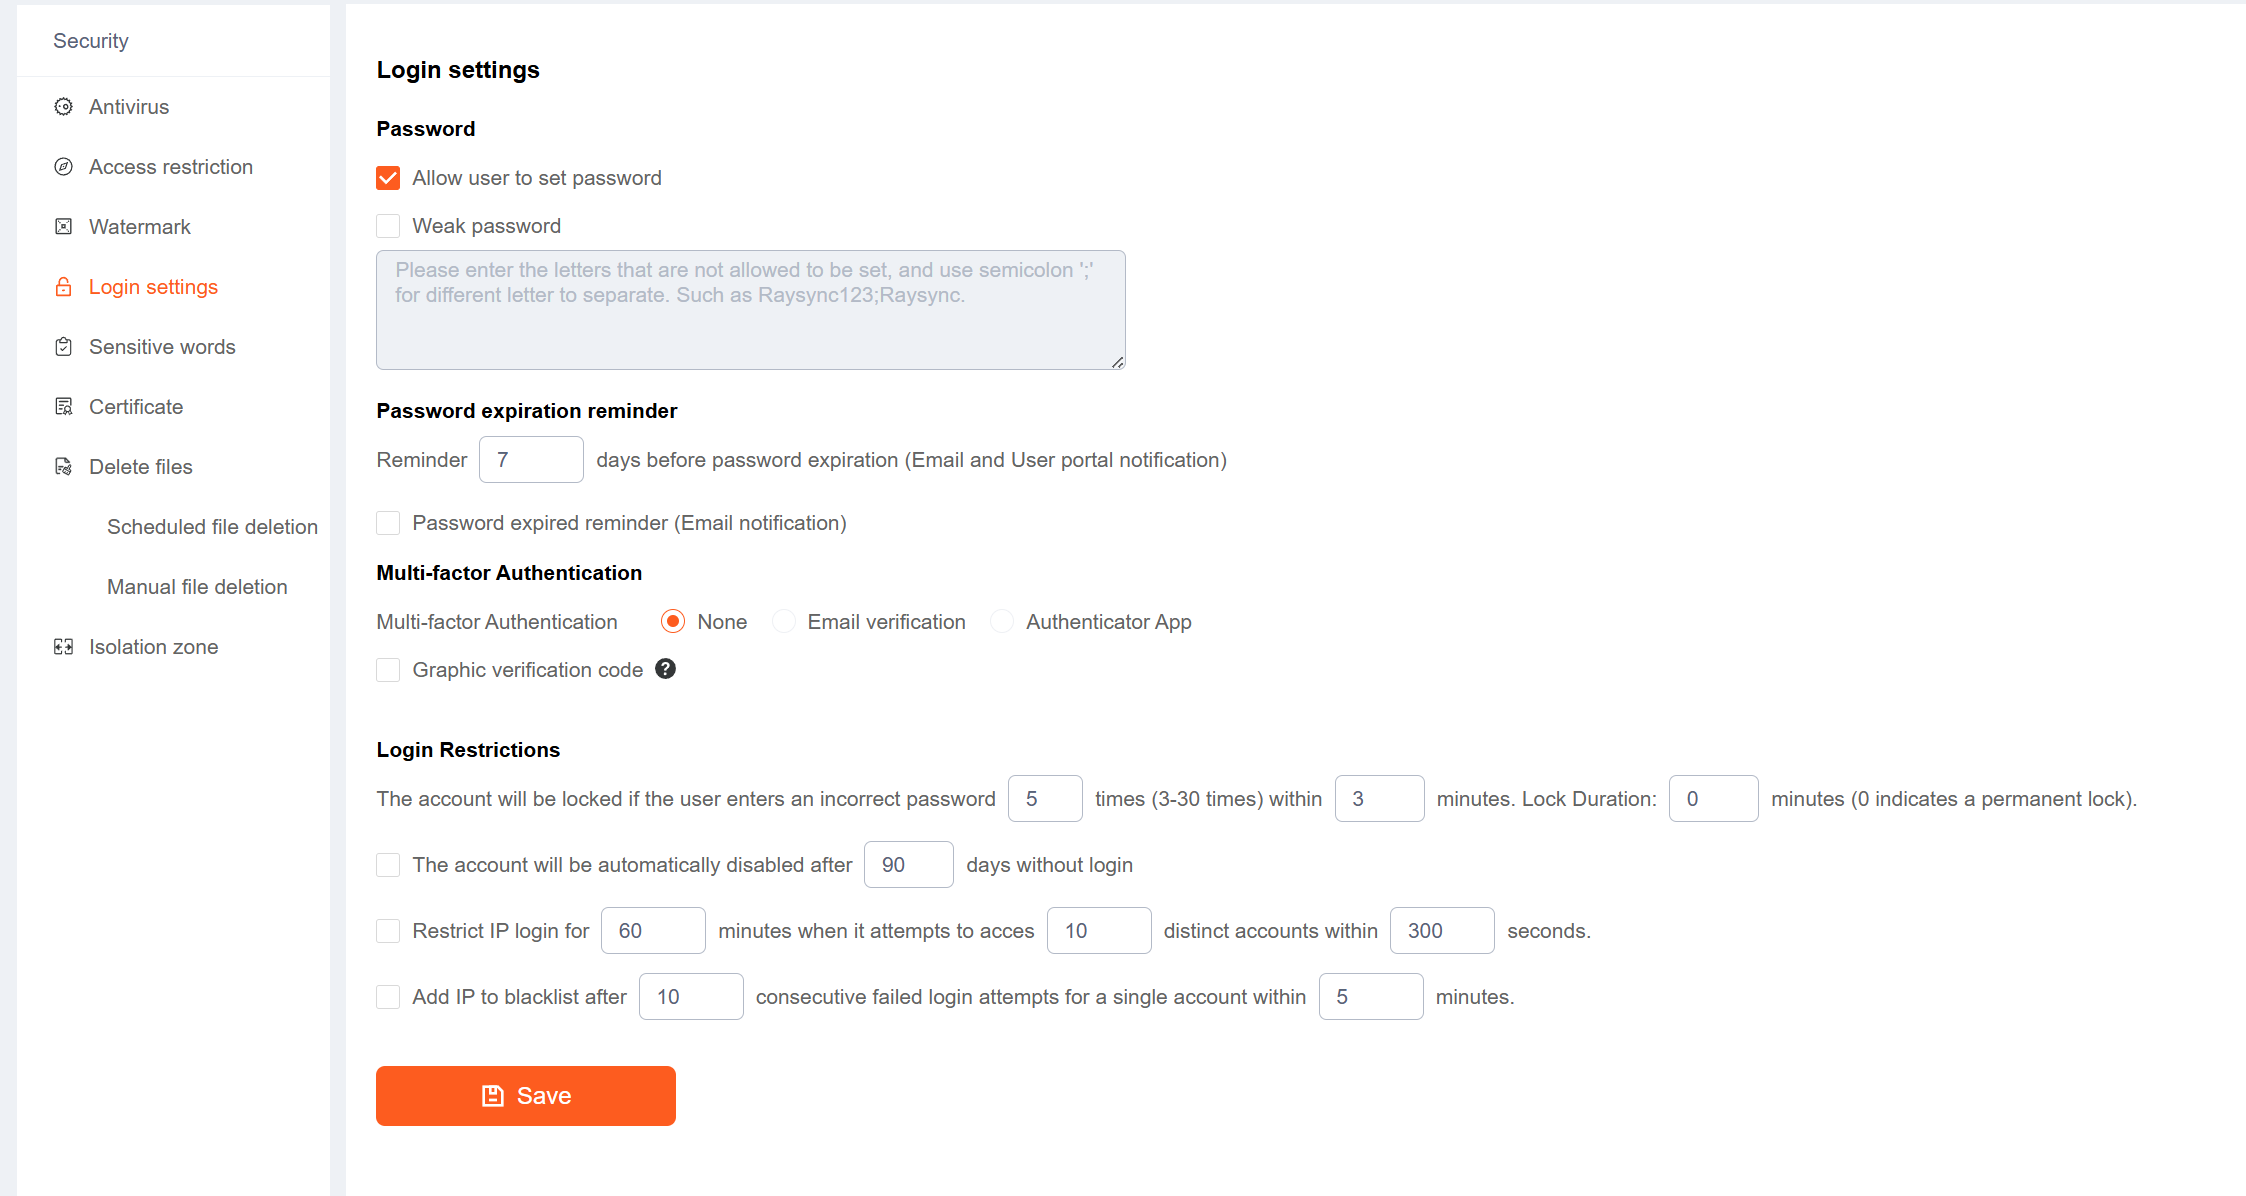
It supports administrators to configure whether to allow users to modify passwords, account lockout rules, Multi-factor Authentication and weak password settings.
| Functions | Description |
|---|---|
| Anti-brute force attacking | You can configure the user password to lock the account after X consecutive wrong input within X minutes, and the number of wrong input is 3~30 times. After the configuration is saved, it will take effect. |
| Allow users to change their passwords | If selected, the front-end users can change their passwords in the front-end, and the button to change the password is displayed in the foreground. If not selected, it will not be displayed. |
| Weak password settings | Passwords that users are not allowed to set, please use“ ; ”to separate multiple passwords, such as Raysync;raysync. After the configuration is saved, it will take effect. |
| Multi-factor Authentication |
You can ignore the admin's two-facotr verification by modifying the value of the field "block_super_administrator_login_email_verify" or "block_super_administrator_login_totp_verify" to 1 in the Raysync Server's config/config.ini.
|
| Graphic verification code | When enabled, you need to enter a graphic verification code each time you log in to the User portal or links |
| Login Restrictions |
|
6. Sensitive words
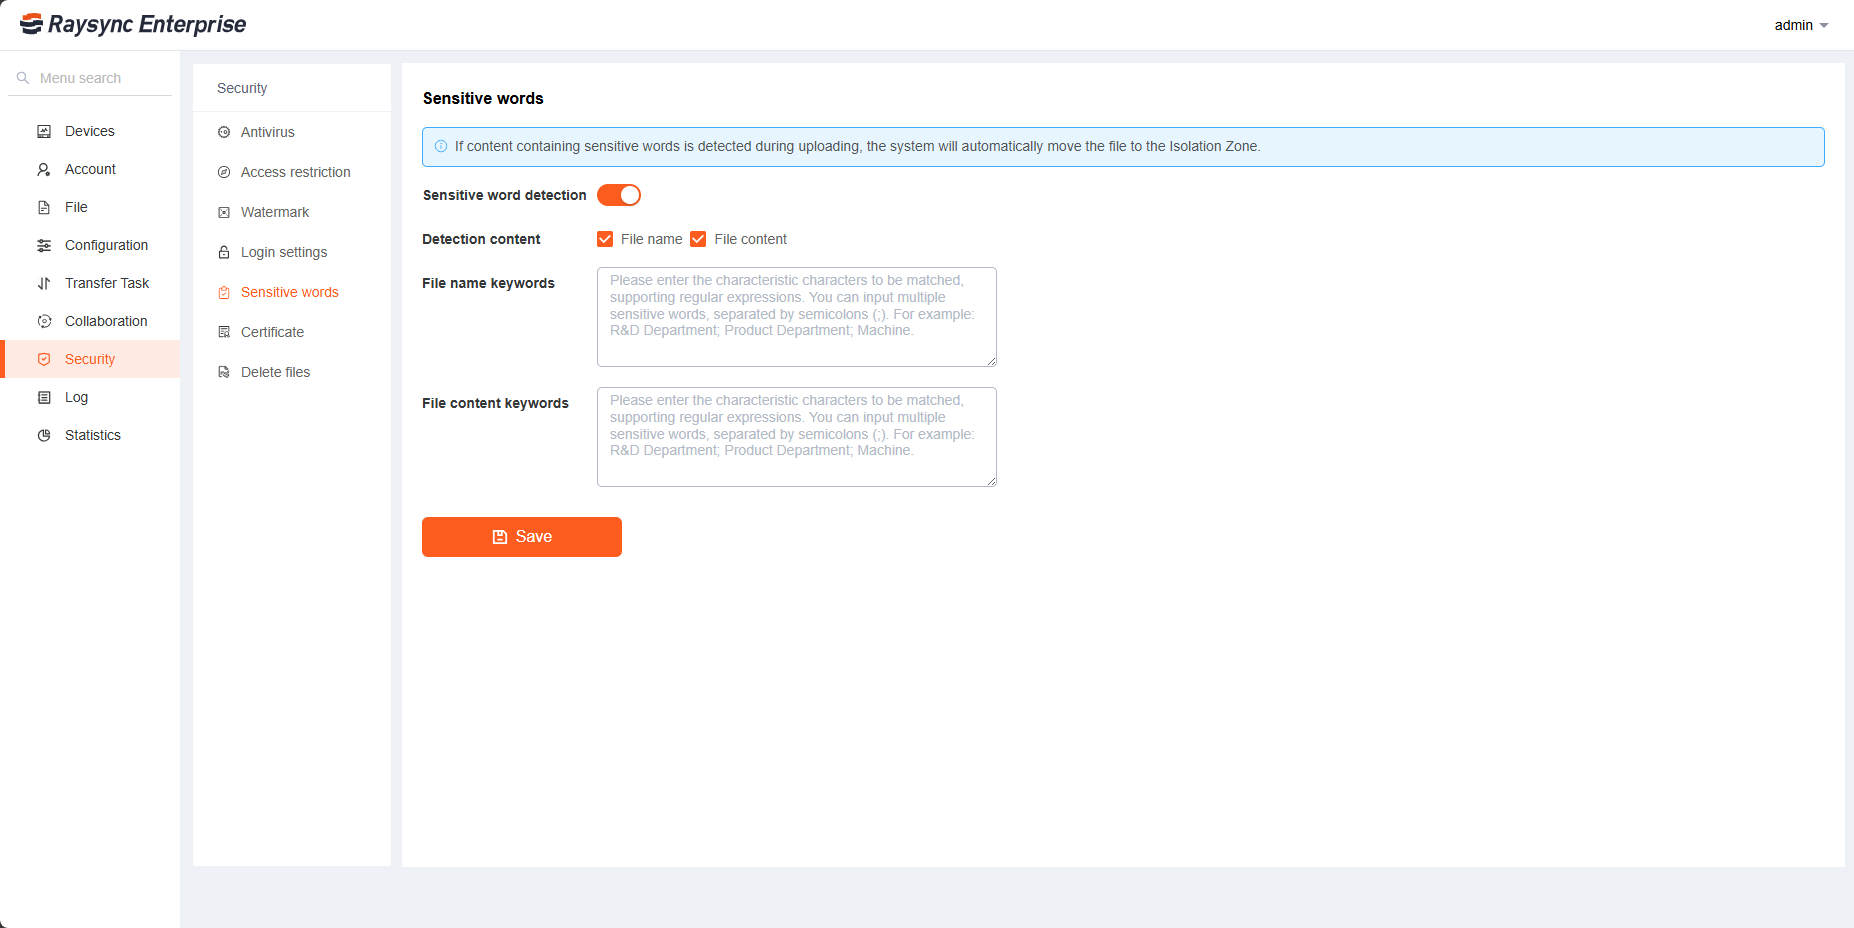
During the transmission process, the content of the file name and text file can be detected. The content of the file contains sensitive words. The system will automatically allocate the file to the isolation area.
If you need to detect the sensitive word like "kill", the input box inputs the sensitive word "kill", click [Save] and then enable
Multiple sensitive words are separated by ;

7. Certificate Management
7.1 TLS certificates
7.1.1 Overview
- Raysync supports TLS for:
- Web portal access (Admin and User portals over HTTPS)
- File transfer encryption (TCP TLS on port 2443)
The built-in Raysync certificate is only for transfer encryption. To enable HTTPS web access, upload your own TLS certificate (typically a public CA certificate matching your domain).
- Configuration Workflow Overview
1. Deploy Raysync and complete firewall configuration.
2. Apply for a certificate.
3. Upload TLS certificate → restart service.
4. Set Server Address to external domain/IP → restart service.
5. Verify:
Admin portal: https://<domain name>:9091/admin
User portal: https://<domain name>:8091/
Desktop Client login: https://<domain name>:8091
7.1.2 Configure TLS Certificate
Path: Admin Portal → Security → Certificate Management → TLS certificates
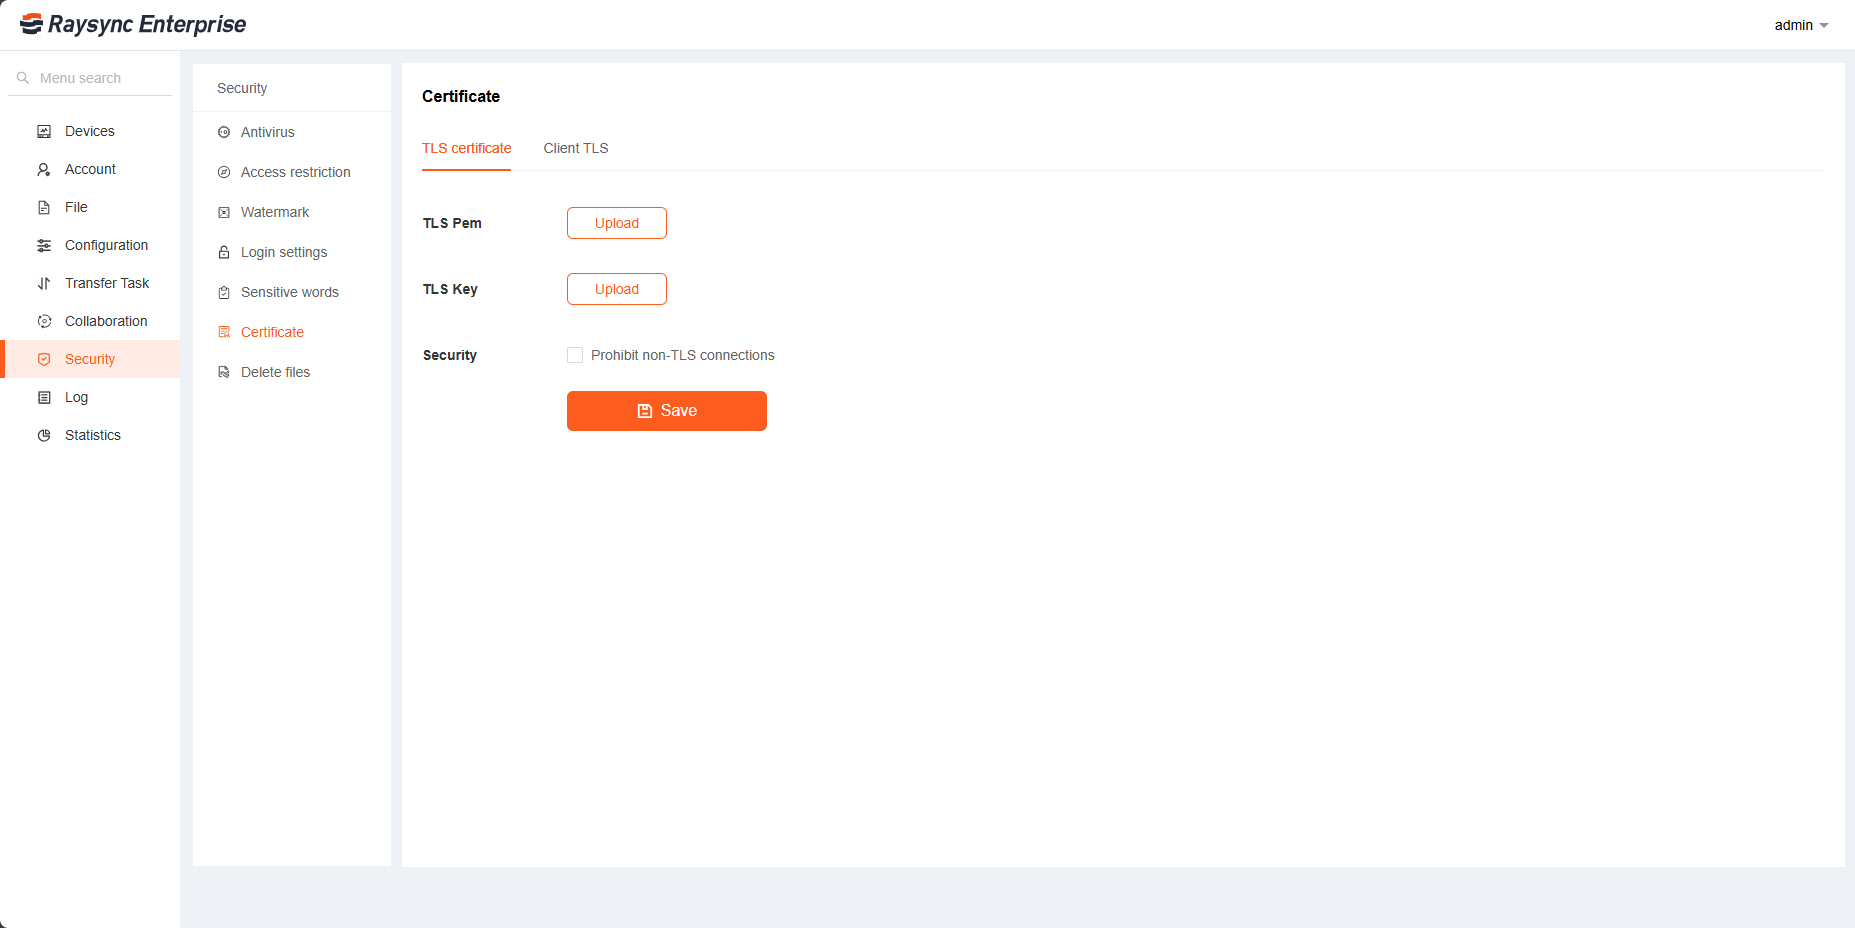
Steps 1: Upload Certificate
1)Prepare your certificate file and private key (PEM format is typical).
2) Upload both files and click Start Upload.
3) Restart the Raysync server for changes to take effect.
4) (Optional) Prohibit non-TLS connections: Admin and user portals are only accessible via HTTPS. HTTP is not allowed.
Steps 2: Firewall Configuration
Minimum ports for HTTPS access
| Direction | Port | Service |
|---|---|---|
| Inbound | TCP/8091 | User Portal HTTPS |
| Inbound | TCP/9091 | Admin Portal HTTPS |
| Inbound | TCP/2481 | Client Web encrypted direct connection |
| Inbound | TCP/2443 | TCP transfer (TLS encryption) |
| Inbound | UDP/32001 | UDP accelerated transfer |
Full port configuration: refer to Firewall Configuration
Step 3: Verification
| Portal | URL format |
|---|---|
| Admin Portal | https://:9091/admin |
| User Portal | https://:8091 |
7.1.3 Set External Domain / Public IP as Server Address
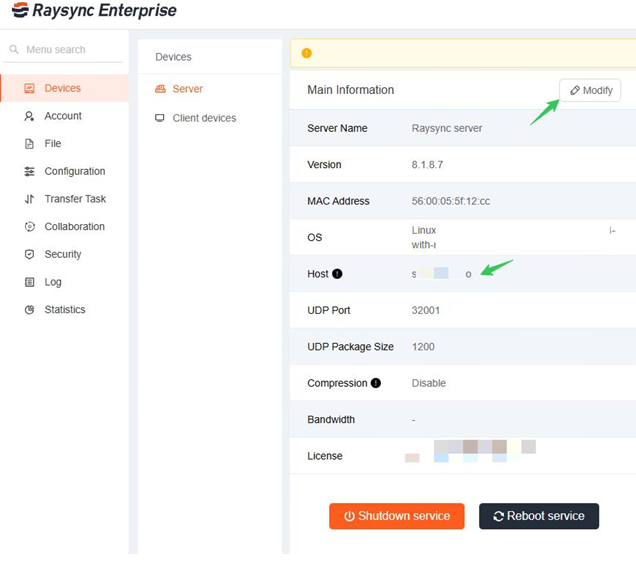
You can update the host in the Admin Portal with your configured domain name. Currently, this setting will be reflected in the User porta URL when sending Create account email after email notifications have been configured.
Path: Devices→Server → Modify→host : Set to your public IP or external domain name (e.g. files.example.com) .
7.2 Client certificates
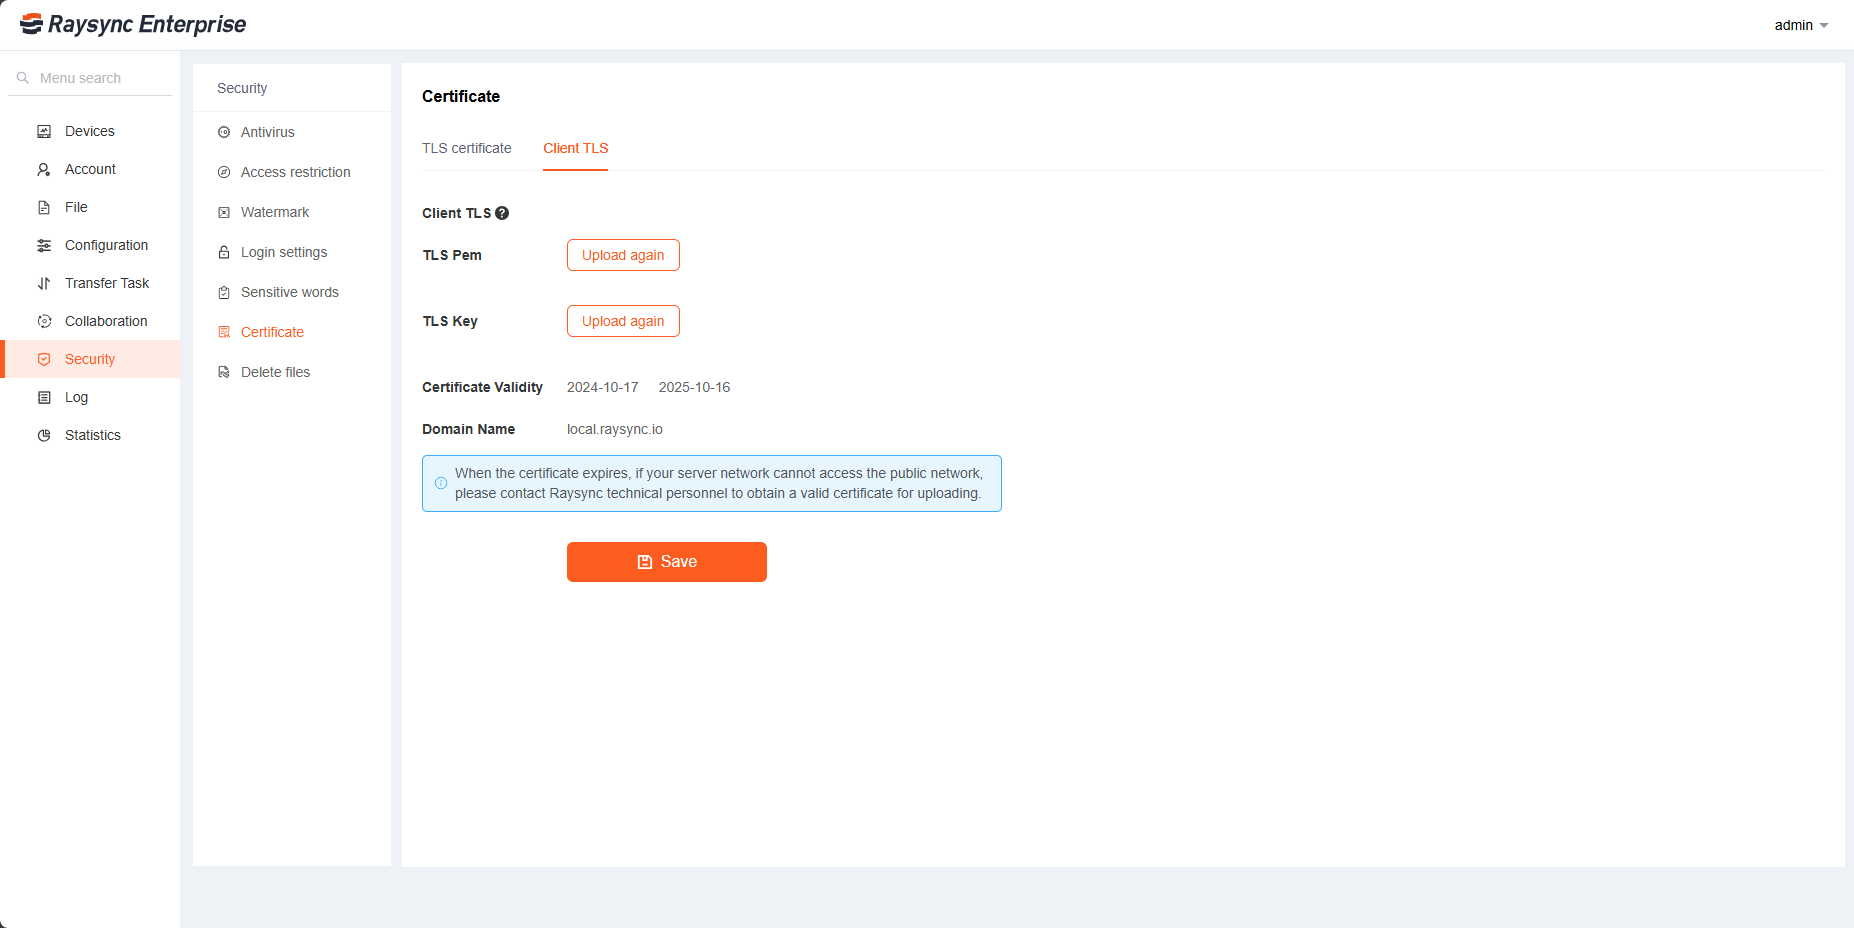
The client certificate used to establish an encrypted connection between the plugin and the browser. The Raysync server comes with this certificate. For online services, this certificate is automatically updated annually. For offline services, when the client certificate expires, you need to upload a new one. Support for uploading your own certificate. After uploading the new certificate, the user needs to exit the plugin Client and restart it on the Web for the changes to take effect.
8. Delete files
8.1 Scheduled file deletion
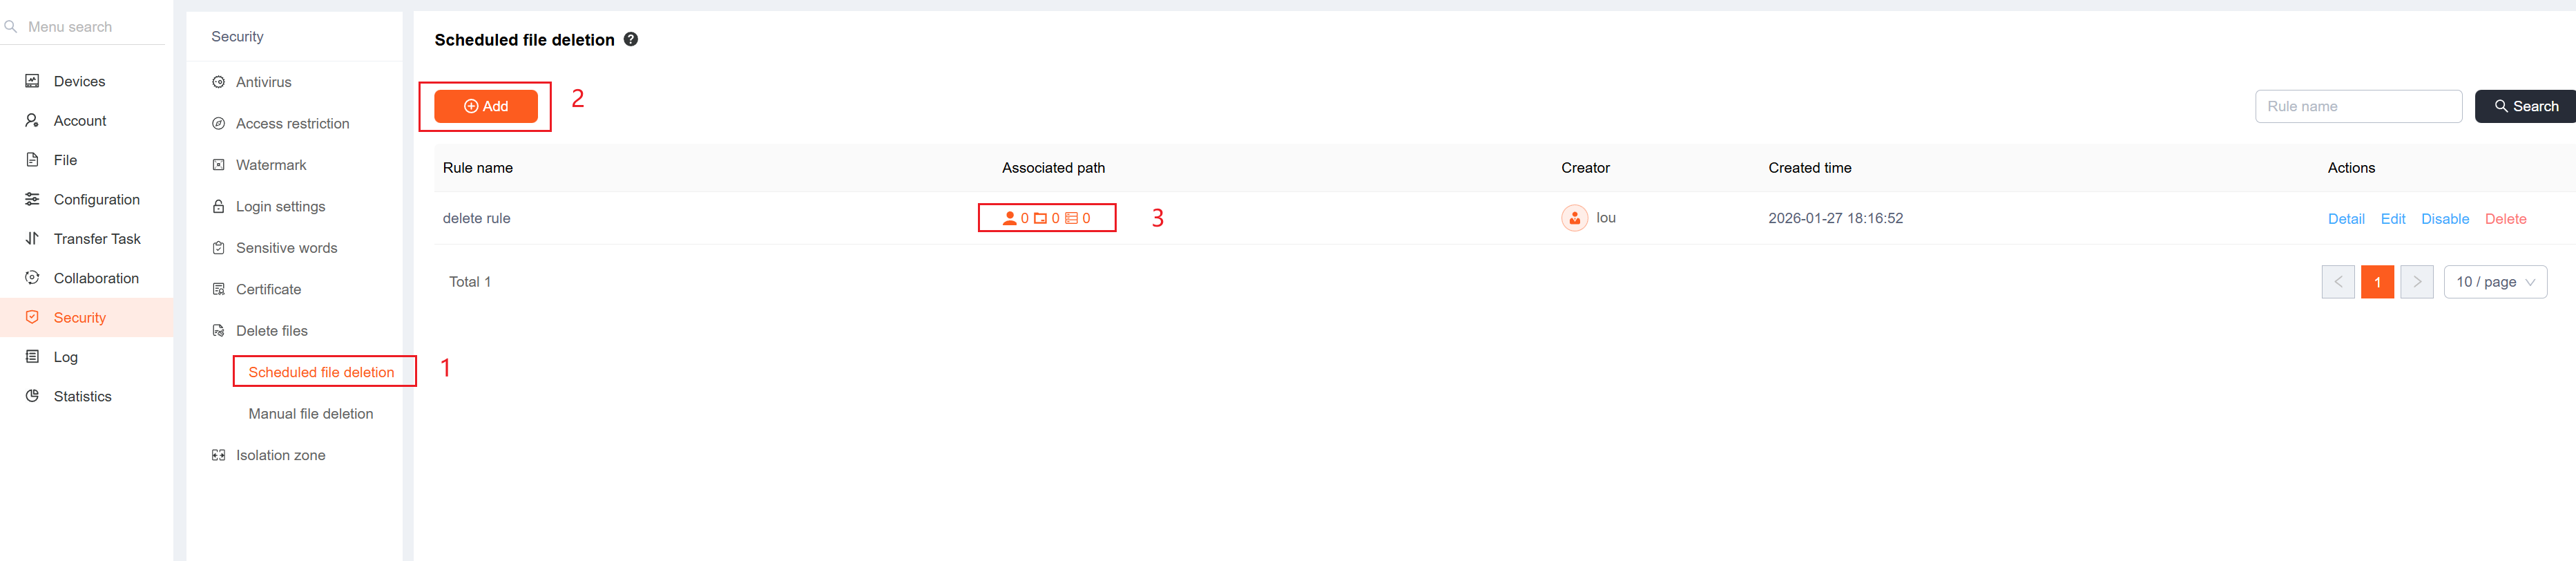
You can create scheduled file deletion rules. Click 【Scheduled file deletion】-【Add】 to set your file deletion rule, click 【Save】, then click 【Associated path】, select the path you want to delete, and click 【Save】. When the system triggers the conditions of this deletion rule, it will automatically delete the files in the path you selected or move them to the recycle bin. It only supports local storages.
8.2 Manual file deletion
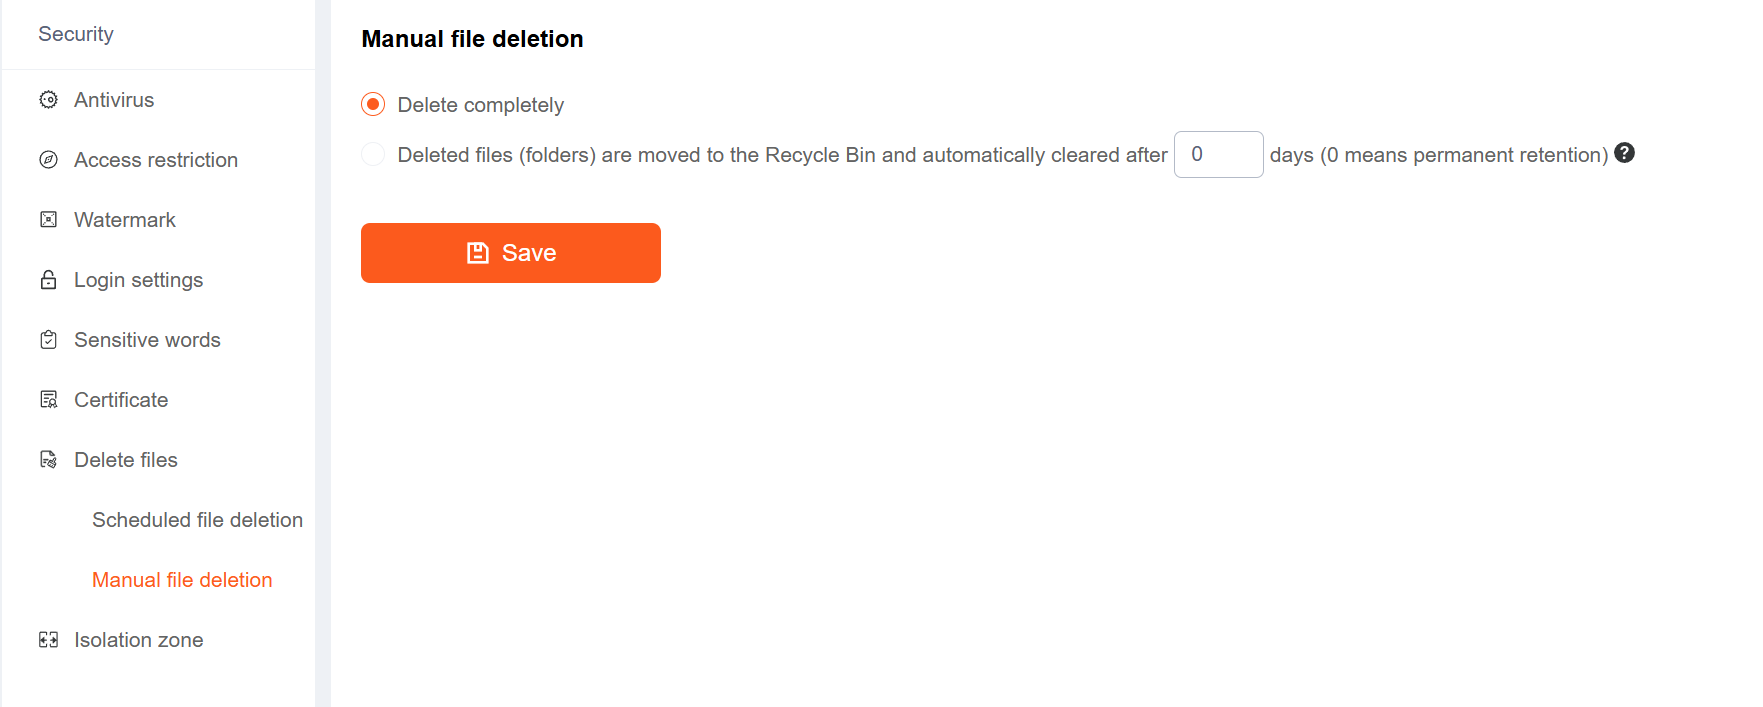
The files that the user manually deletes, you can choose to delete them directly, or first move them to the recycle bin before deleting them.