1. Users
1.1 Add user
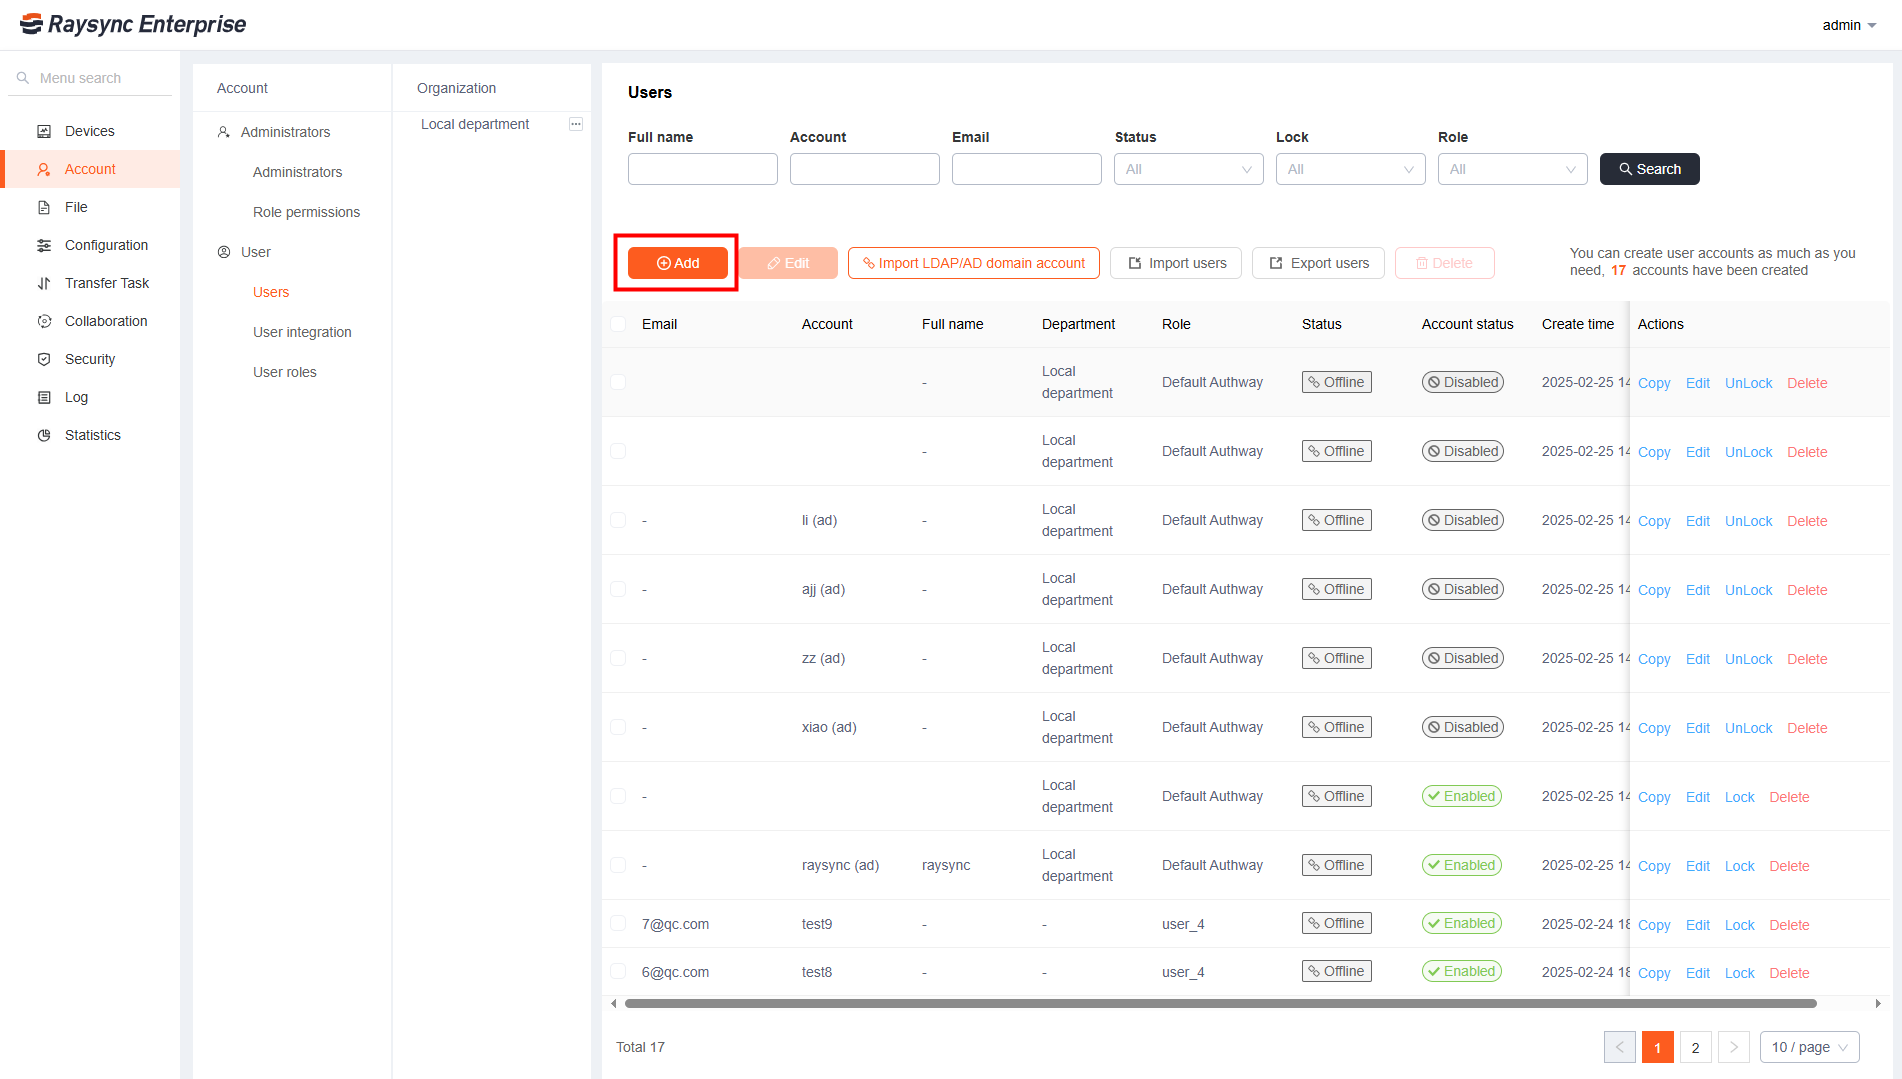
Click Account-User, click Add to add users.
| Options |
Function Description |
| Name |
Account real name |
| Account number |
Cannot be modified after successful creation |
| Password |
Can be set manually or auto-generated. Must meet the following requirements:
• Length between 8 and 20 characters
• Must contain at least one lowercase letter, one uppercase letter, one number, and one special character
• Cannot include the account name
• Cannot be identical to the account number
Supported special characters: _~!@#%$.^-+*(){}?
|
| Department |
Establish a department for users |
| Forced password change on first login |
When this function is enabled, user must change the initial password upon the first login |
| Email |
Support email login |
| Department |
Establish a department for users |
| Account status |
When a user's status is disabled, the user will no longer be able to log in. |
| User creation notification |
Email notification after successful account creation |
| Forced password change |
Force users to change password for the first time when they login |
| Home directory |
User's personal file storage location |
| Virtual directory |
A Virtual Directory maps a path to a physical storage location outside the User's root folder. To users, it appears as a standard subfolder, while the actual files can reside on any local drive, network share, or remote server.
• Virtual Directory Alias: It appears as a folder under the user's home directory
• Virtual Directory Path: Actual physical storage location
|
| Password expiration |
After the password expires, the account will be automatically disabled |
| Account validity |
No expiration or custom expiration time. Once expired, users will be unable to log in to the system. |
| Mailbox sender |
Select the mailbox to be used for sending email notifications such as sharing links.
• Send with administrator's configured mailbox: After setting, you need to configure the mailbox in the administrator's background mailbox settings before using. Email notifications such as sharing links will be sent to the mailbox configured by the administrator;
• Sending by user configured mailbox: After setting, users need to configure the mailbox in the account settings before using. Email notifications such as sharing links will be sent to the mailbox configured by users.
|
| Share download email notification |
How the share link and password are delivered.
• Link and password will be sent in one email
• Link and password will be sent in different emails
|
| IP Login Whitelist |
Enable this feature to restrict user login to specific IP addresses.
Example:127.0.0.1;172.16.4.55;192.169.80.12
|
| Email validation |
Login validation using only password when eabled two-factor authentication of email. |
| Sync task frequency |
When enabled, the frequency of all sync tasks will be in compliance with this setting, users cannot set the frequency when creating and editing sync tasks in the User Portal |
| Prompt when logging in for the first time |
After turning it on, a prompt will pop up on the user's home page when the user logs in for the first time. |
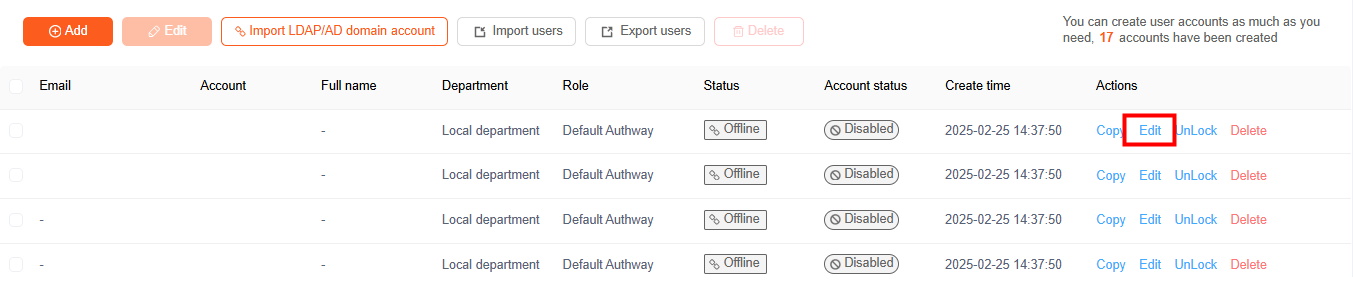
1.2 Edit user
Can edit user's password/home directory/permissions/speed limit/user group/prohibited path/synchronous directory function/file format transfer restriction/upload file option/file filtering/virtual directory/IP login whitelist/etc. Select any user and click Edit.
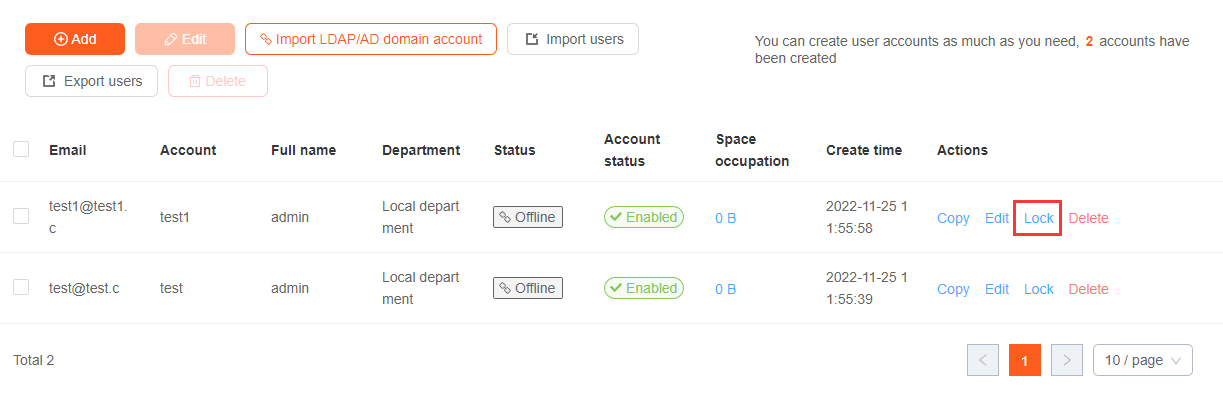
1.3 Lock/unlock user
Select any unlocked user and click Lock; for any locked user, click Unlock to unlock.
1.4 Delete user account
Check the users you want to delete and click Delete above. Click confirm to delete successfully.

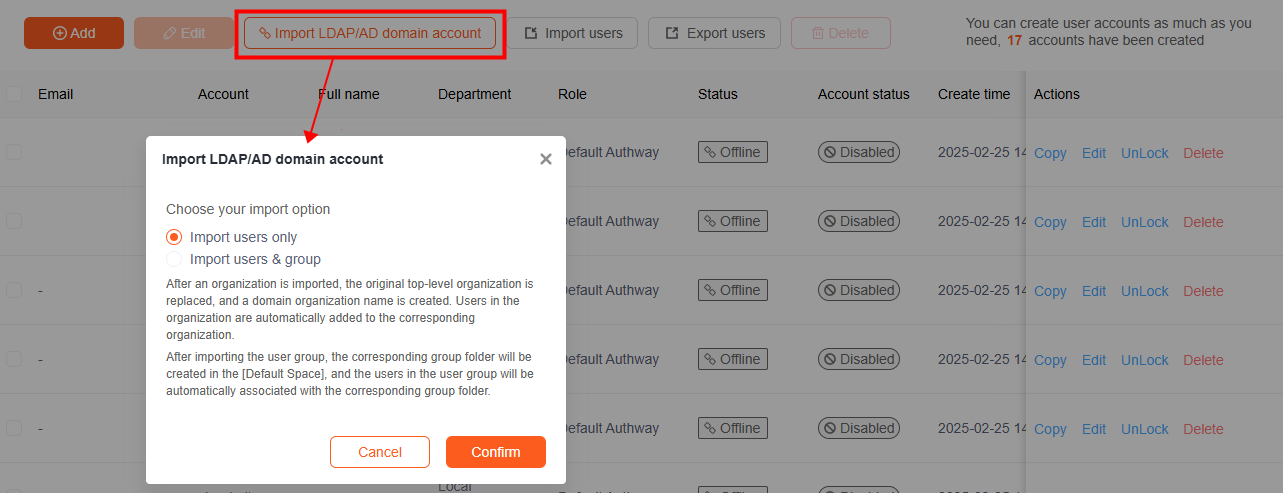
1.5 Import LDAP/AD domain account
Click Import LDAP/AD domain account to actively import all domain user accounts created by the domain server, provided that you need to configure LDAP/AP domain in User Integration - Third-party Authentication to support this feature.
1.6 Import/Export users
Click Import User to fill in the account, mailbox, and password through the specified template. Click Export User to export the mailboxes, accounts, and names of all accounts.

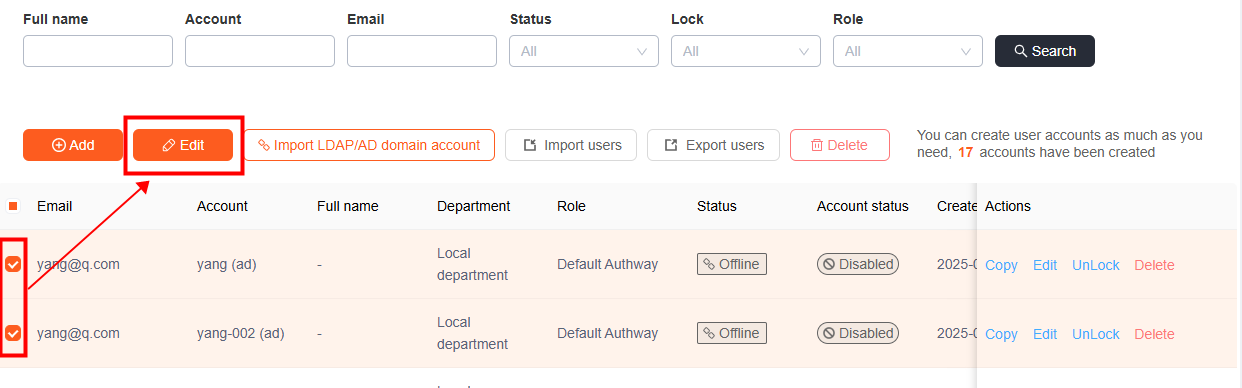
1.7 Batch edit users
Select the account number that needs to be edited, click Edit to edit the status, directory settings, transmission settings, and security settings of the account number in batches
1.8 Copy user
Select the account you need to copy, click Copy to copy an account with the same settings, but the mailbox, account number, password, and name need to be configured separately.

1.9 Reset authenticator
When two-factor Authenticator App is enabled, clicking "Reset authenticator" will reset the authenticator. This will be effective if the user loses their authenticator or changes devices.

1.10 View / Refresh User Storage Usage
Navigate to the user list and click on the Occupation to view their current storage usage. Click the "Refresh" button to update the storage information.
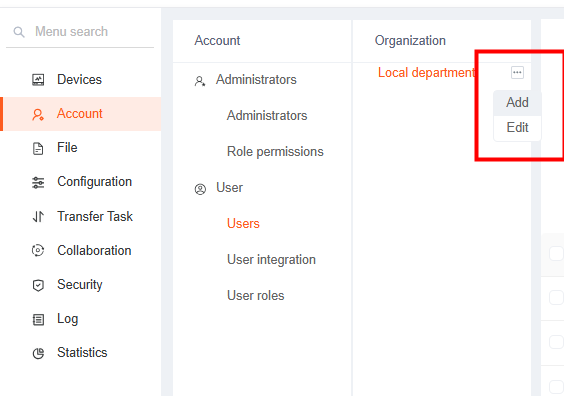
1.11 Organization
Support the creation department and add users to the department. When importing the AD domain account, it can be imported directly according to the user's organization to facilitate the administrator to manage the user. The system defaults to the Local department.