v6.8.8.1
Updated: 2024-6-28
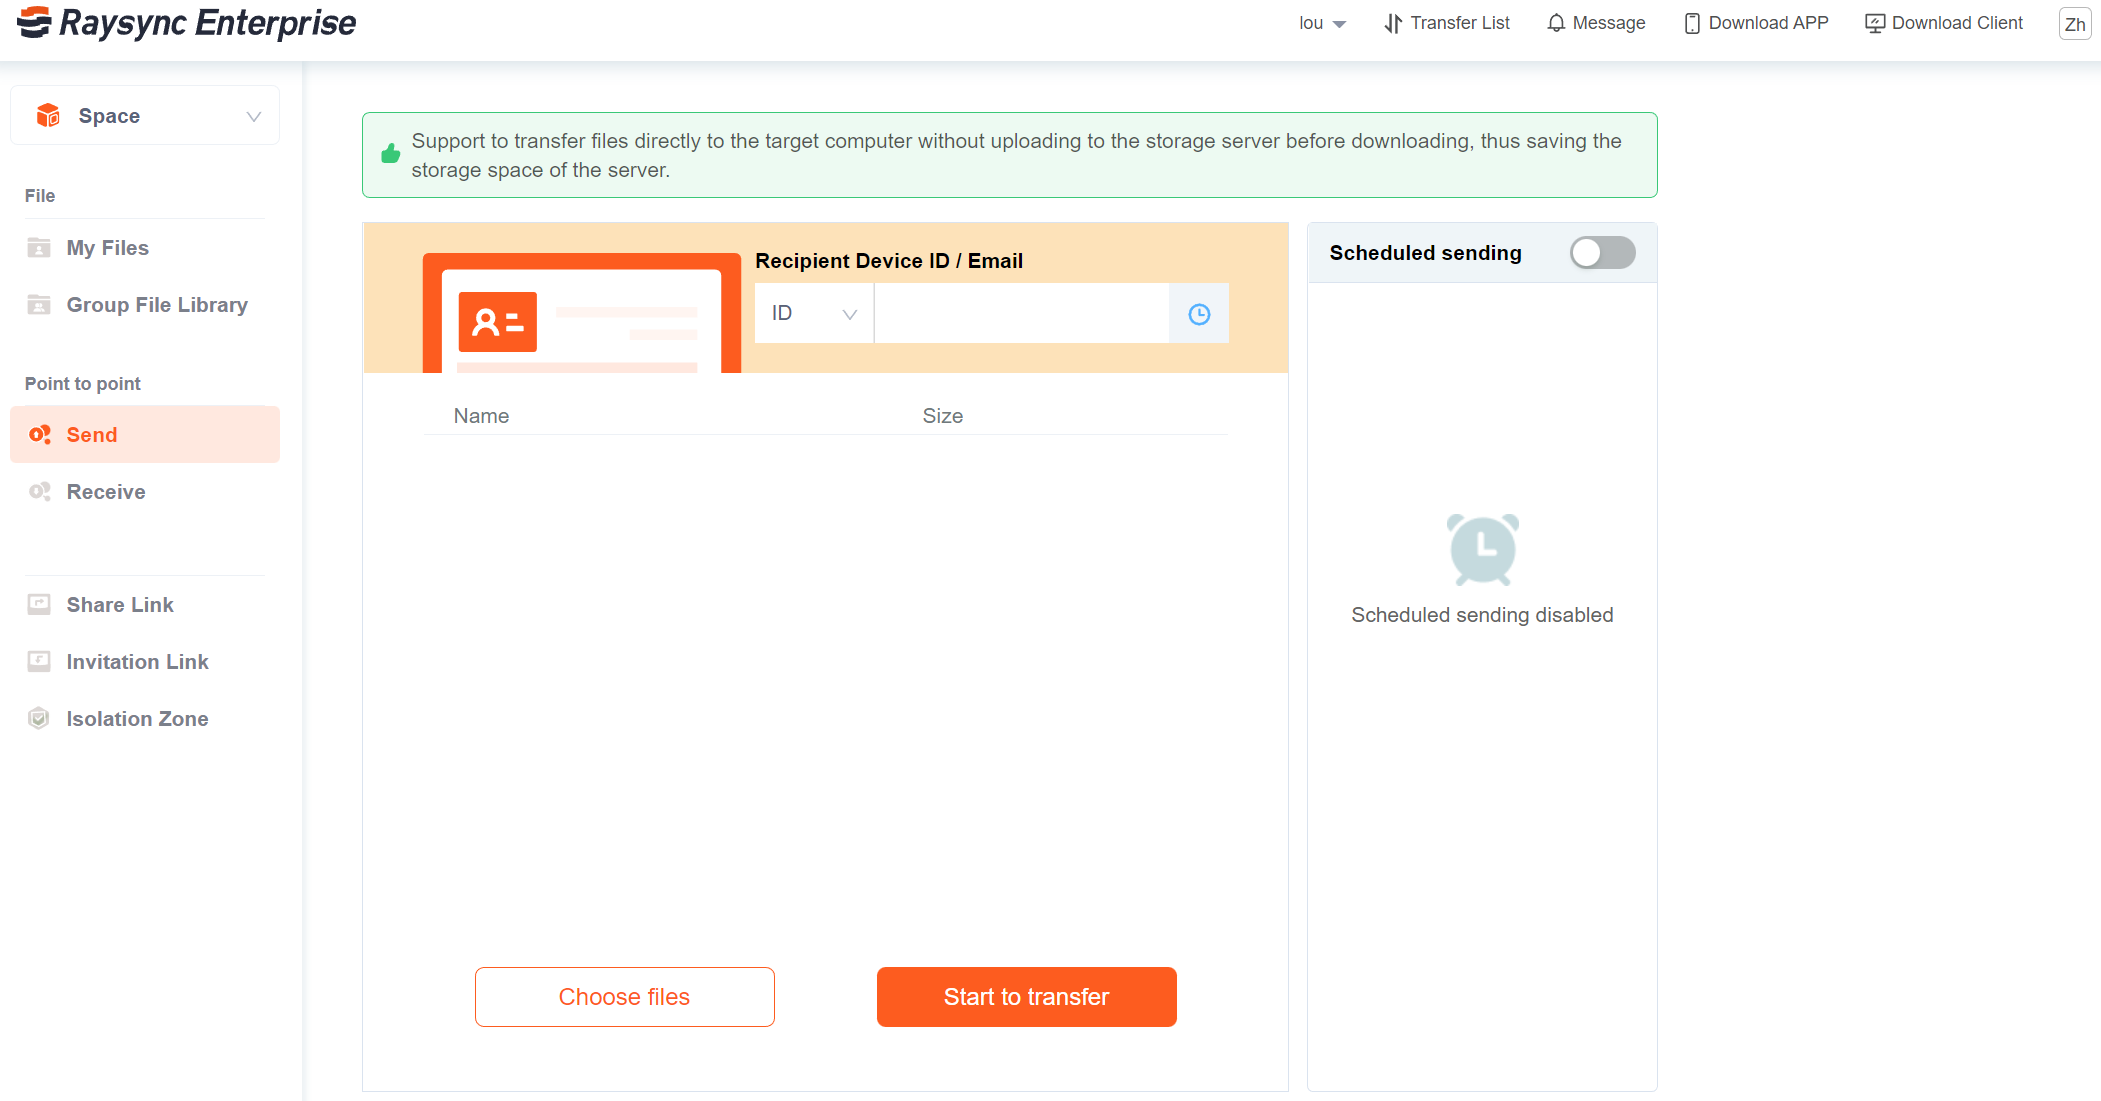
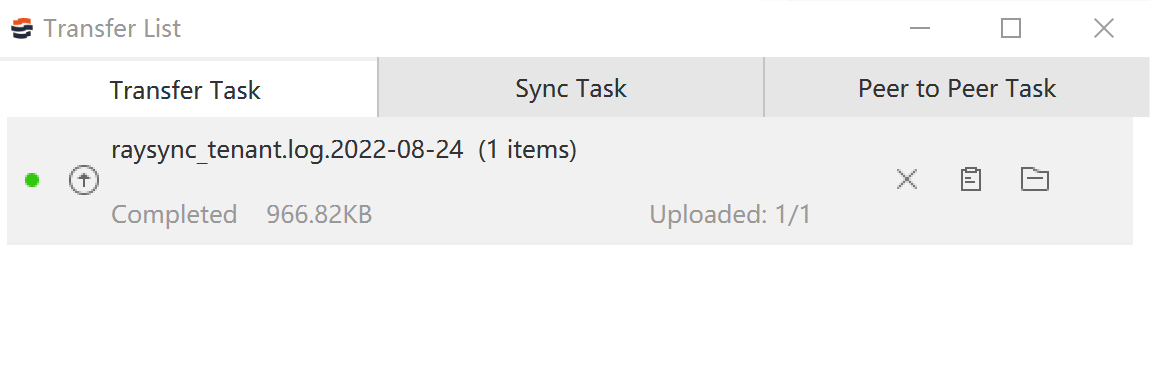
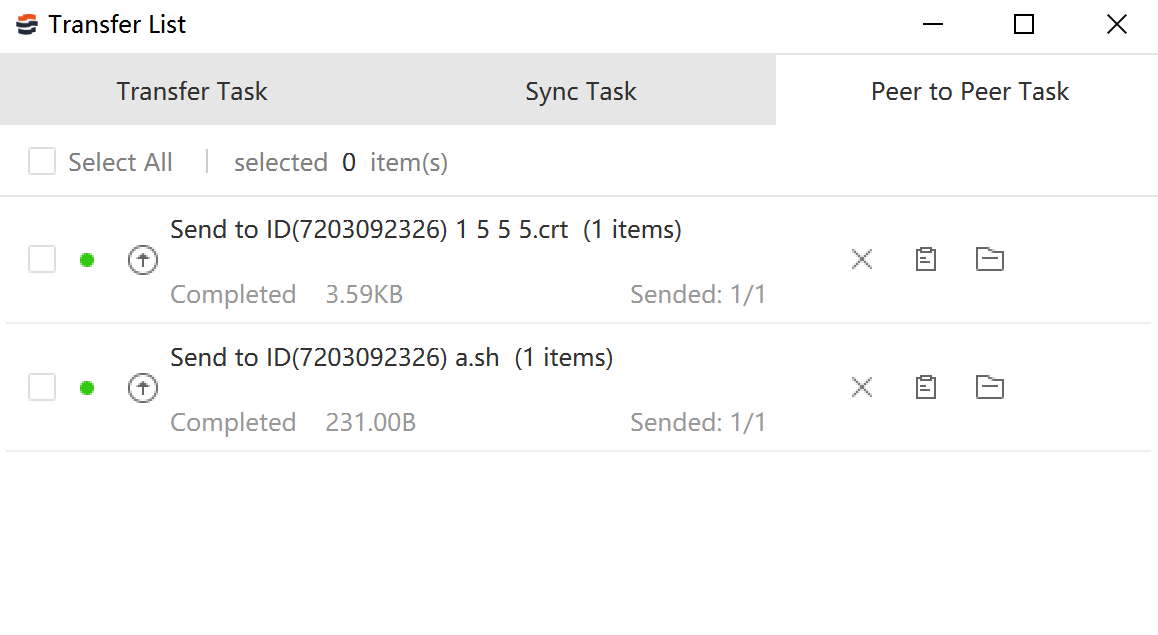
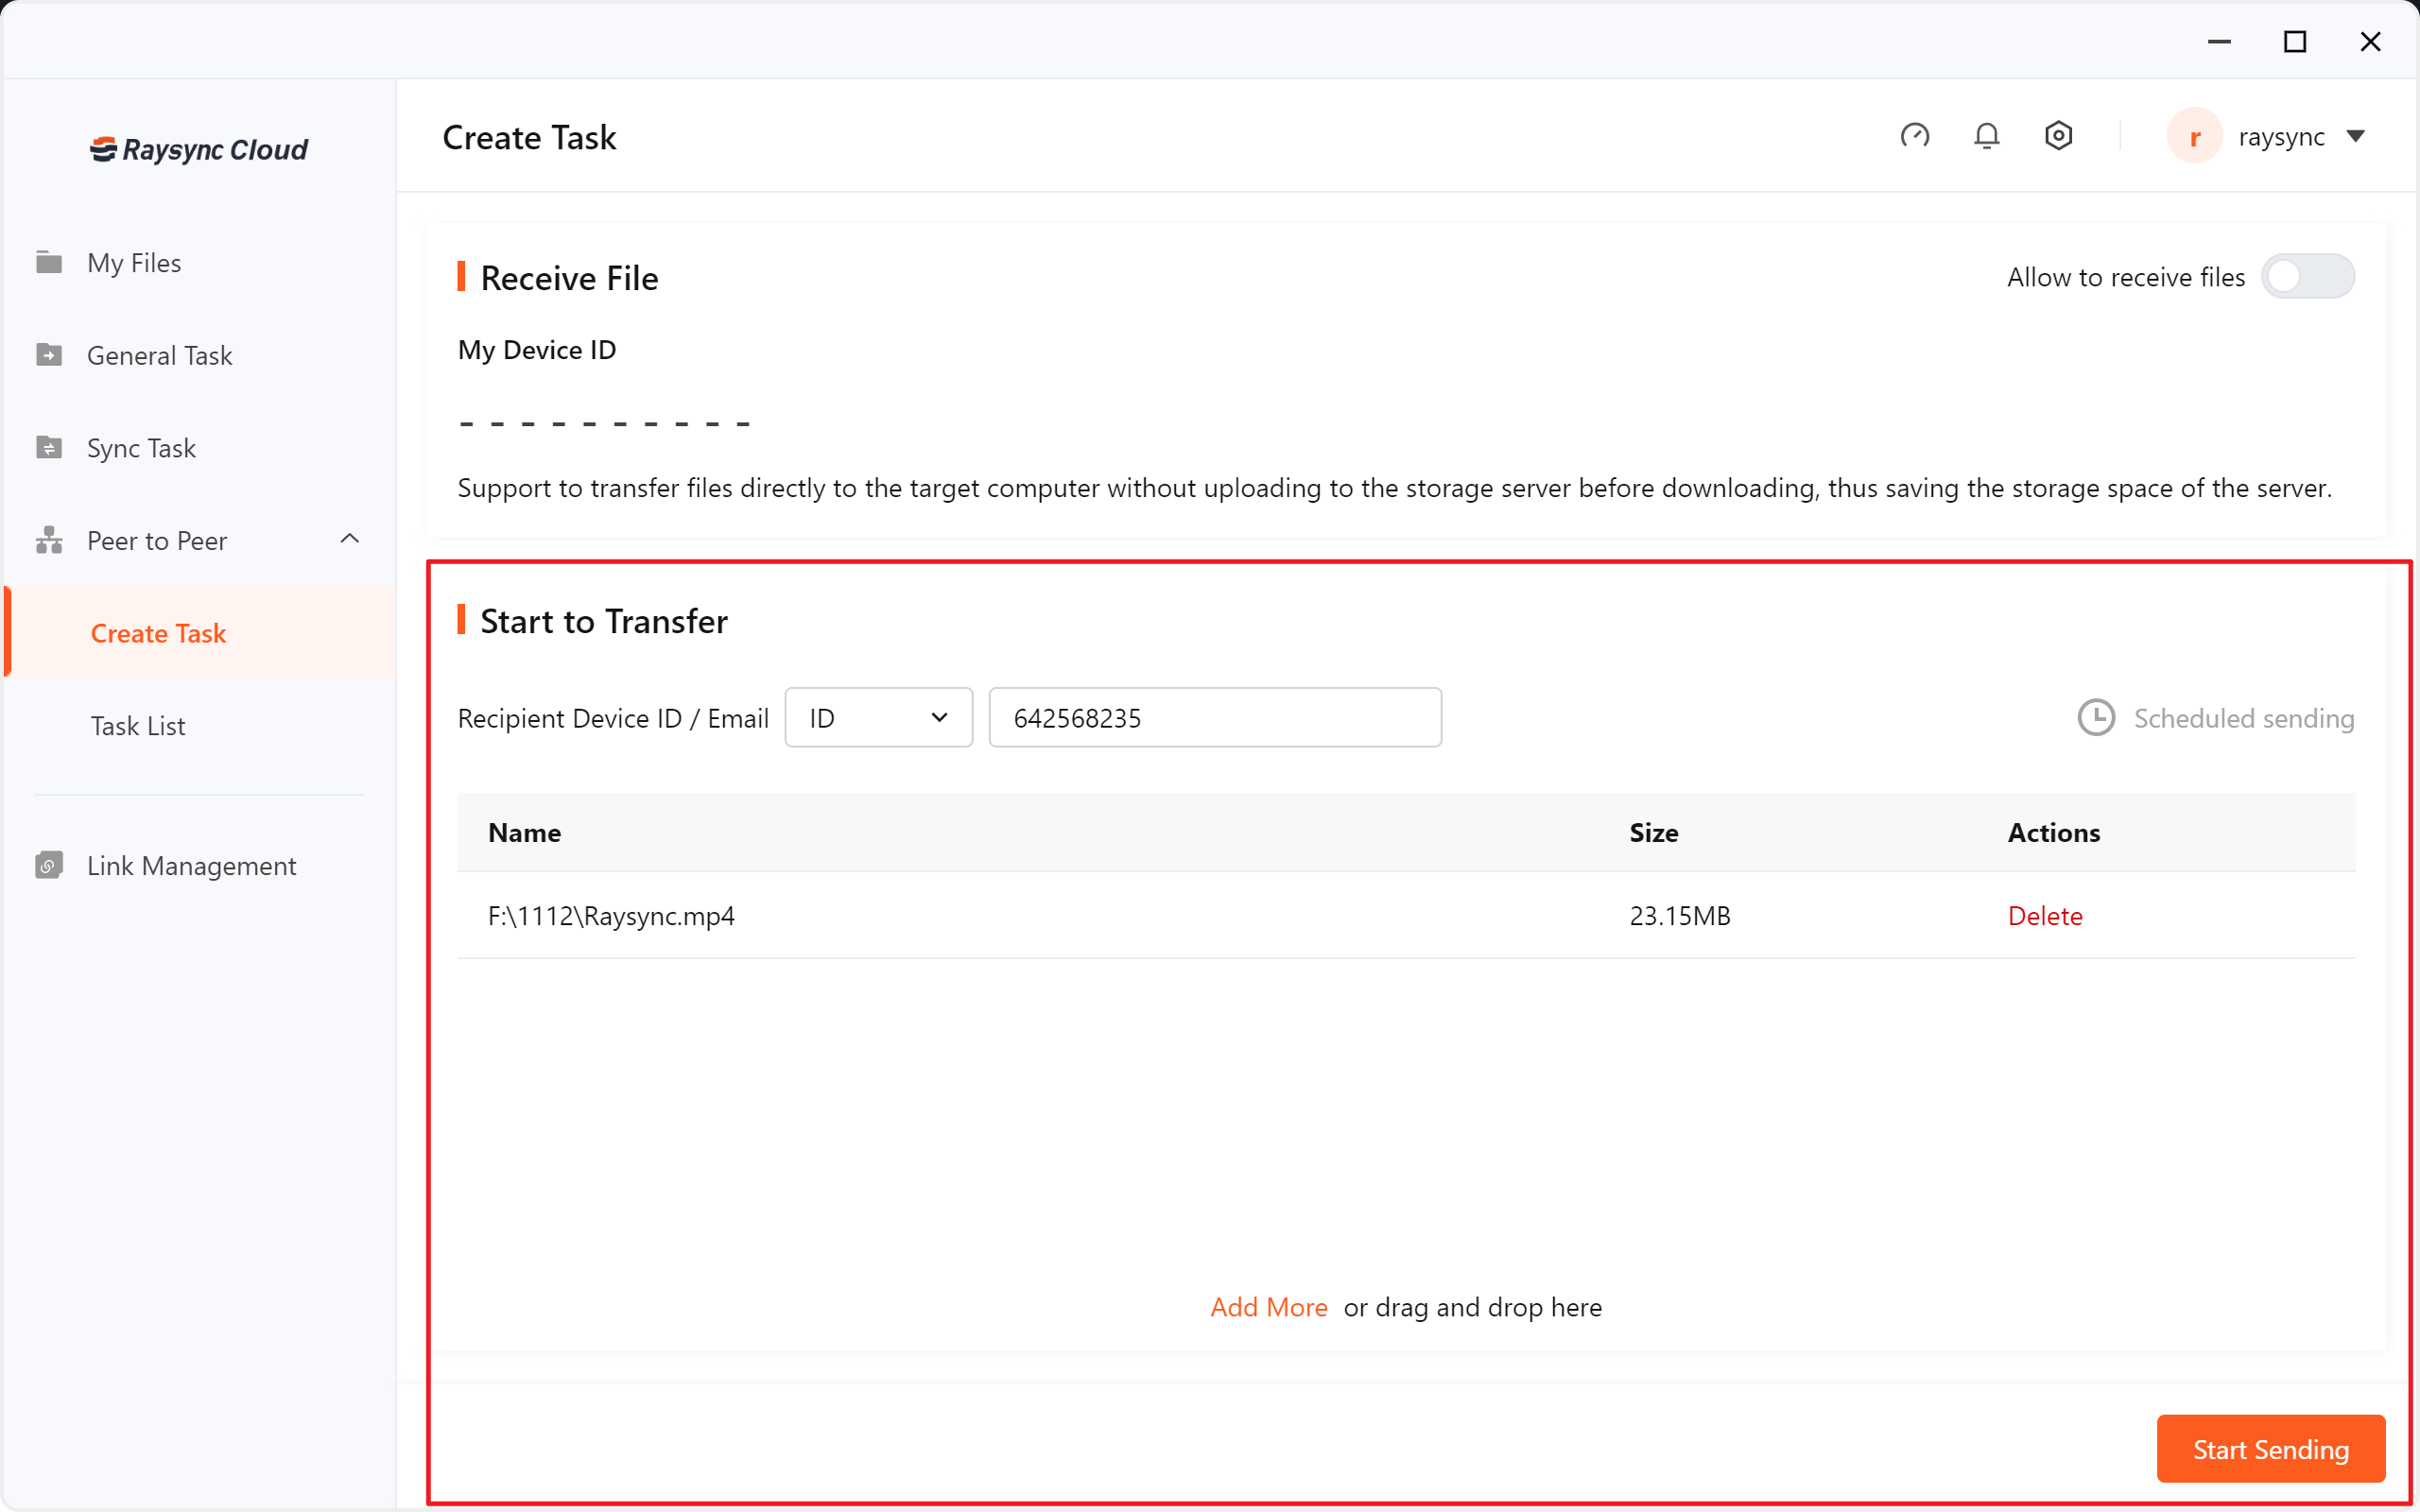
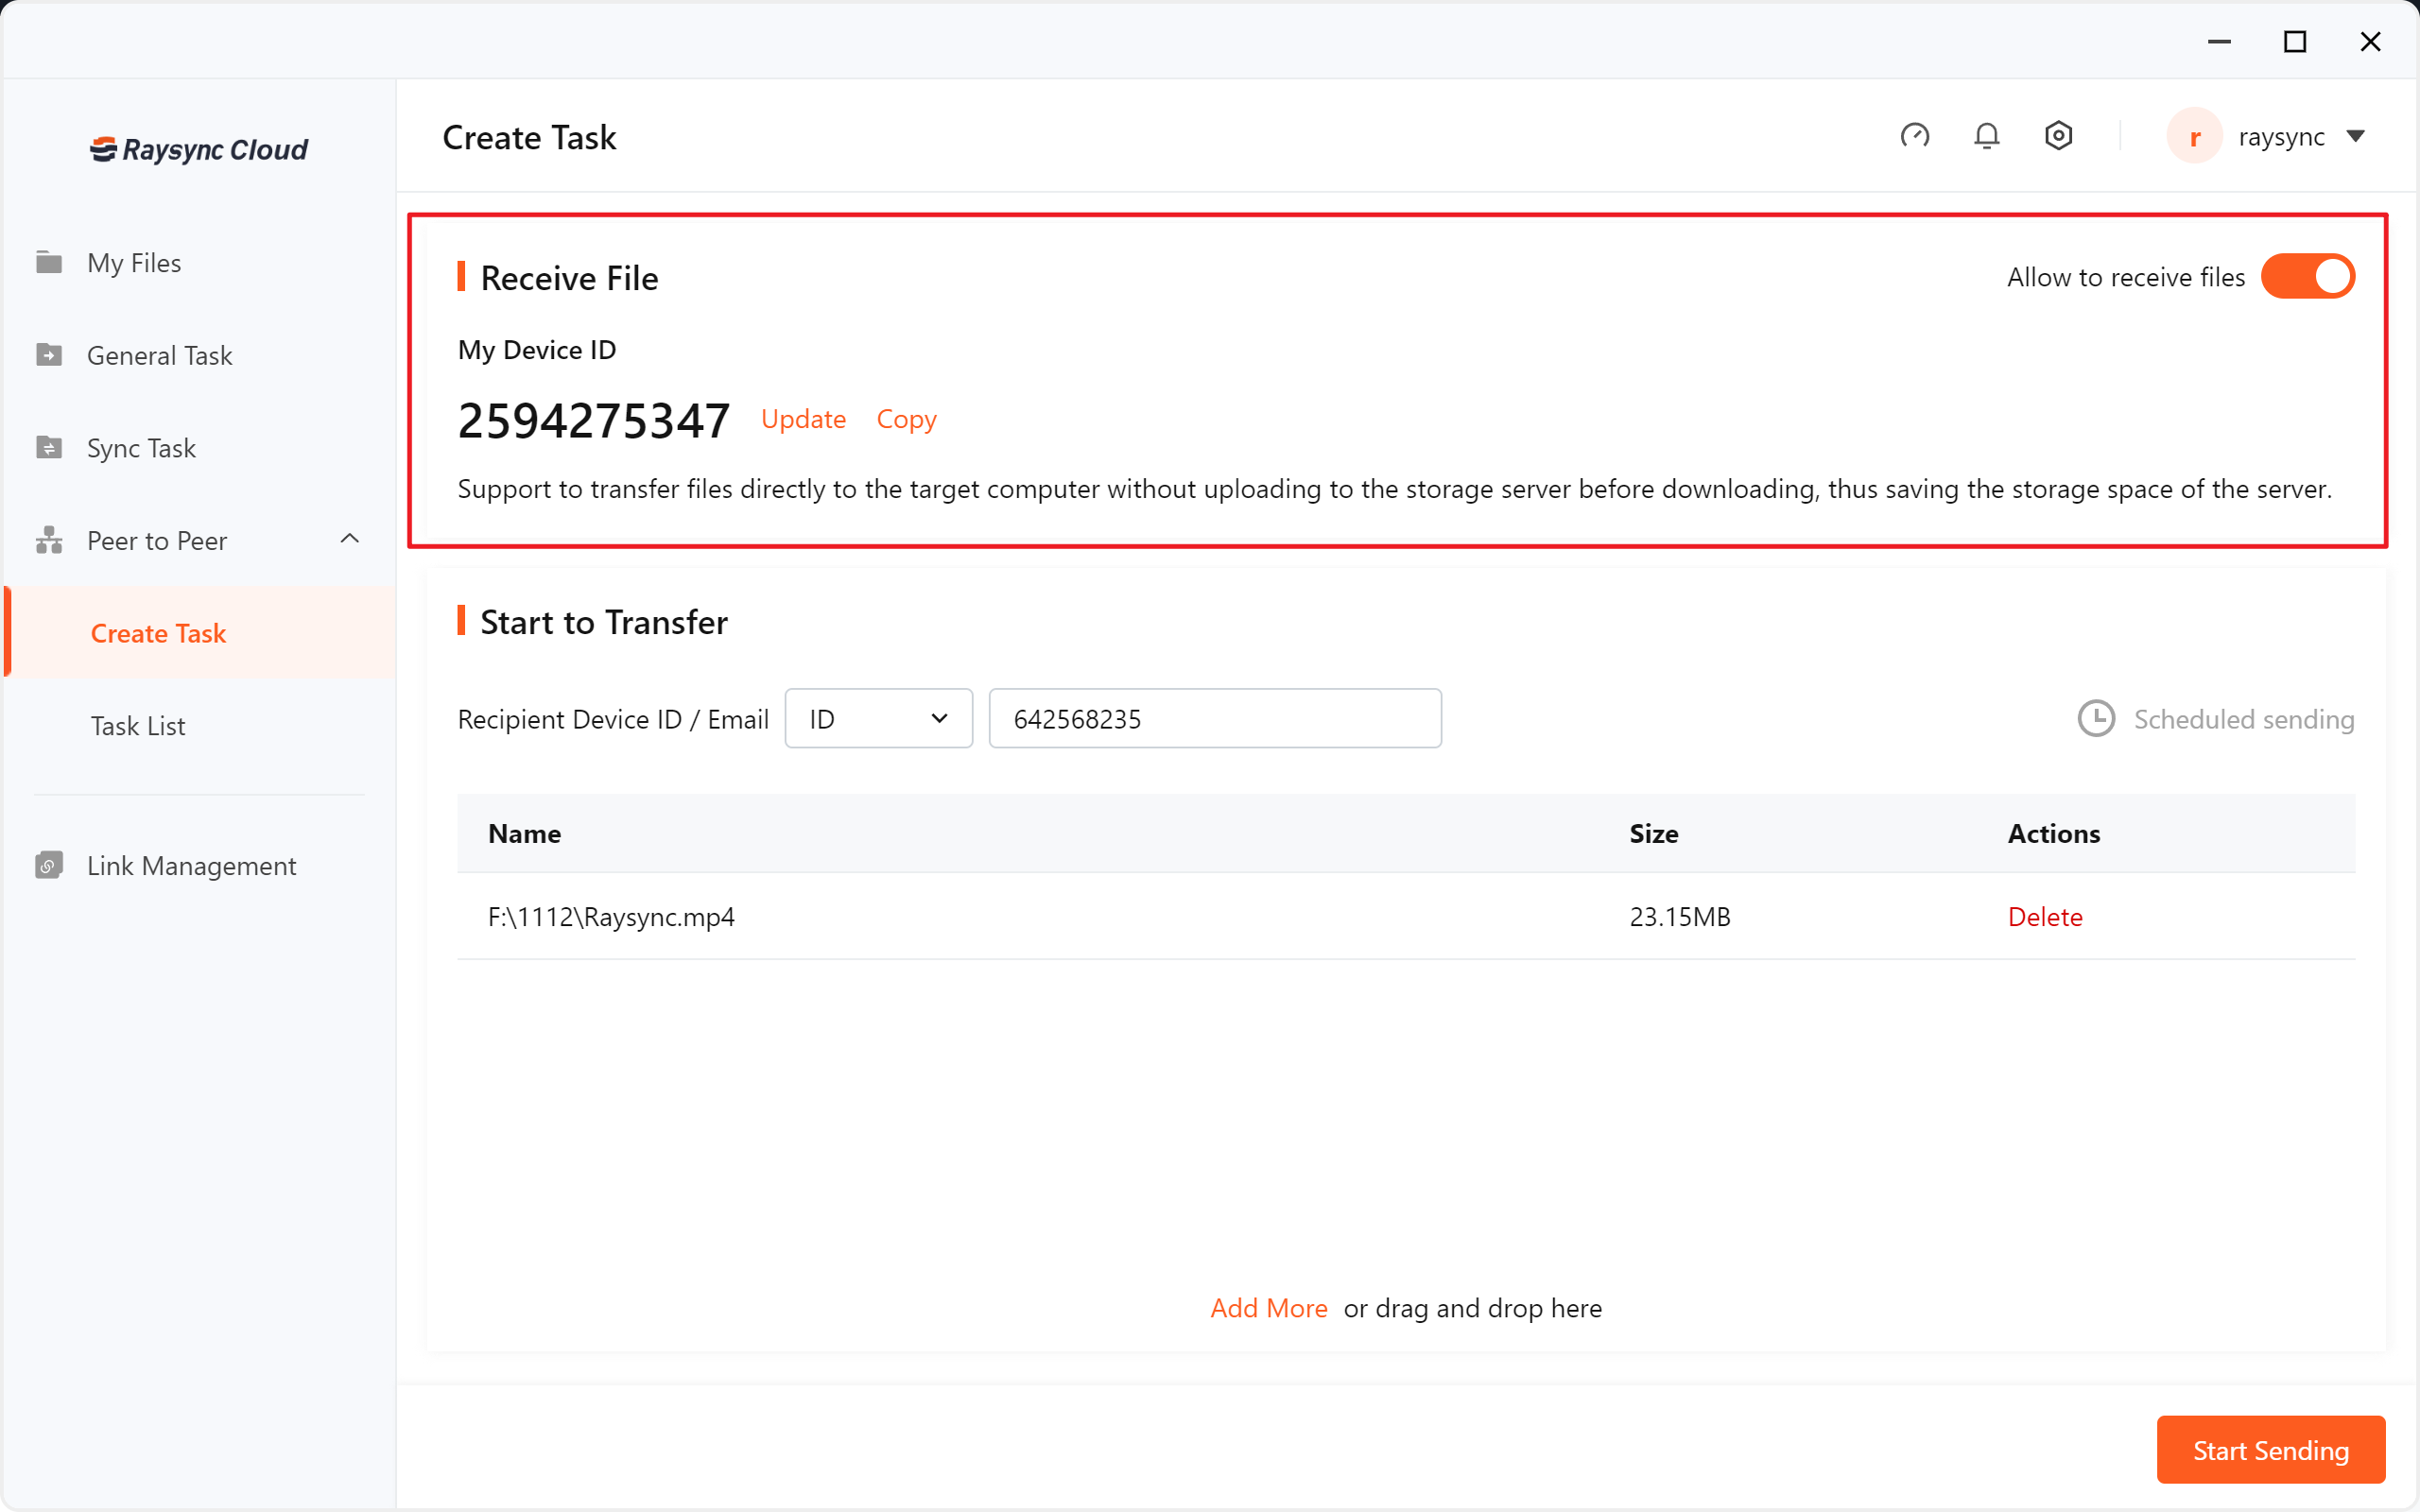
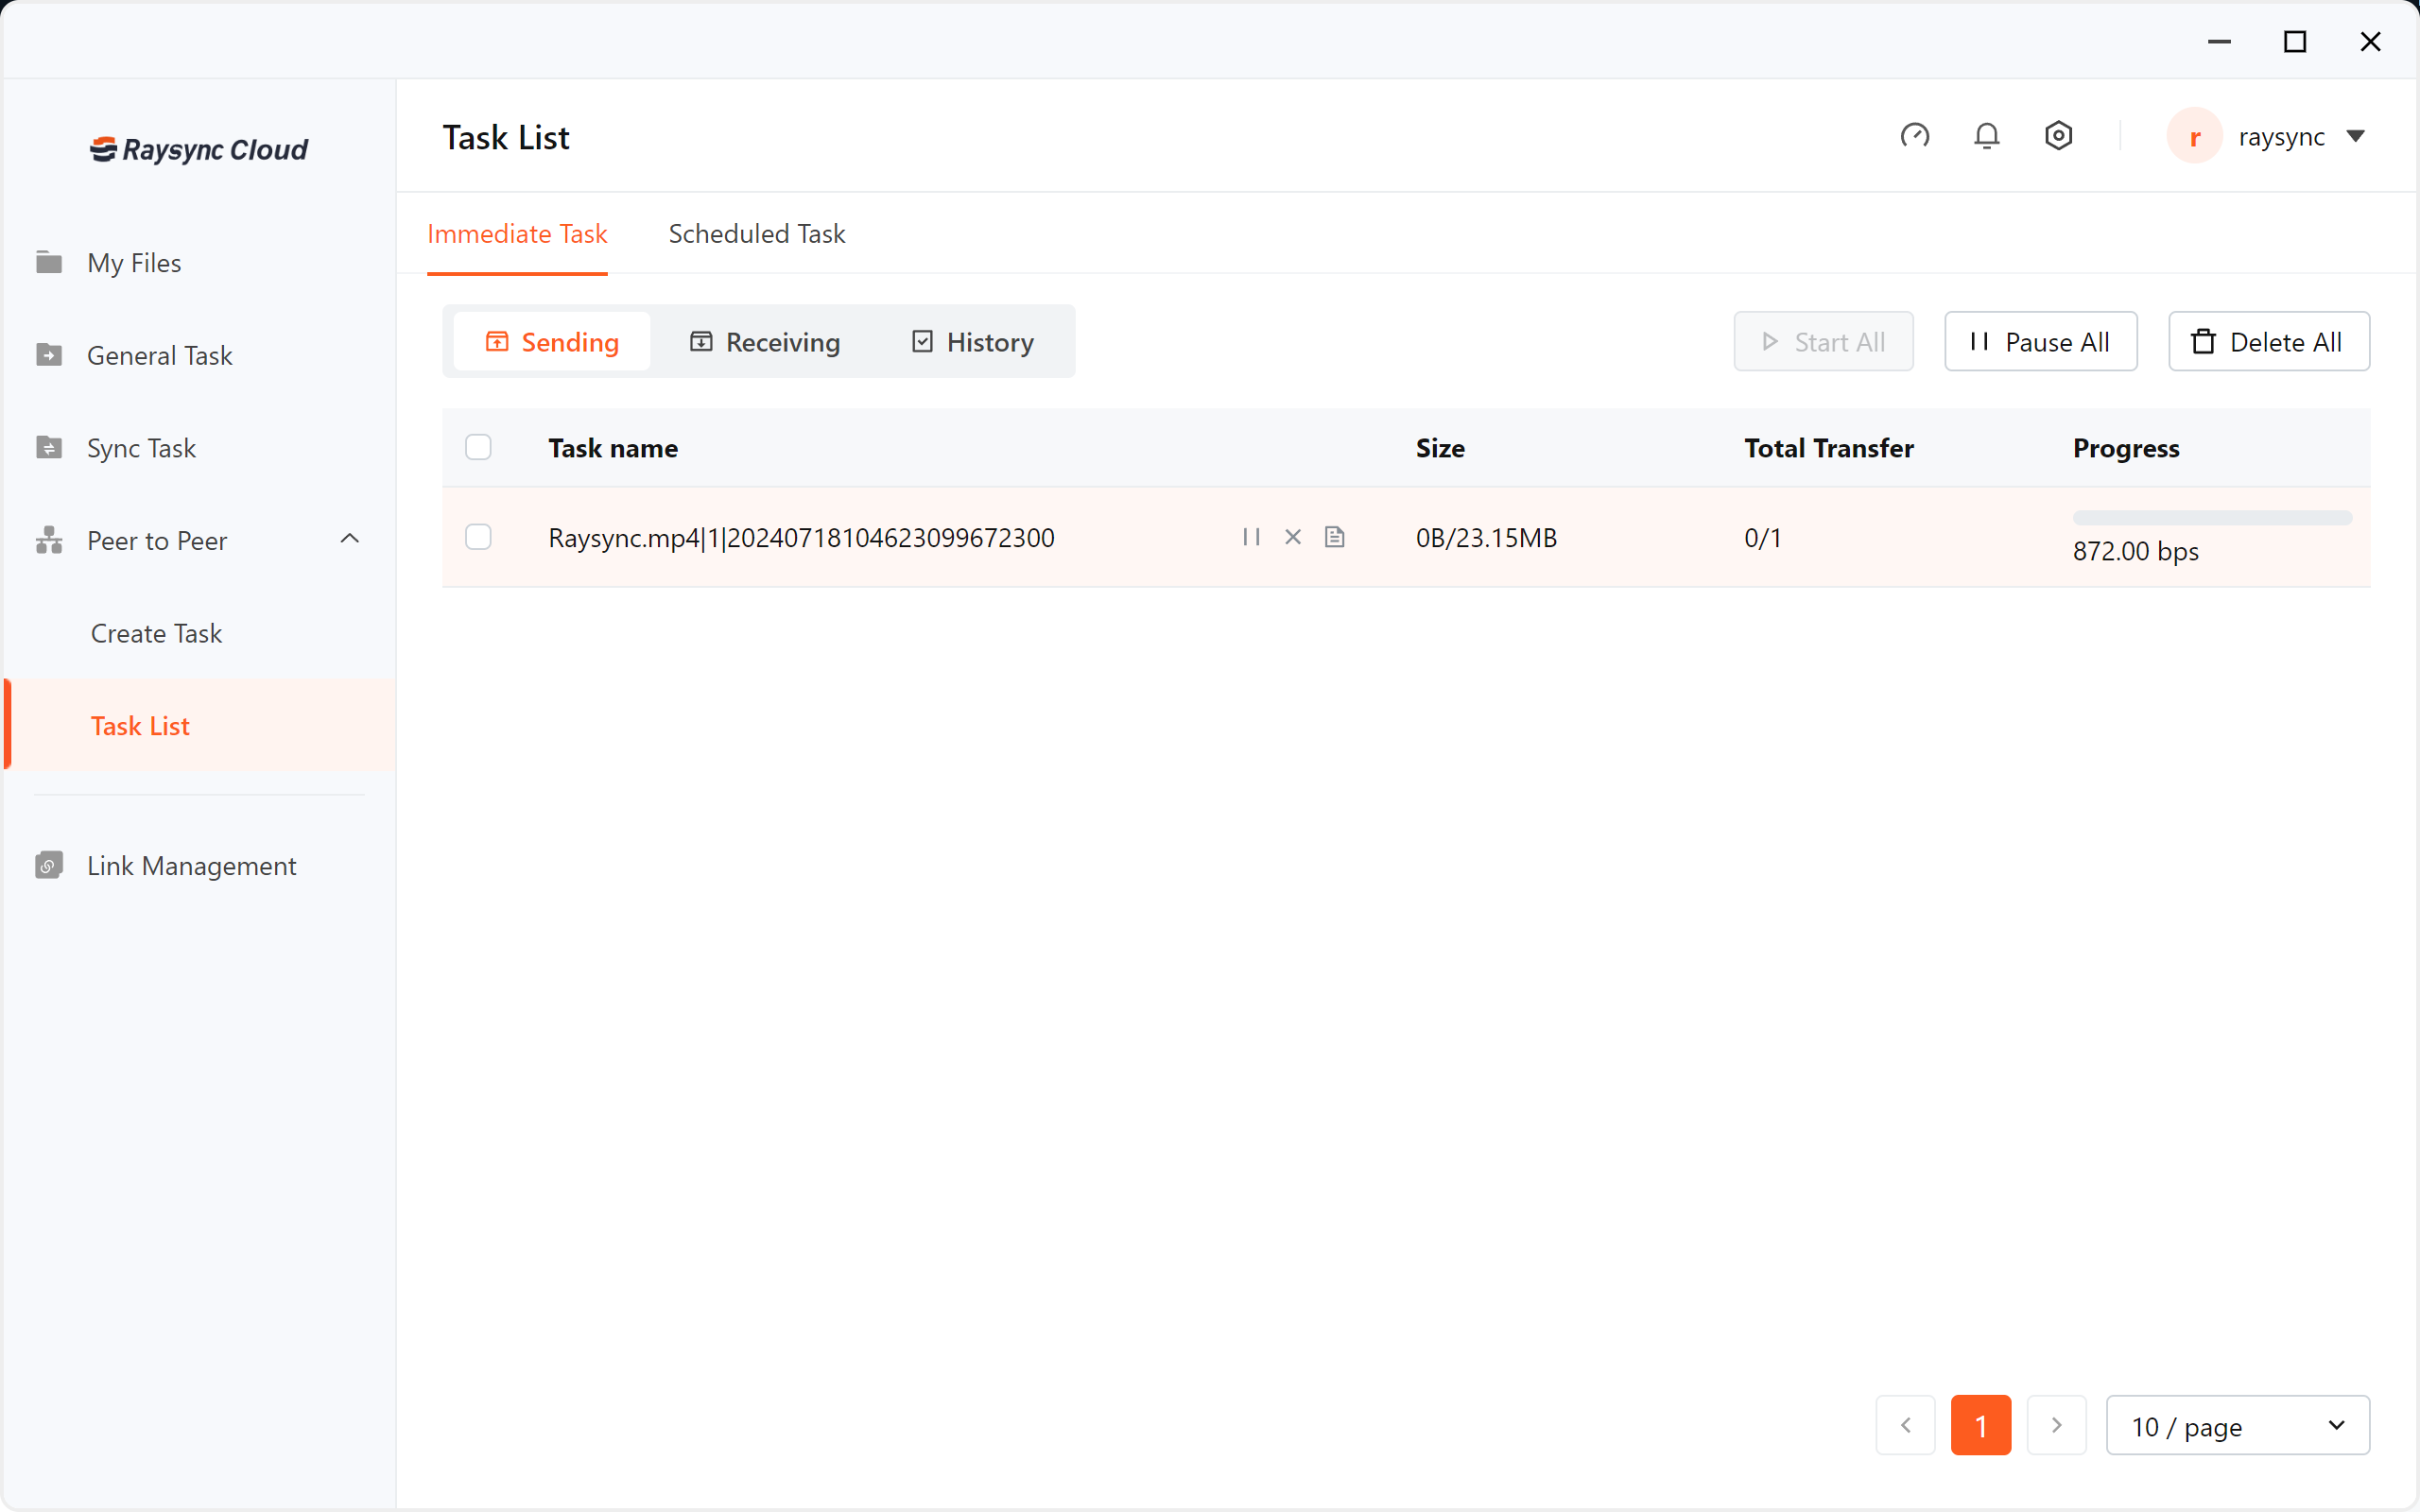
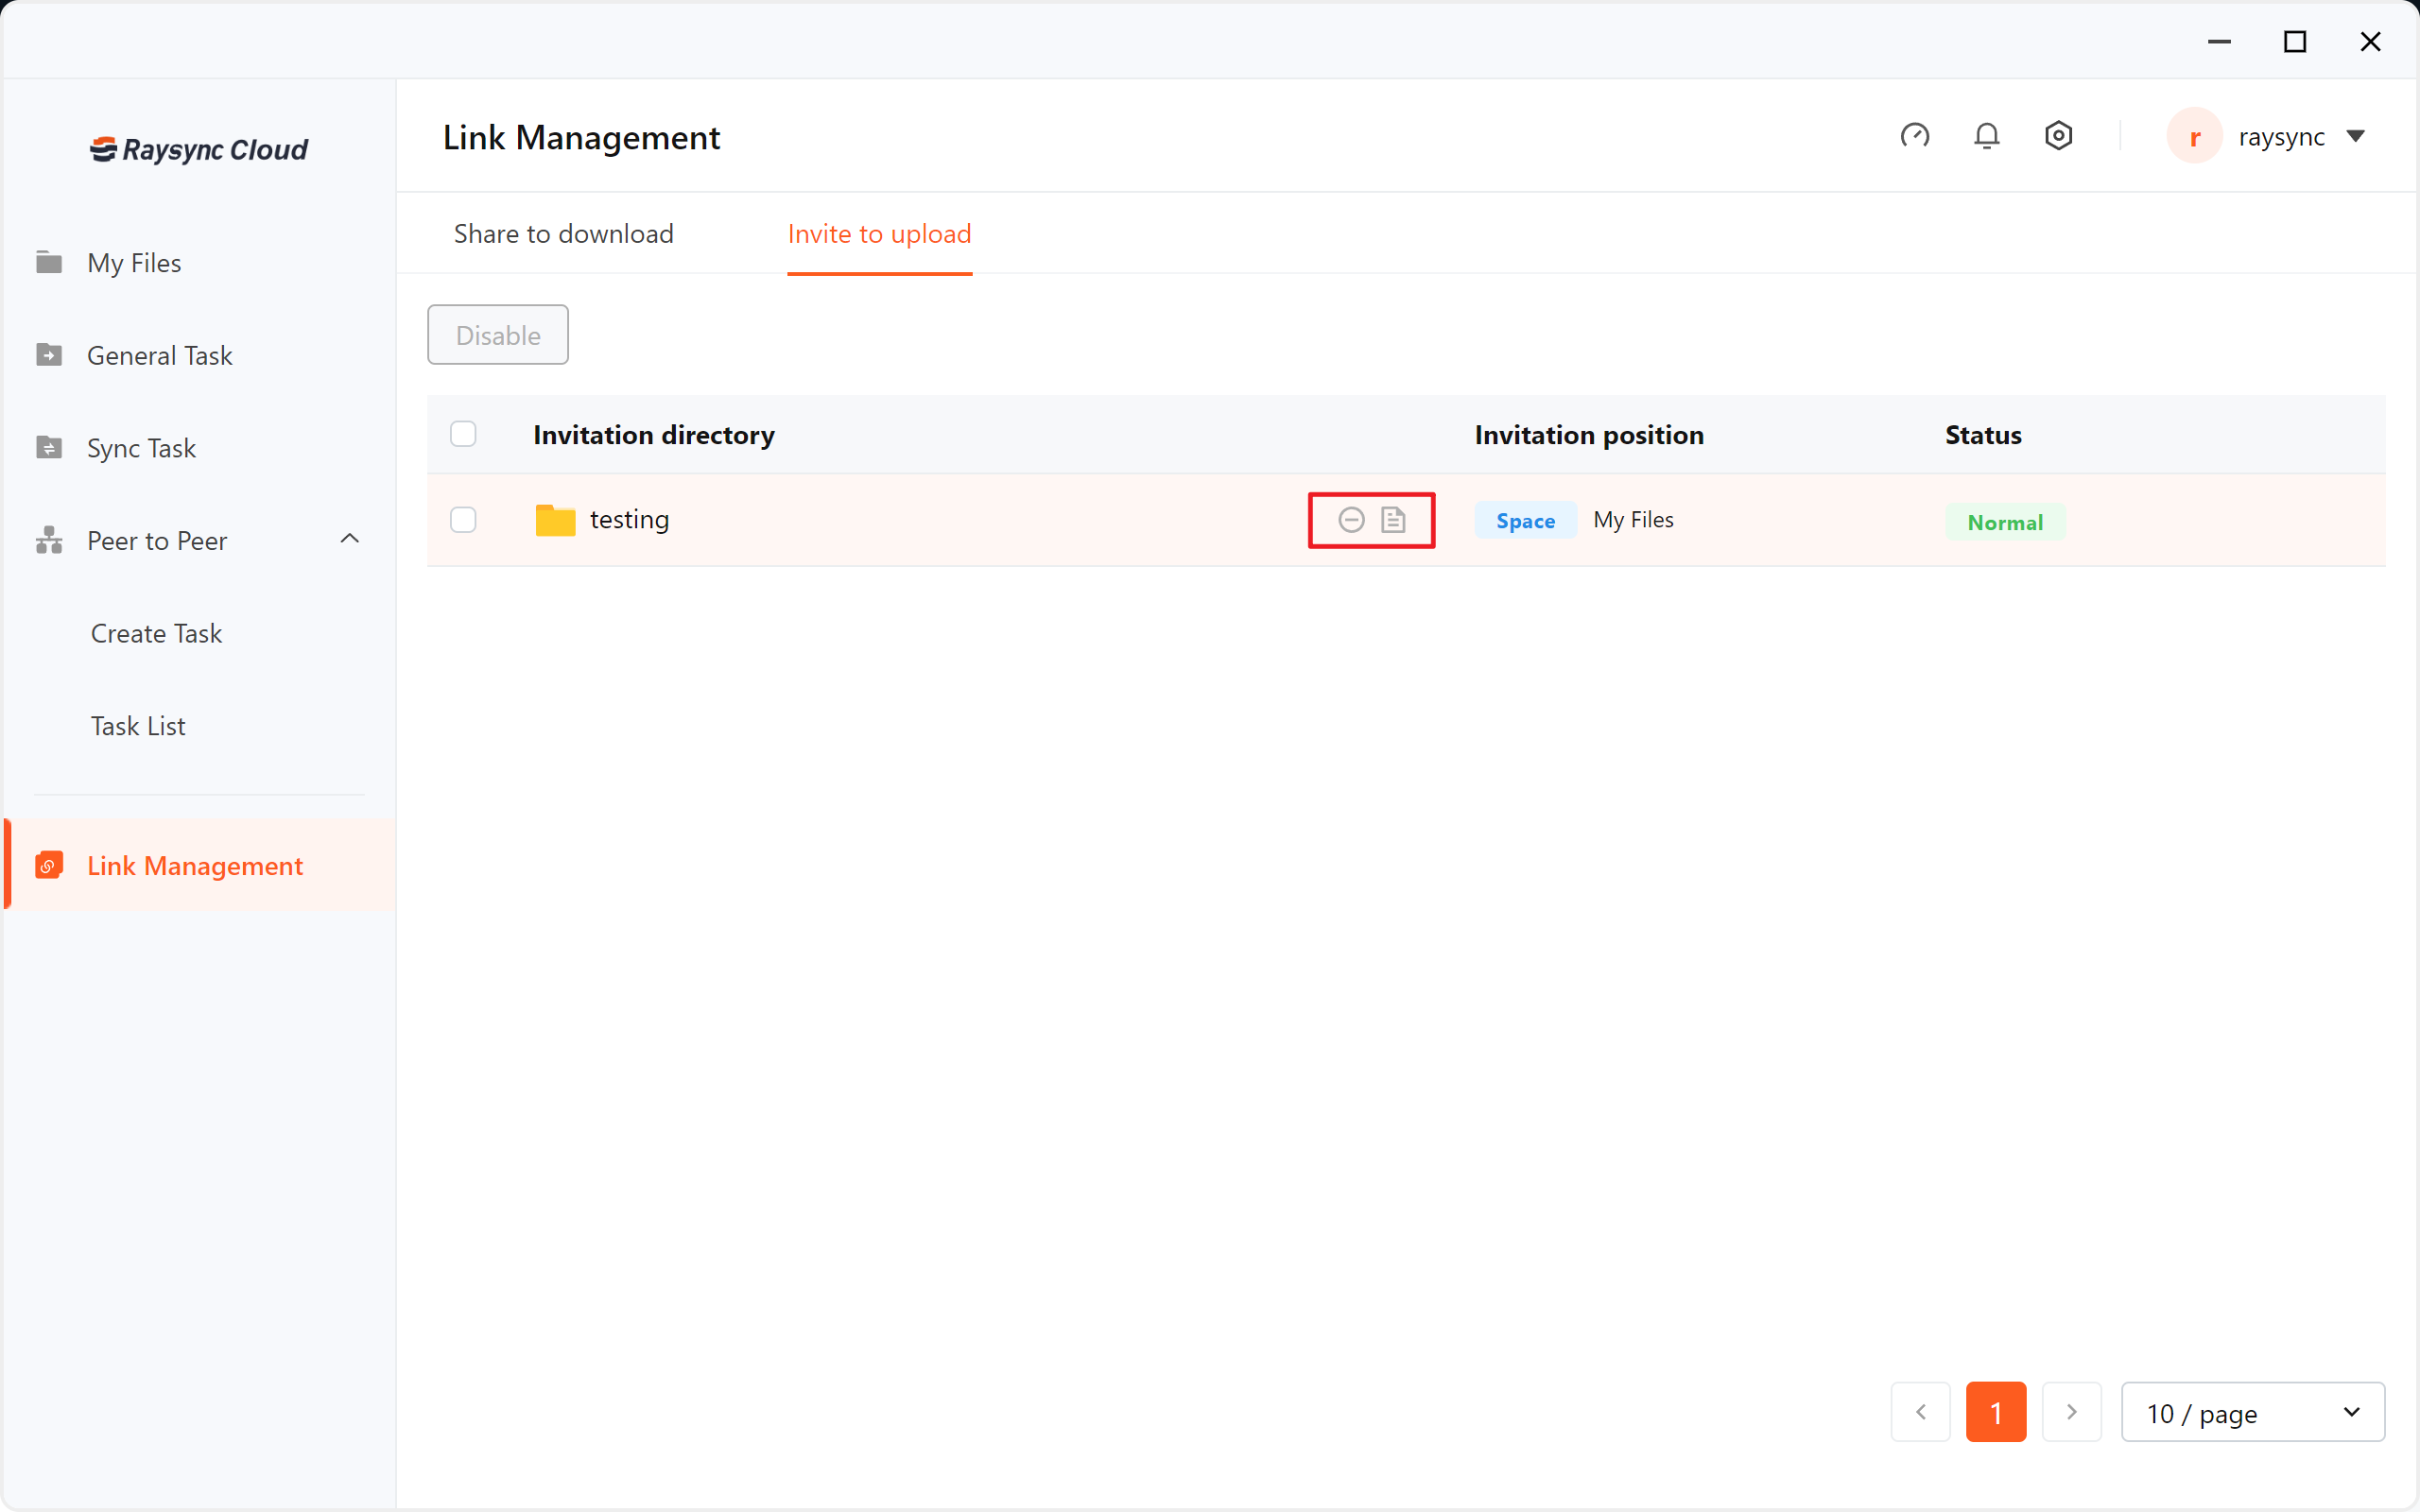
1. Peer to Peer transfer supports sending offline tasks
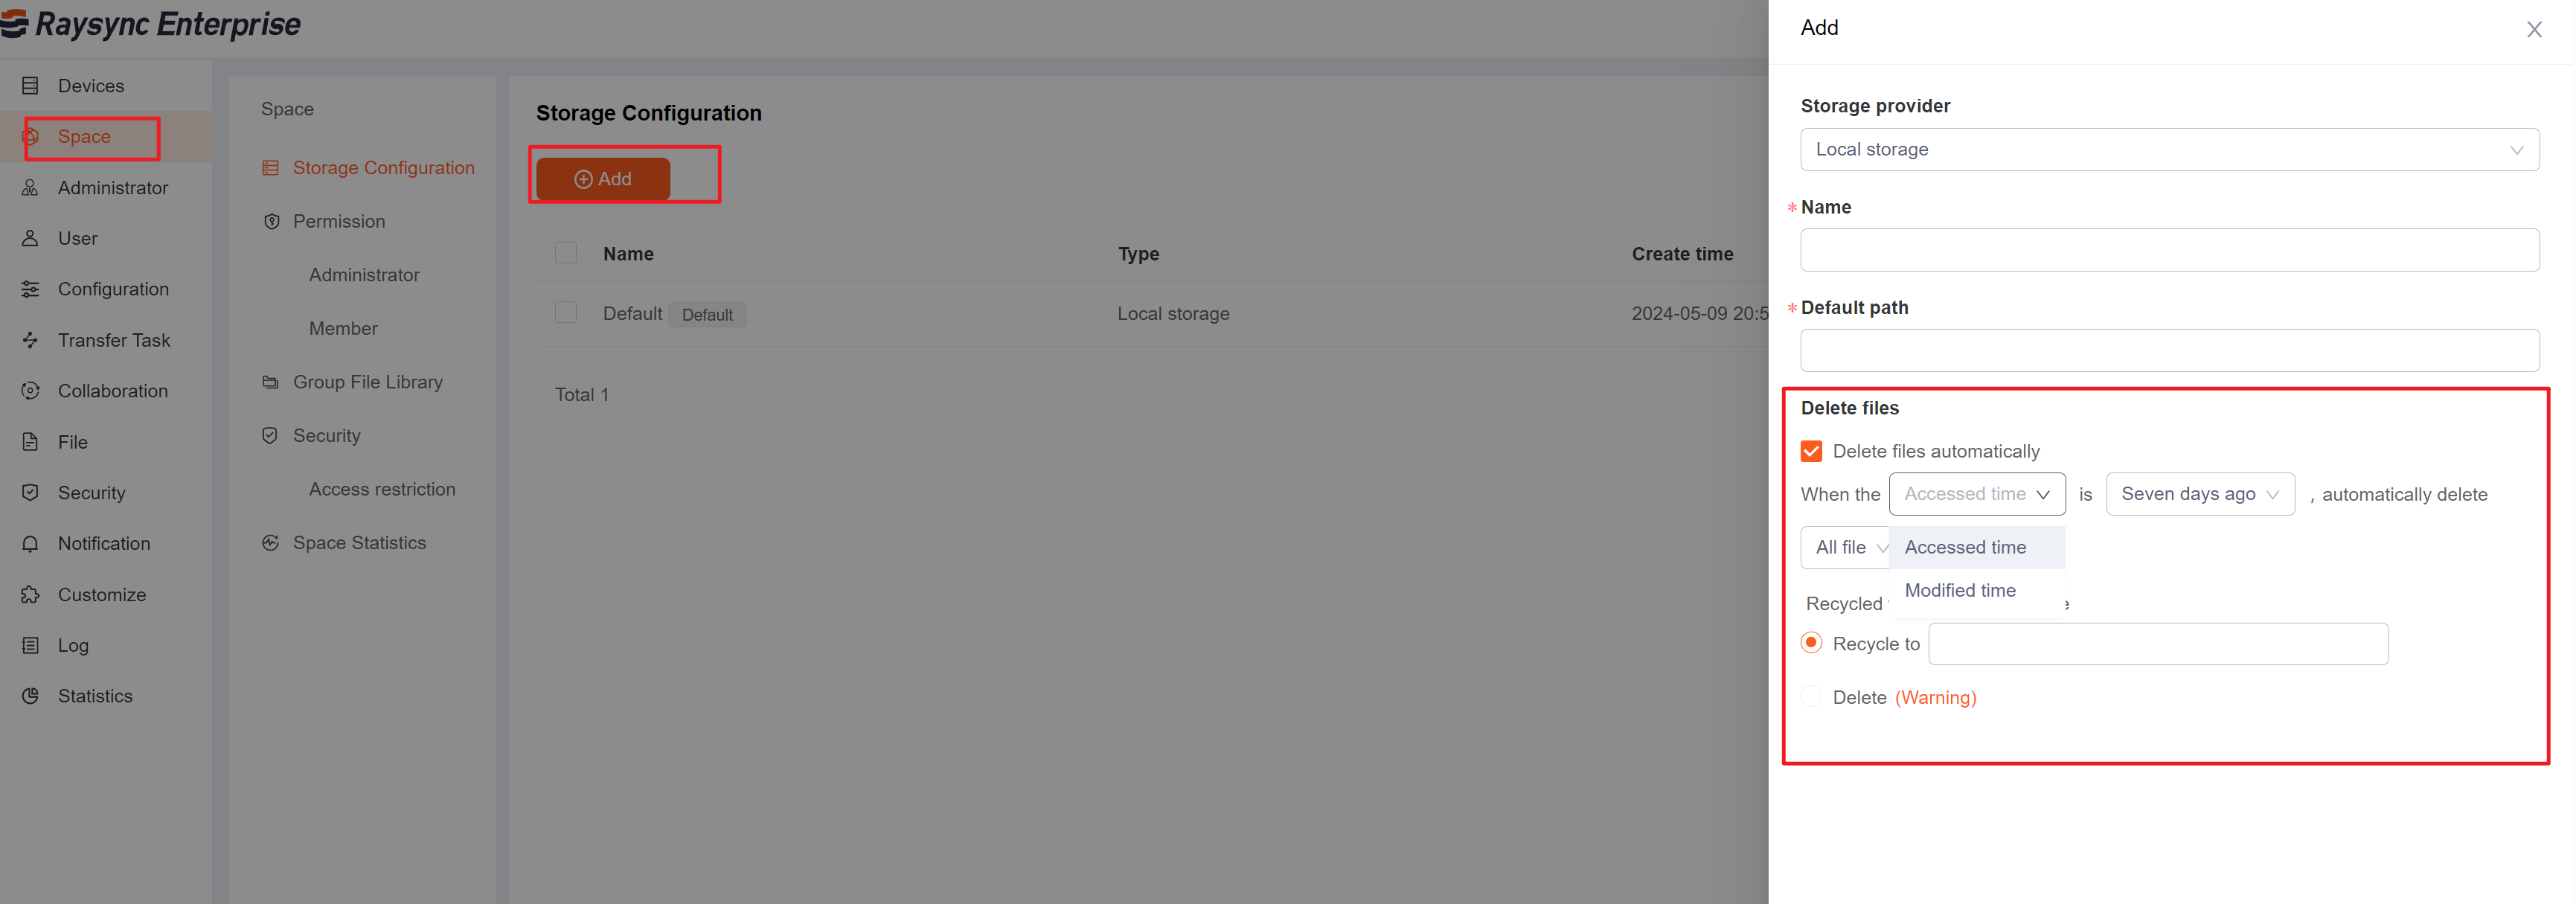
2. Support automatic file cleanup in user home directories
3. Supports search navigation bar in admin portal
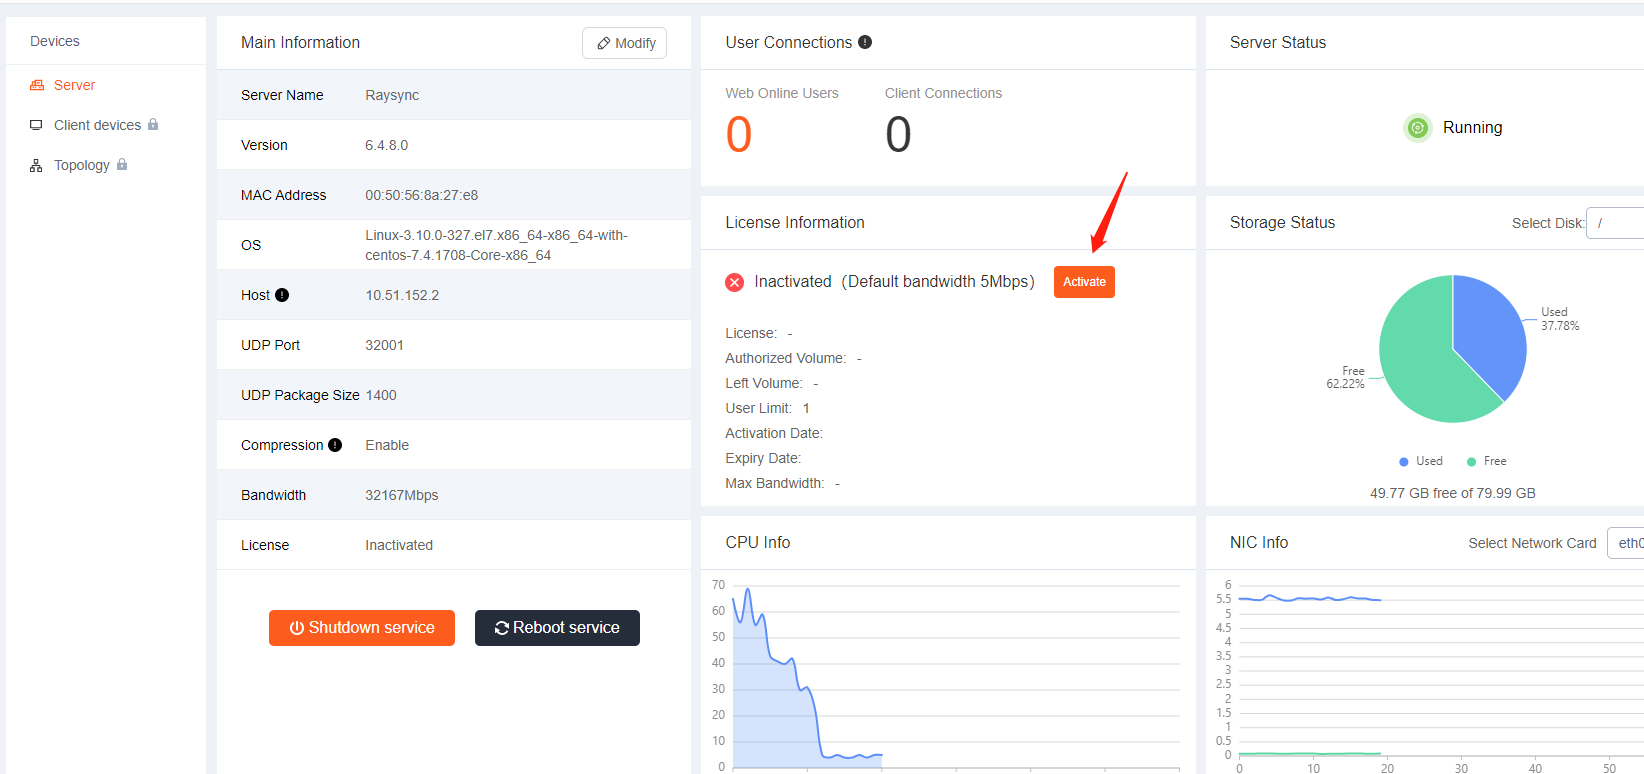
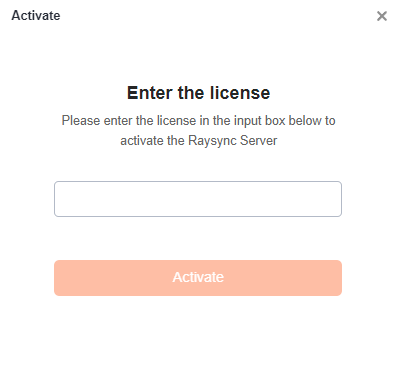
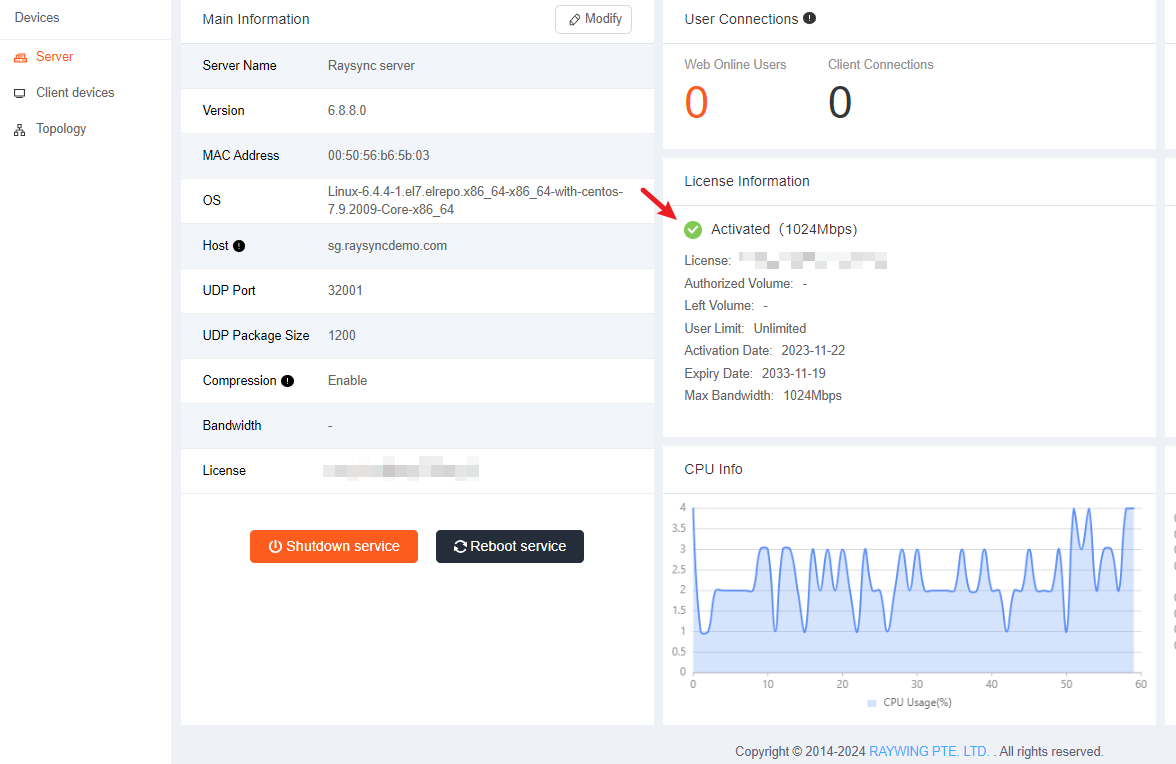
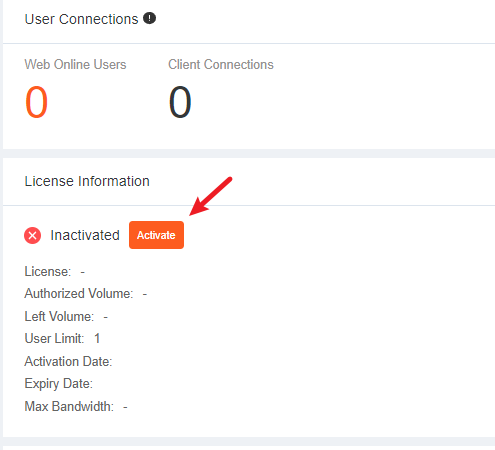
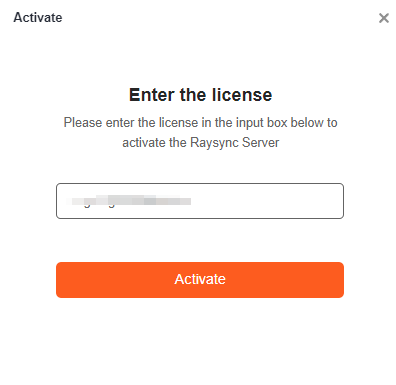
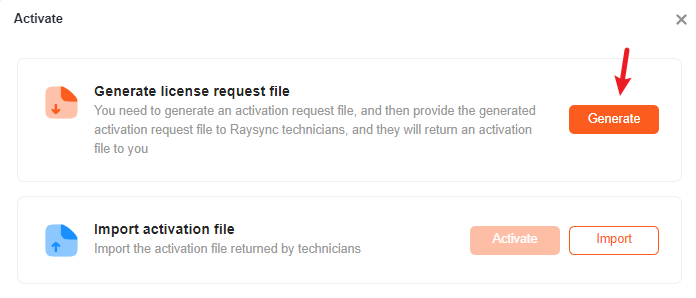
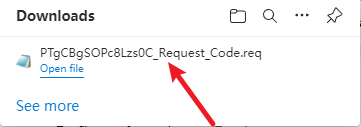
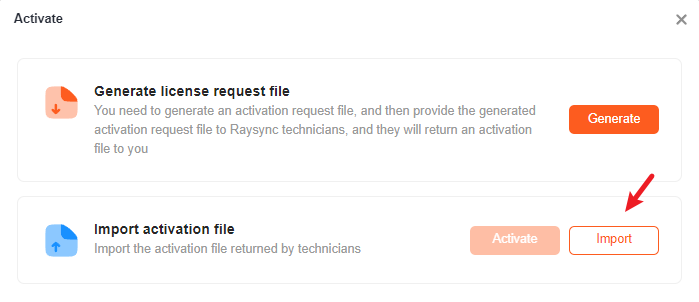
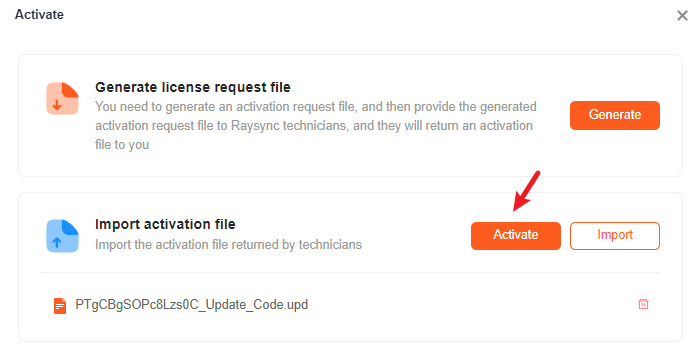
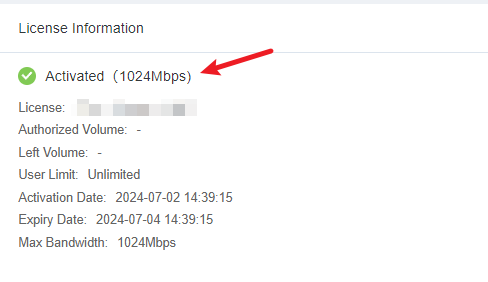
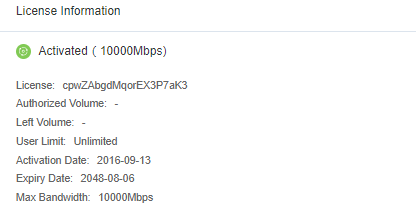
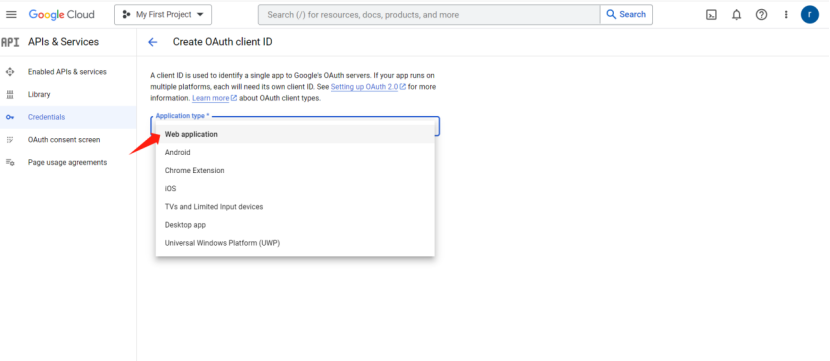
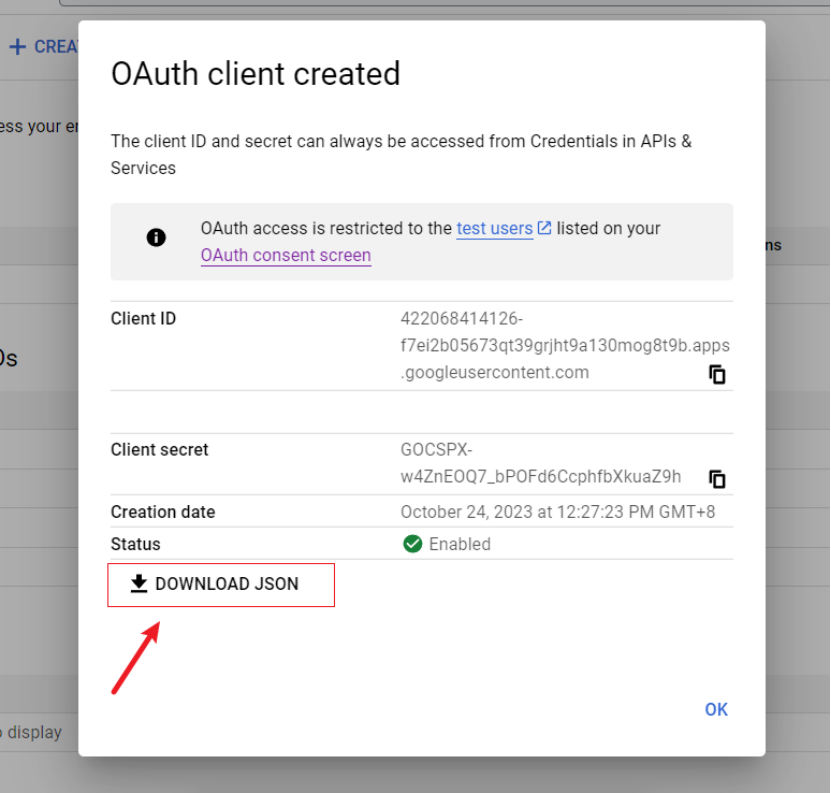
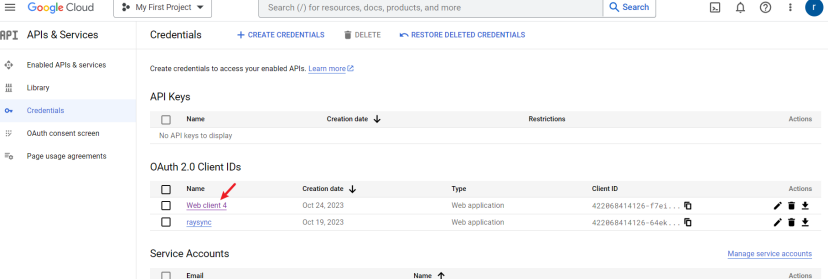
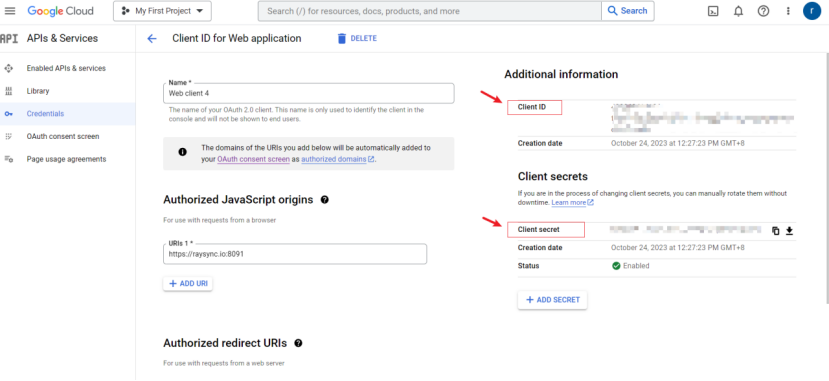
4. Offline License Activation Interface
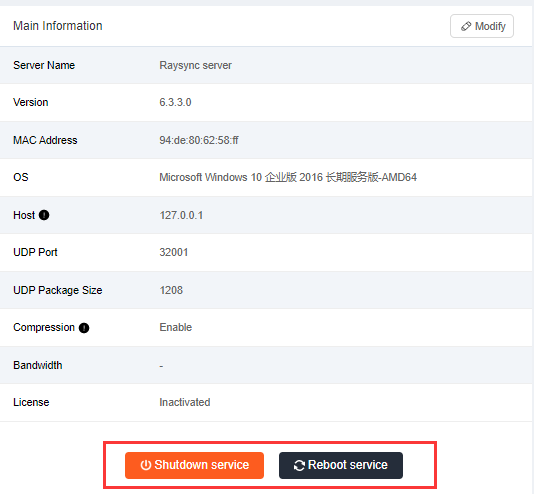
5. Raysync service port unification
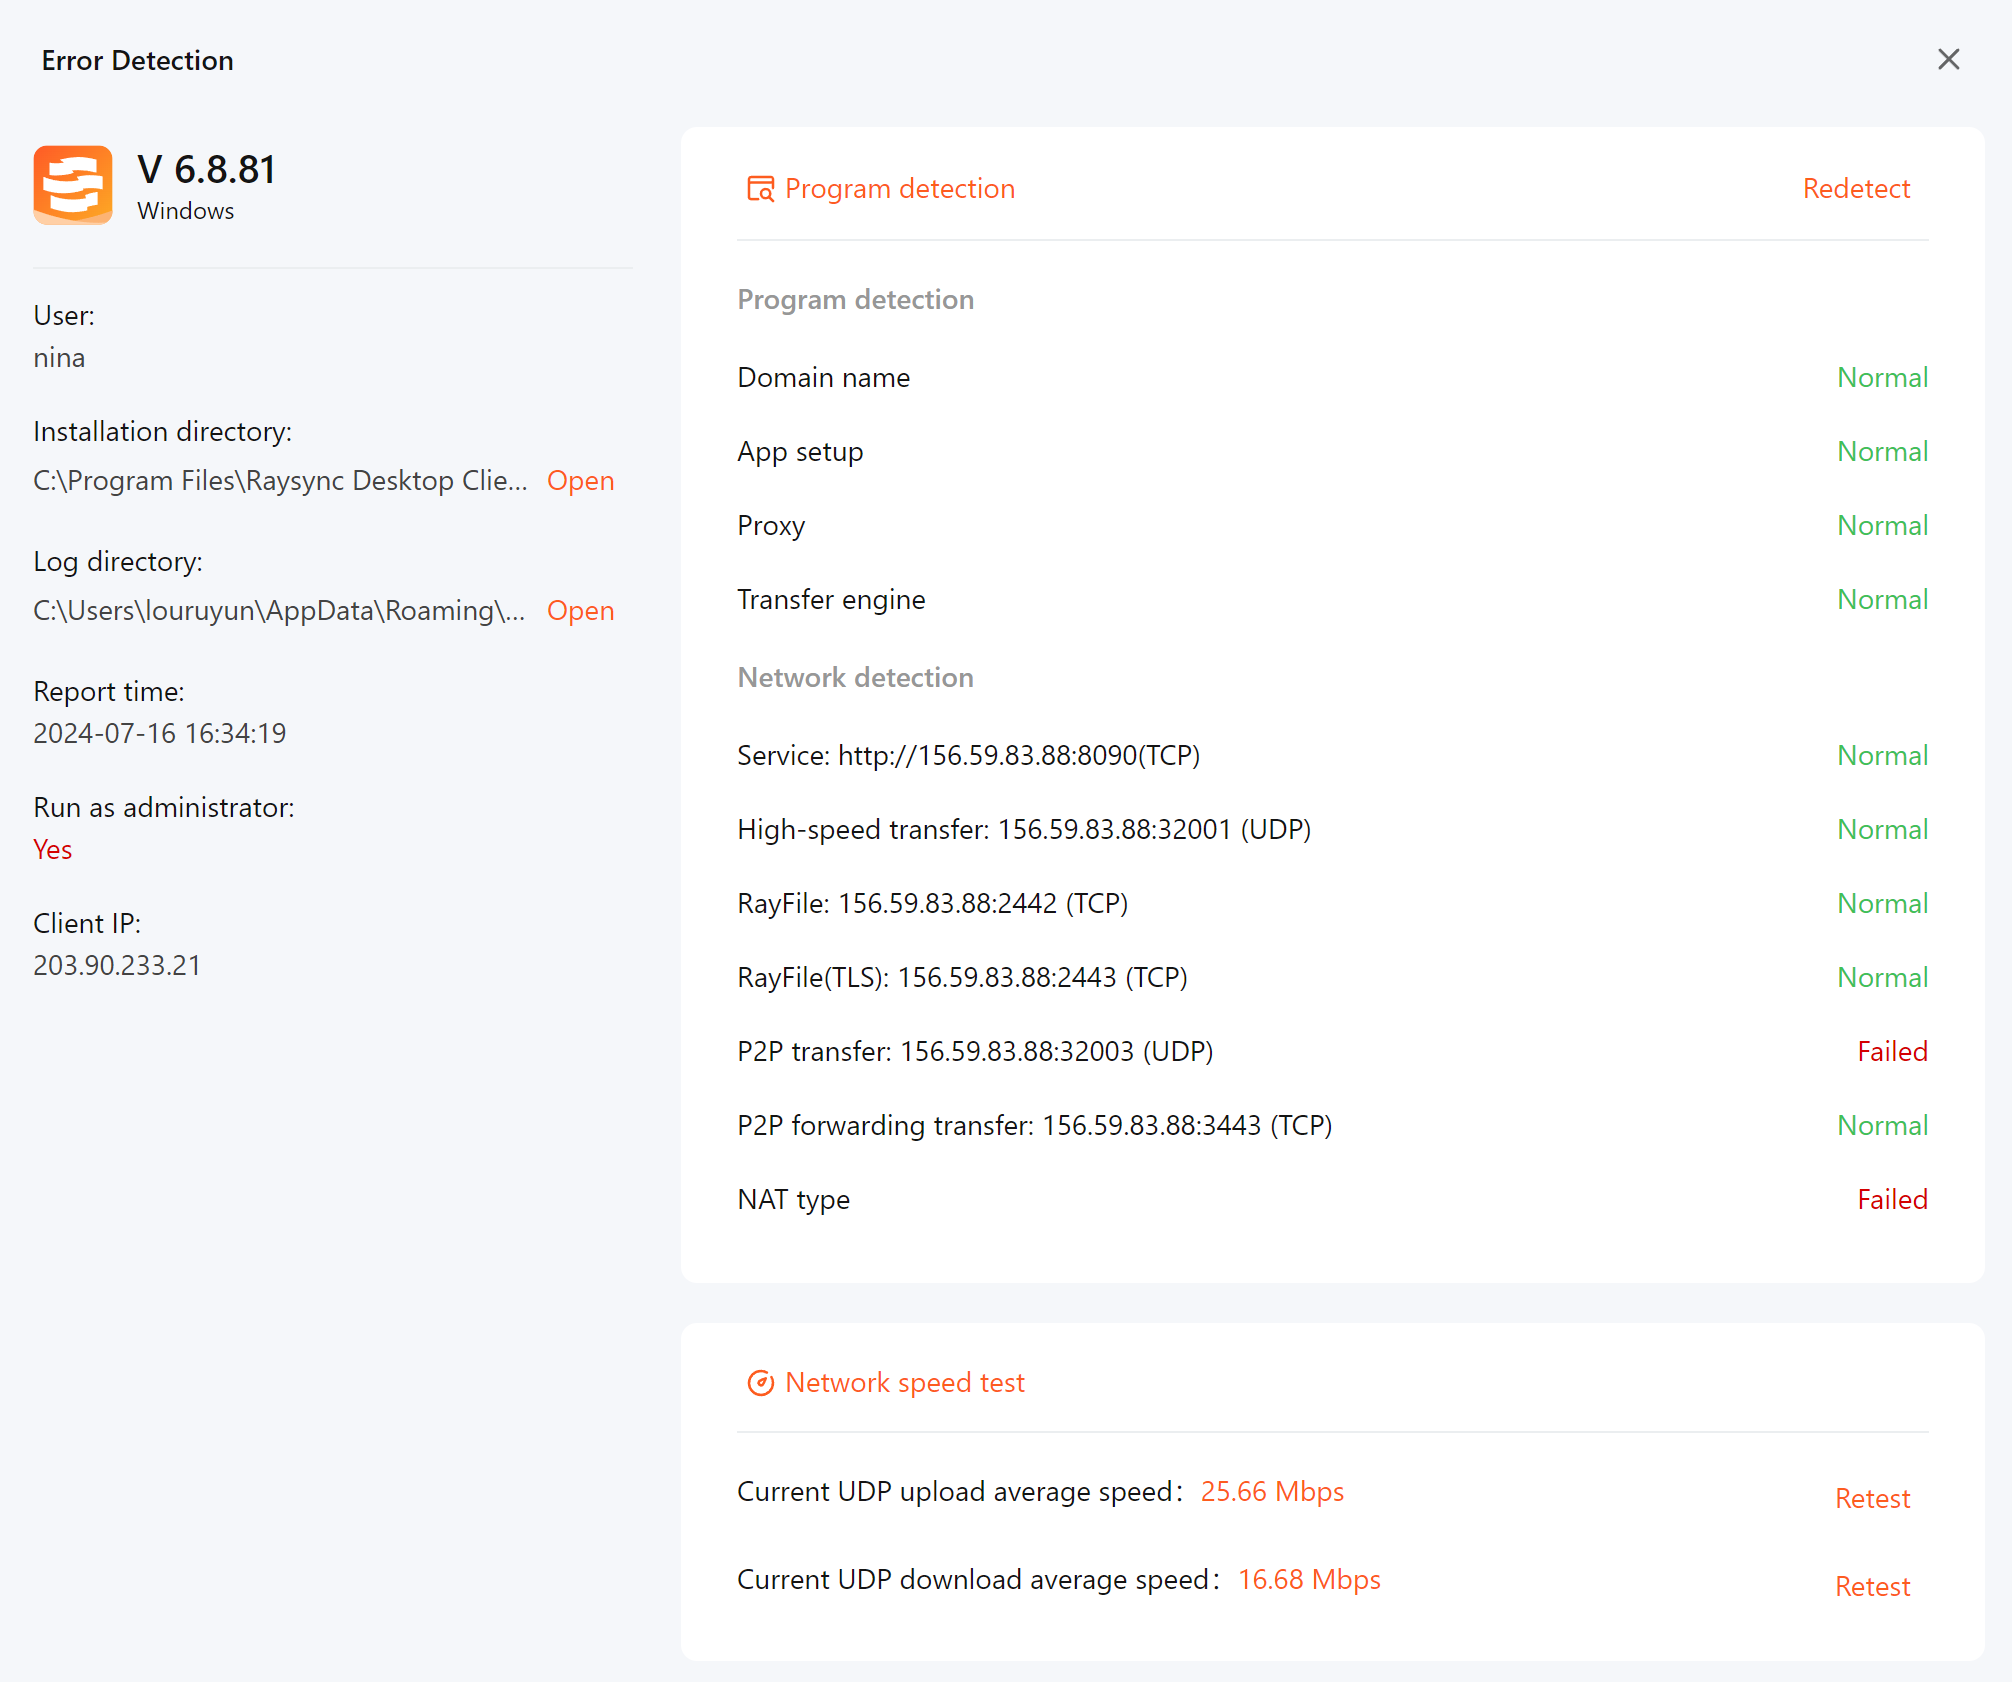
6. Supports UDP speed and port detection on Client Error detection
7. Email notification after successful user creation
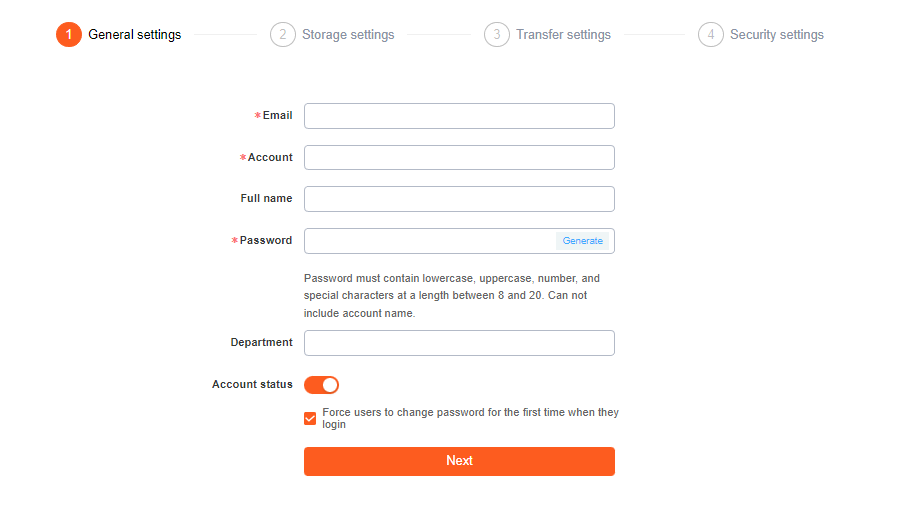
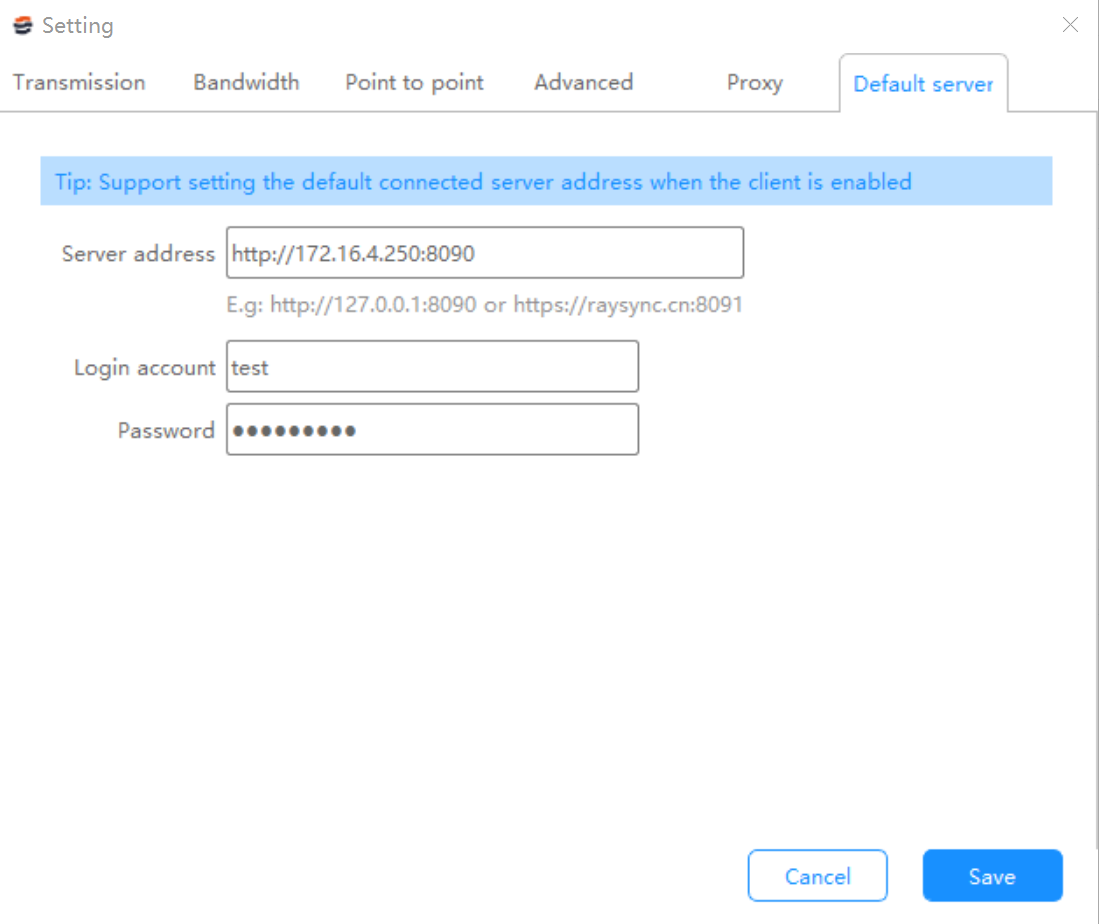
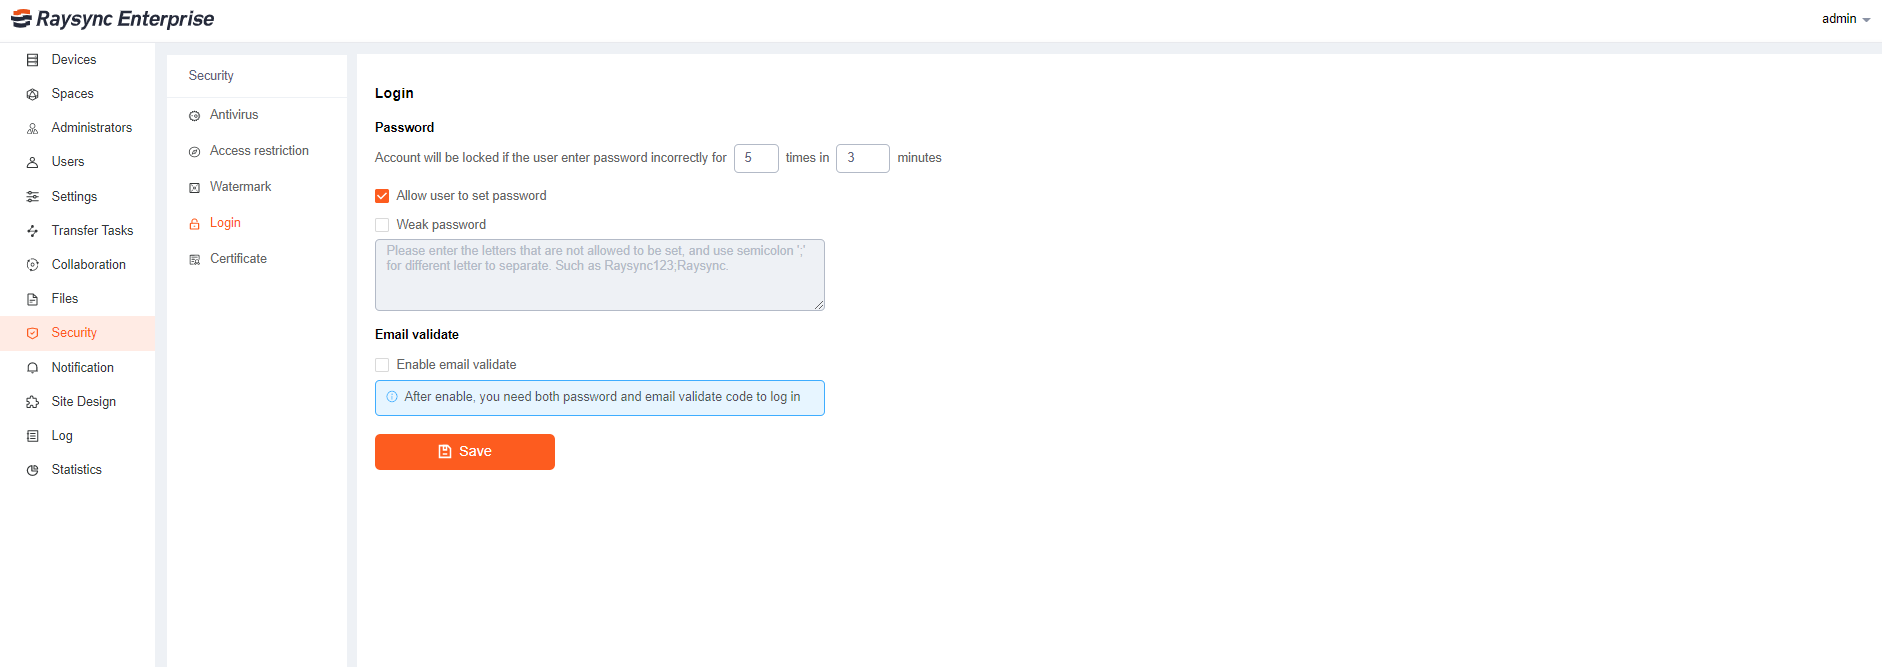
8. Support setting account validity period
v6.8.8.0
Updated: 2024-3-26
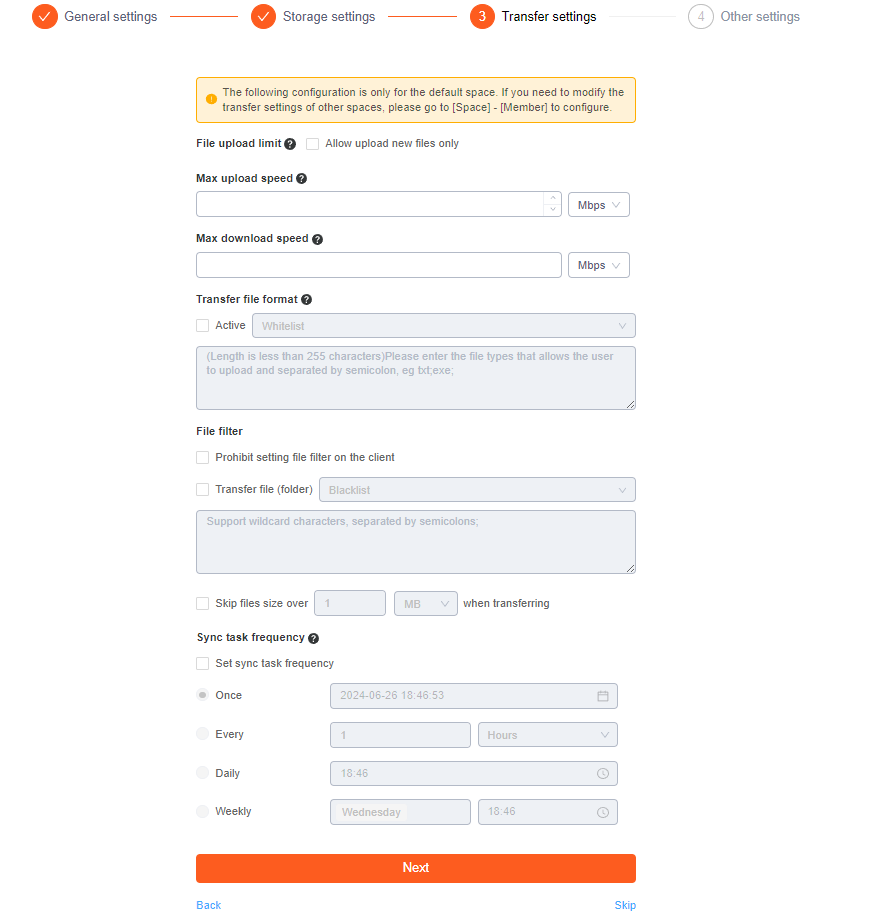
1. Transmission filtering supports file whitelists
2. Supports long-term transfer of uncompleted temporary file clearing on local storage
3. Support setting not to display hidden files in the file list
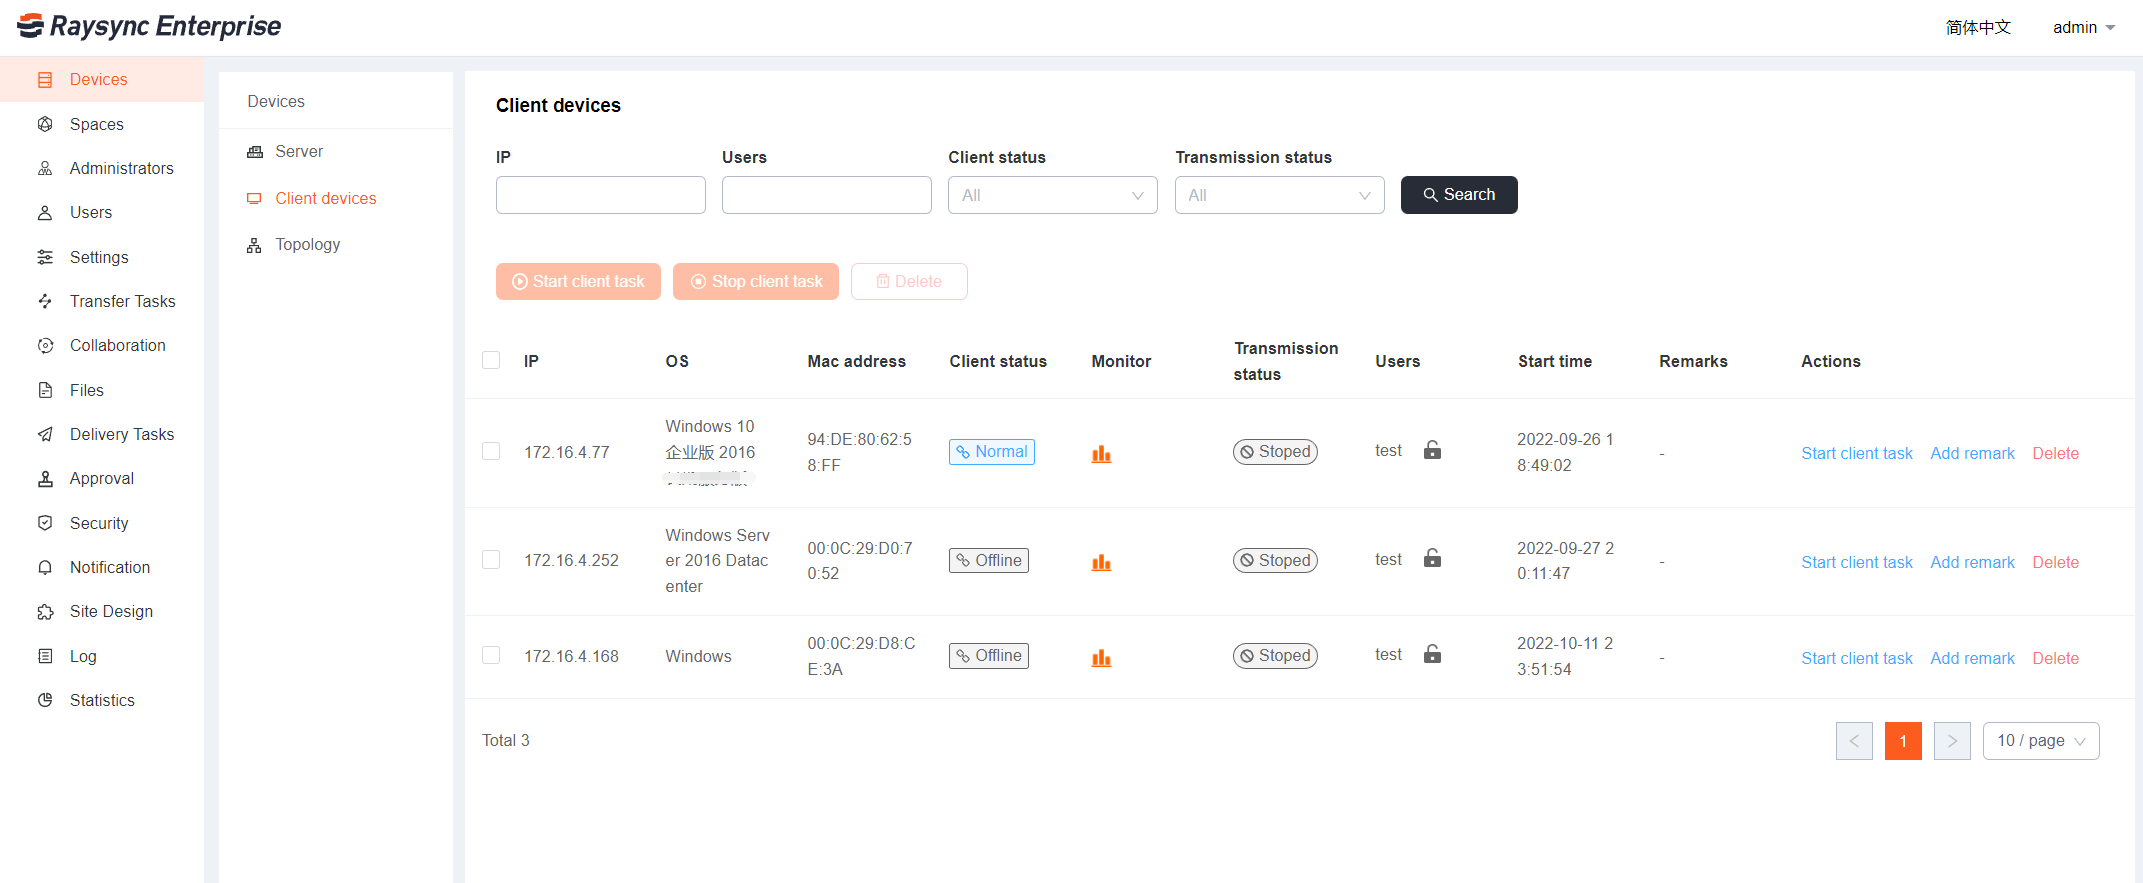
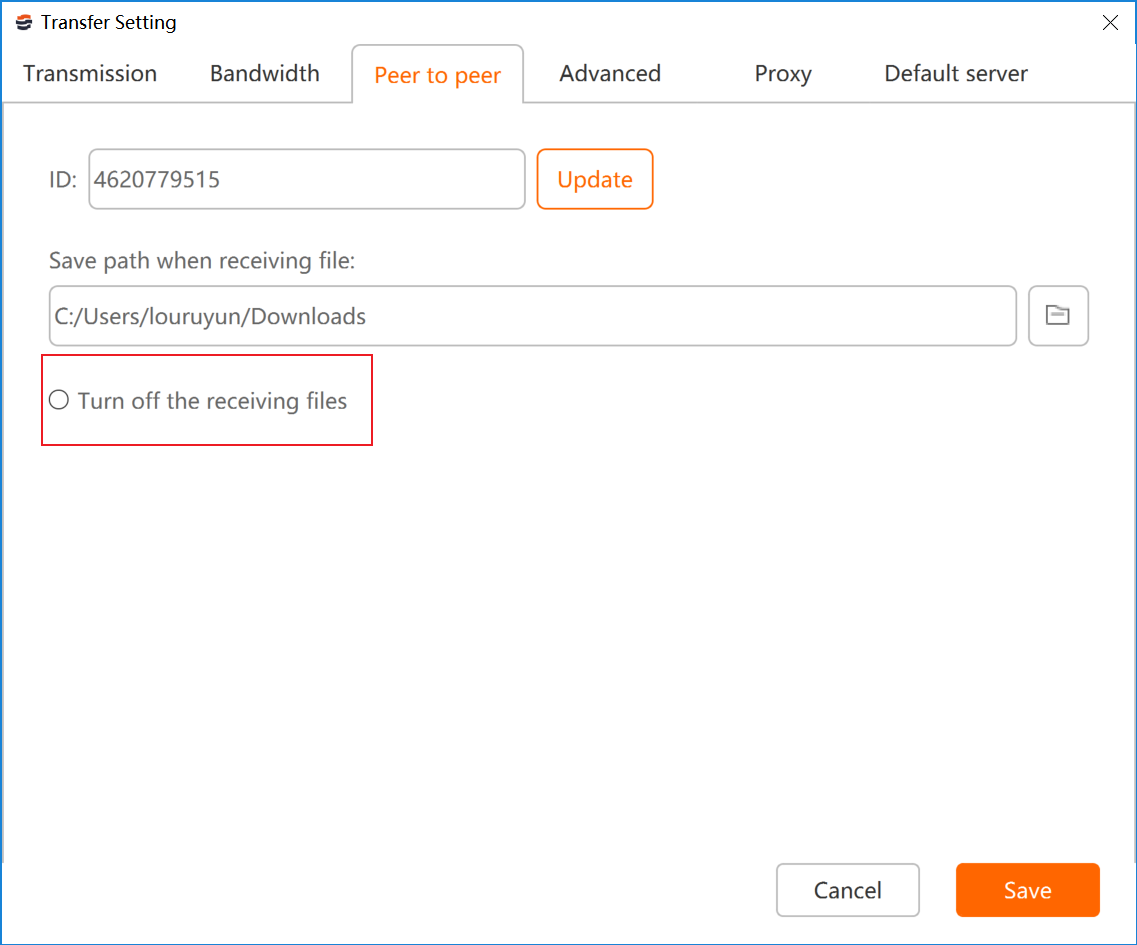
4. The peer-to-peer function can be enabled or disabled by specified users
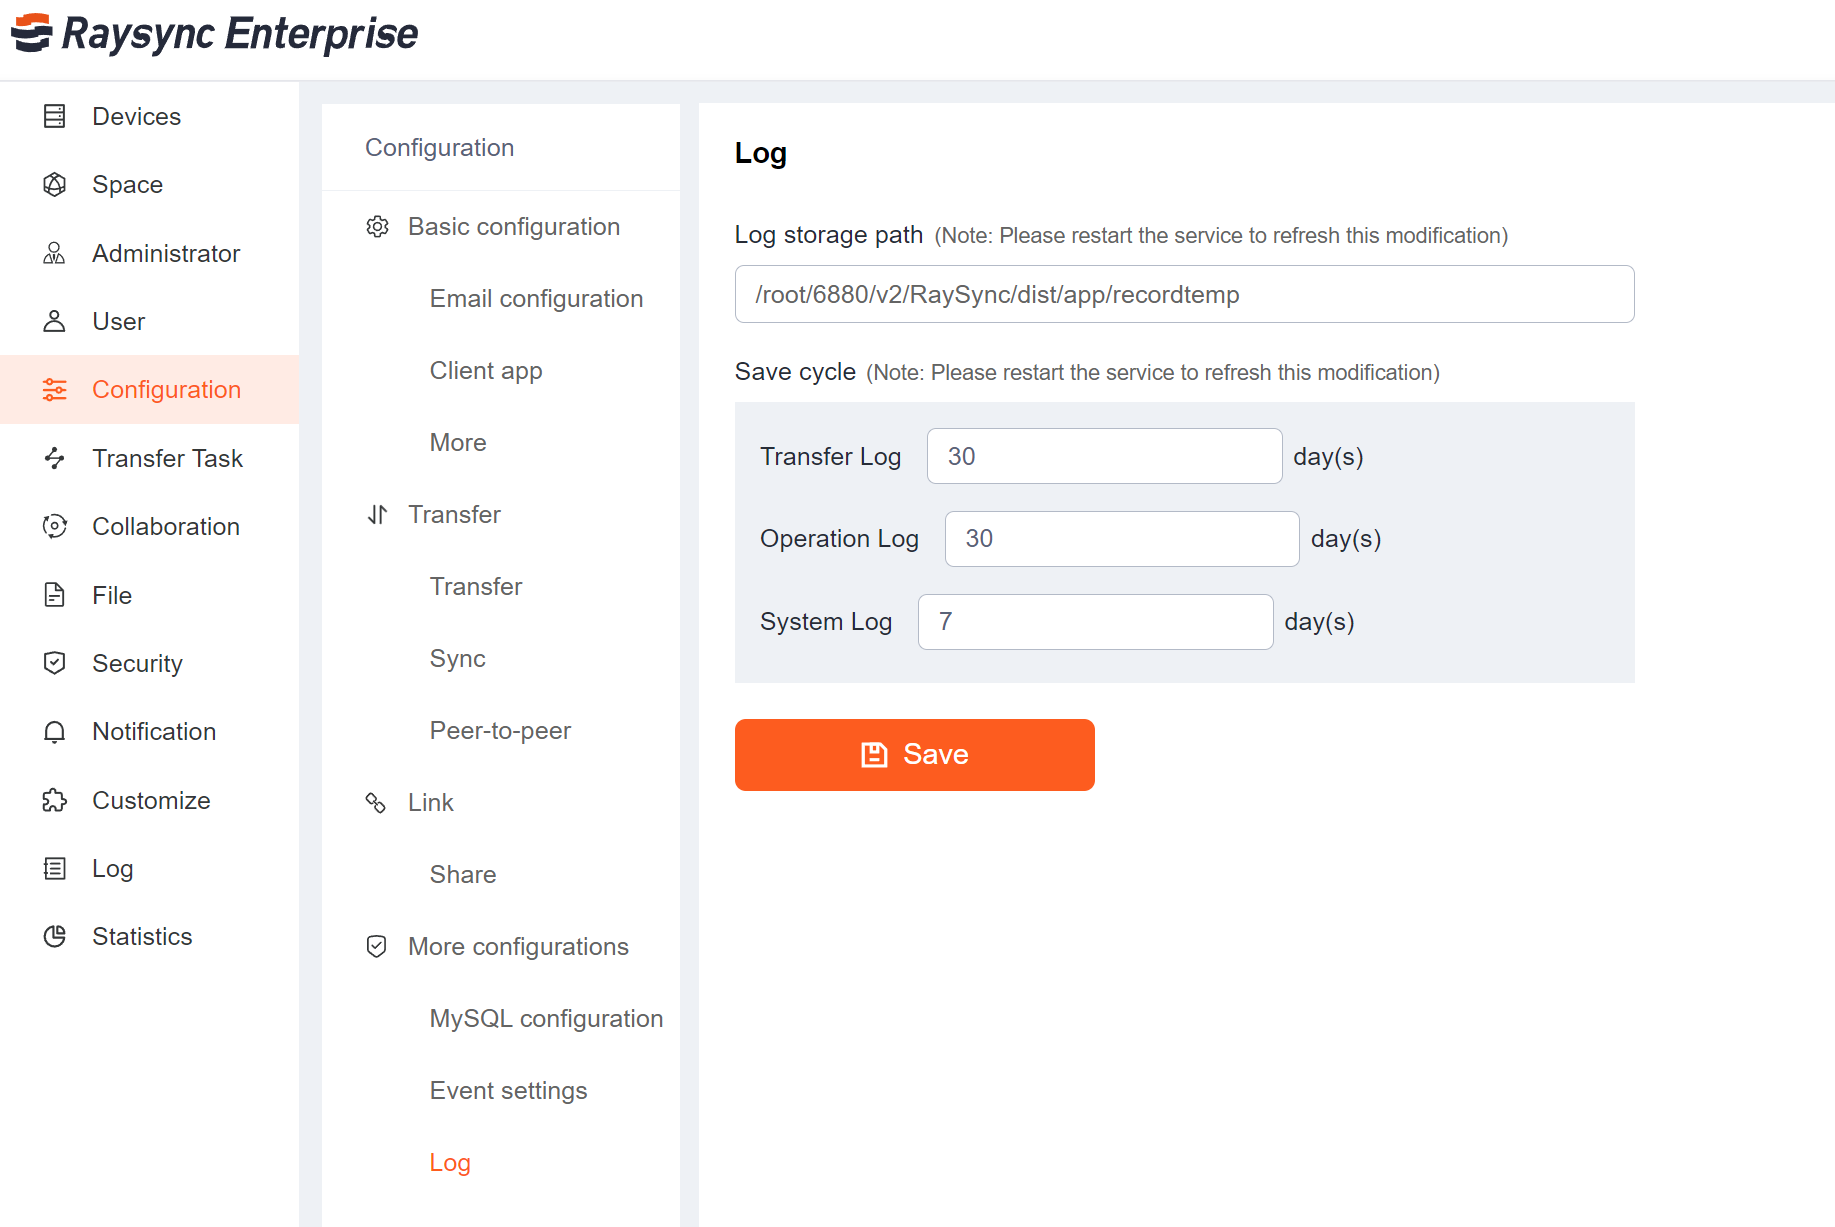
5. Configure the storage period for system logs
6. Add Stun service and increase the direct connection rate of high peer-to-peer transfer
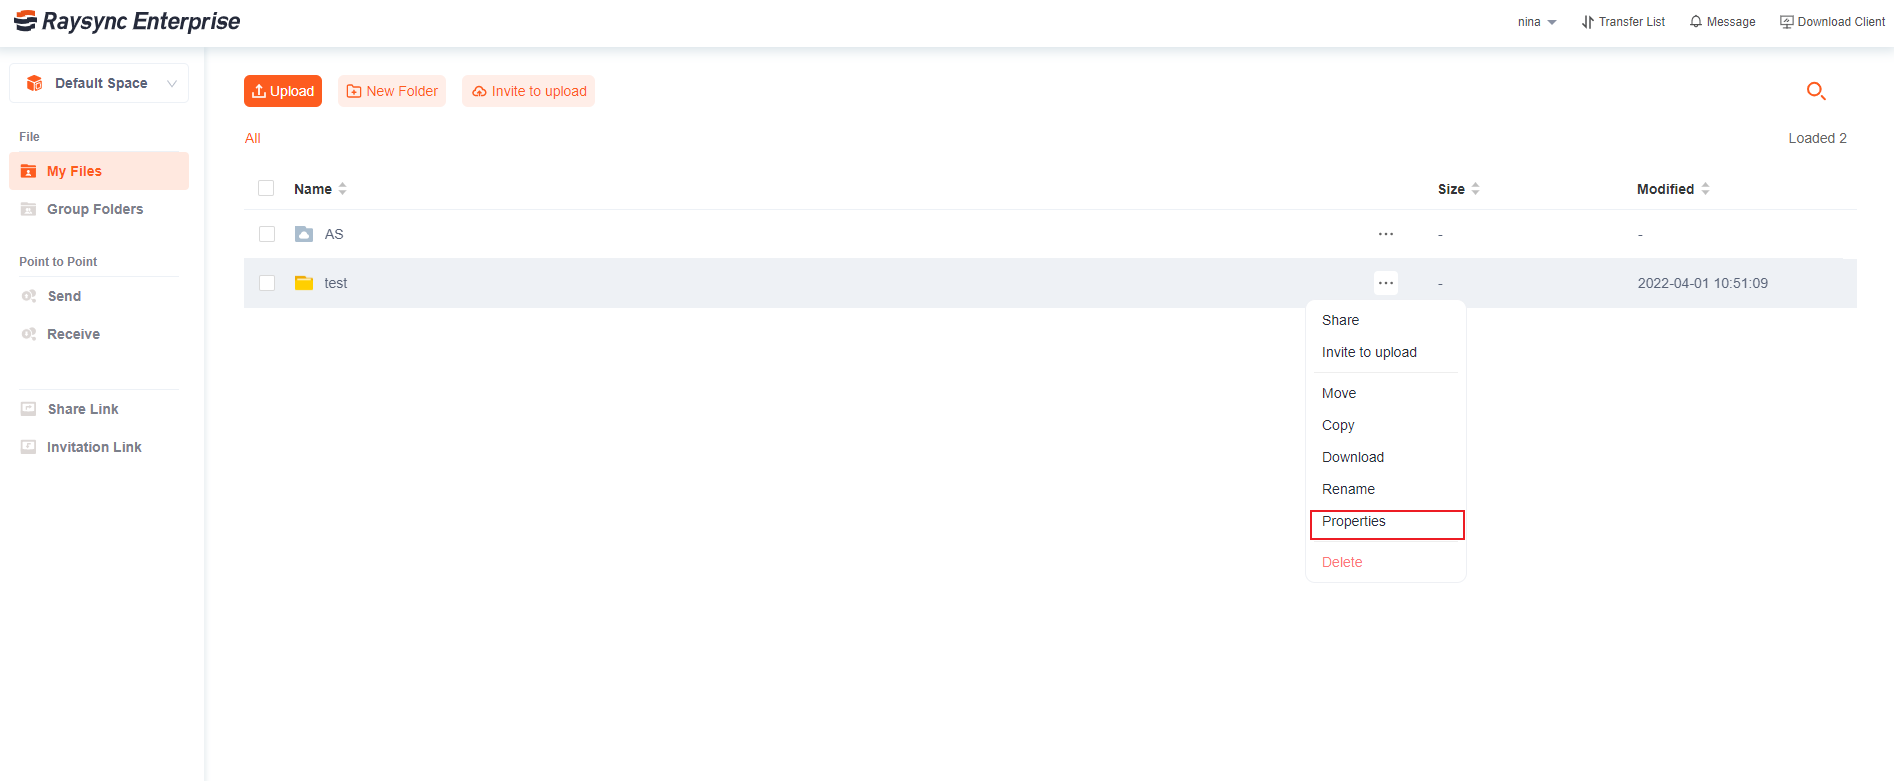
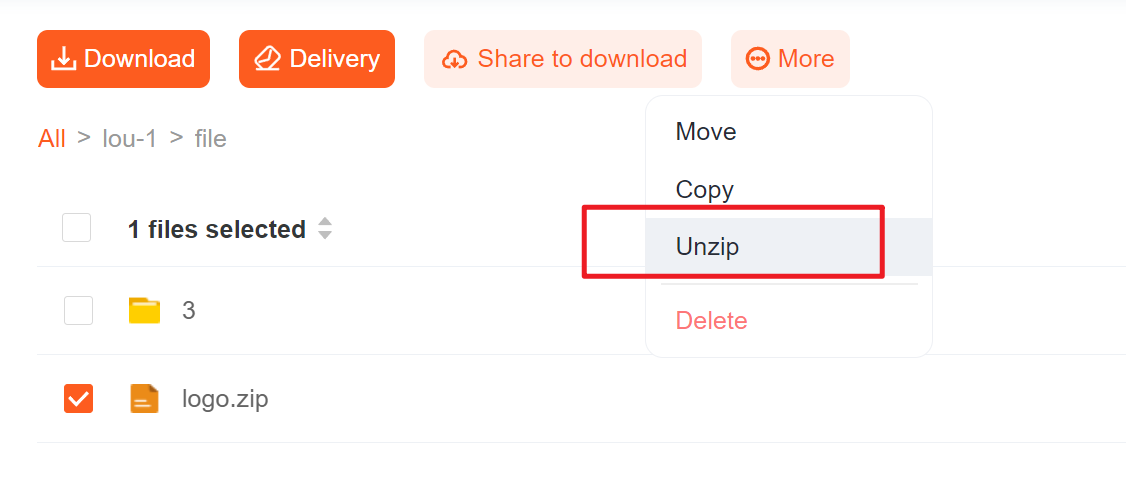
8. Uzip file
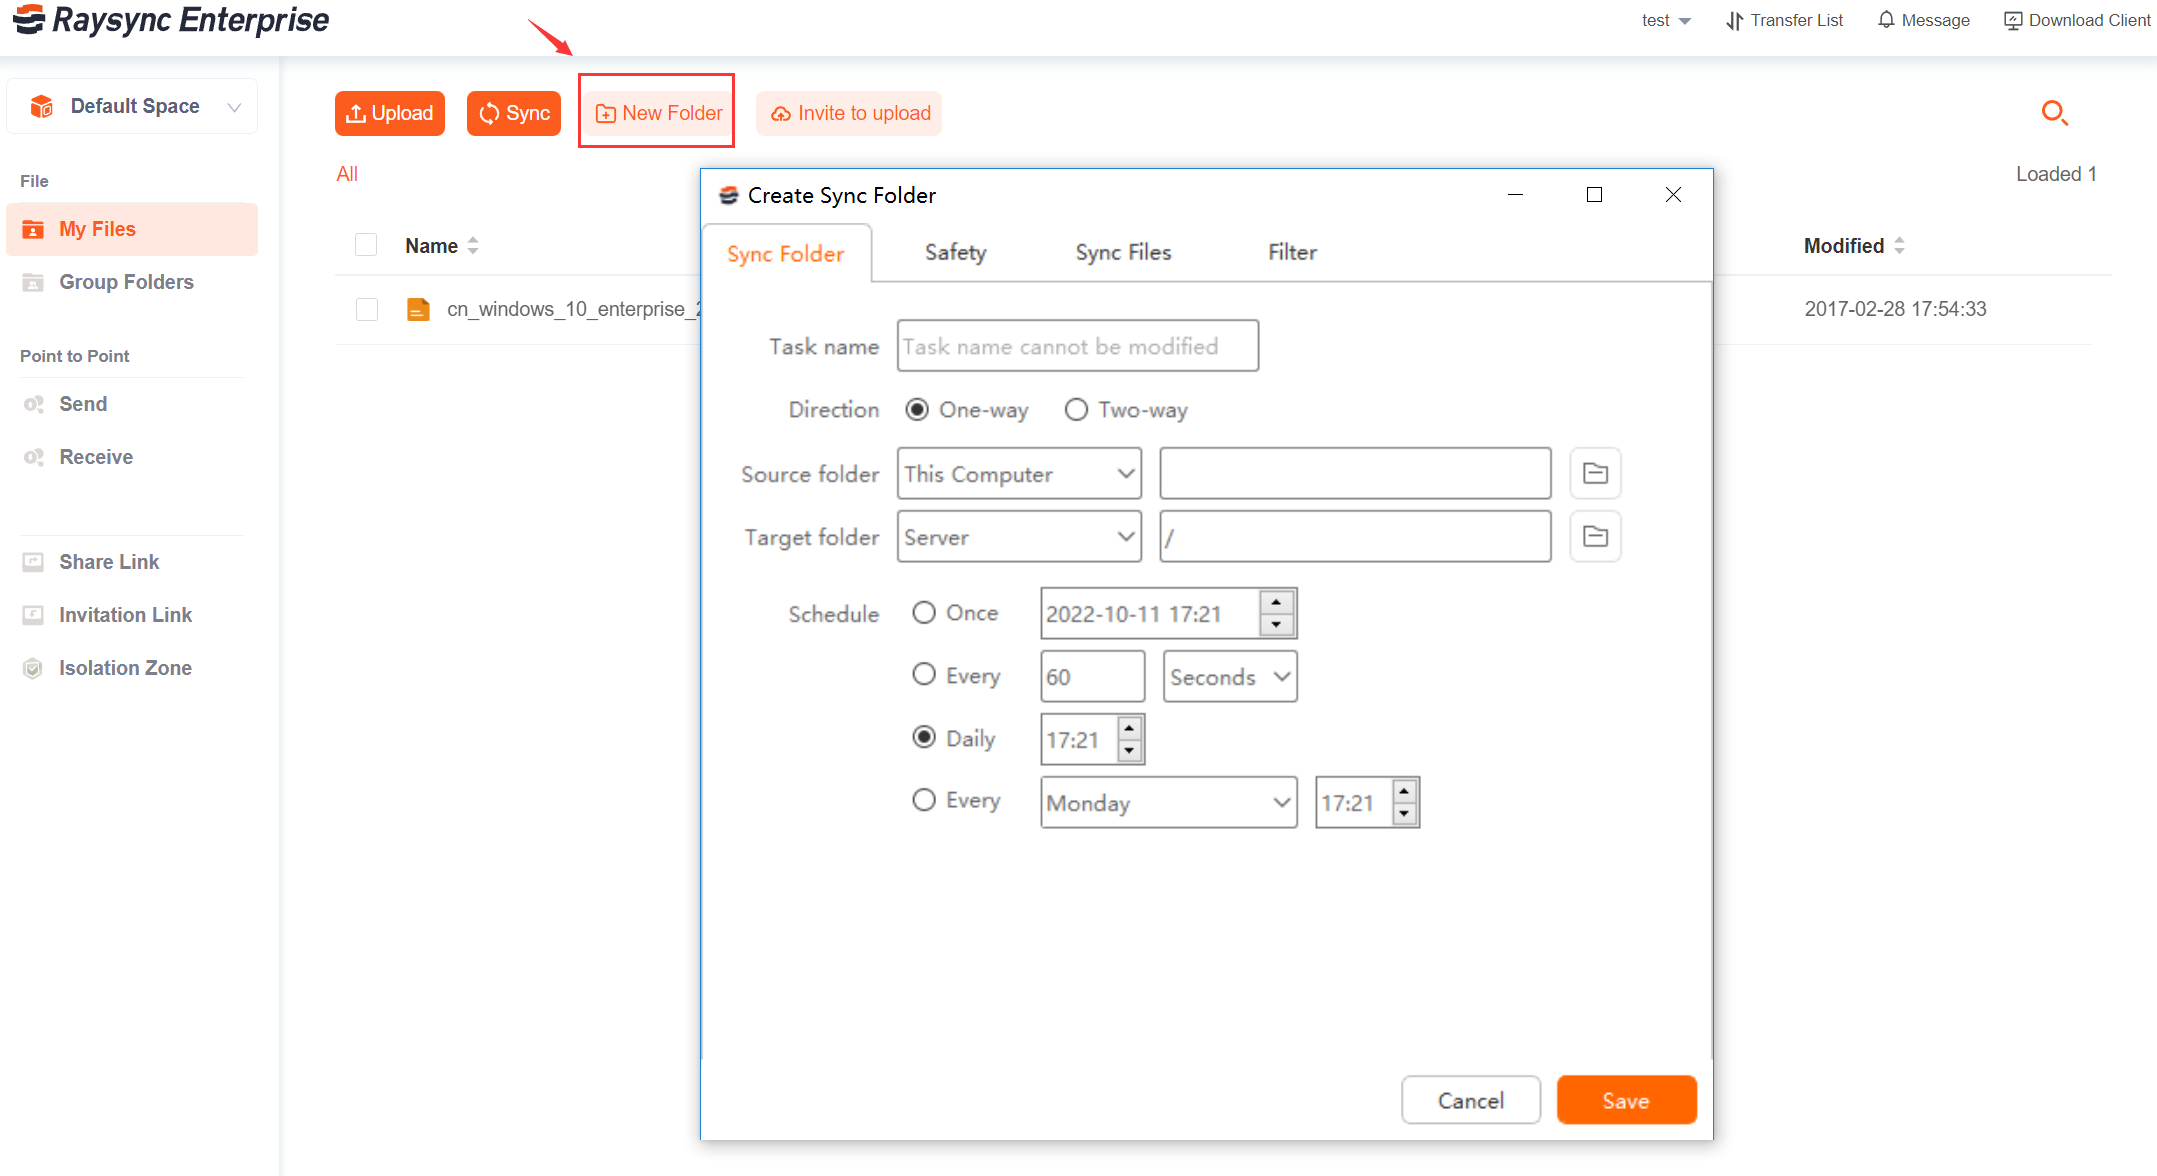
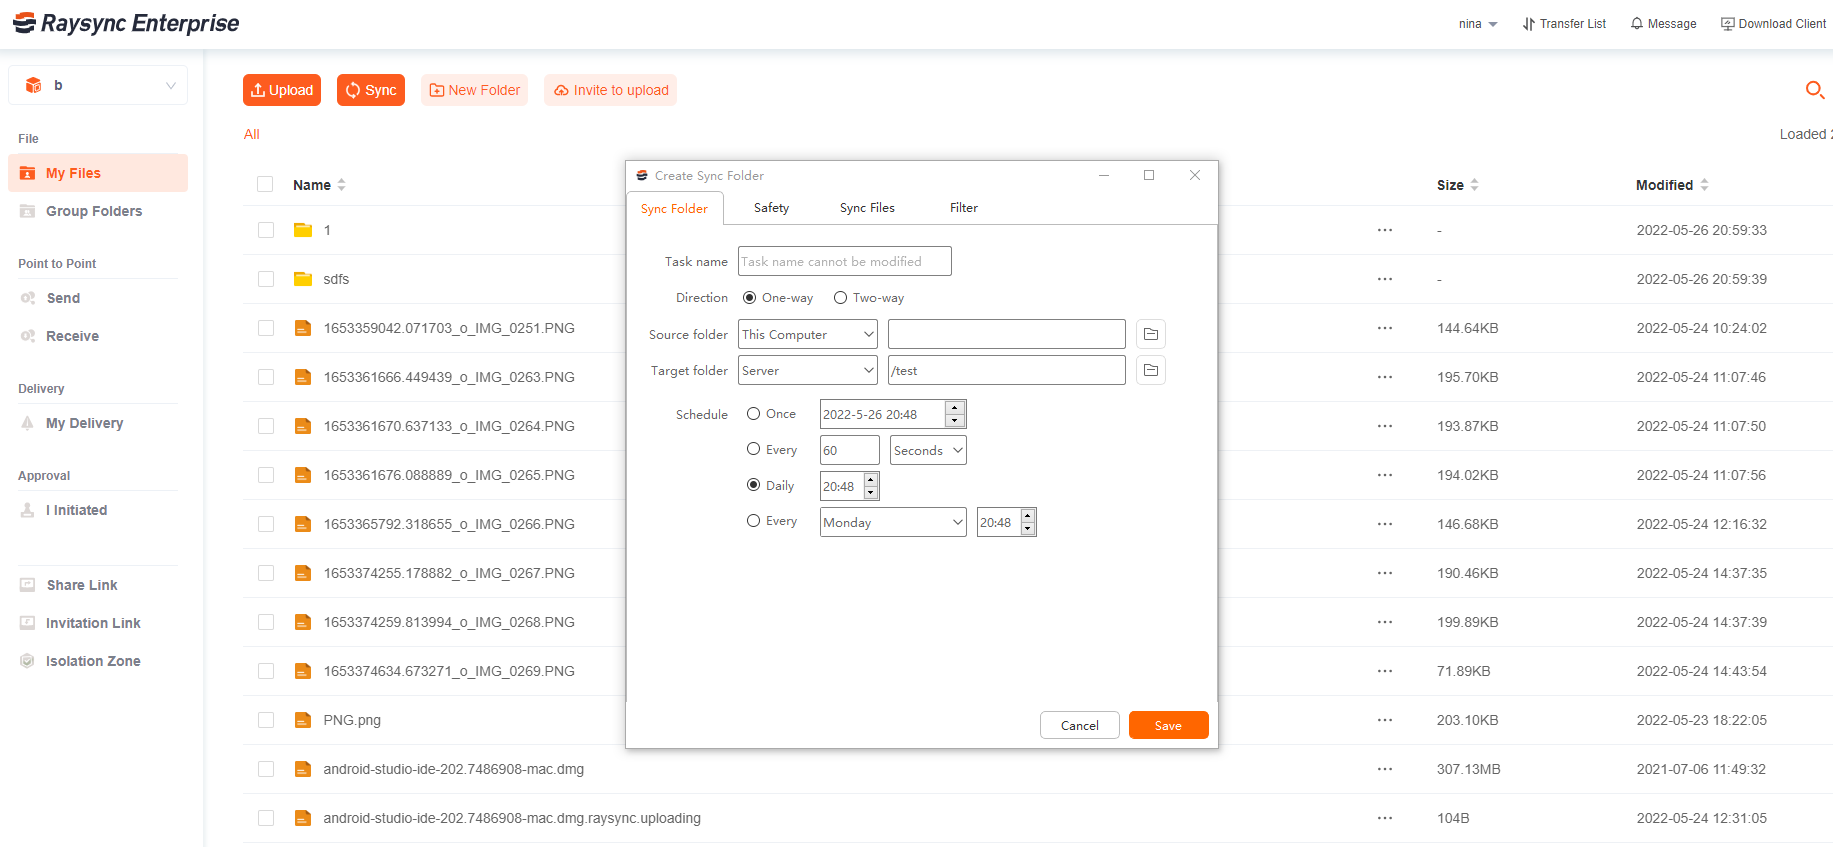
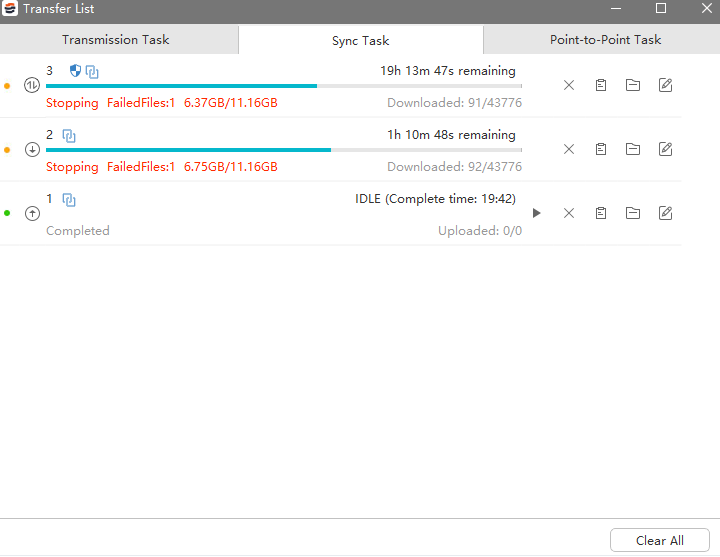
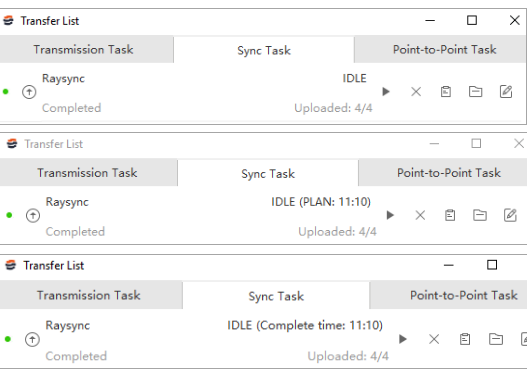
9. Synchronous transfer Supports sync when the source file is updated
10. Other optimizations and bug fixes
v6.7.8.5
Updated: 2024-1-25
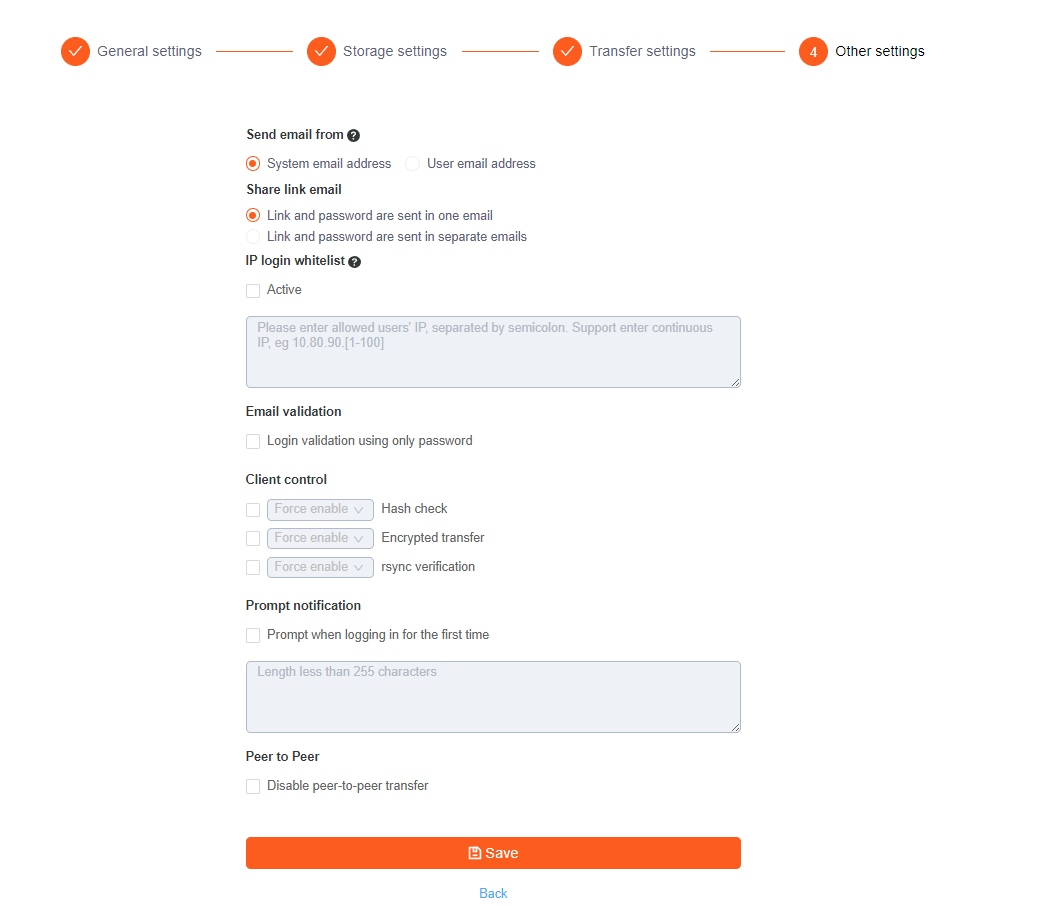
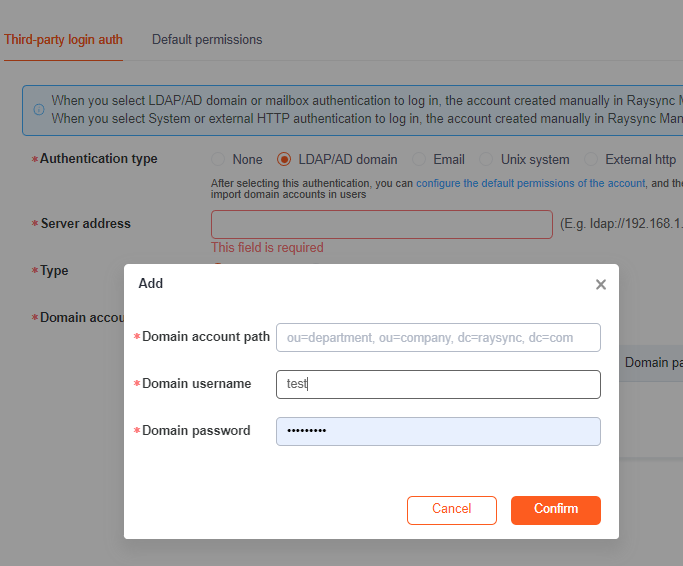
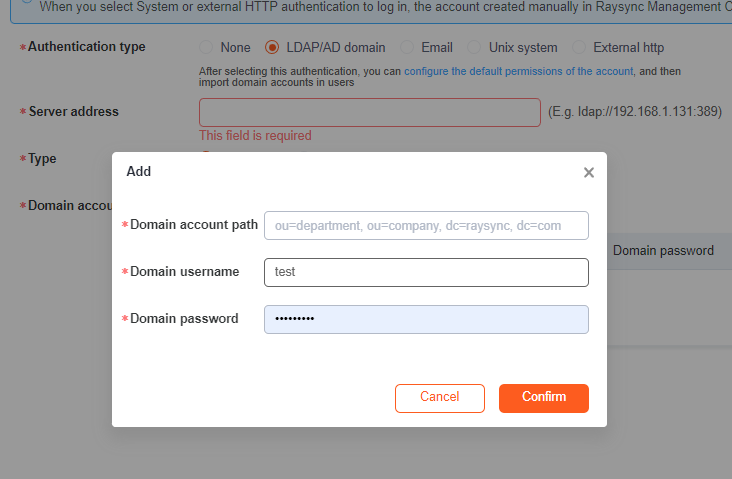
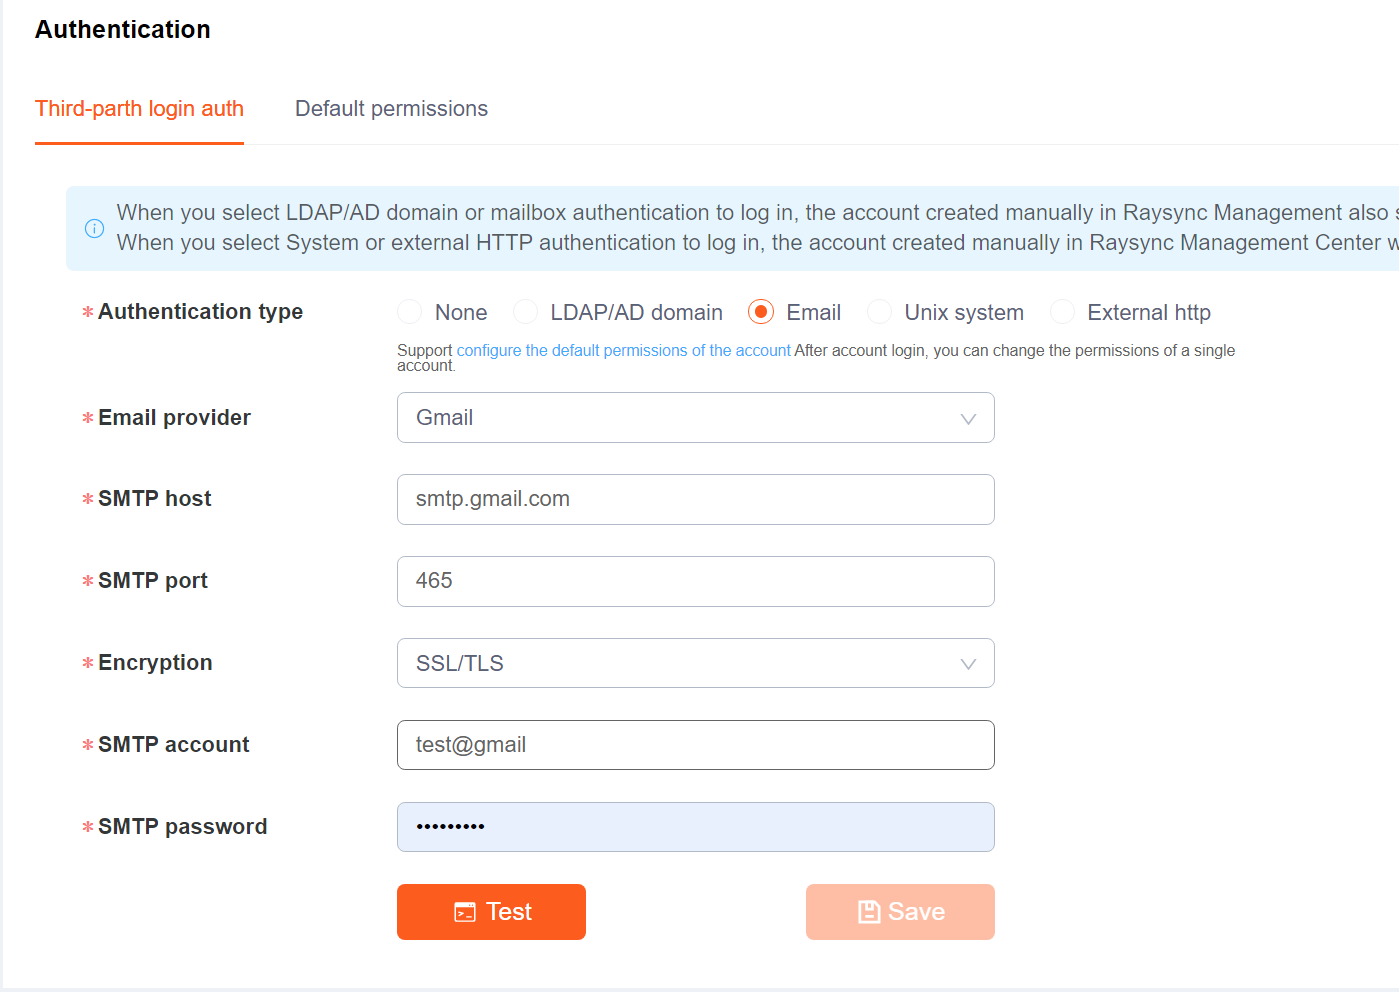
1.External http authentication supports account password - permissions are controlled by Raysync
2. Supports setting pop-up prompts for user first login
3. Authentication default permission configuration adds virtual directory and prompt pop-up
4. Add official website links and brand slogans to the client
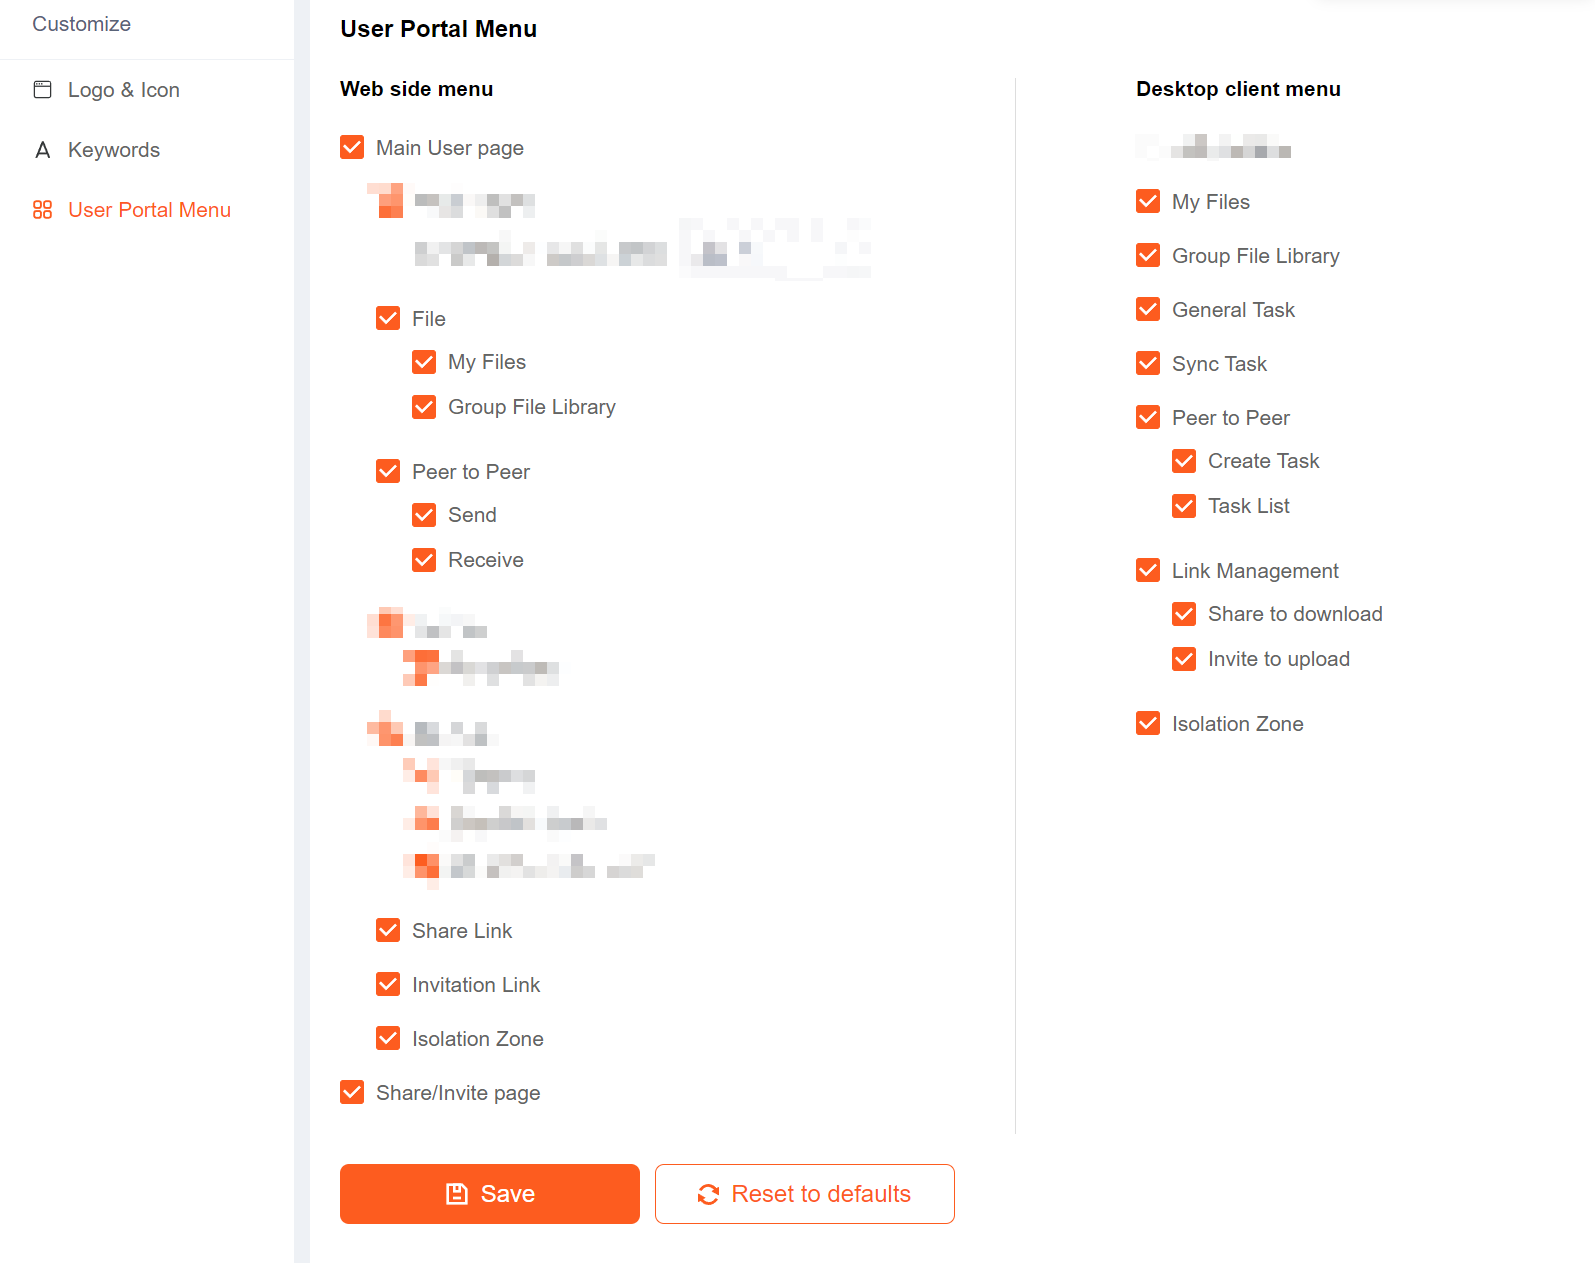
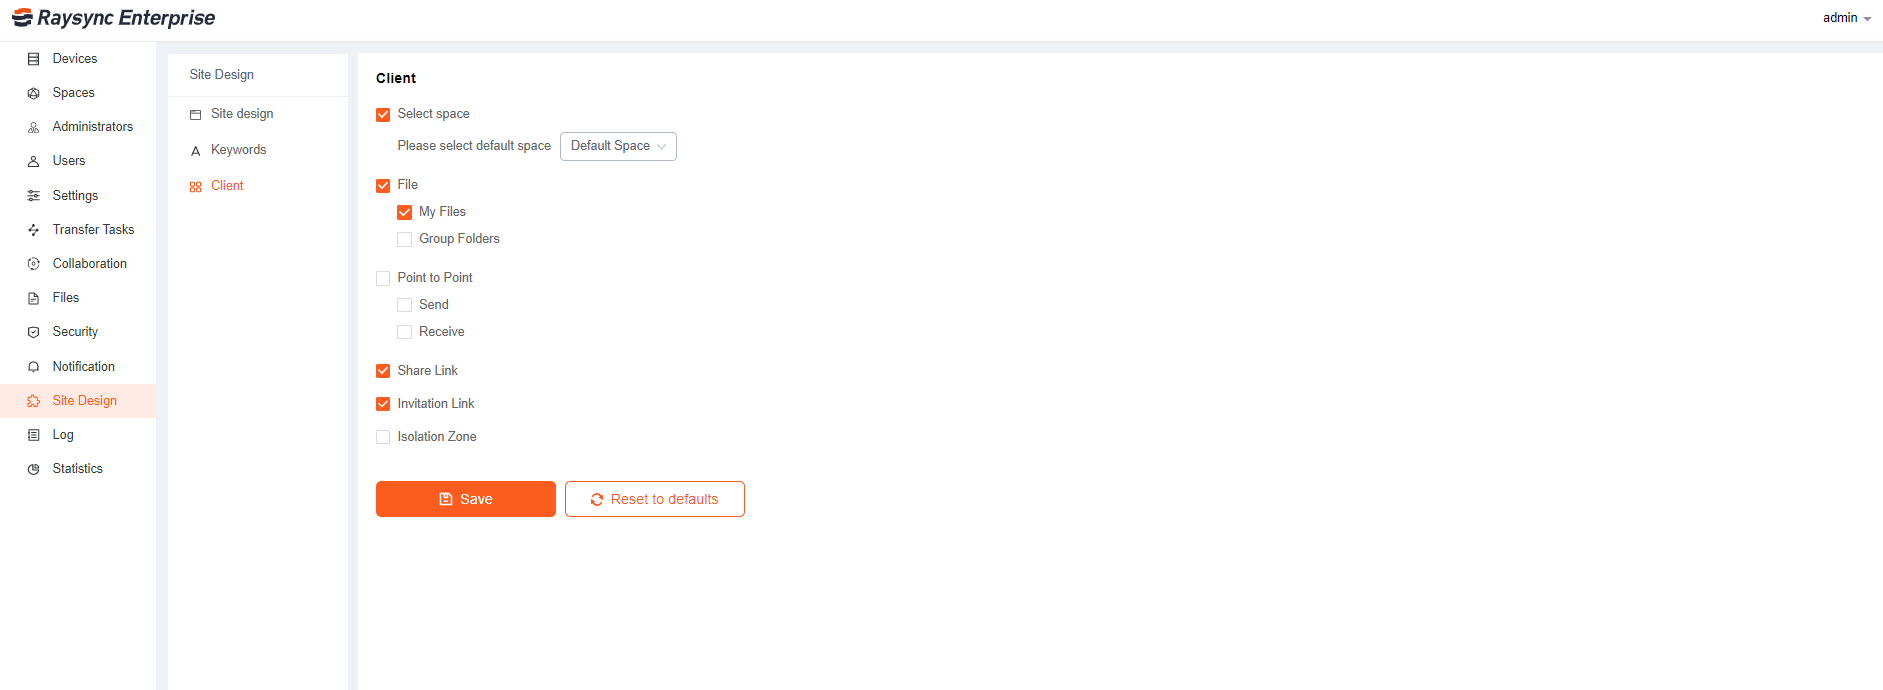
5. Support custom desktop client menu functions on admin portal
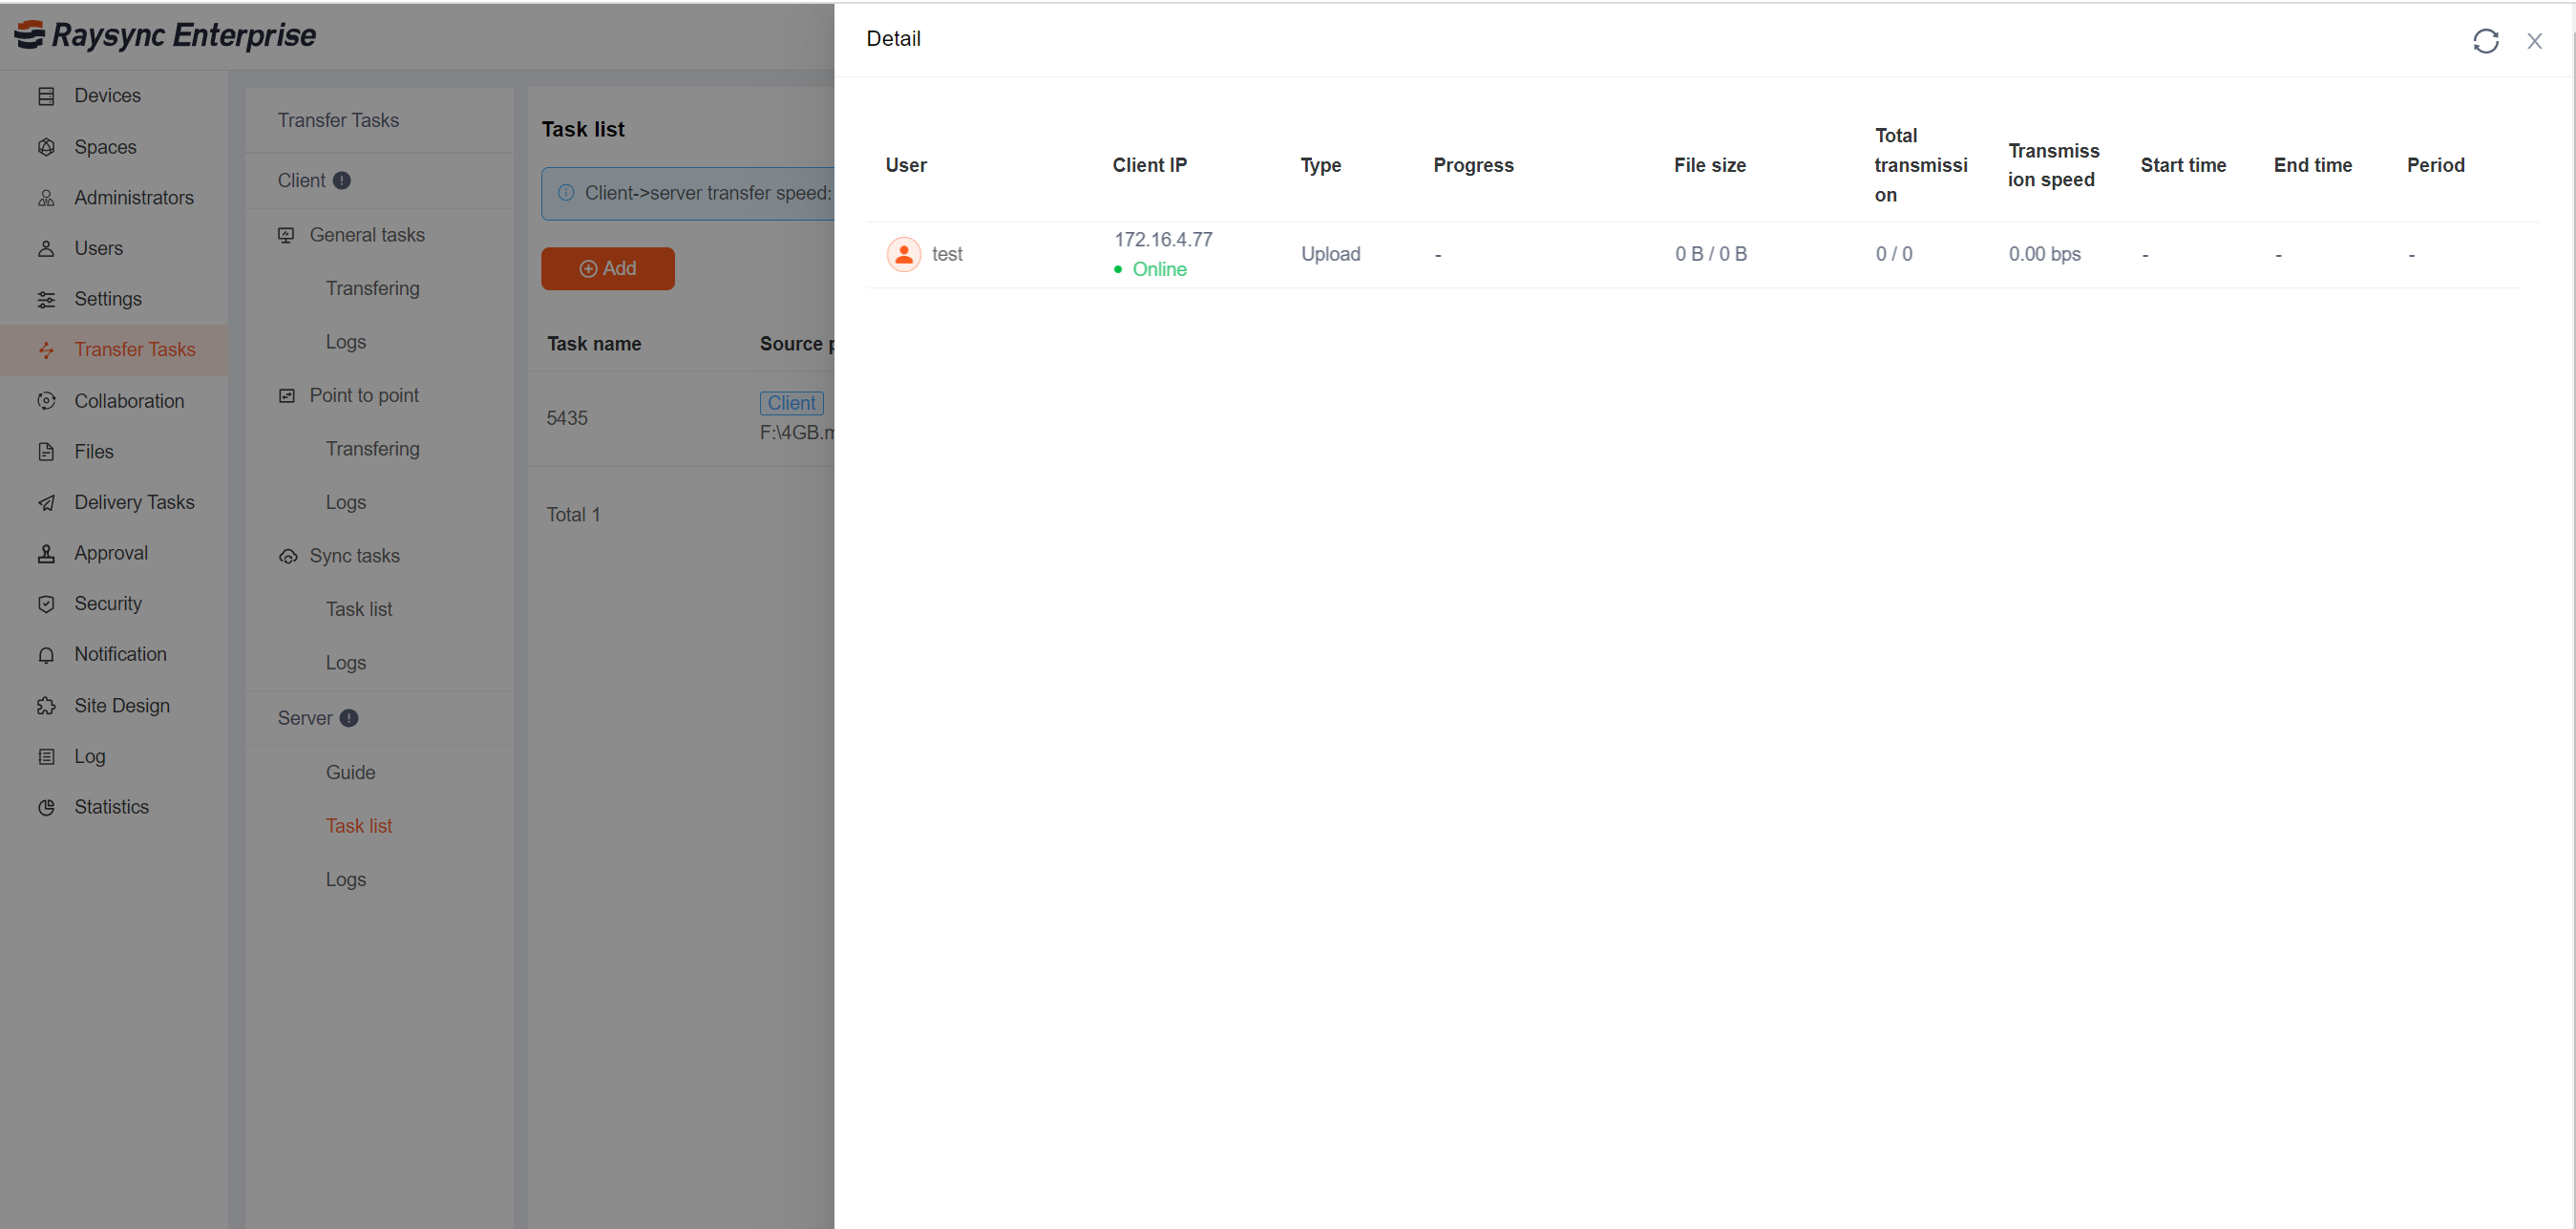
6. The sync task created by the GUI client is displayed on the admin portal
v6.7.8.3
Updated: 2023-12-5
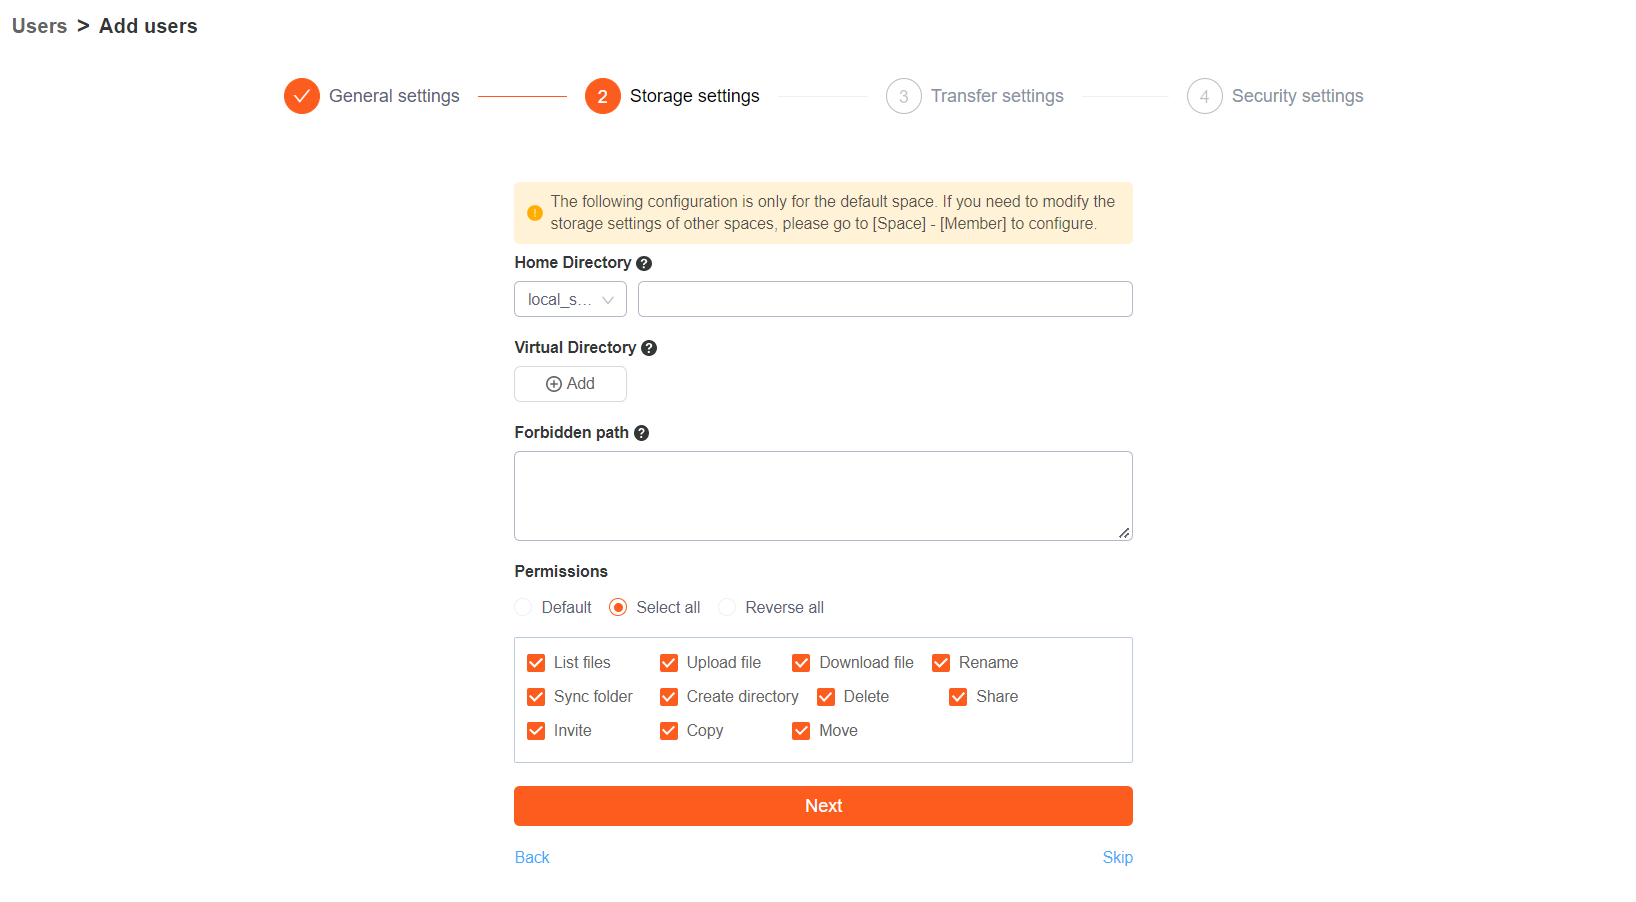
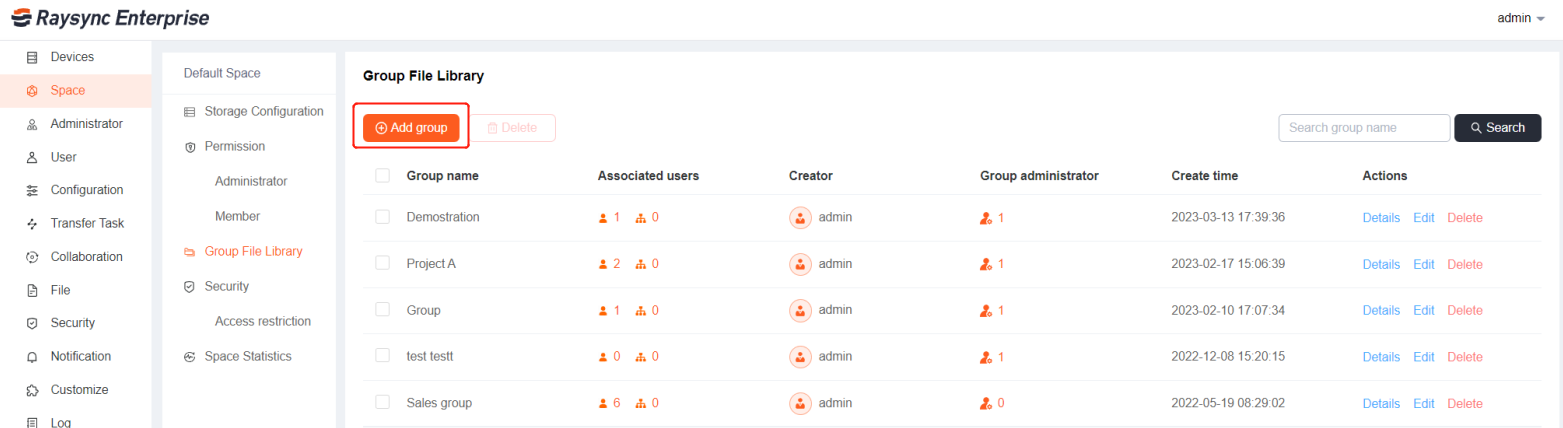
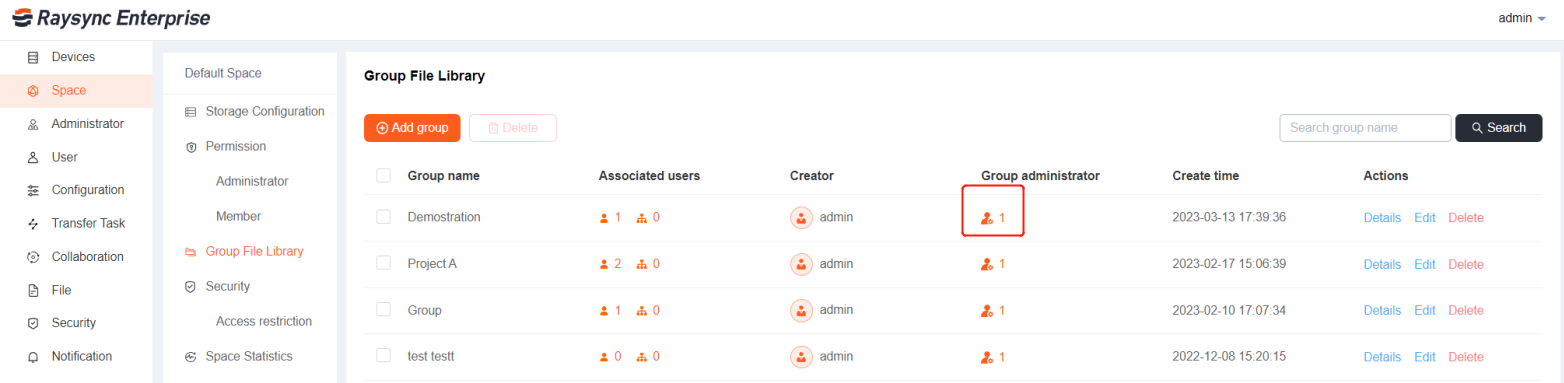
1.Group file library supports setting speed limits, forbidden access paths, and allowed access paths.
2. Users and group file libraries support setting the maximum storage capacity.
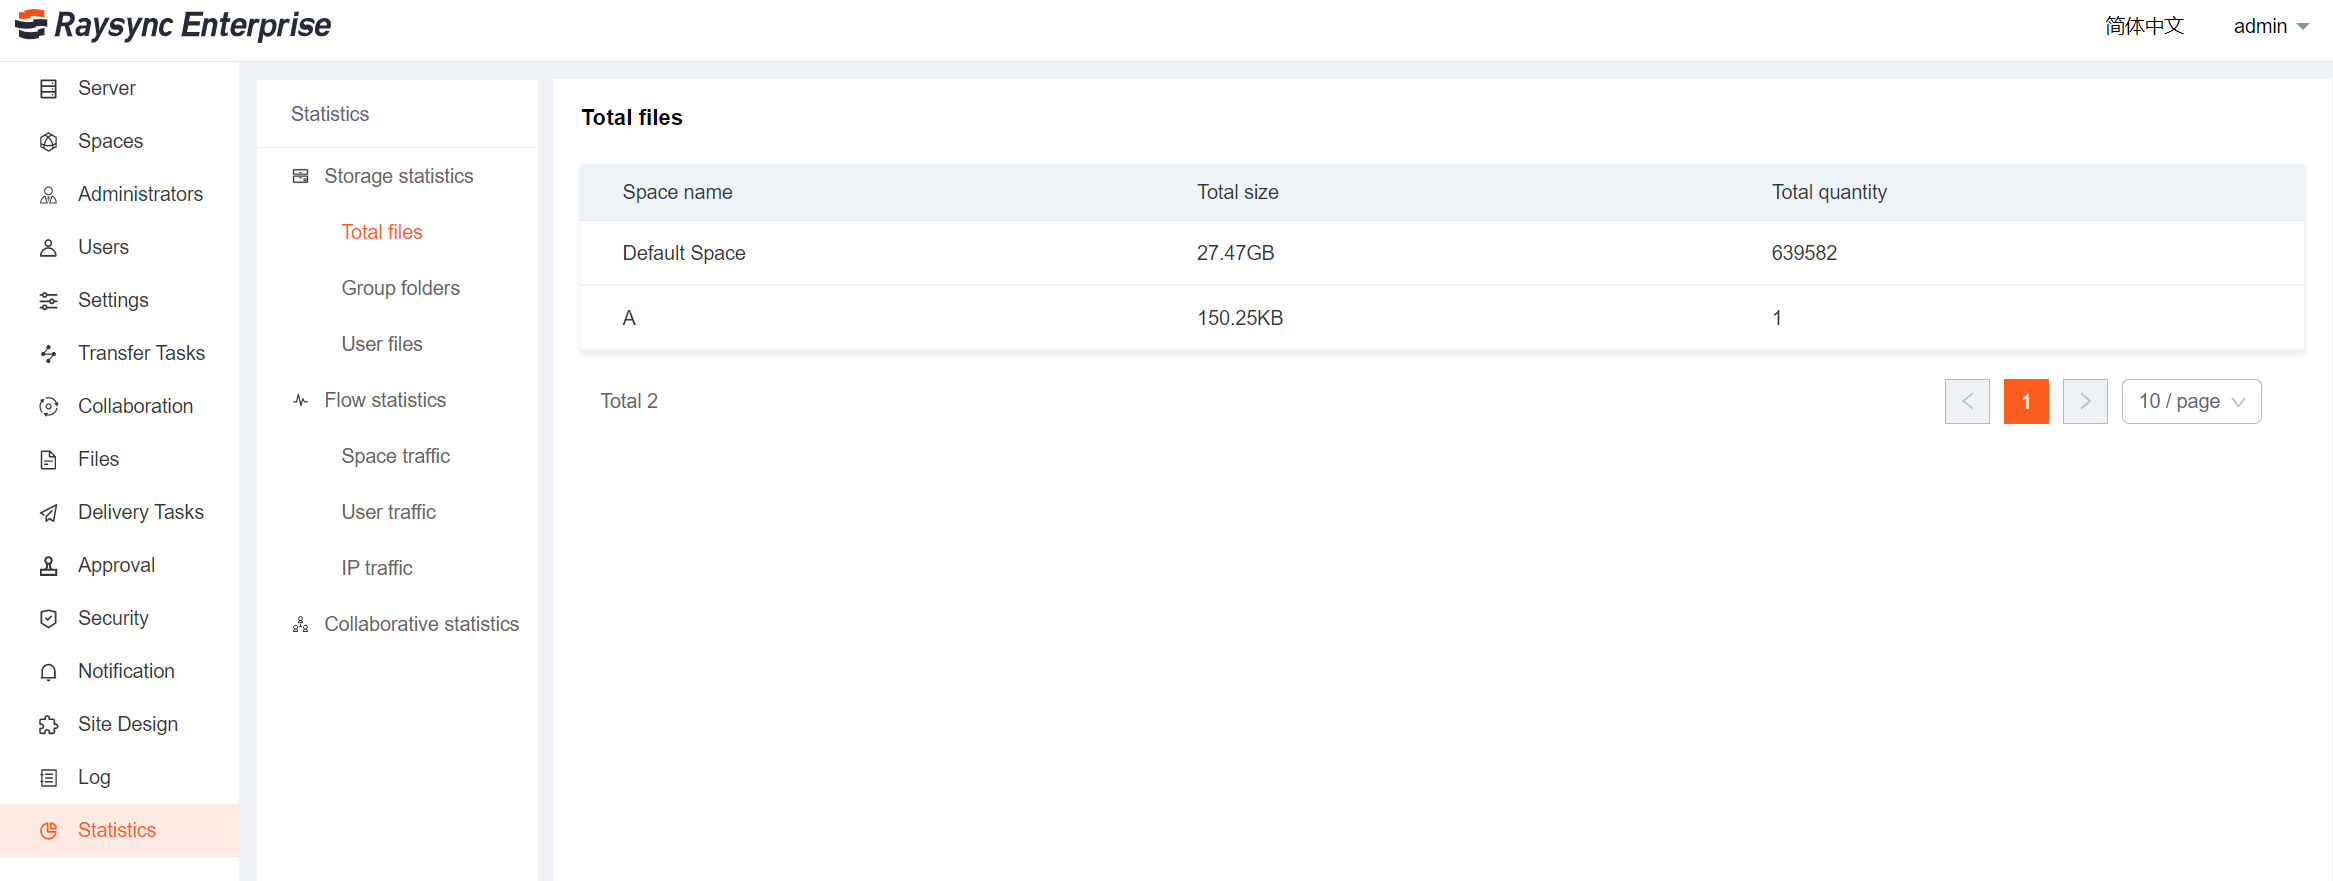
3. Space statistics support object storage statistics
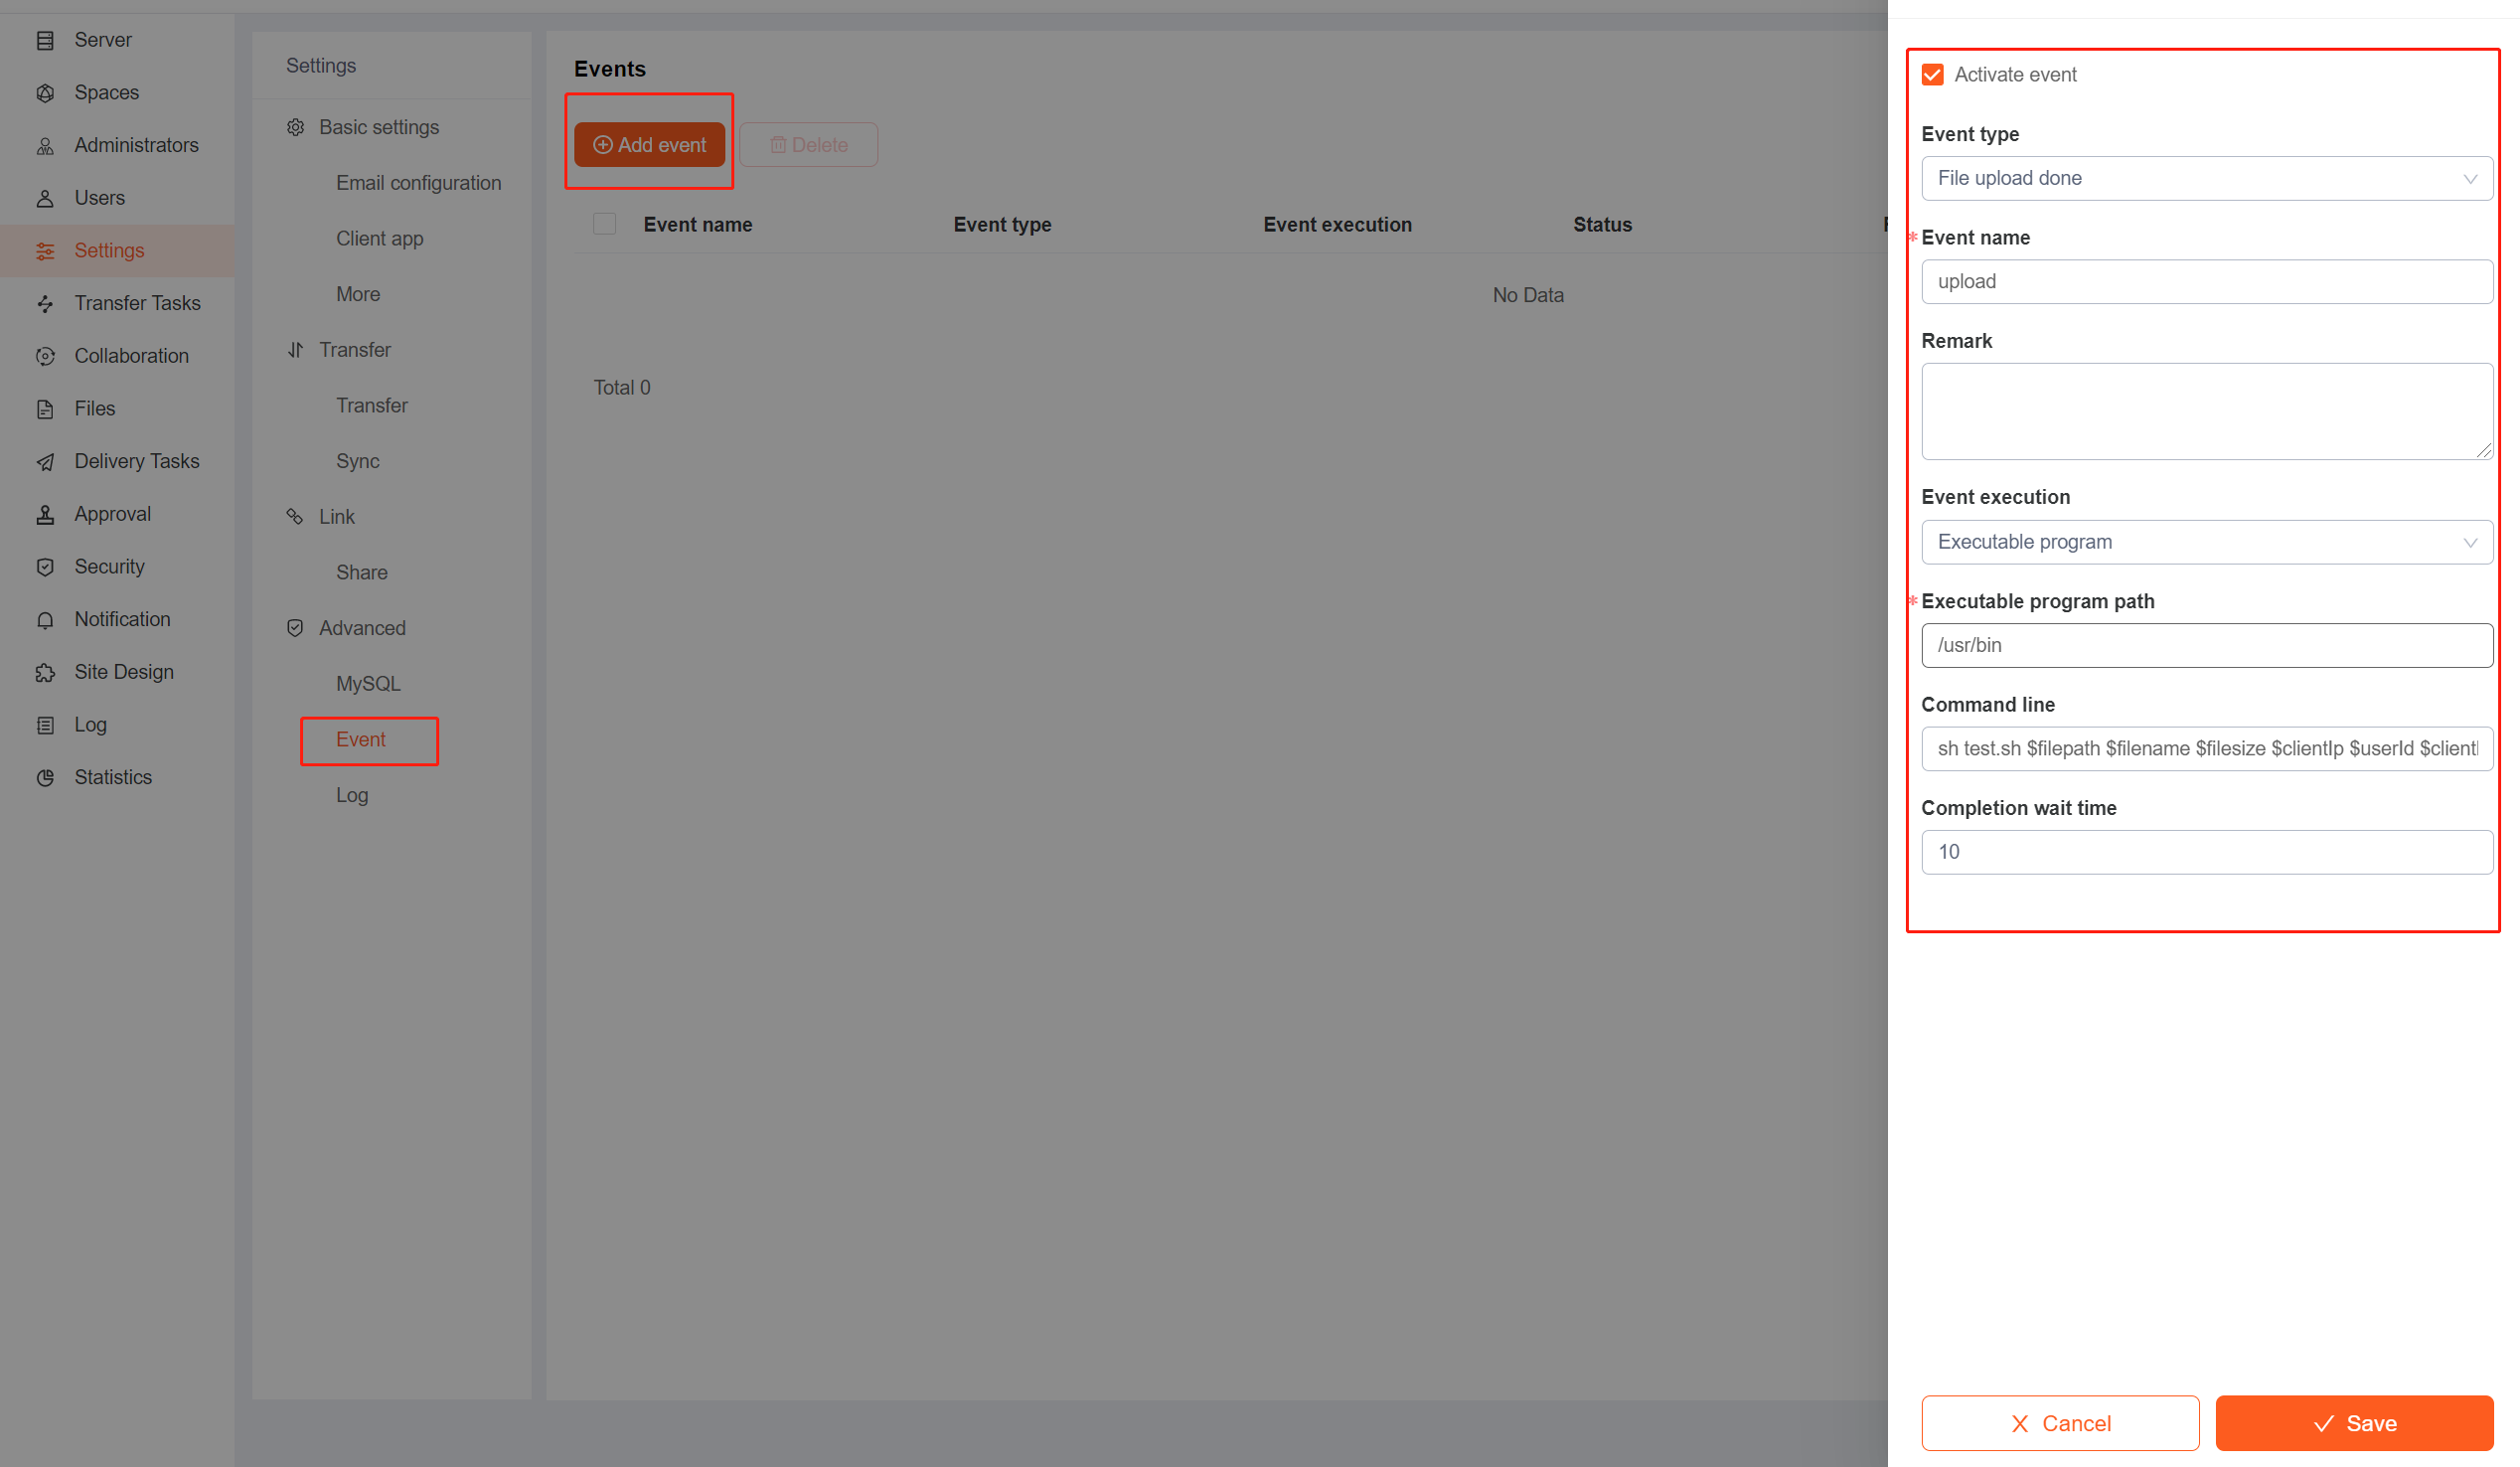
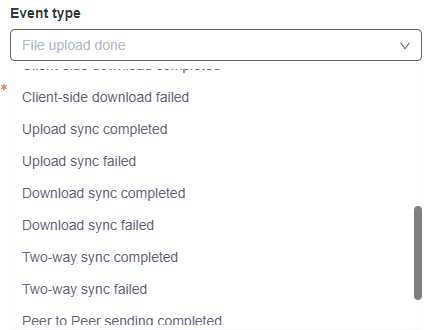
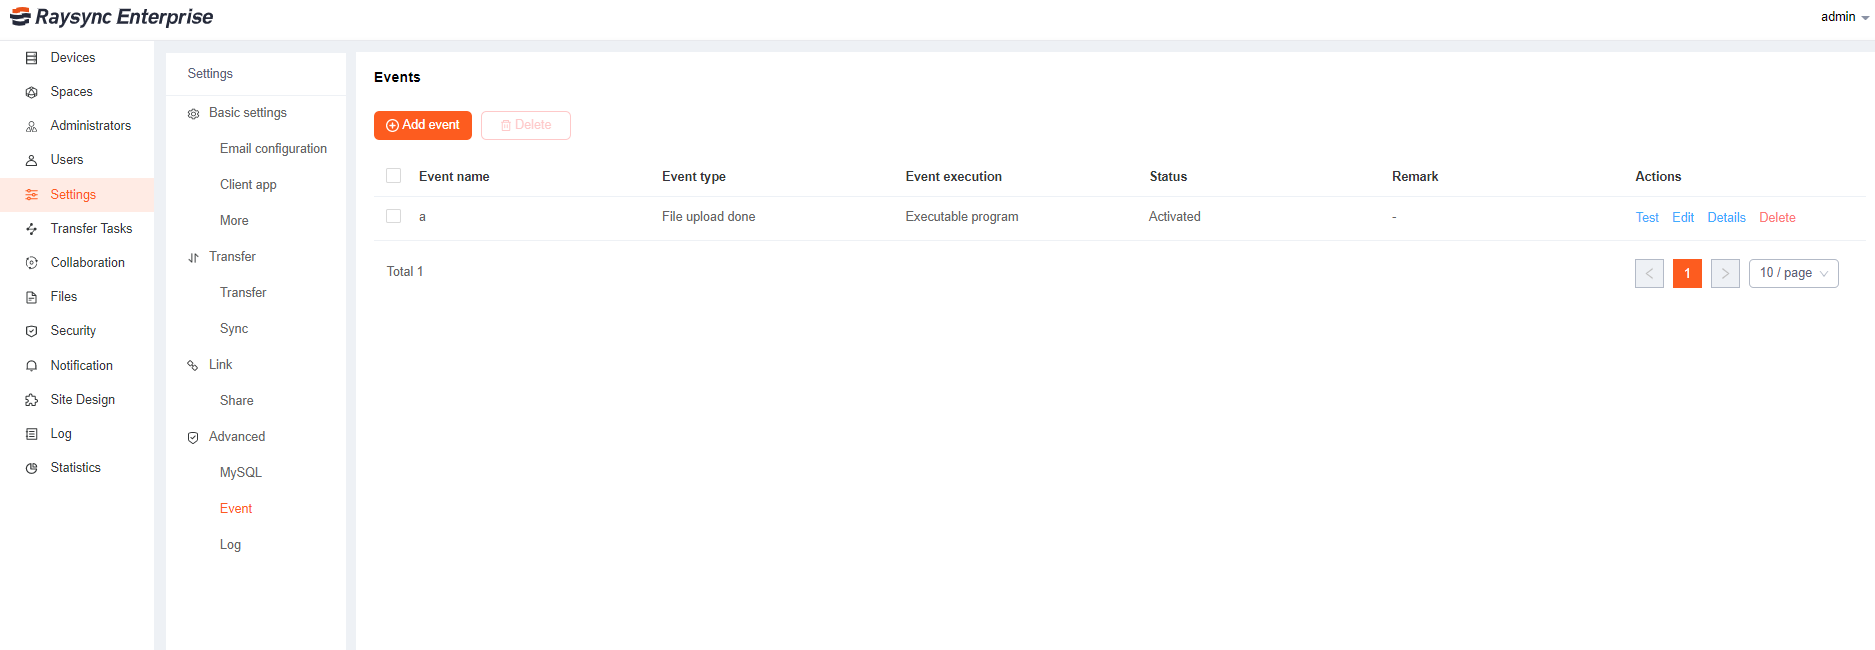
4. Event notification supports task event type and task ID variable
5. Email notification supports custom transfer email notification templates
6. Operation log optimization on admin portal
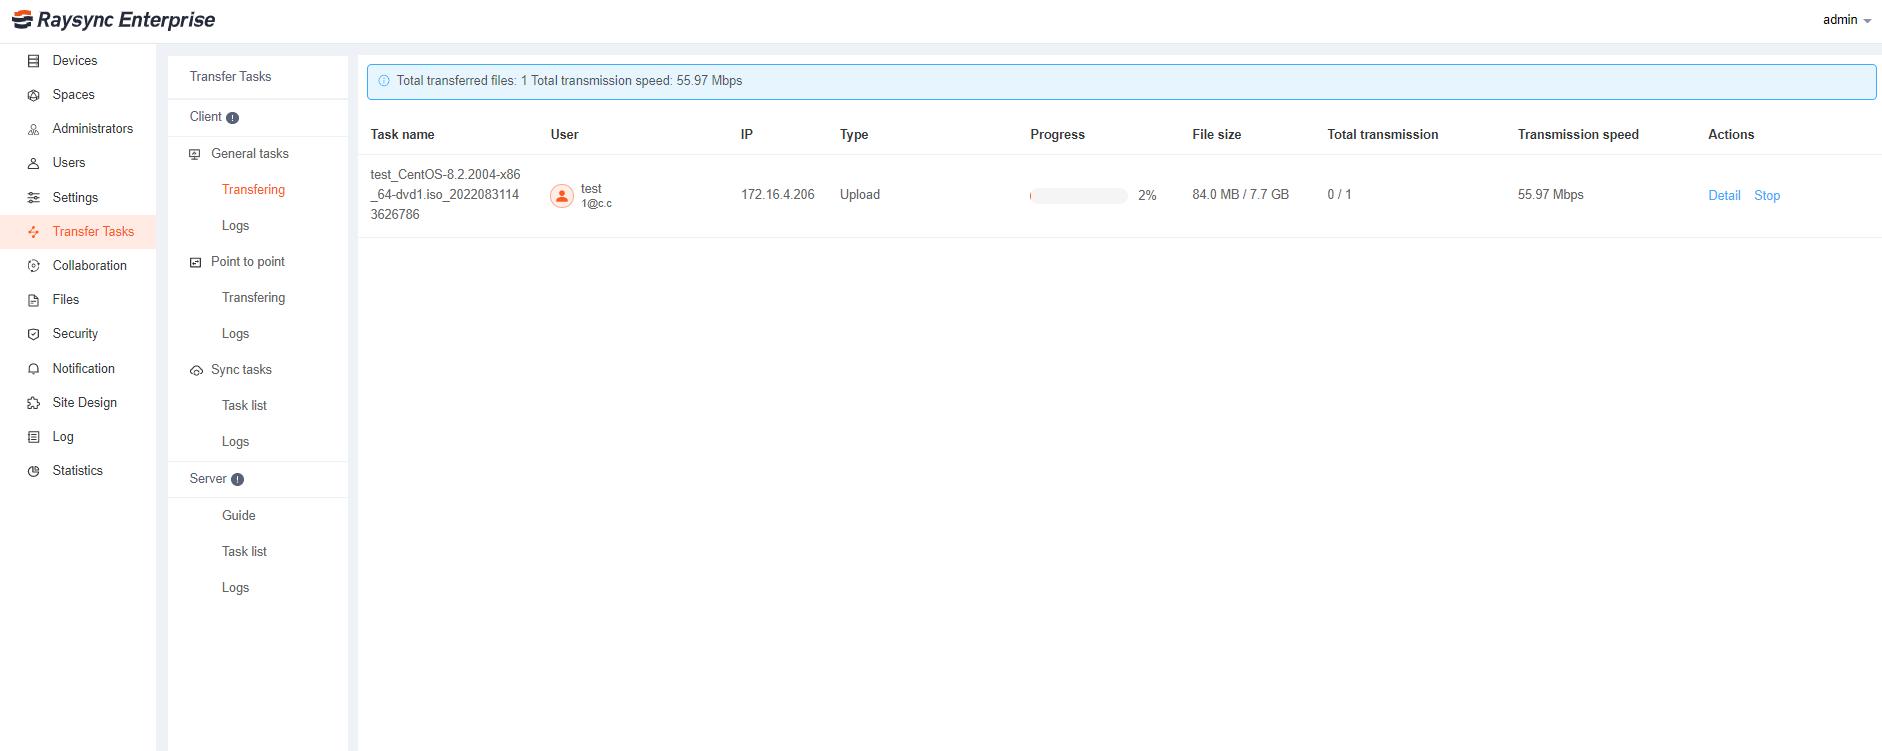
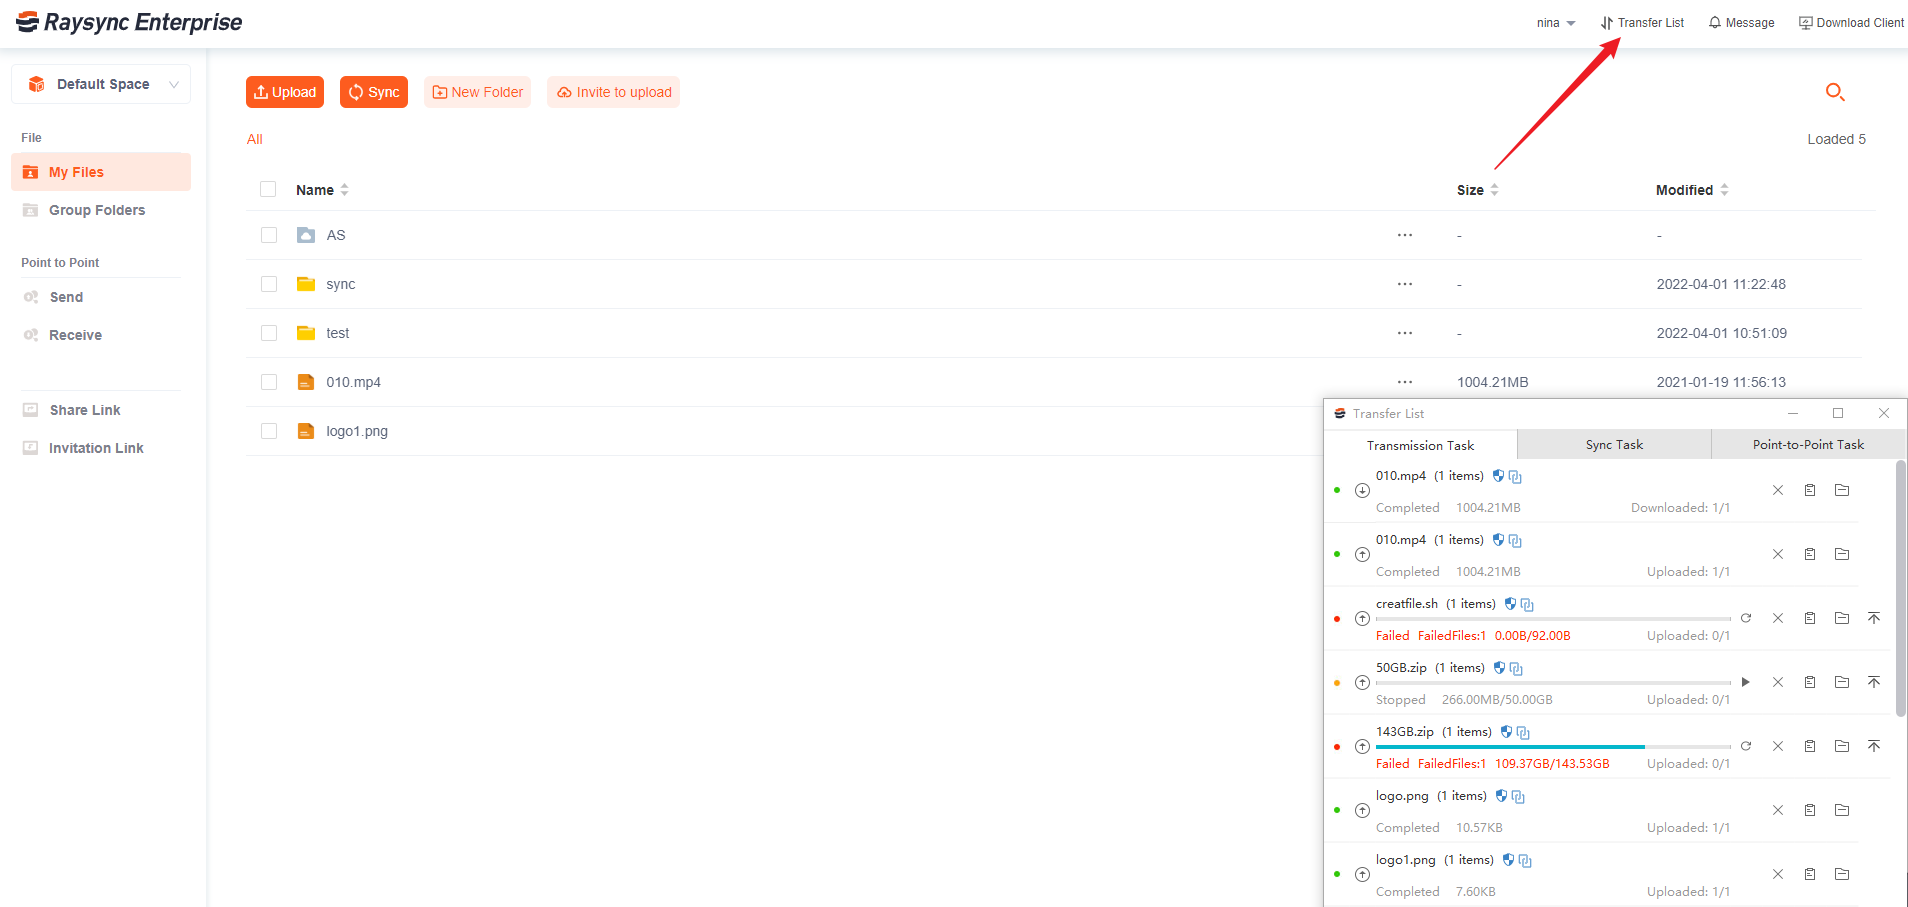
7. The client supports all pause and all start
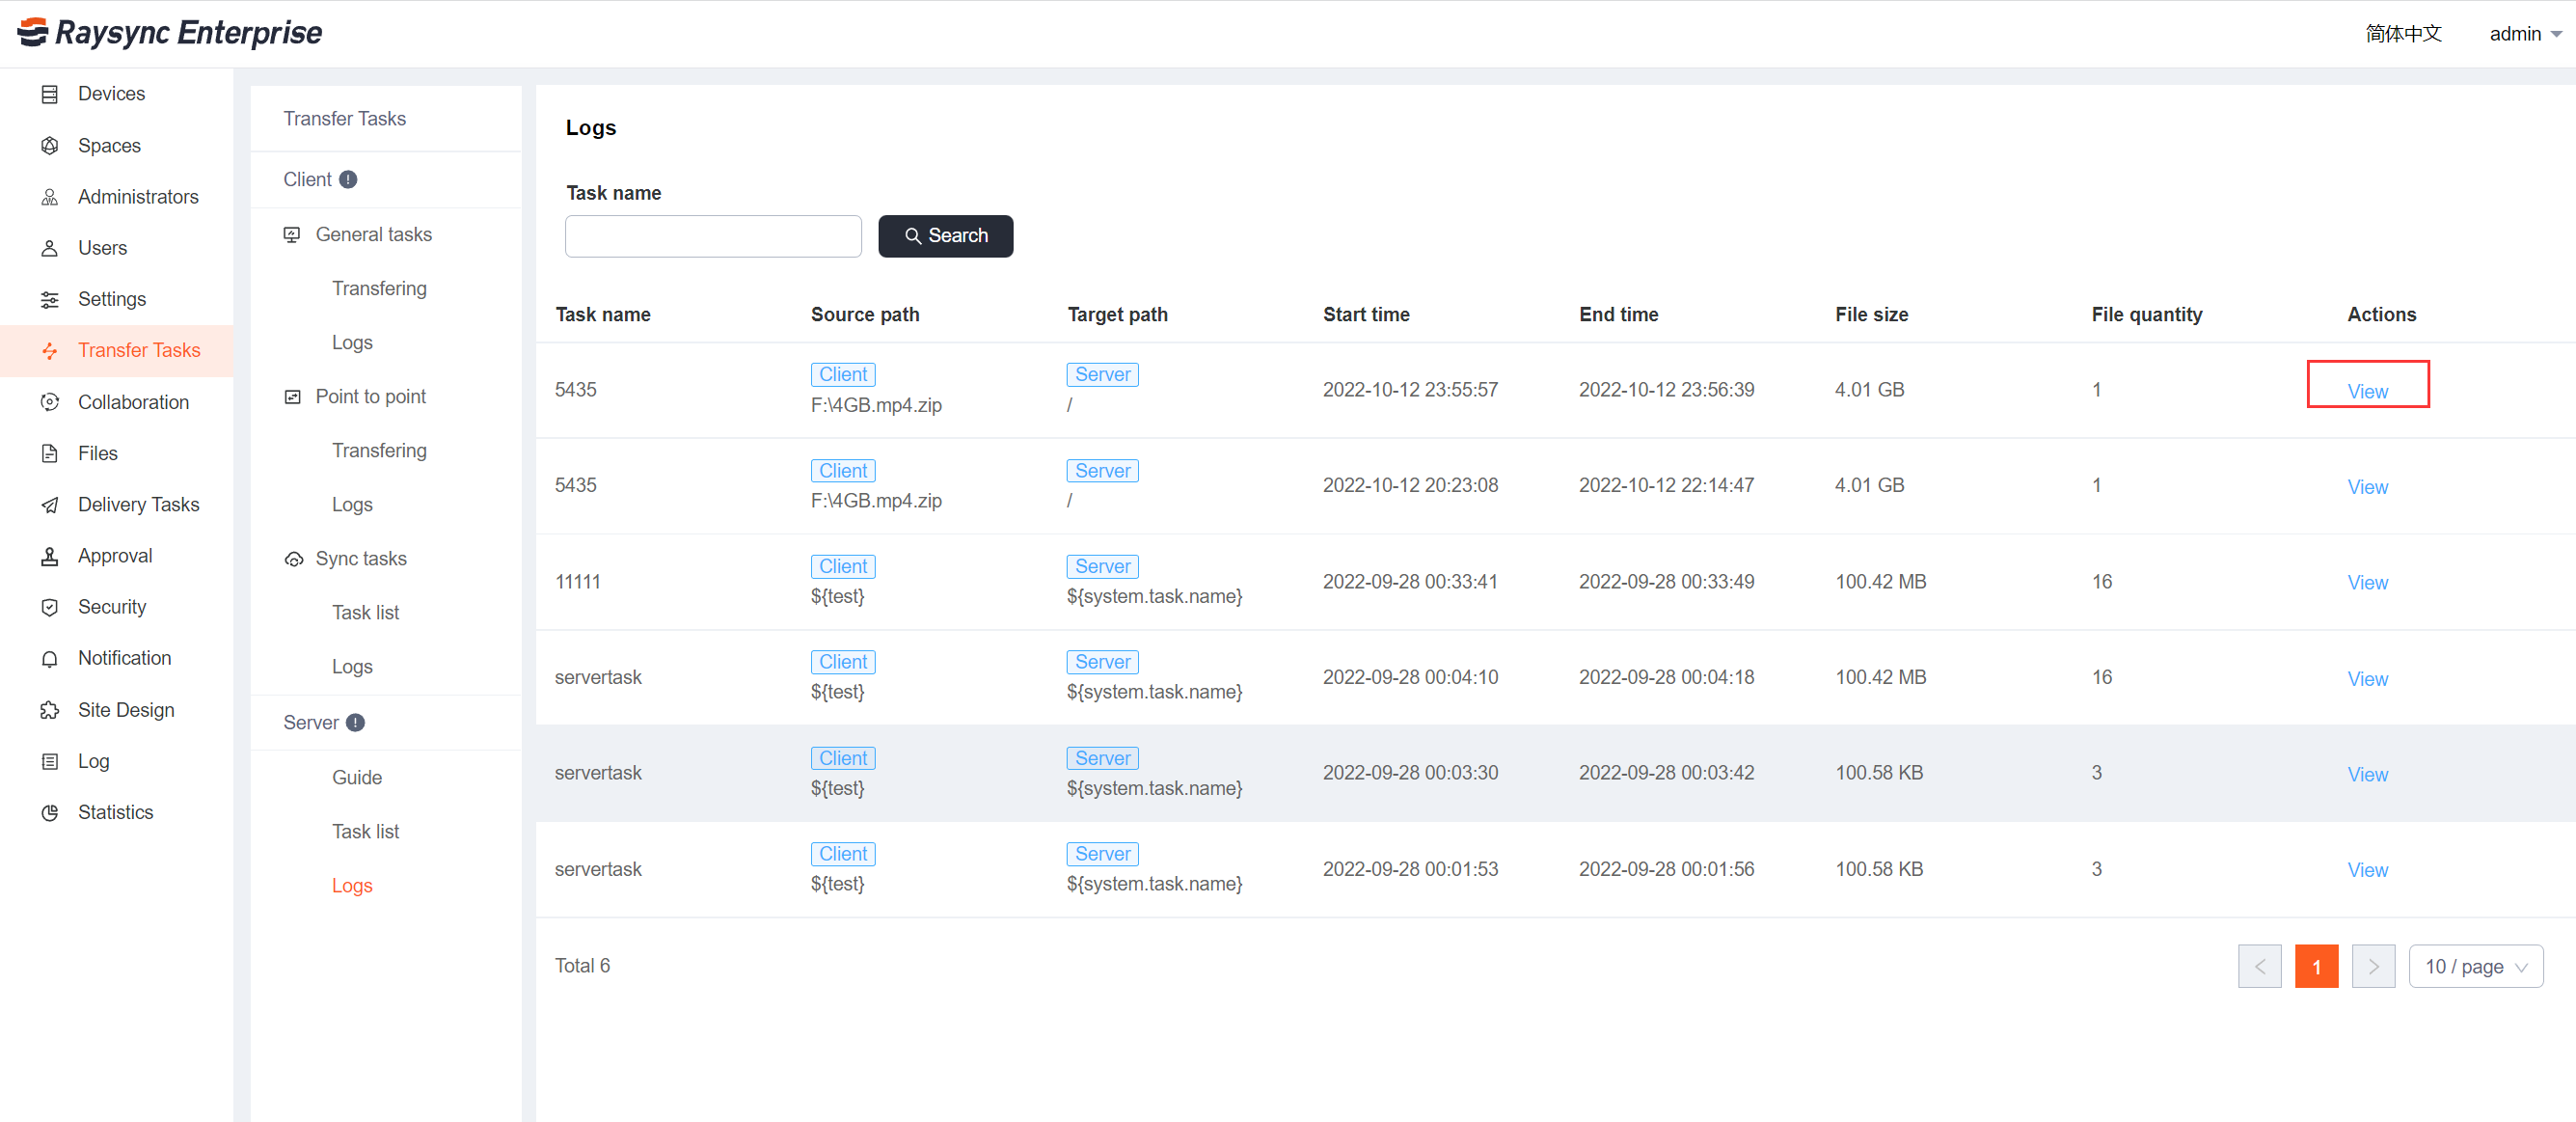
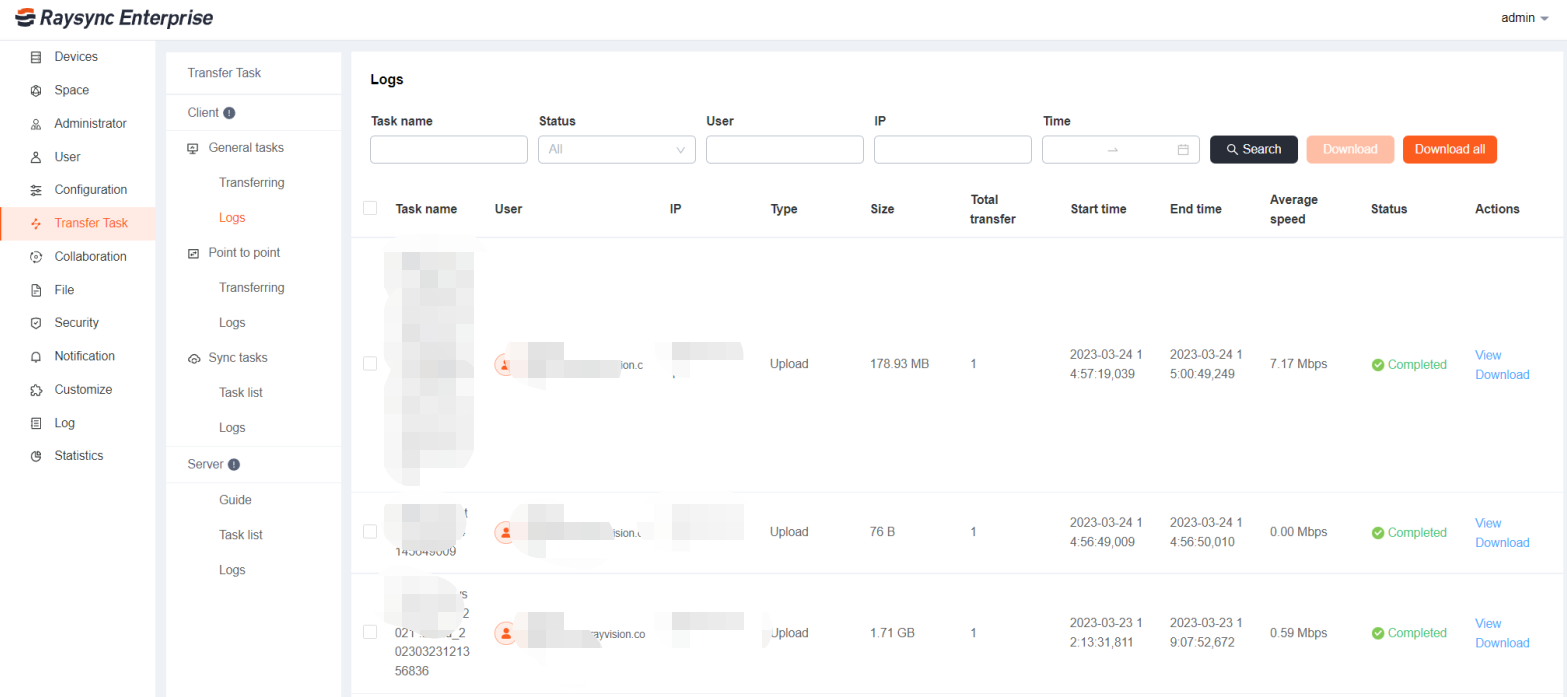
8. Support viewing live web page transfer and web page transfer logs
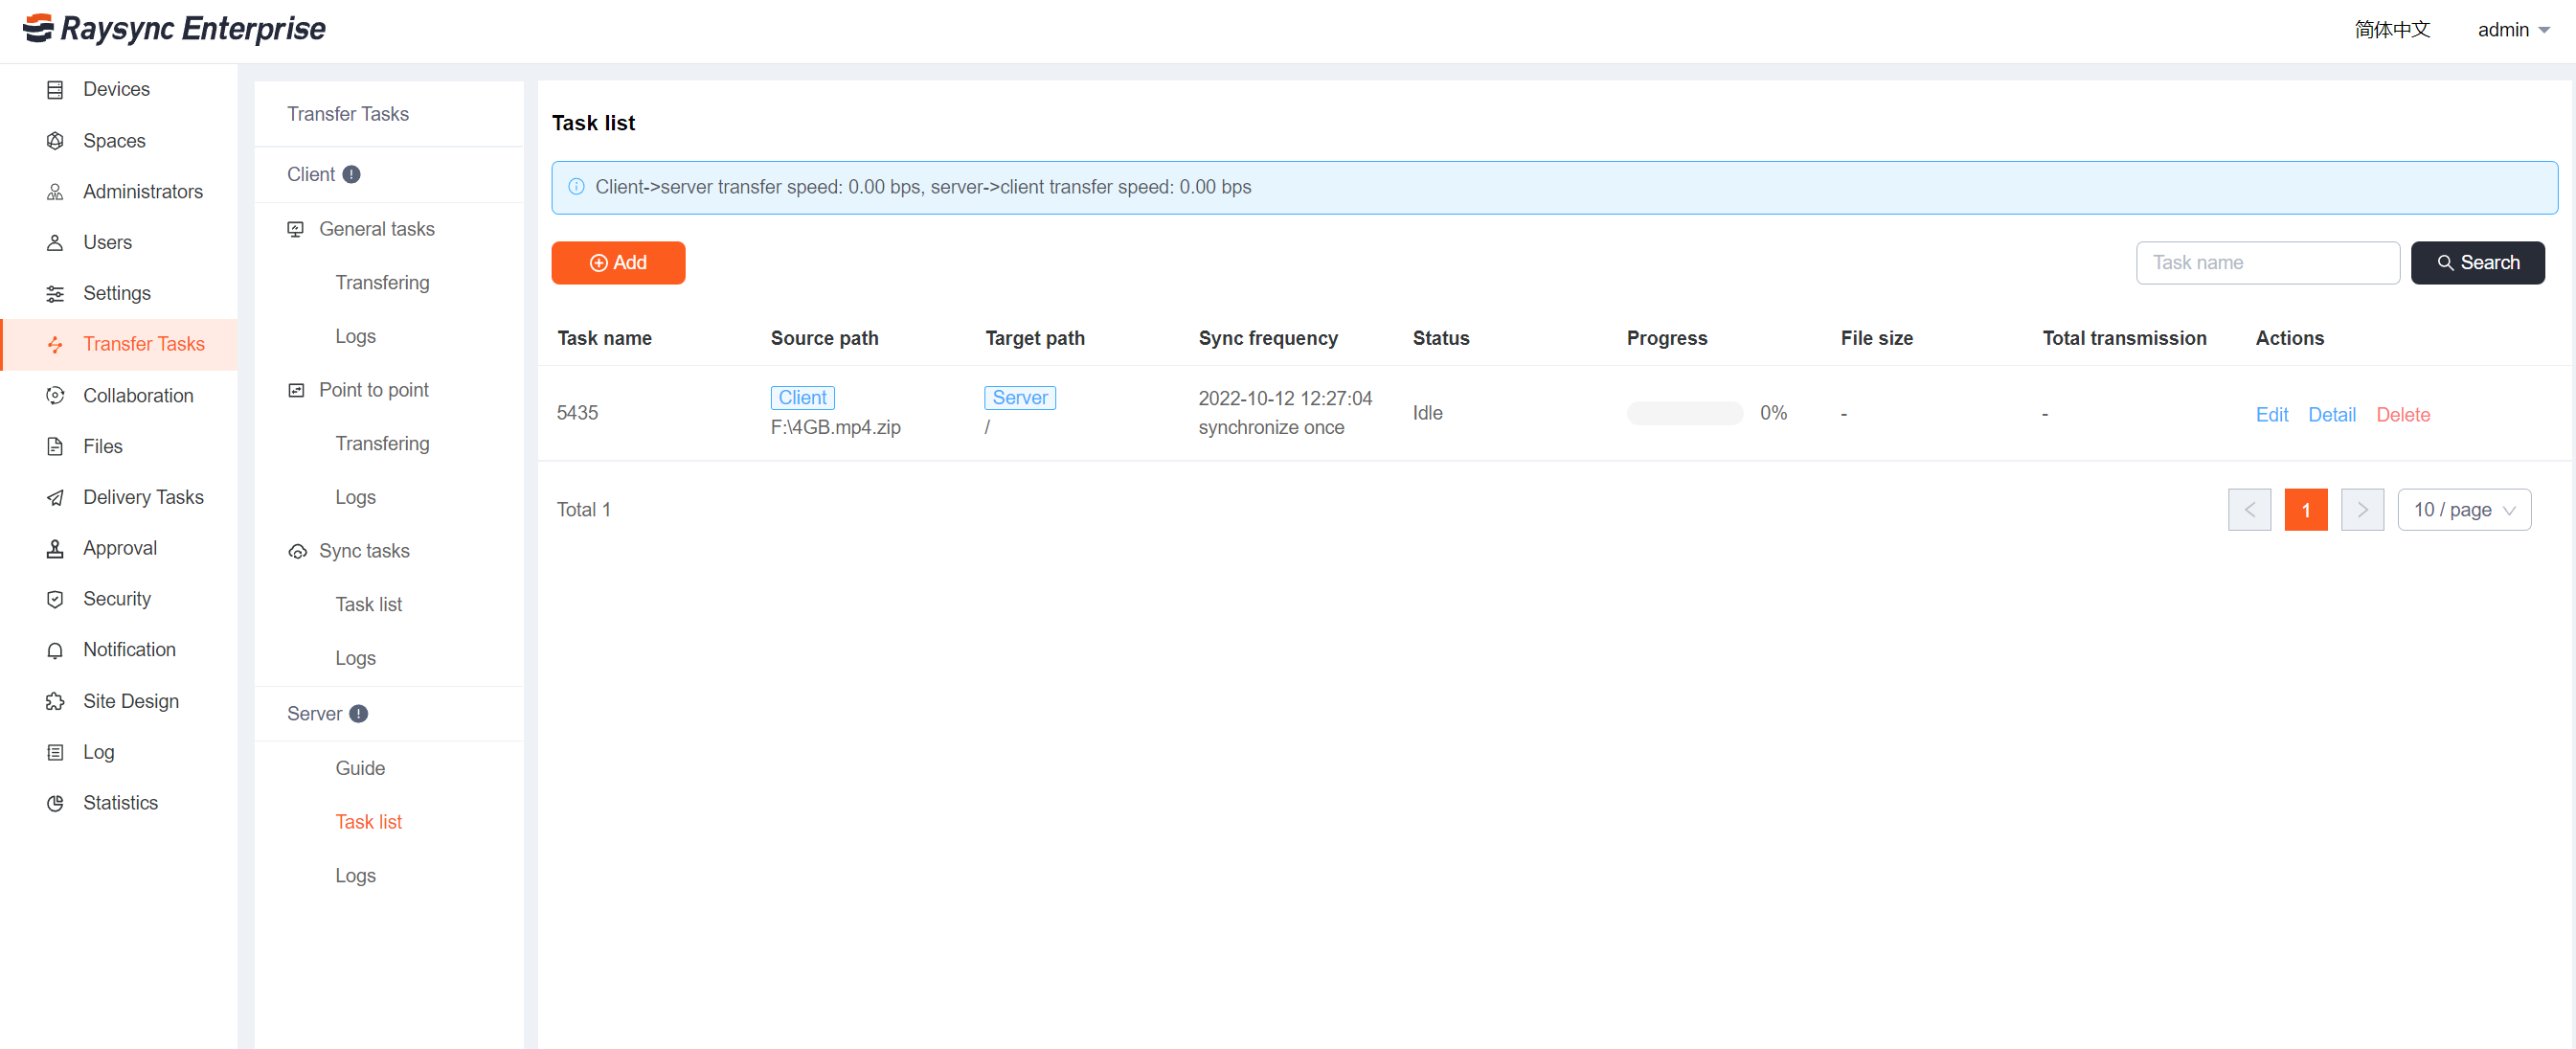
9. Synchronization tasks and delivery tasks support disabling/enabling
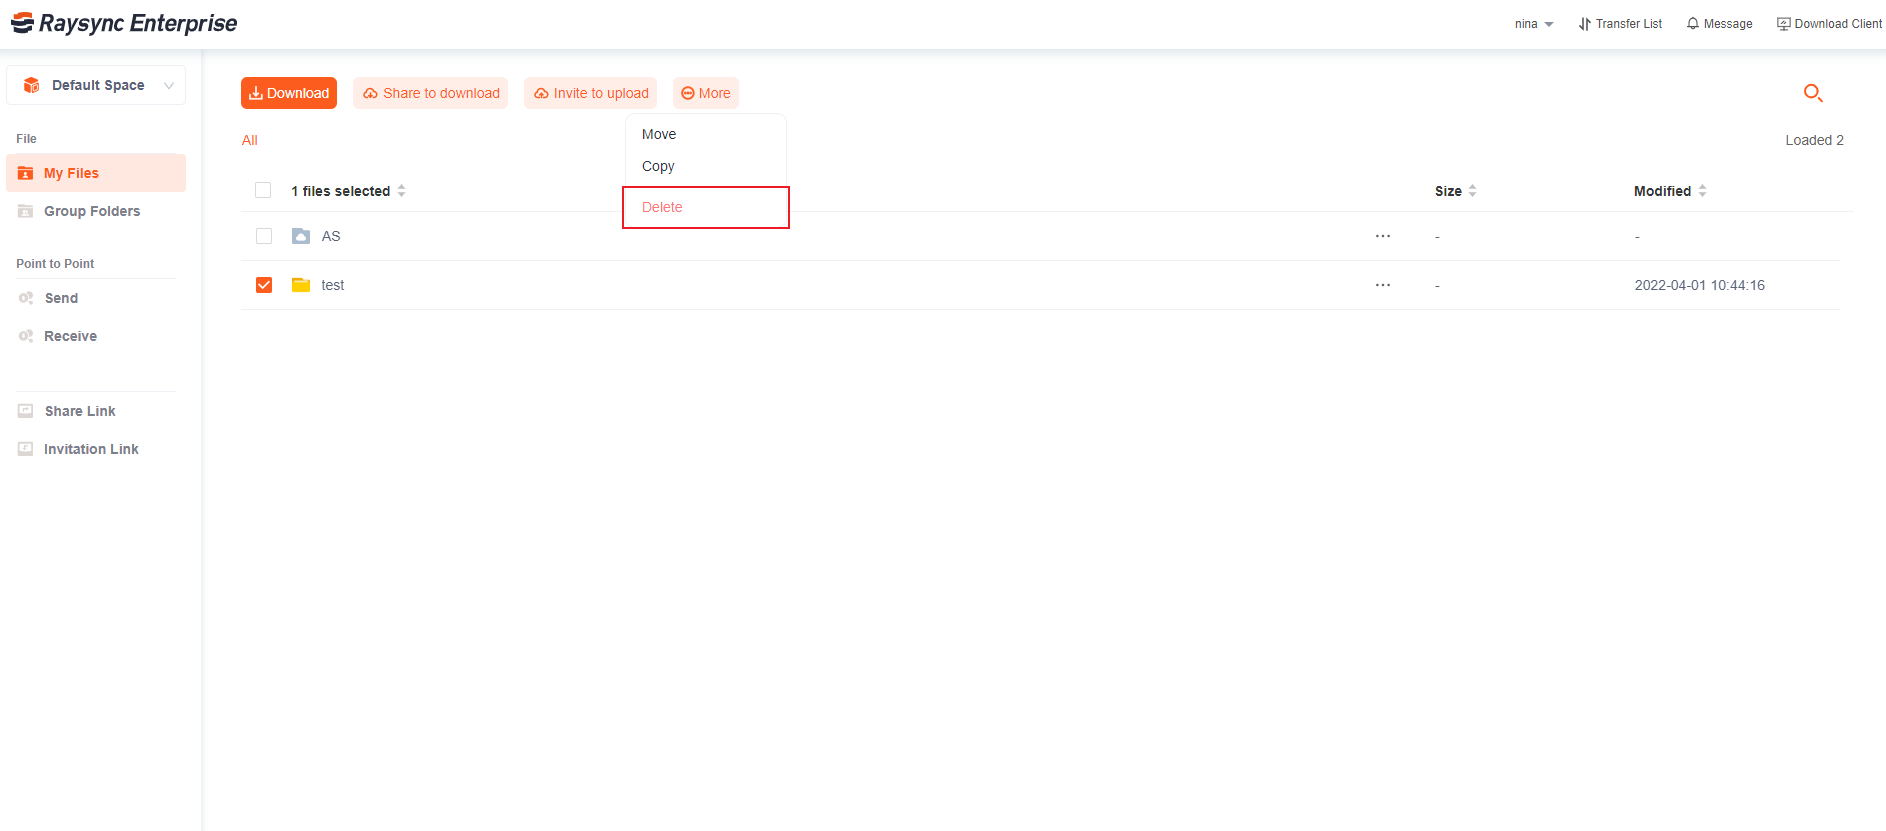
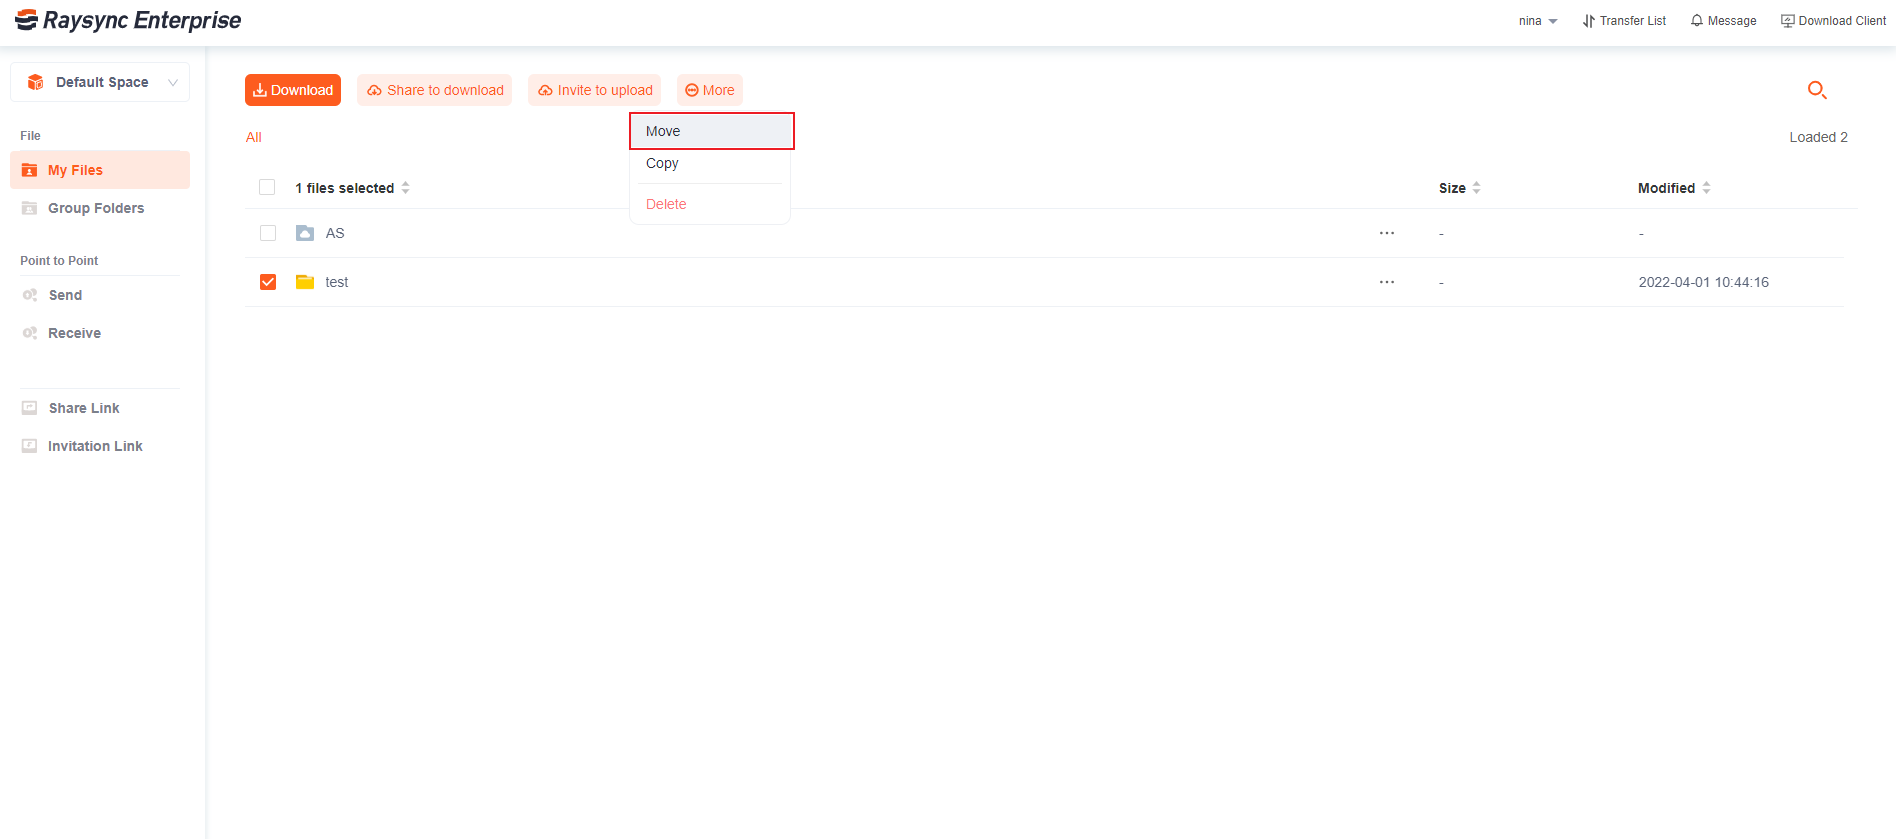
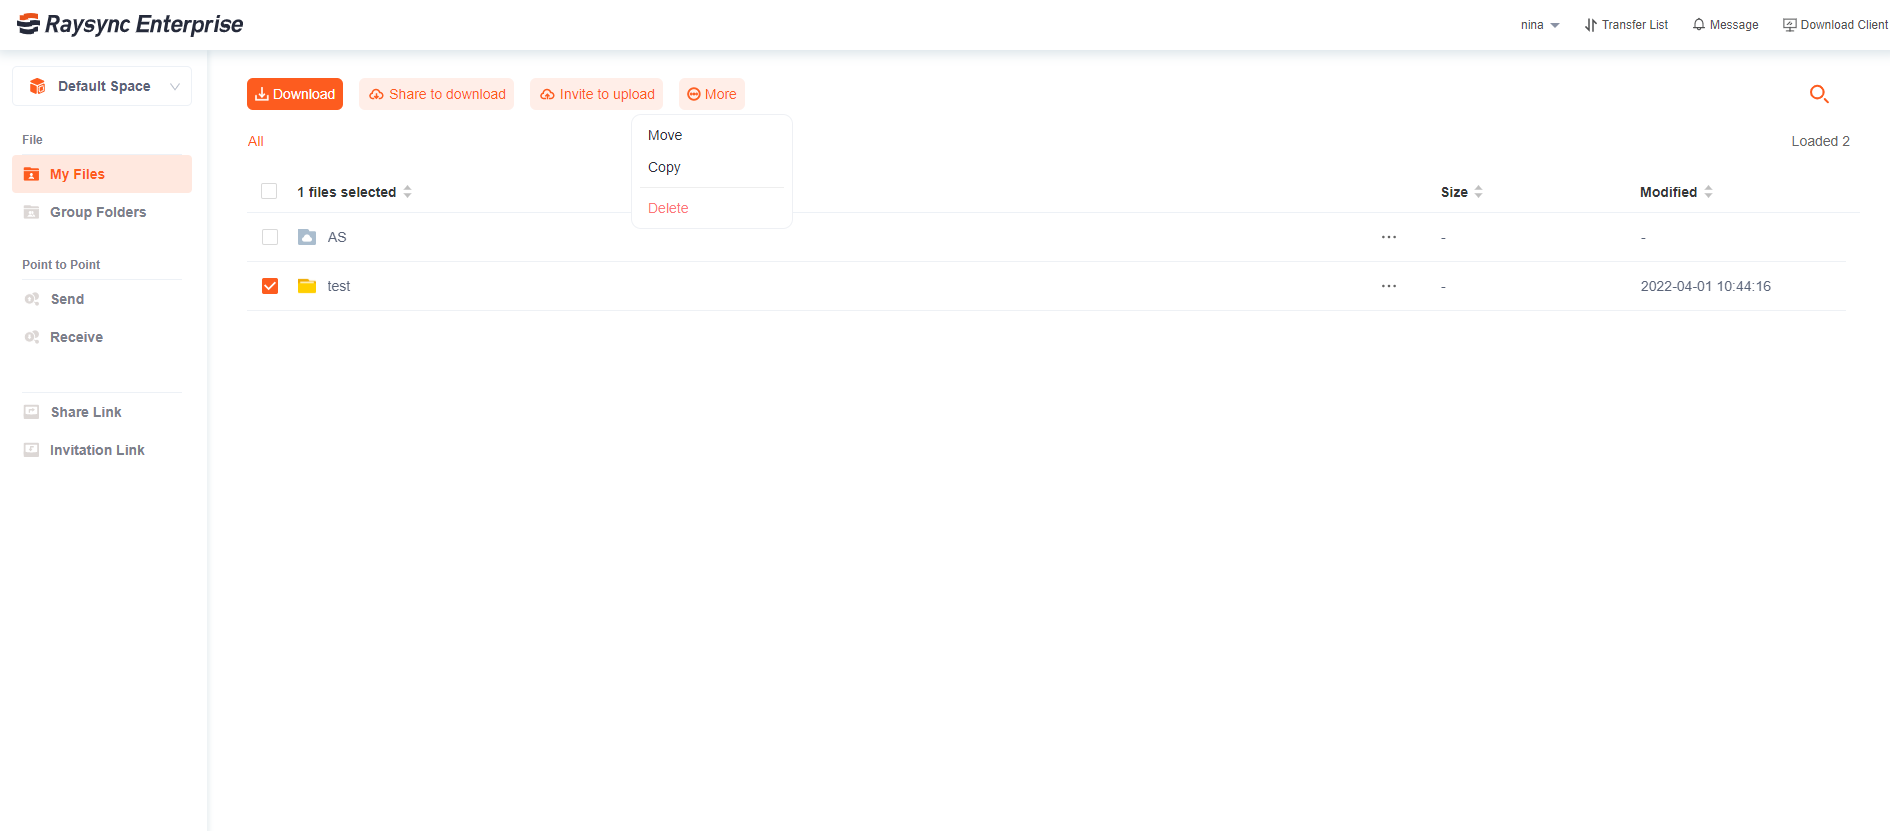
11. Synchronous upload supports moving source files and then deleting them
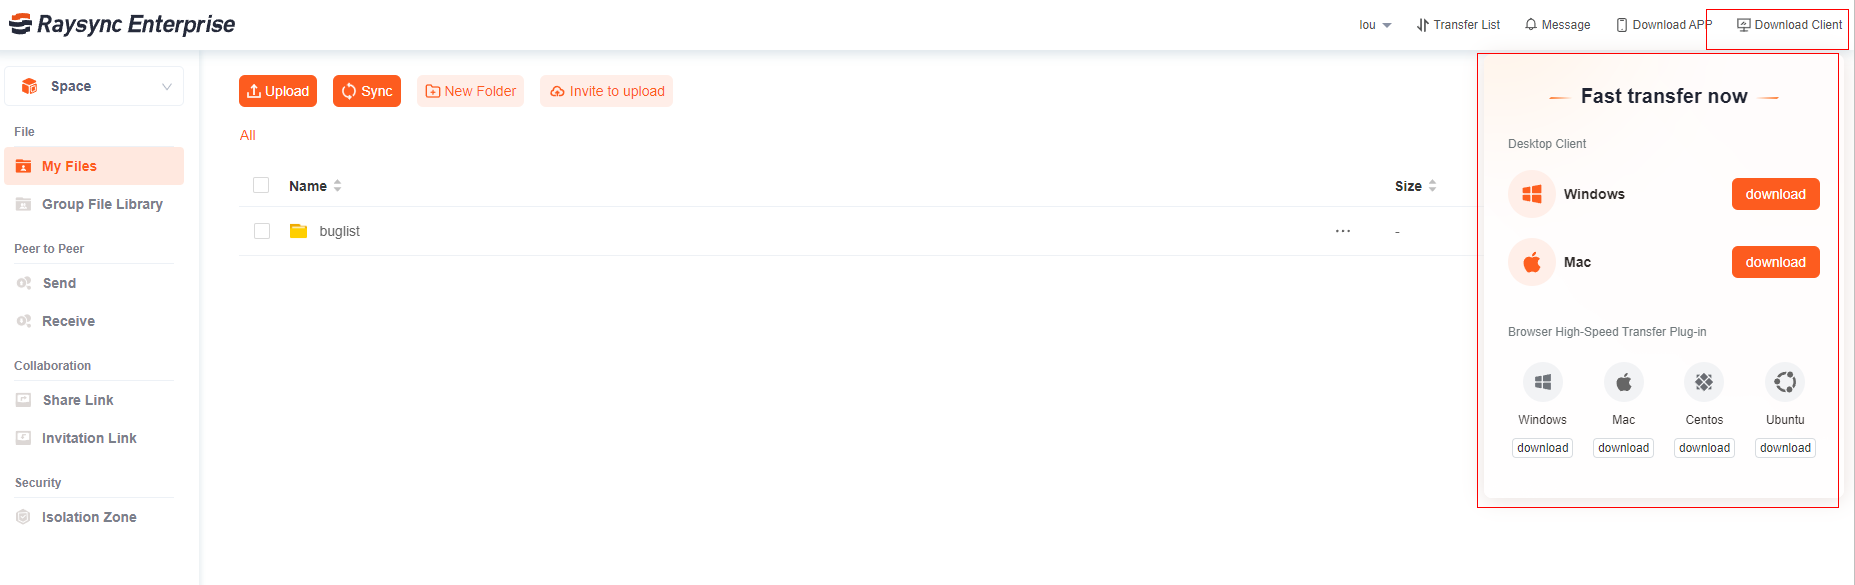
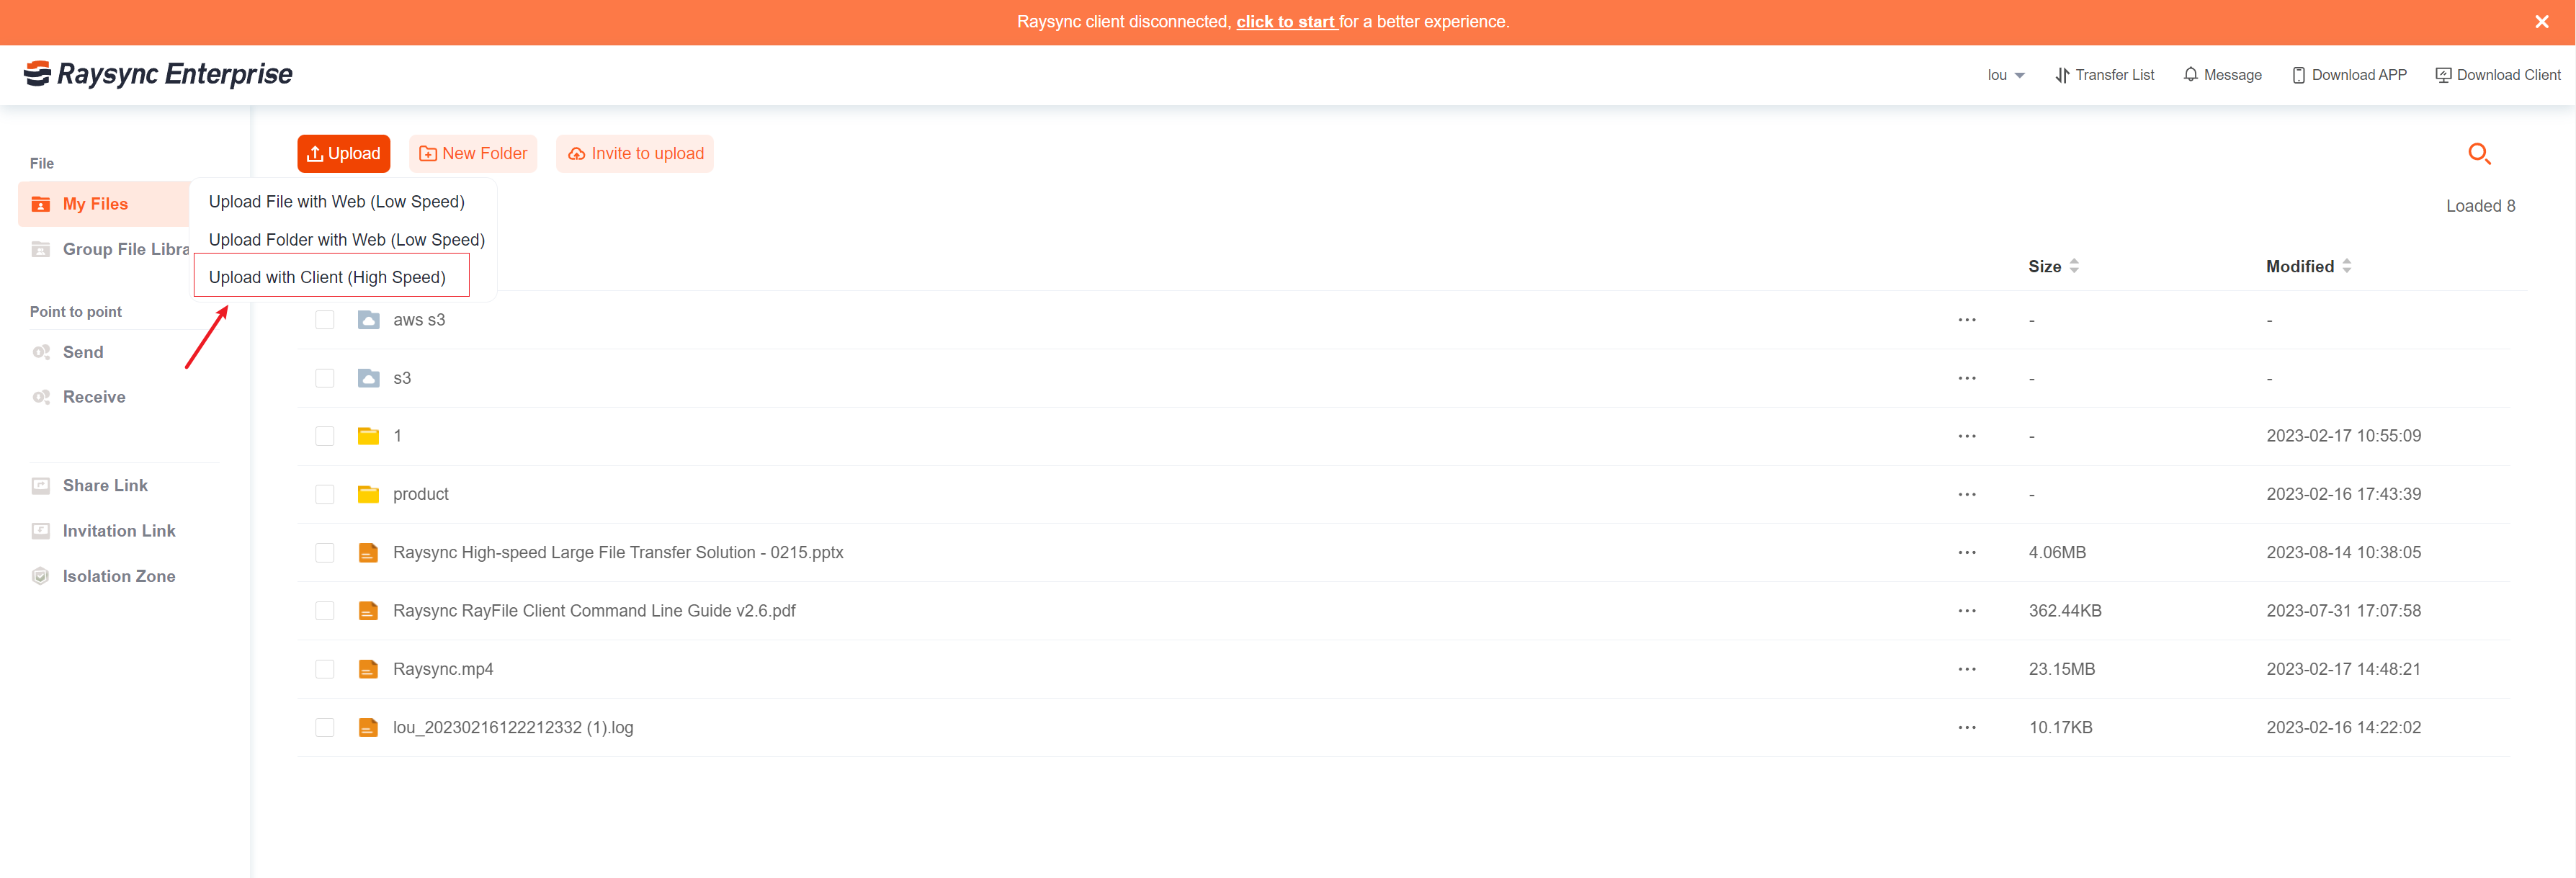
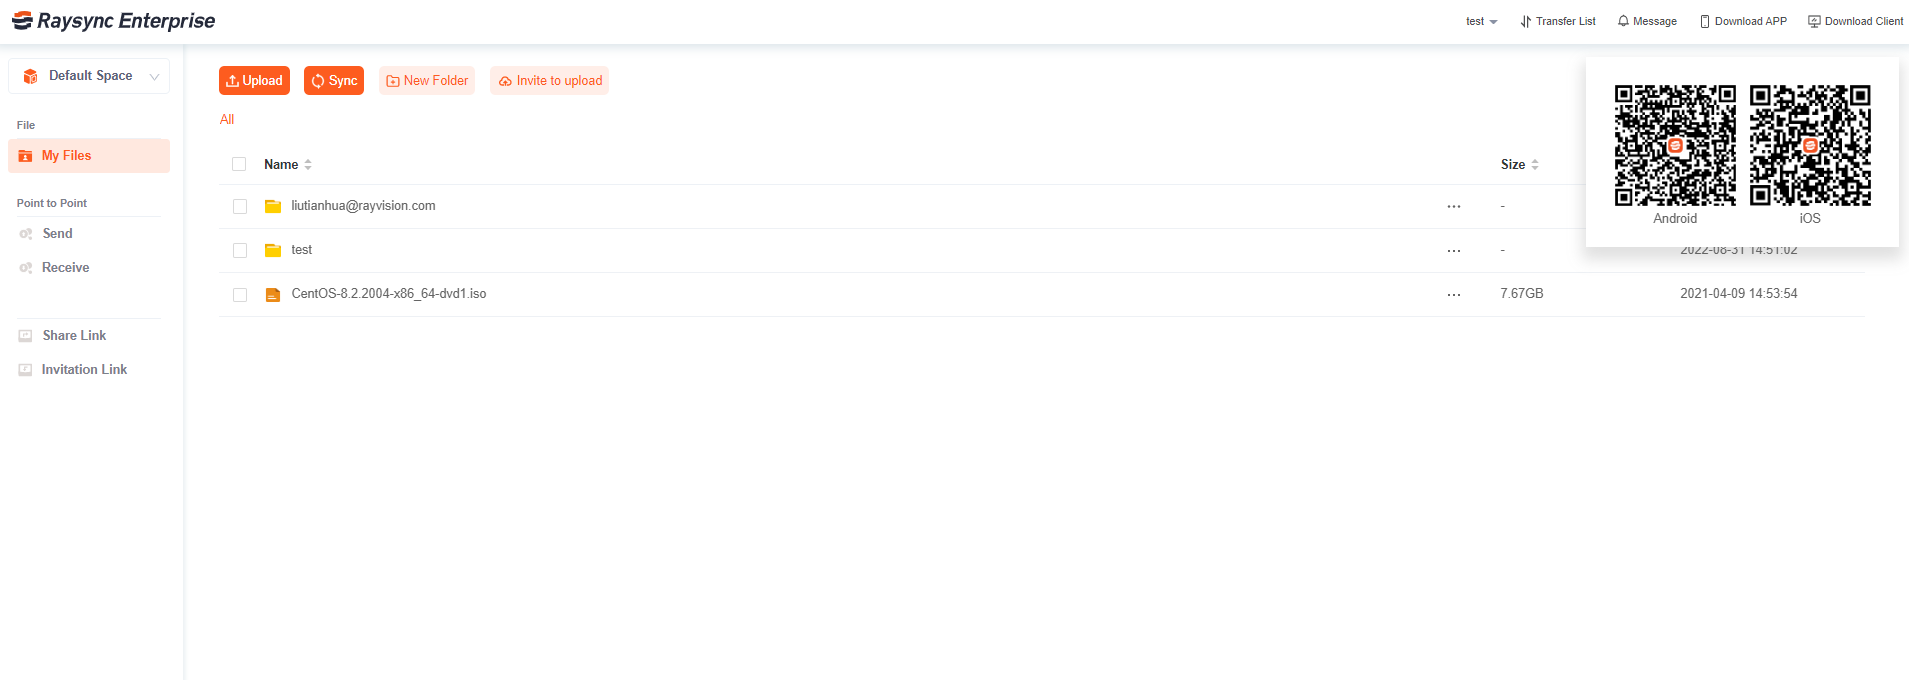
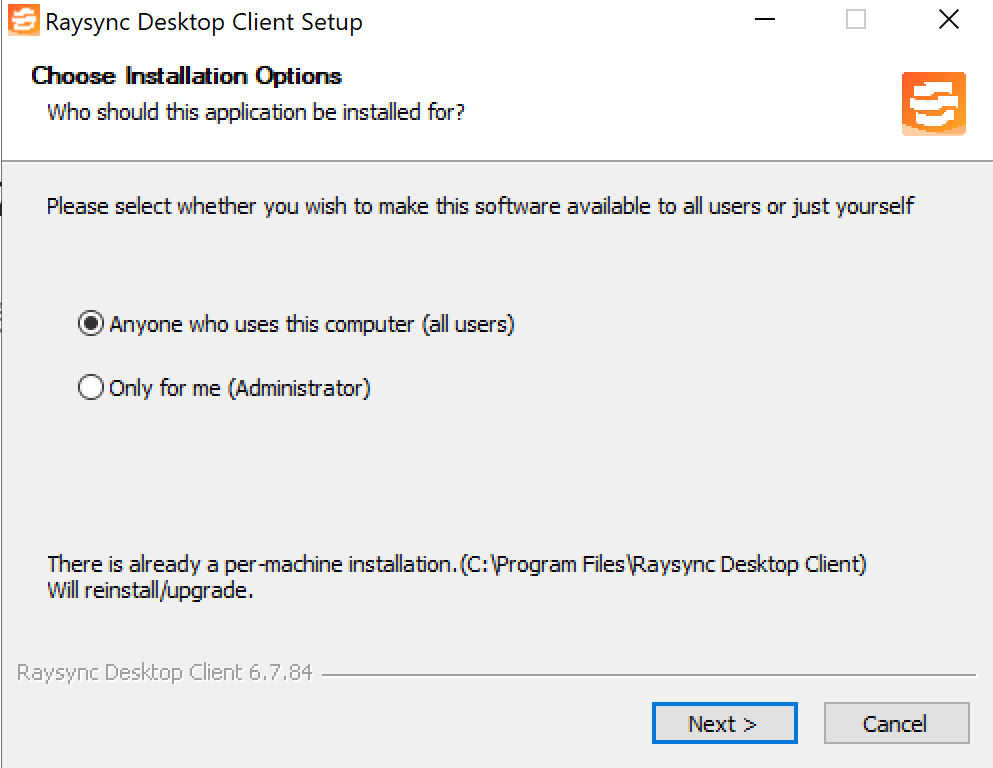
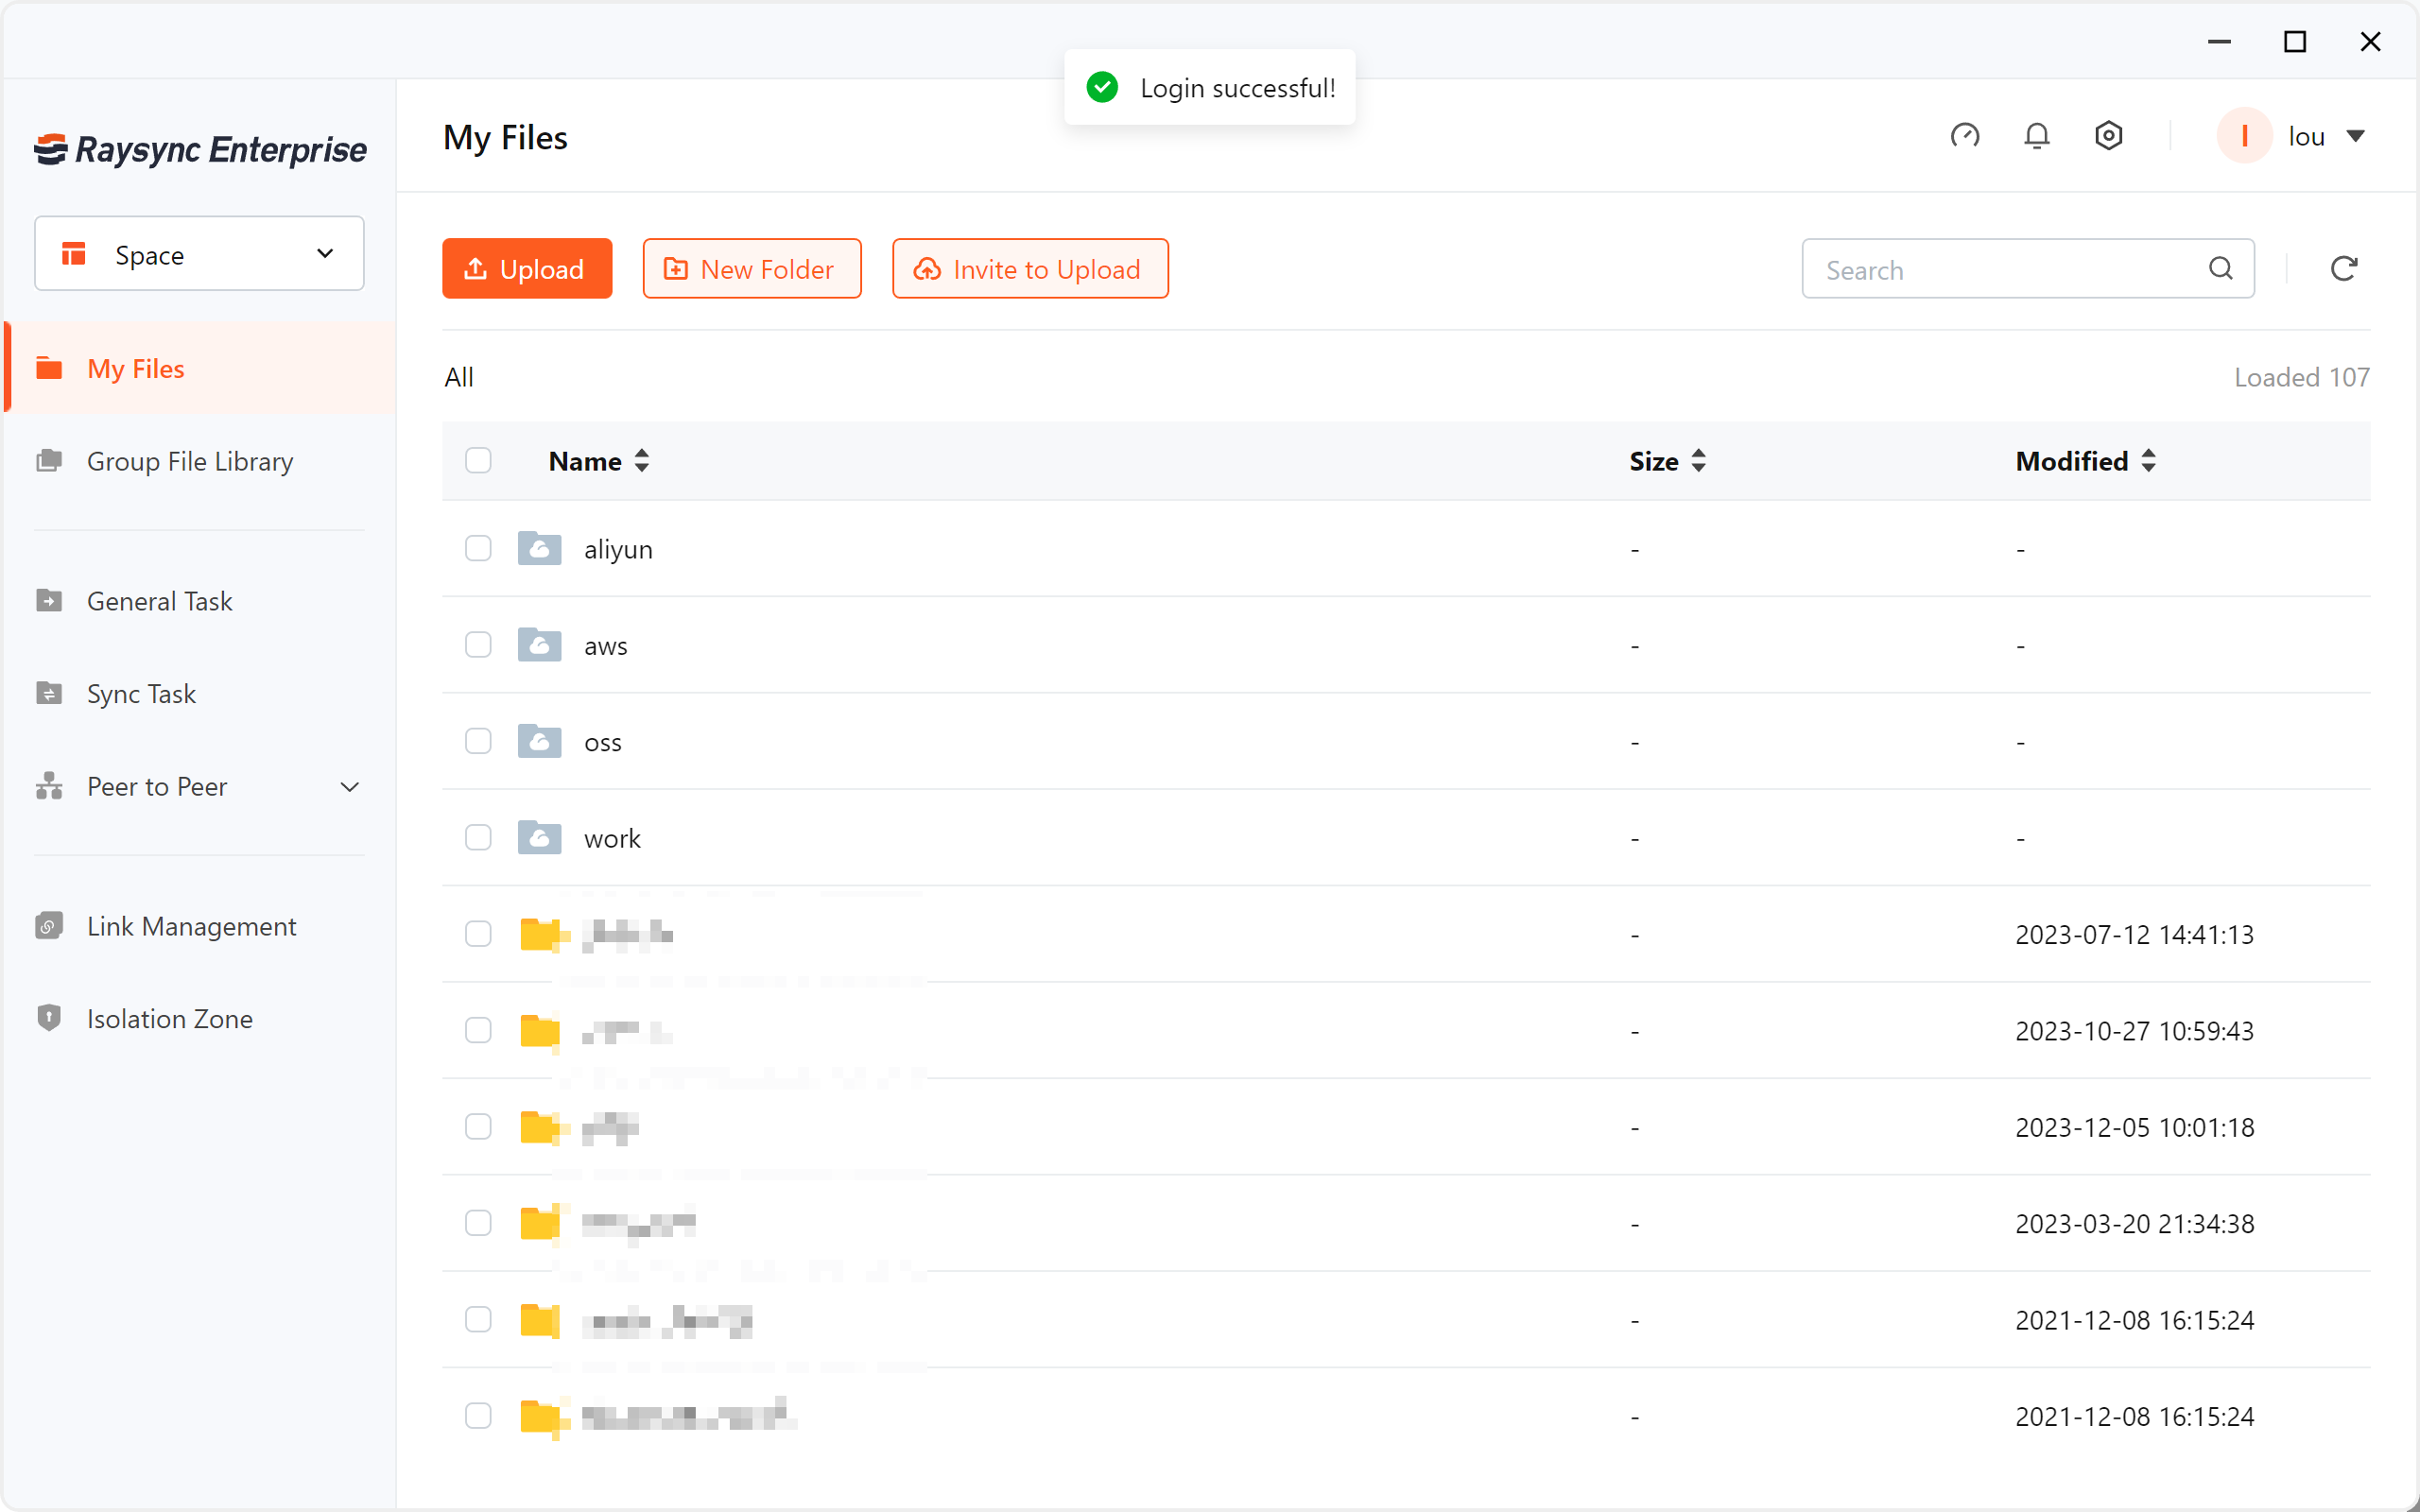
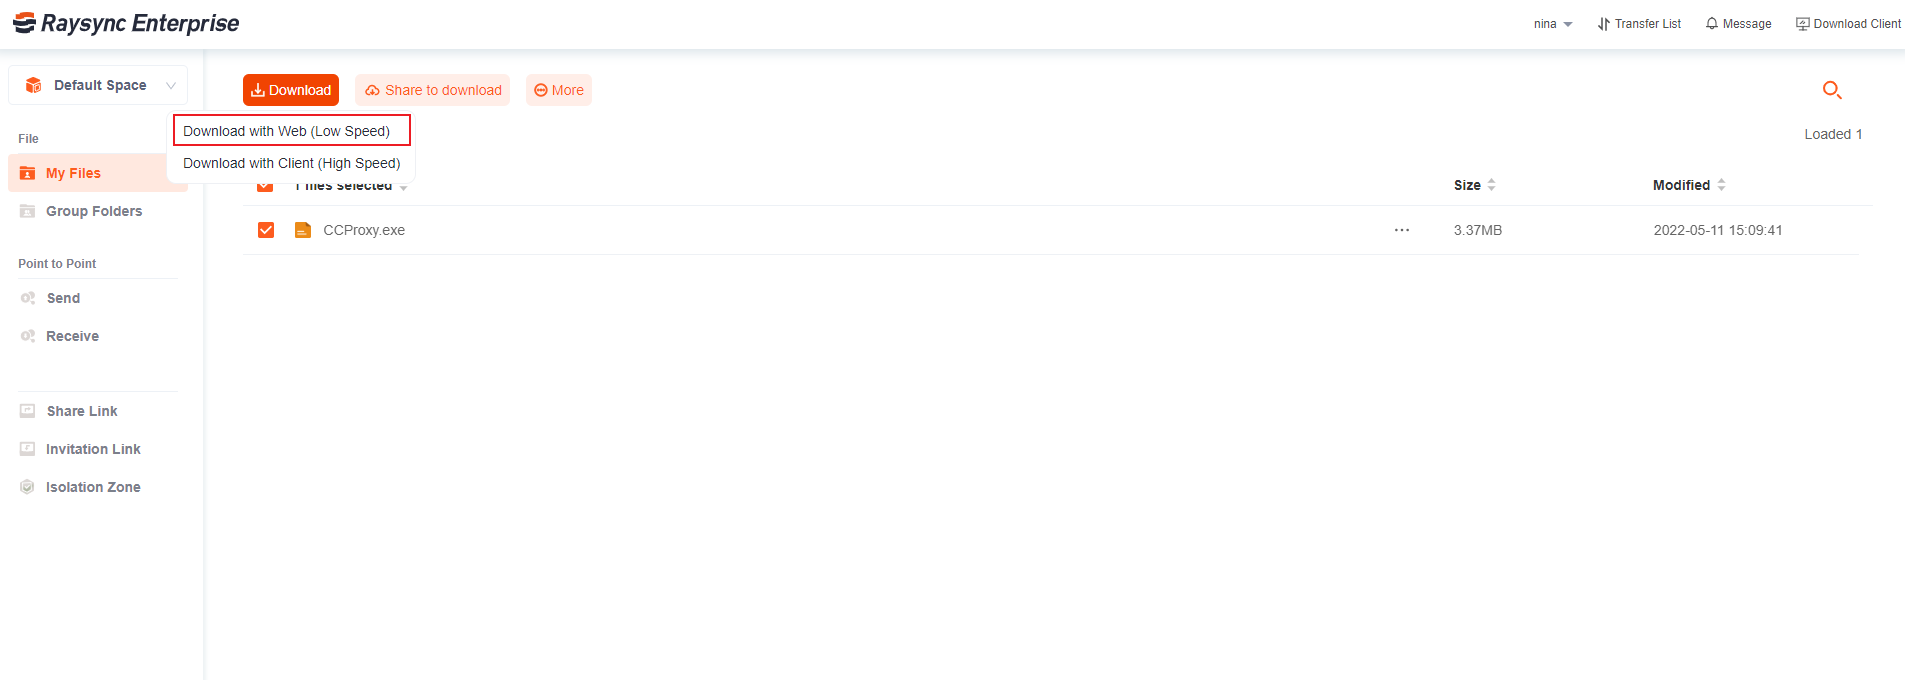
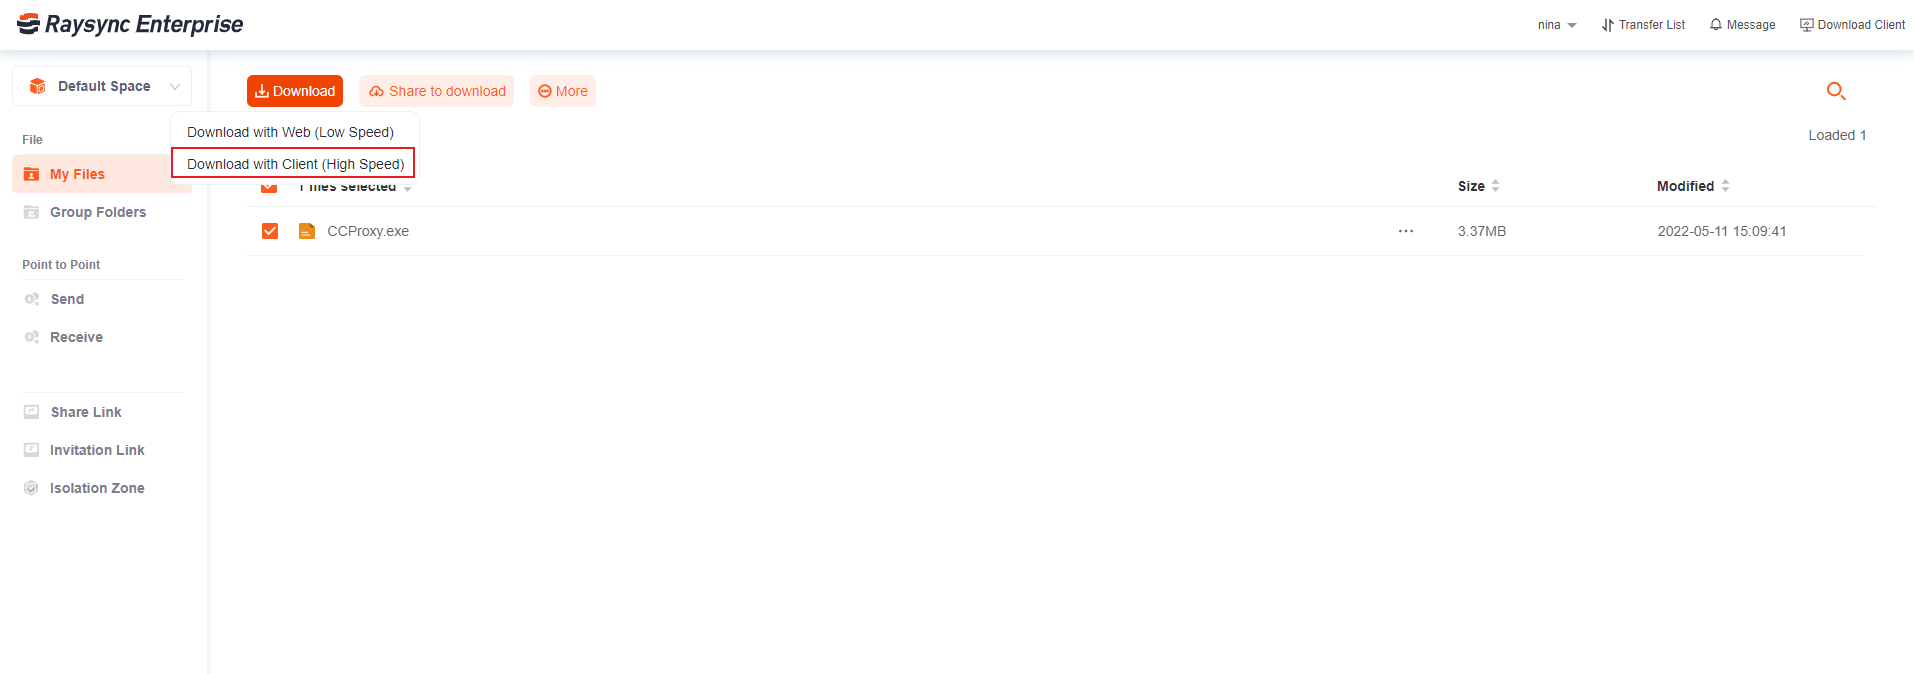
12. Support PC desktop client download, no need to use web to experience high-speed transfer
v6.7.8.2
Updated: 2023-9-19
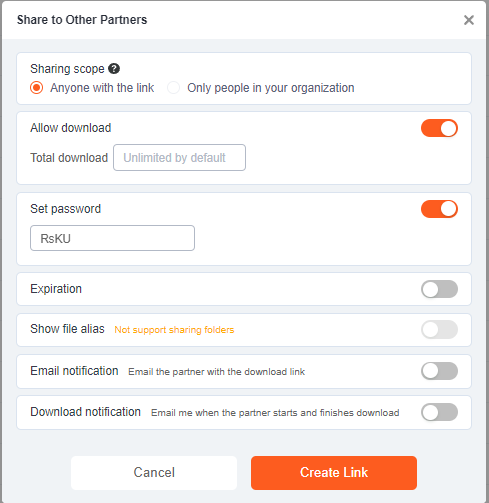
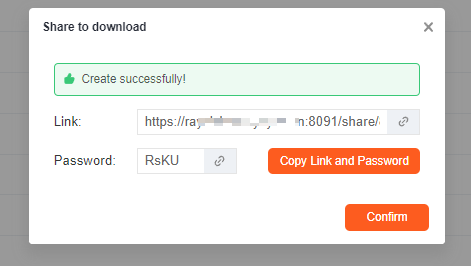
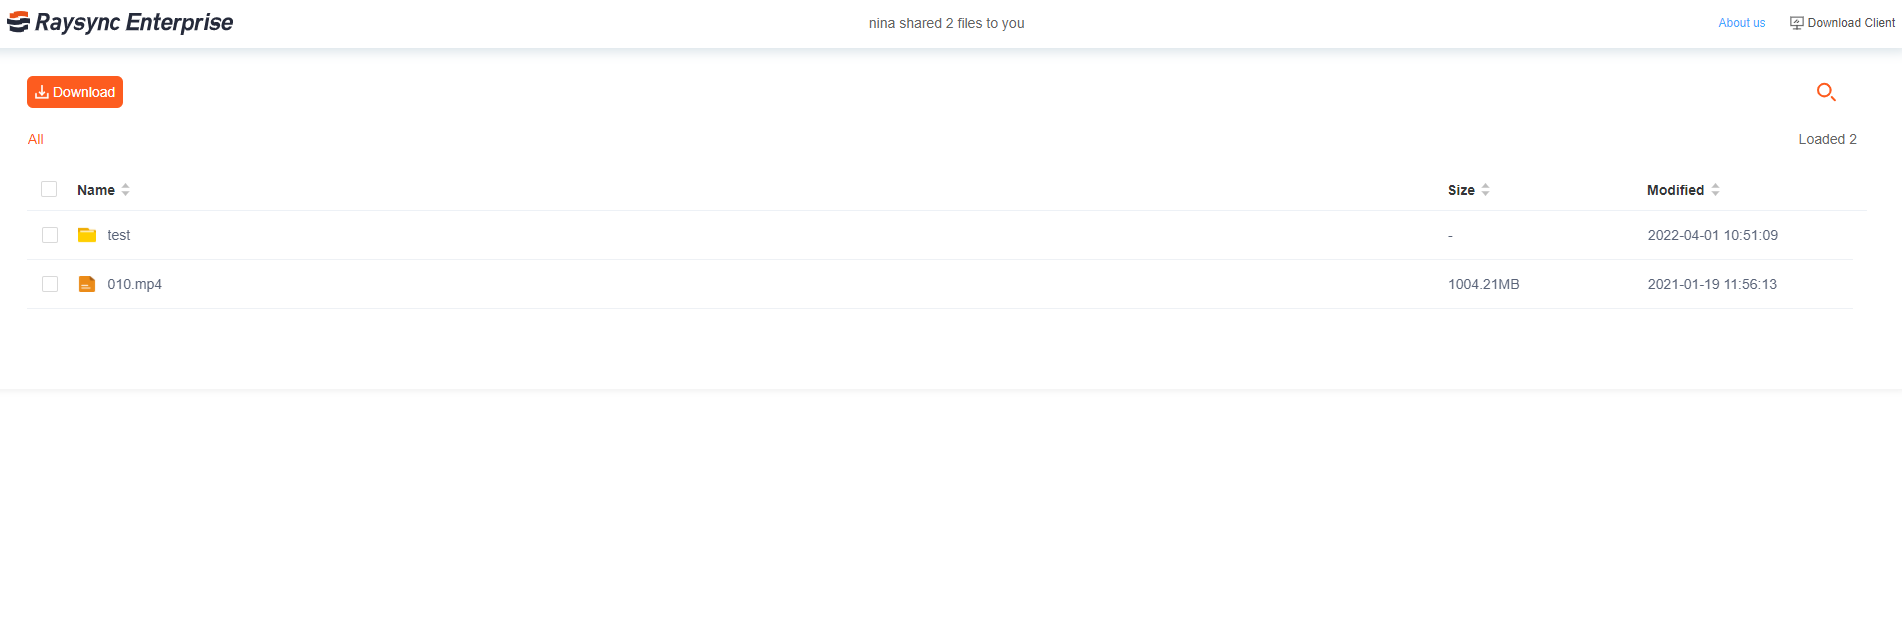
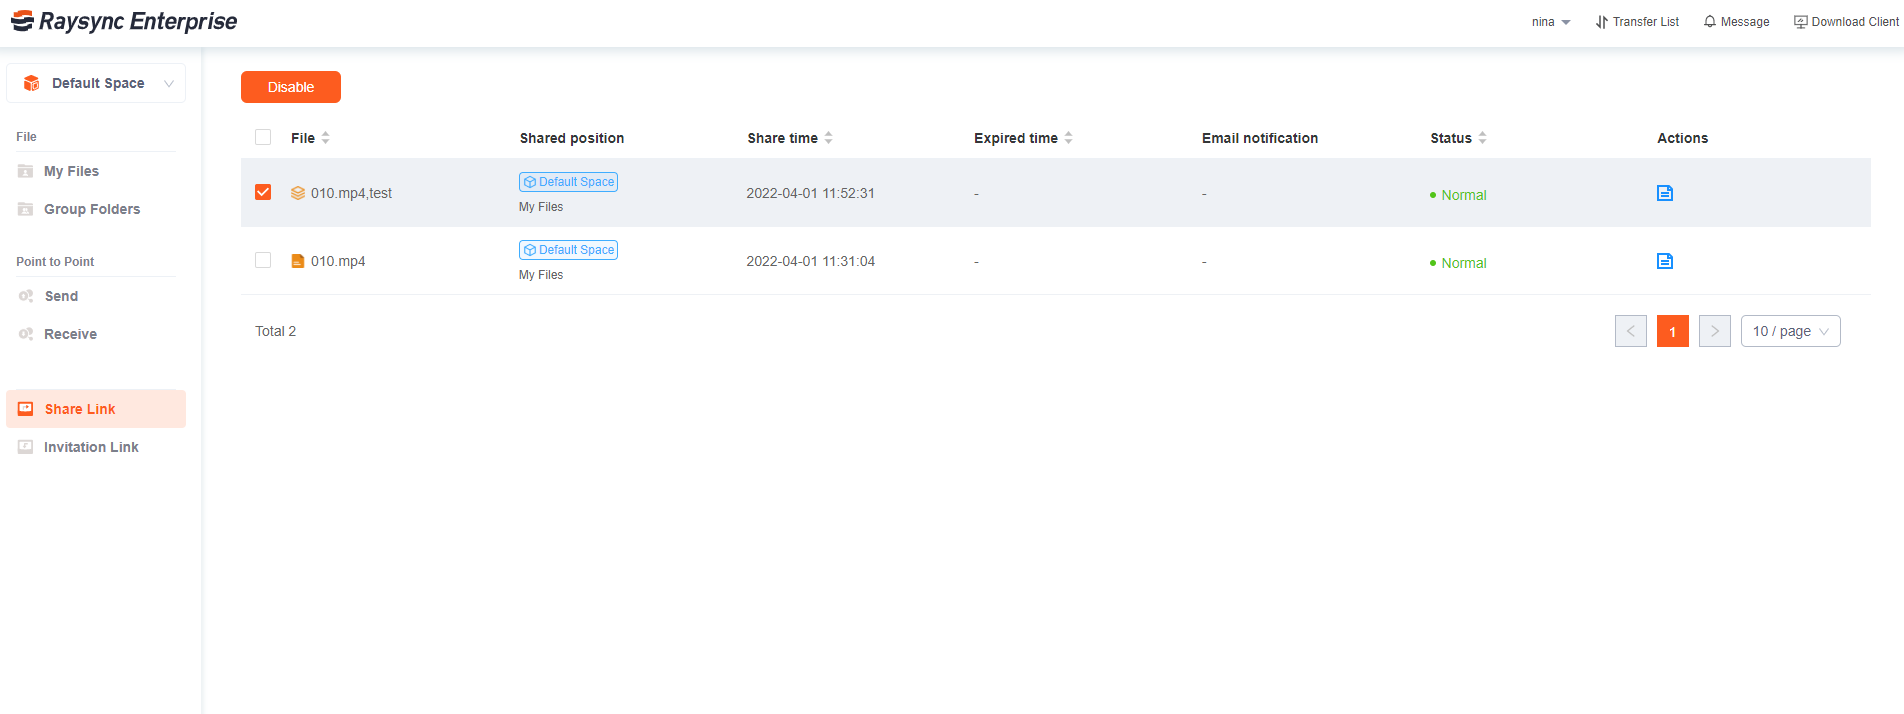
2. Support to set download time on share link and schedule link sharing notification
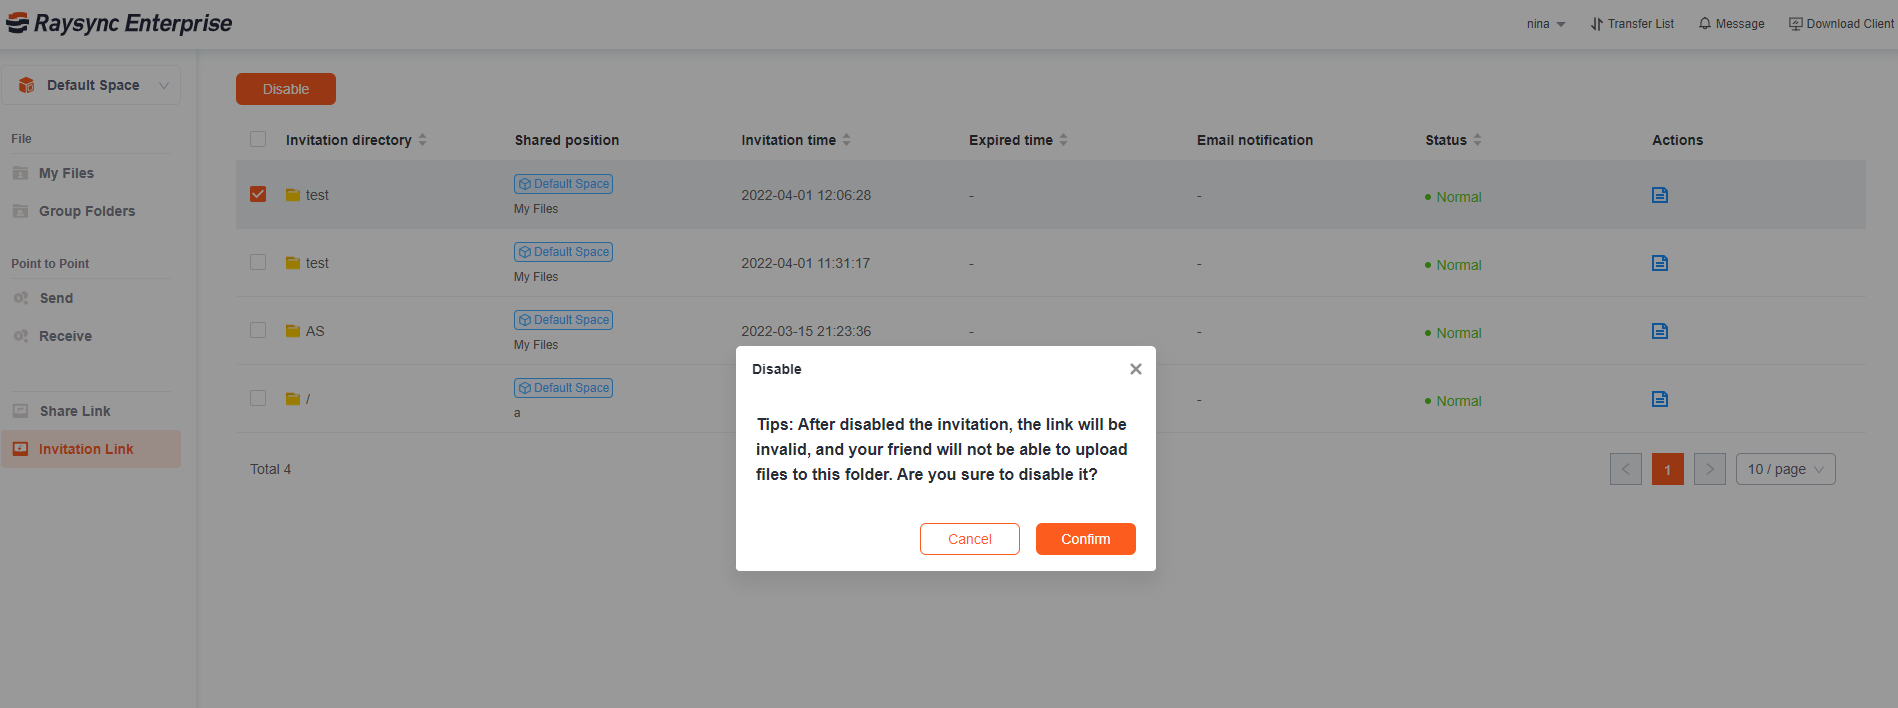
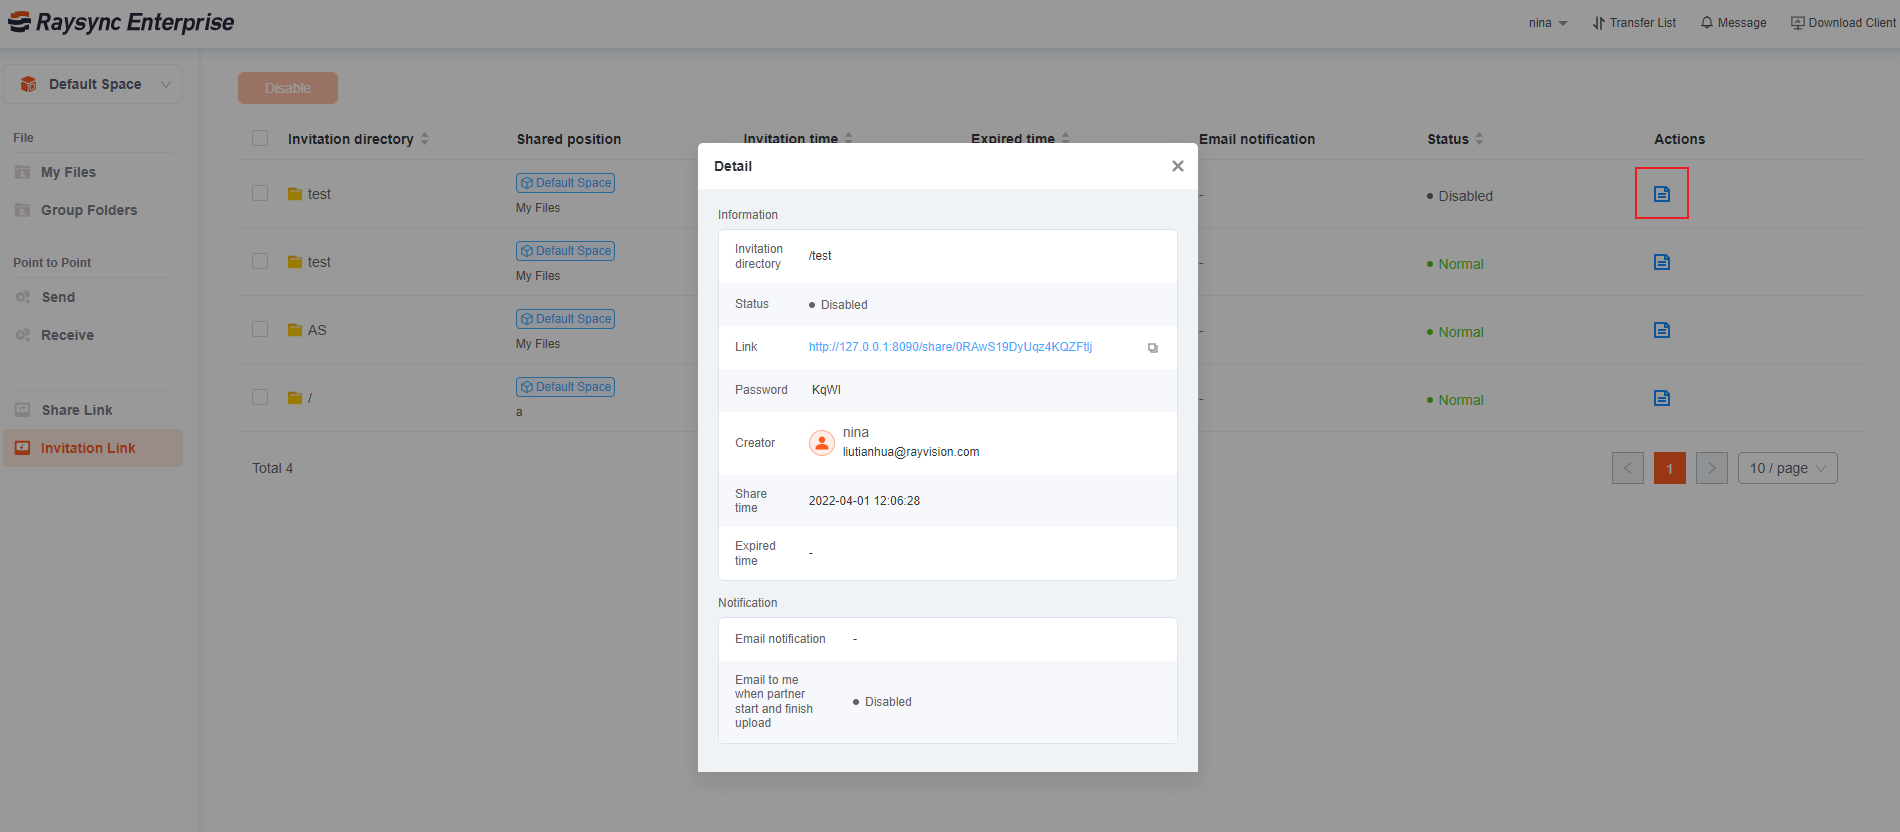
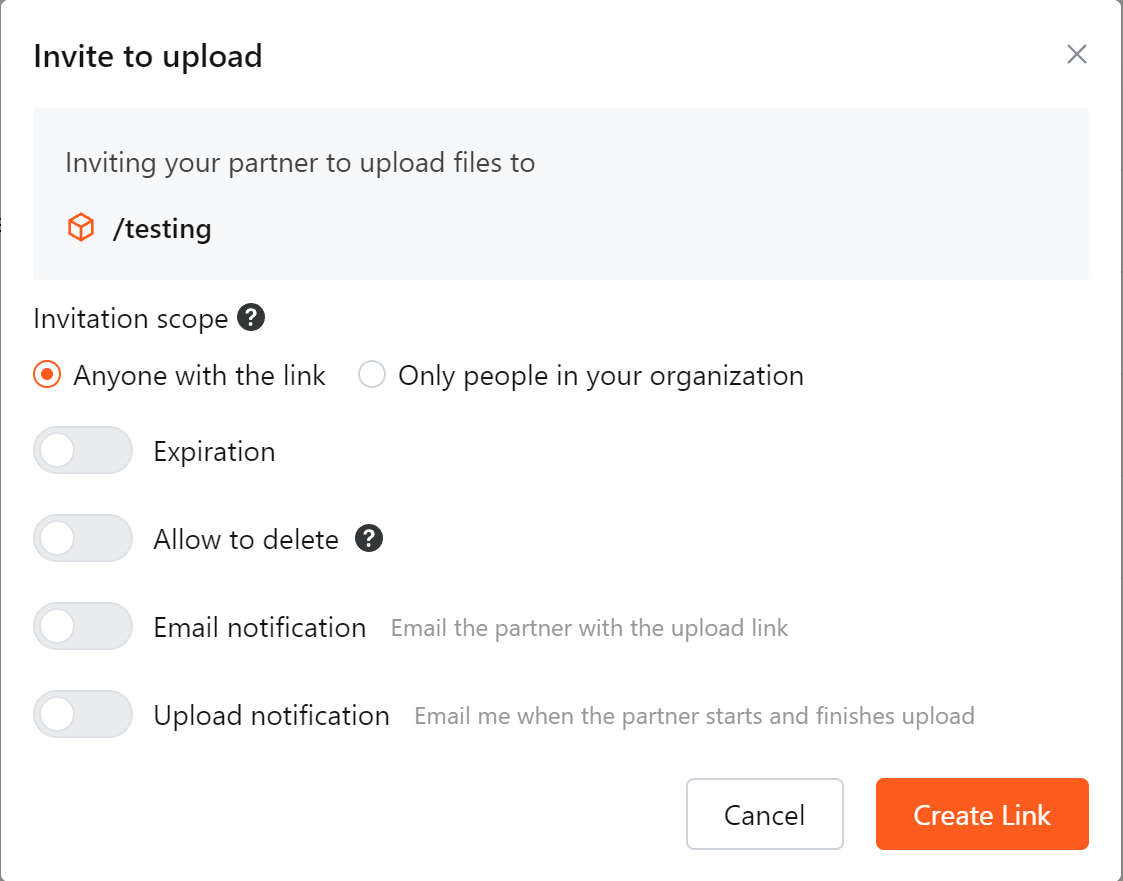
3. Support to allow external users to delete files from the invite link
4. Support to disable the access the user portal or share/invite links
5. Support to preserve the full structure of the source directory when uploading to target
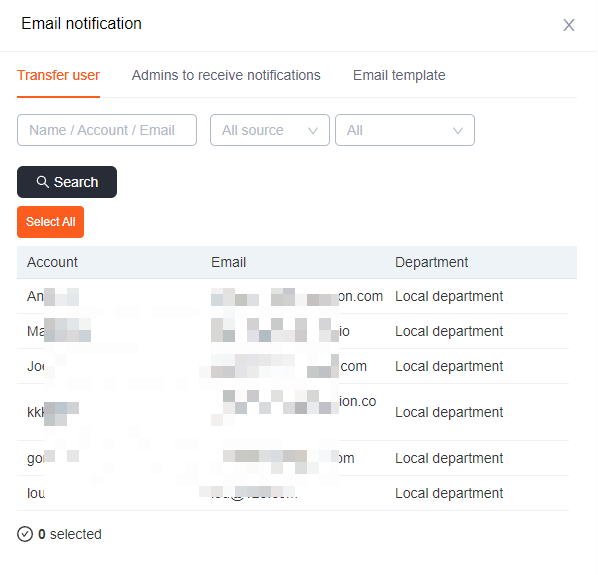
6. Support selected administrators to receive the system notification from selected users
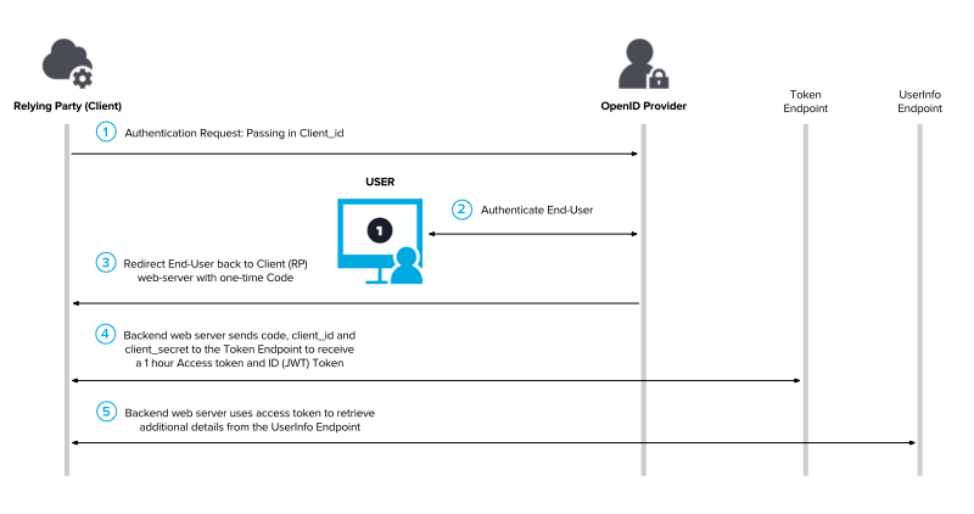
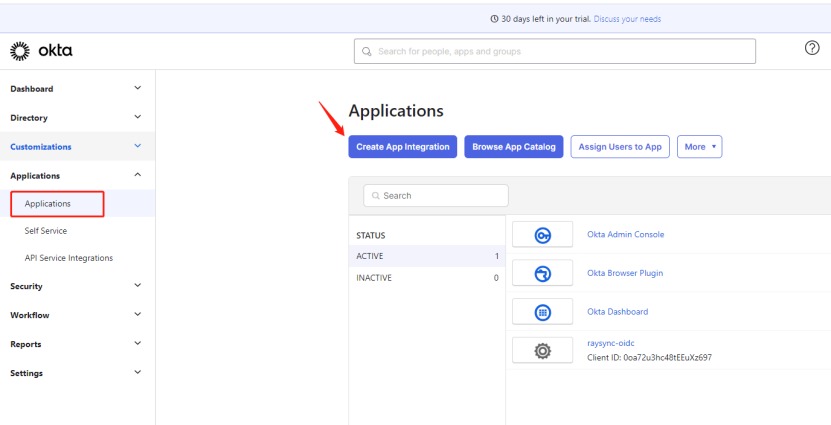
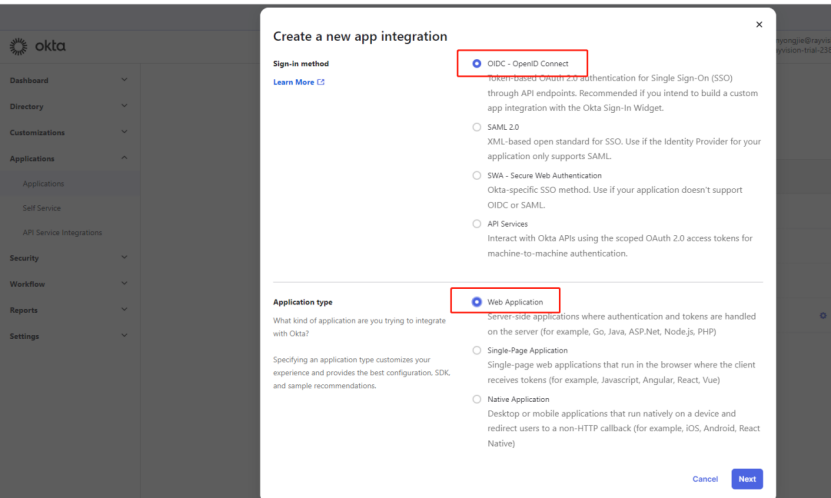
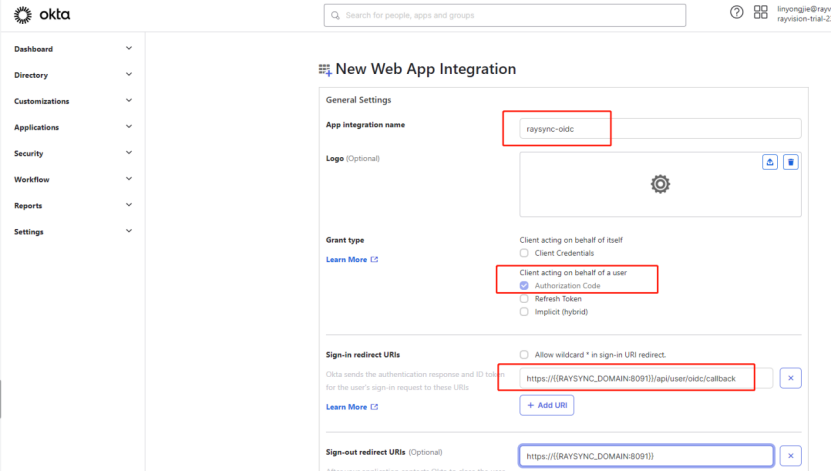
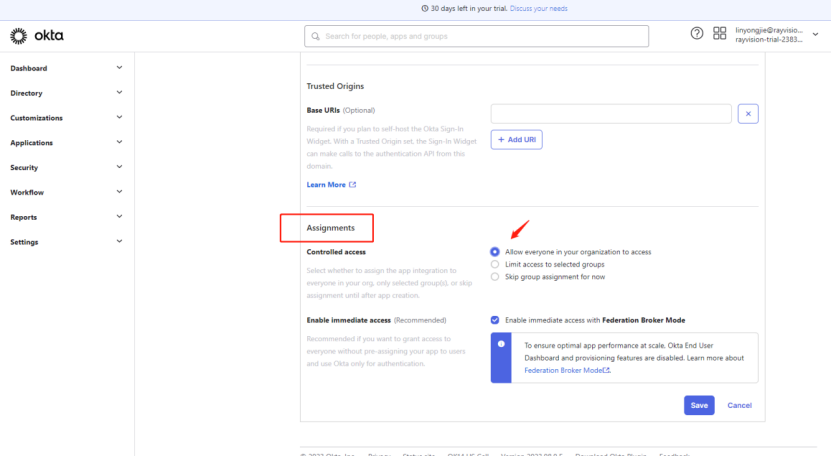
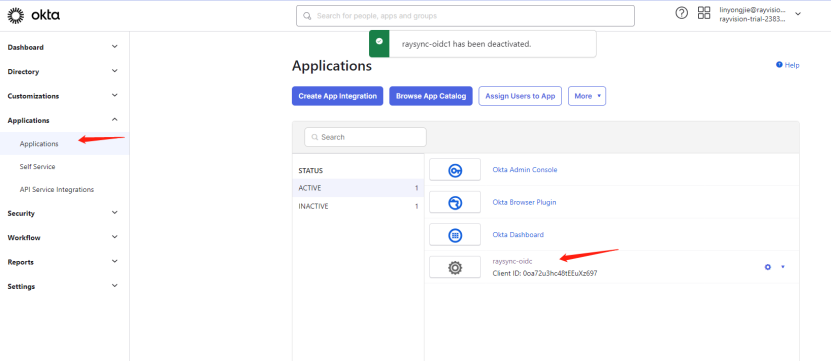
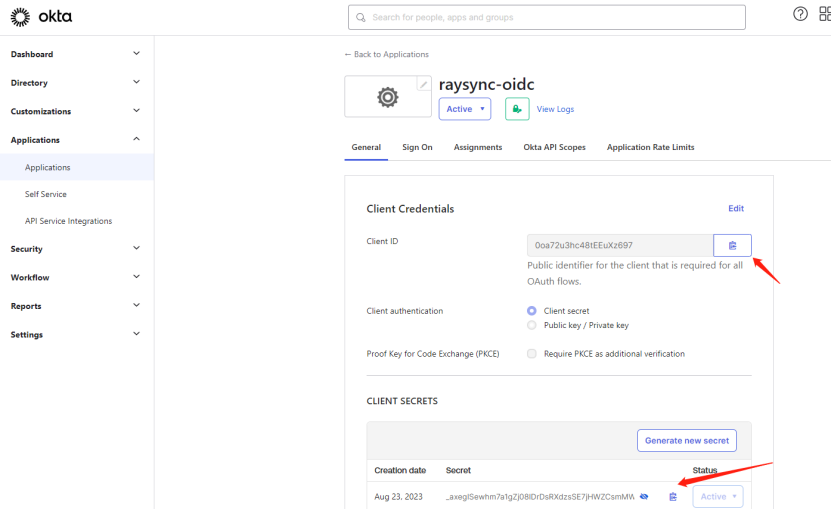
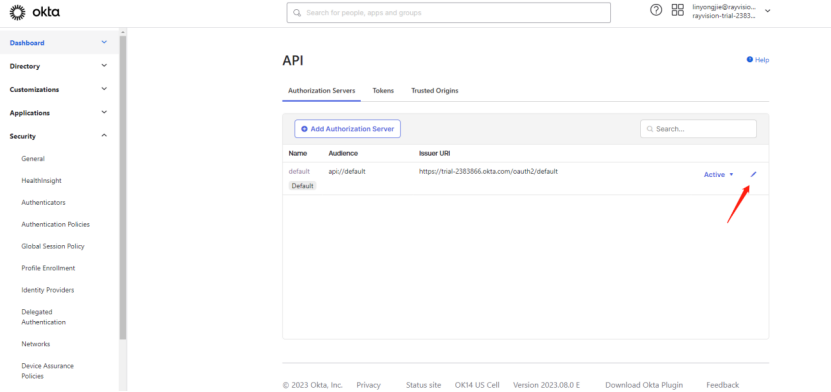
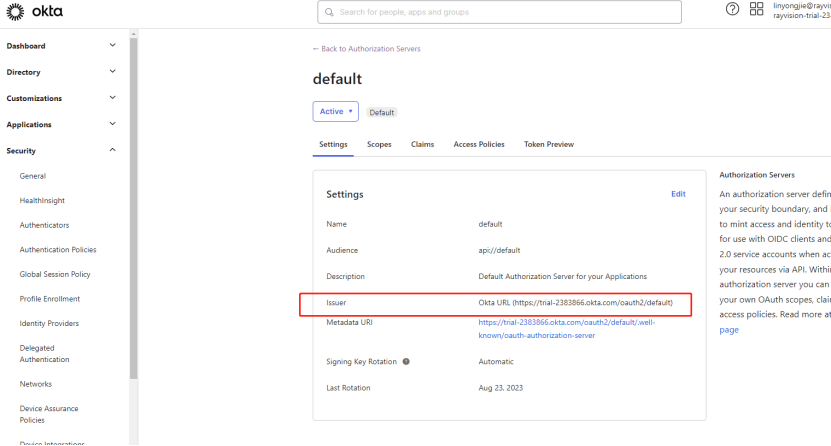
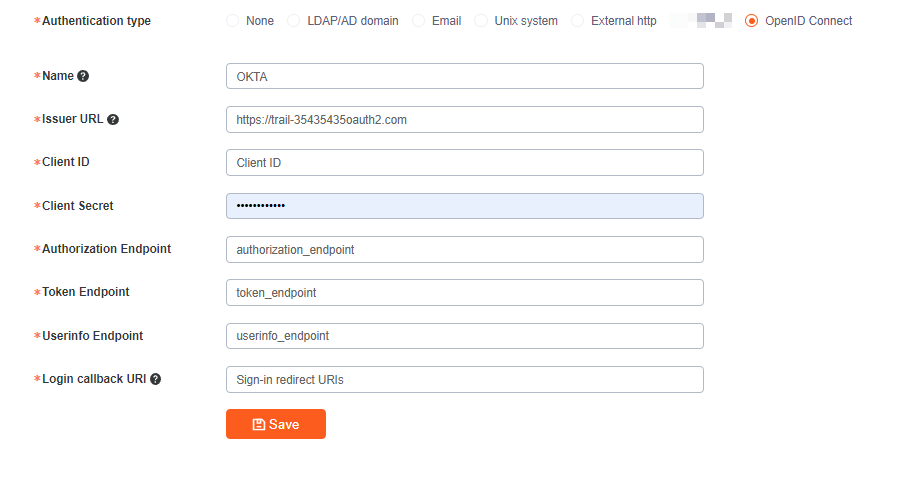
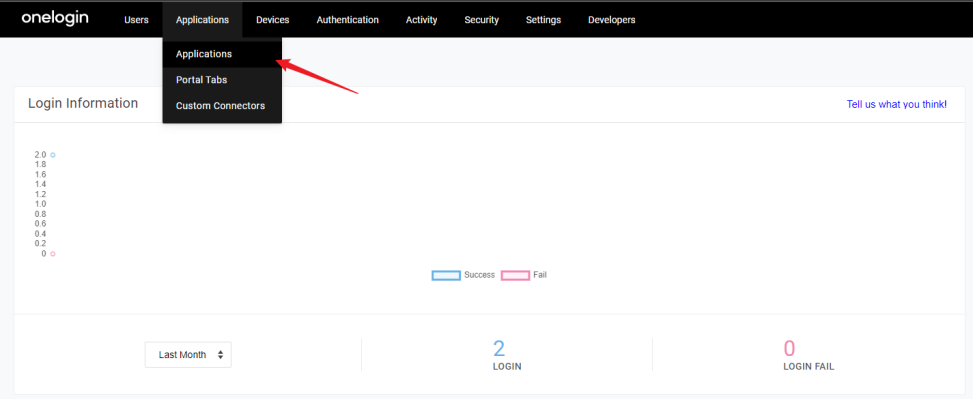
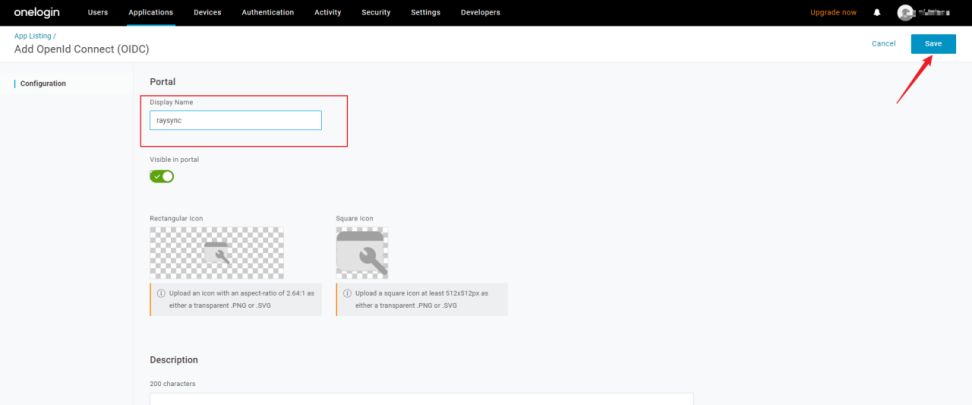
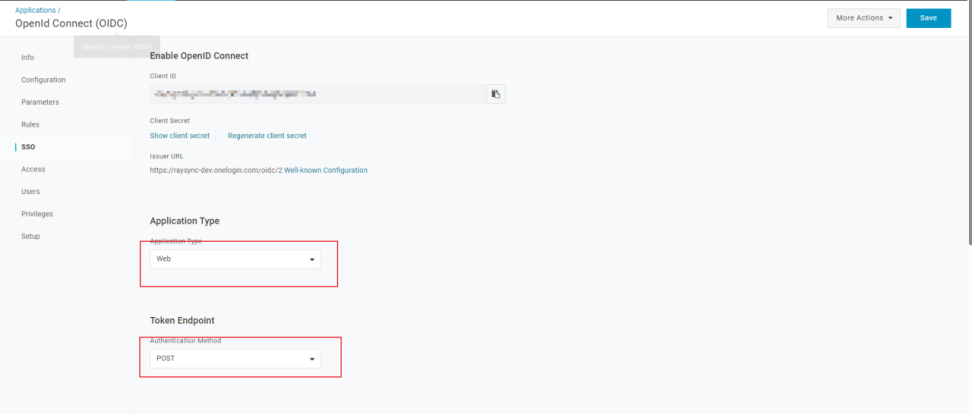
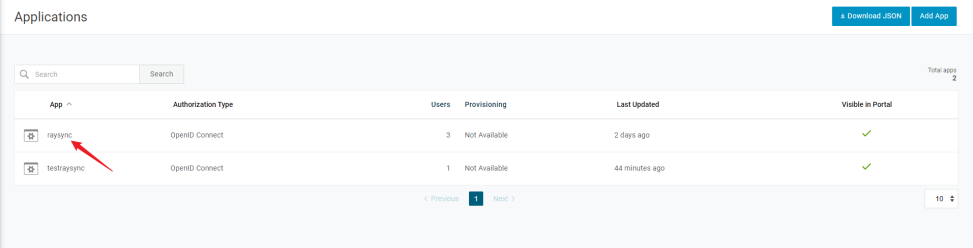
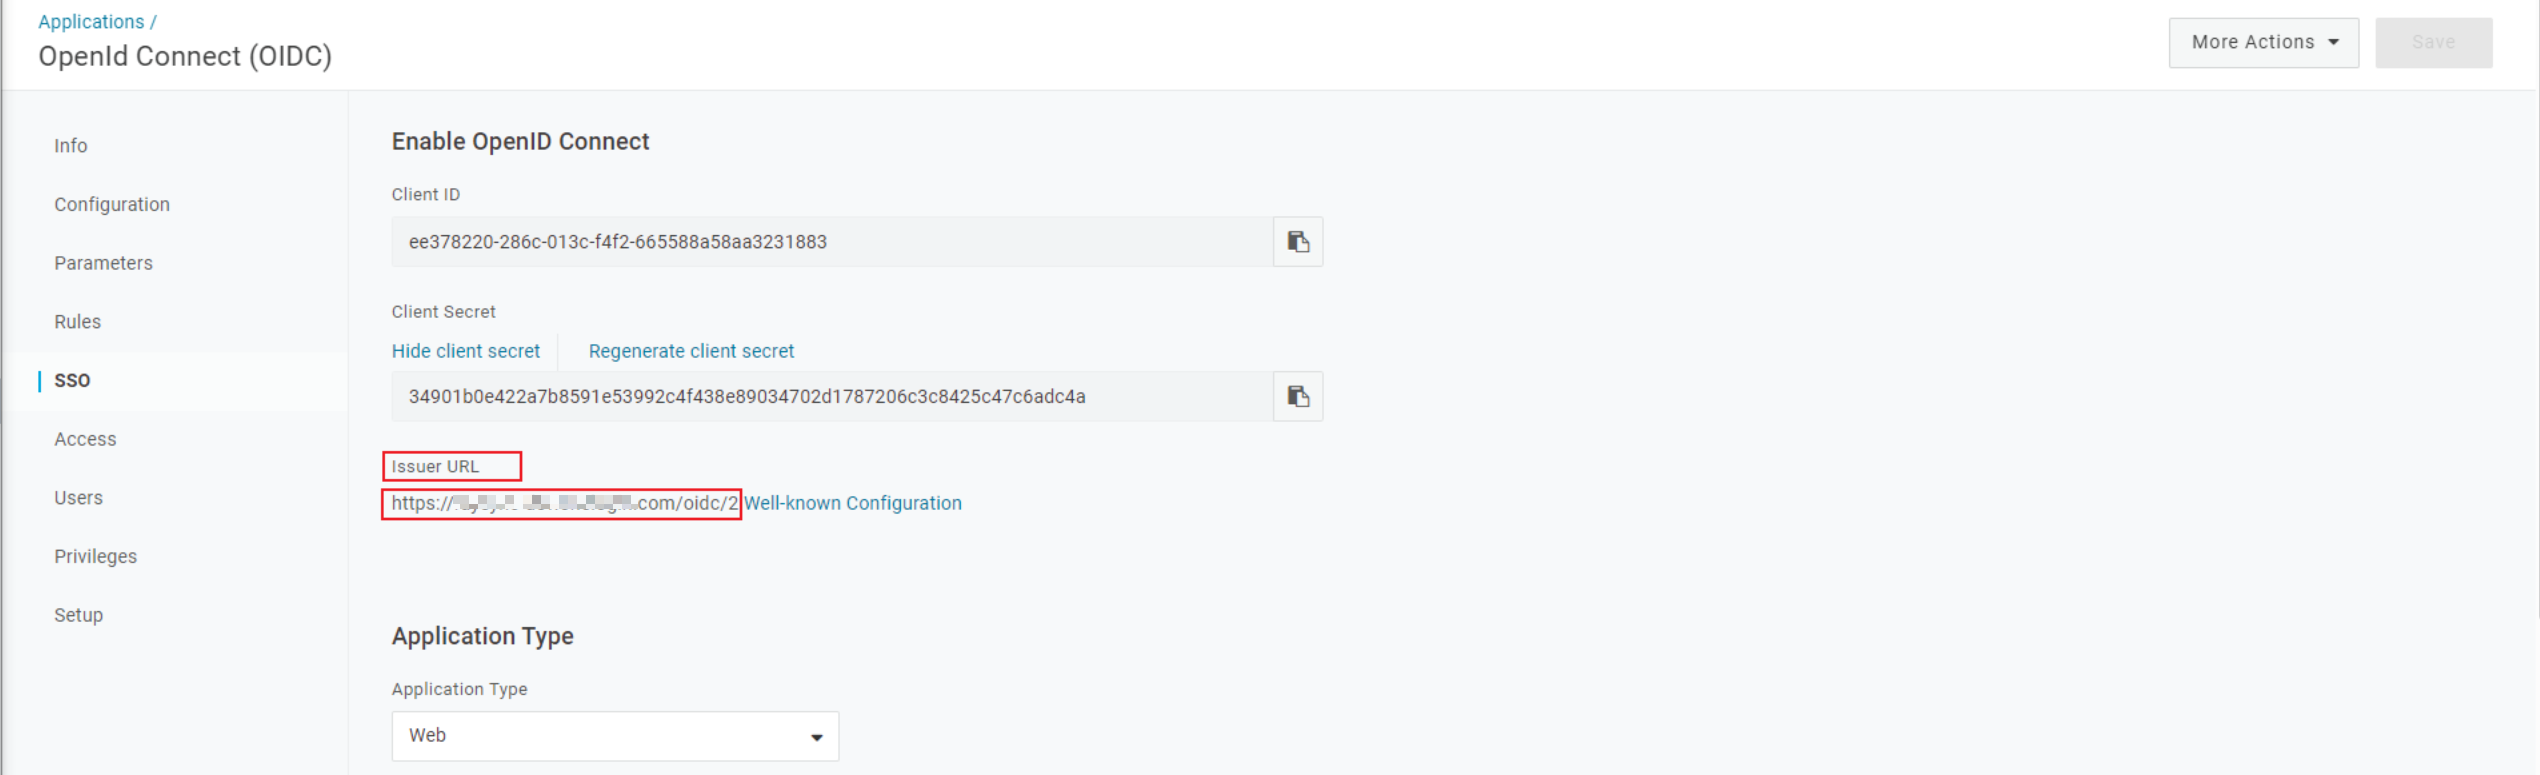
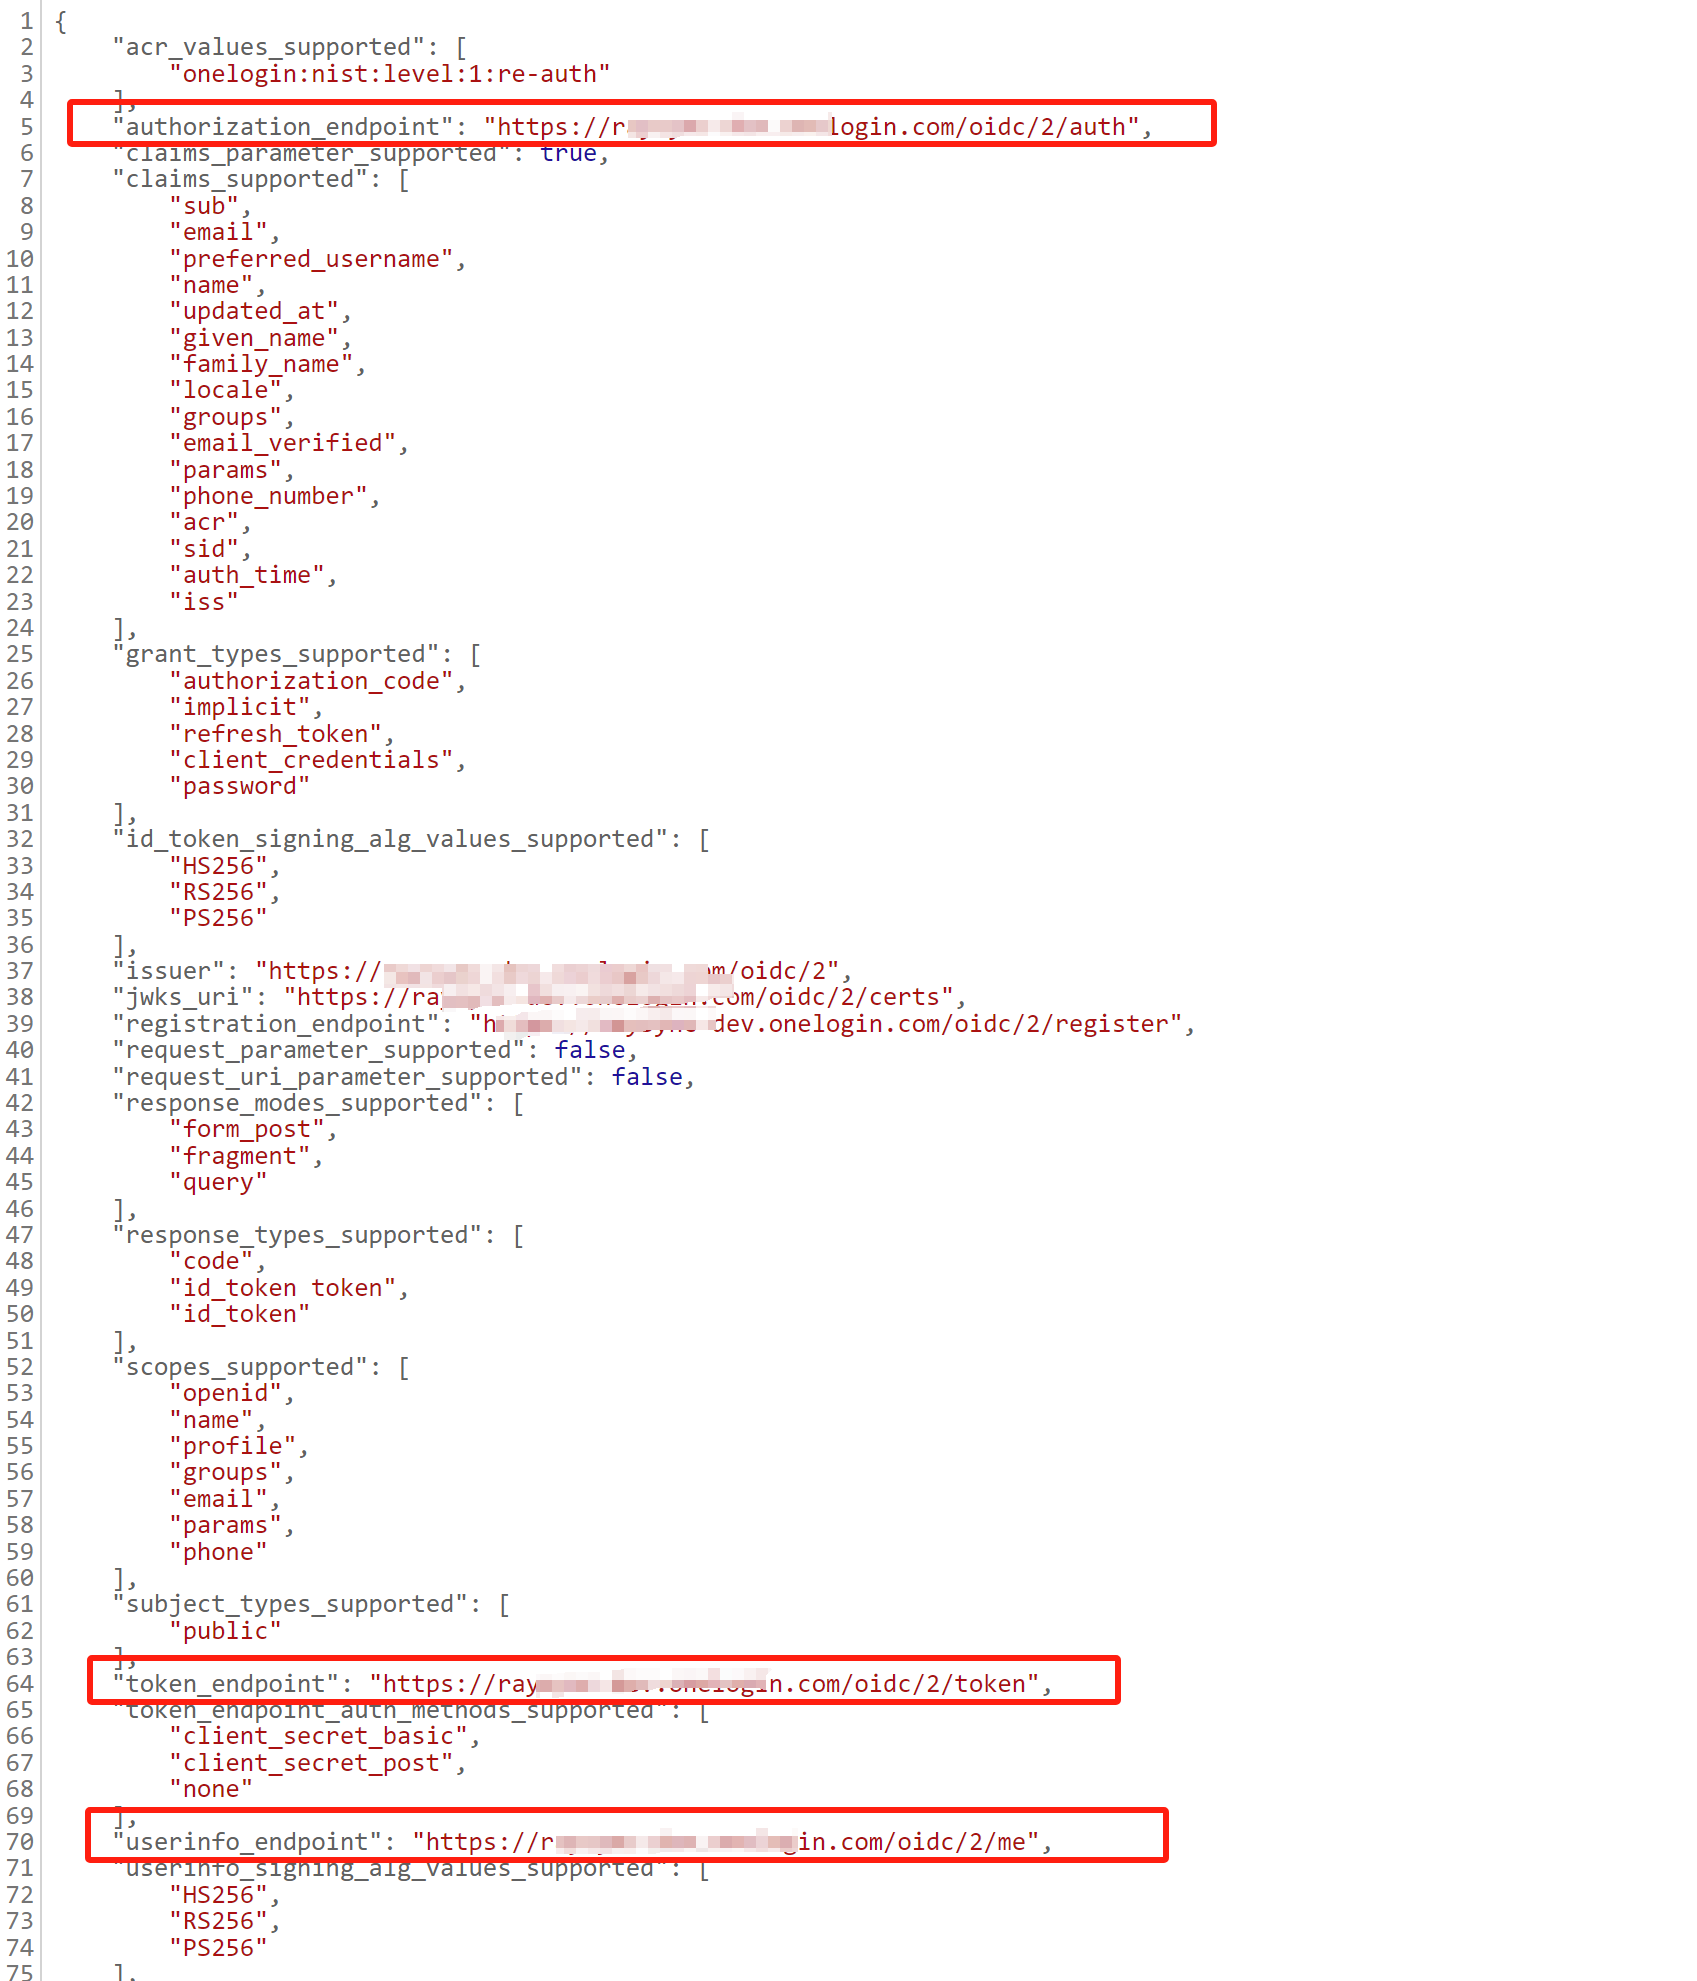
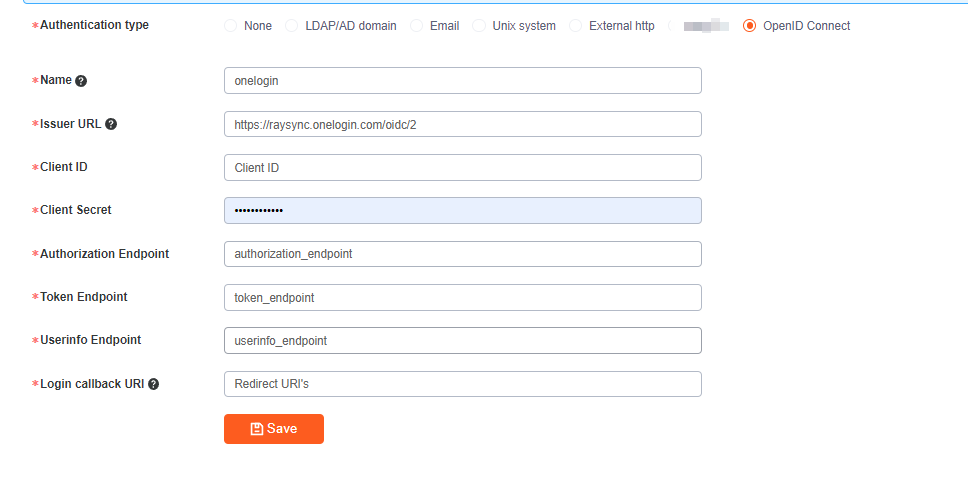
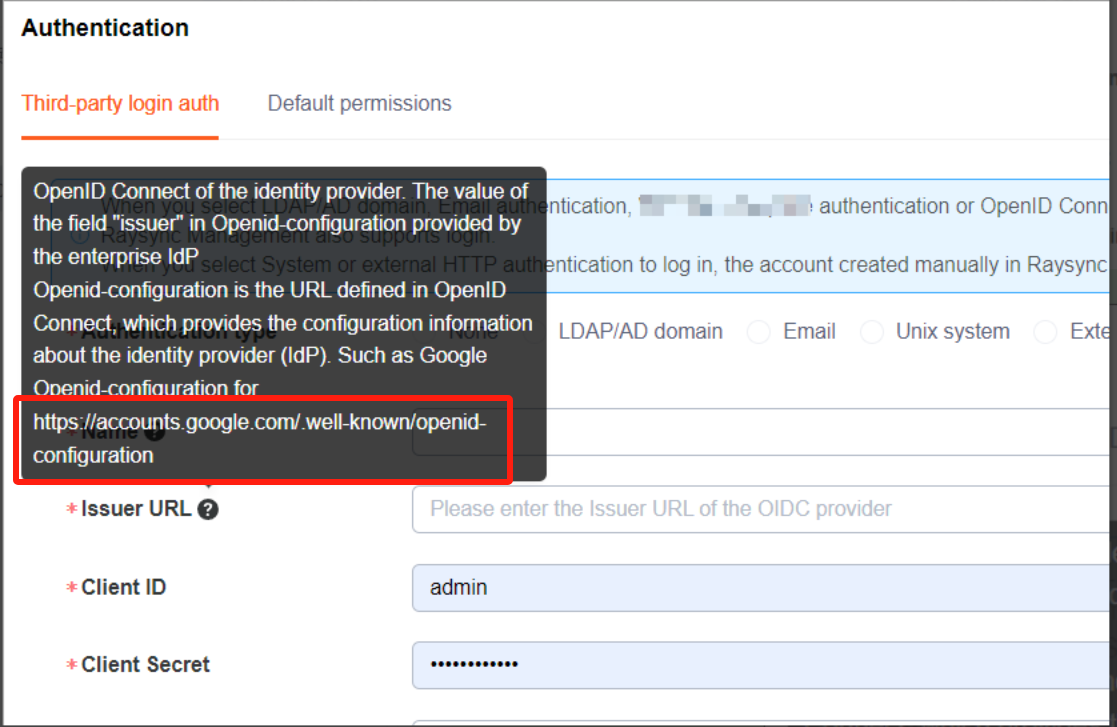
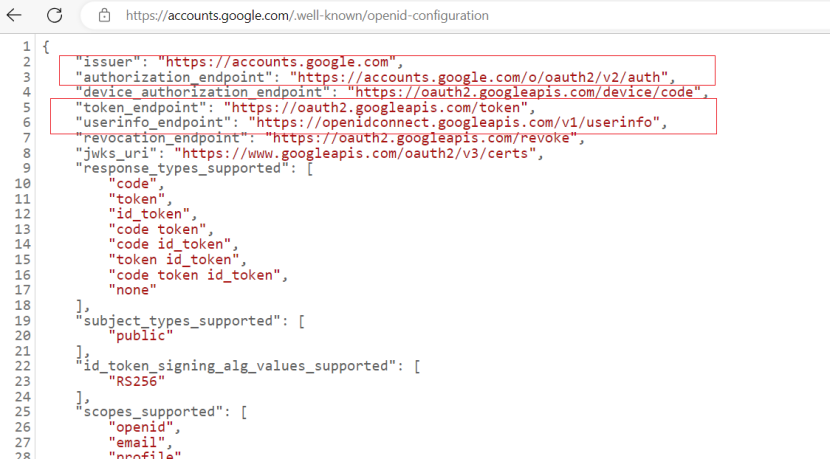
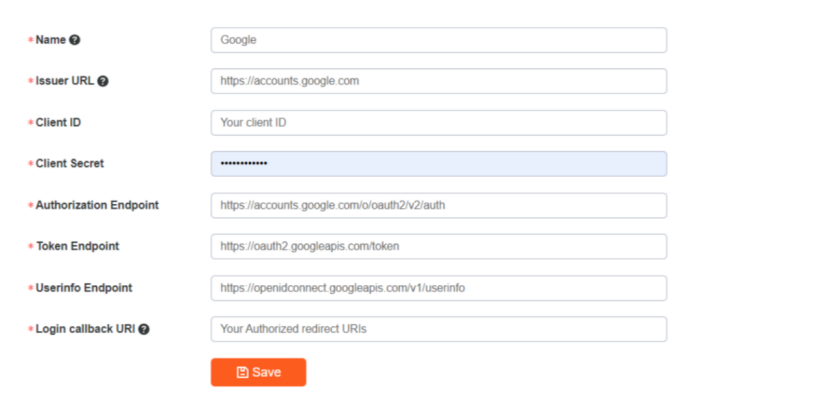
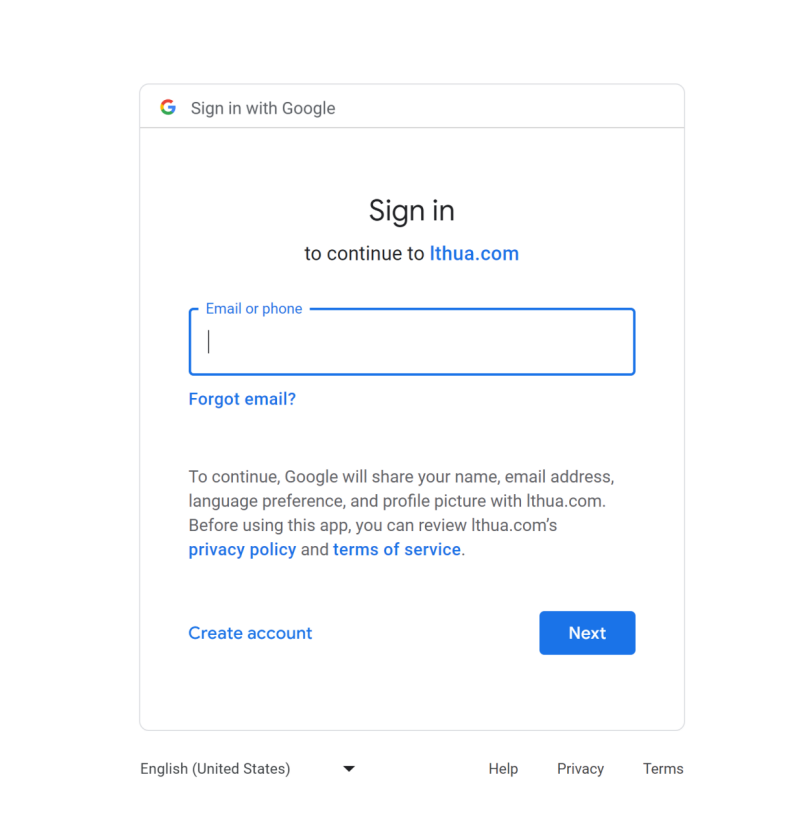
7. Support OpenID Connect(SSO), such as OKTA, OneLogin, Google, etc
V6.7.8.0
Updated: 2023-8-14
2、Peer-to-Peer transfer optimization
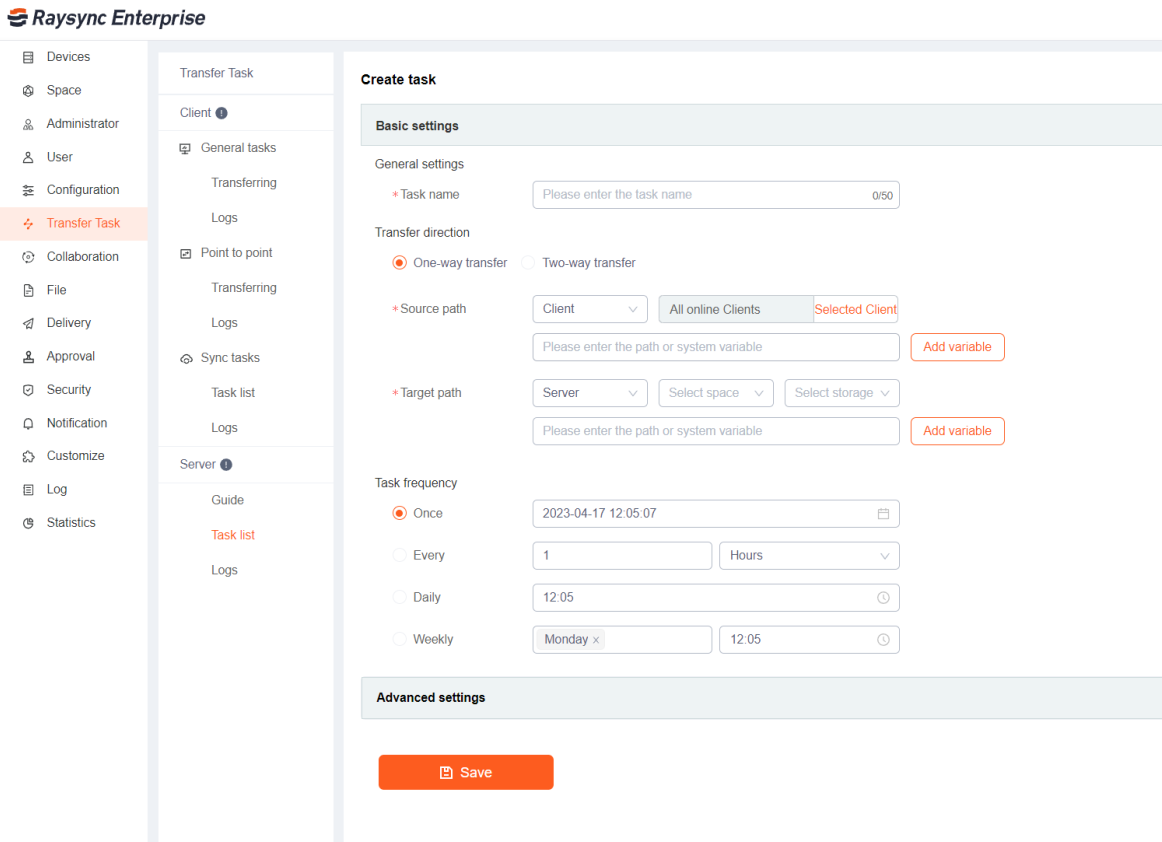
3、Set the task name when creating a client transmission task
4、When SDK is uploaded, the file regular verification parameter regexexp
5、Dynamic file verification before transfer
5、Select multiple tasks to delete
6、Admin Portal adds Client Rsync, Hash, Encrypted forced opening or forced closing button
7、Transfer email notification Adds task name, location, source path, destination path, and task details
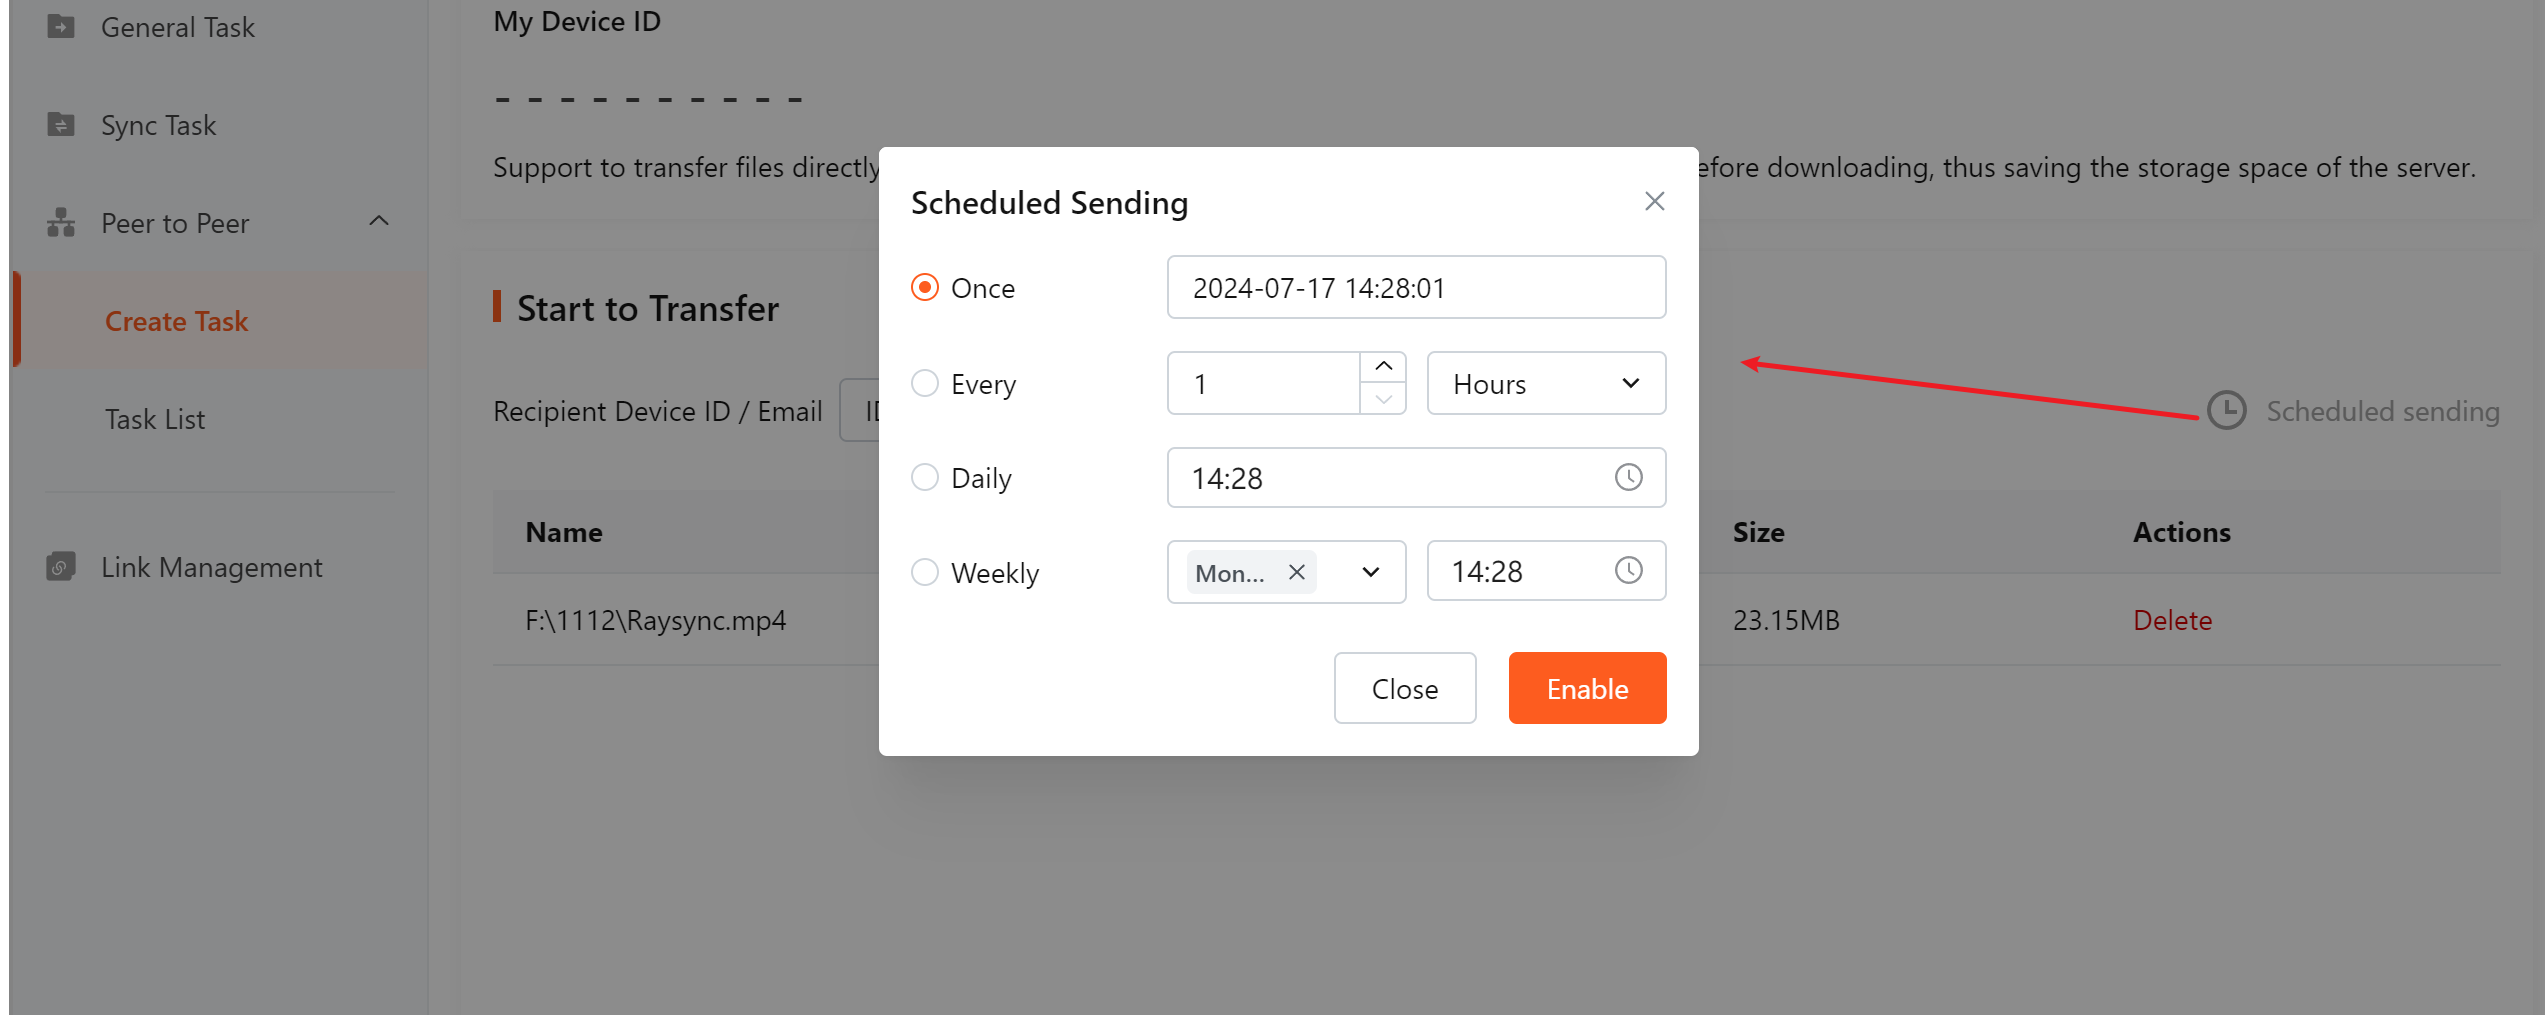
8、Peer-to-Peer transfer supports scheduled tasks
9、Admin Portal Increase allowed access path
10、Fix some bugs
V6.6.8.0
Updated: 2023-3-20
- The Server Task support specifying clients
-
Add the average speed, task status, and failure cause to the task log
- Added log clearing and log compression on the client
6. Fix some bugs
V6.5.8.4
Updated: 2023-1-13
- Control the synchronization frequency at the Admin Portal
-
Multiple source paths of the same level can be selected for client synchronization tasks
-
Transfer mail template revision
- Fix some bugs
V6.5.8.0
Updated: 2022-11-24
-
Support sensitive word detection
-
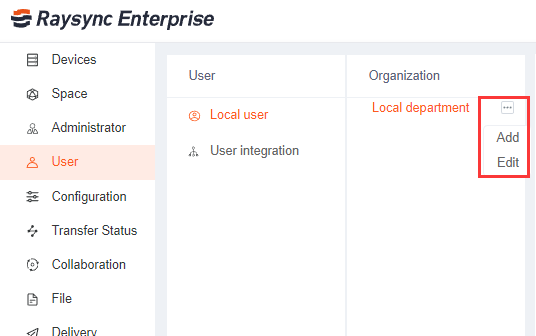
Support department organization
-
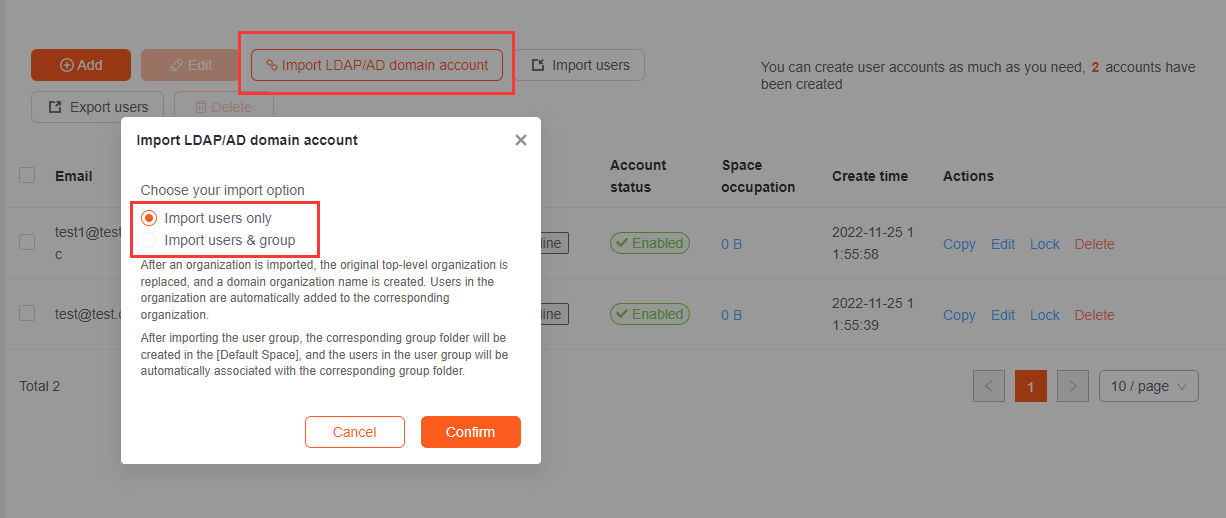
Import AD domain according to the organization
-
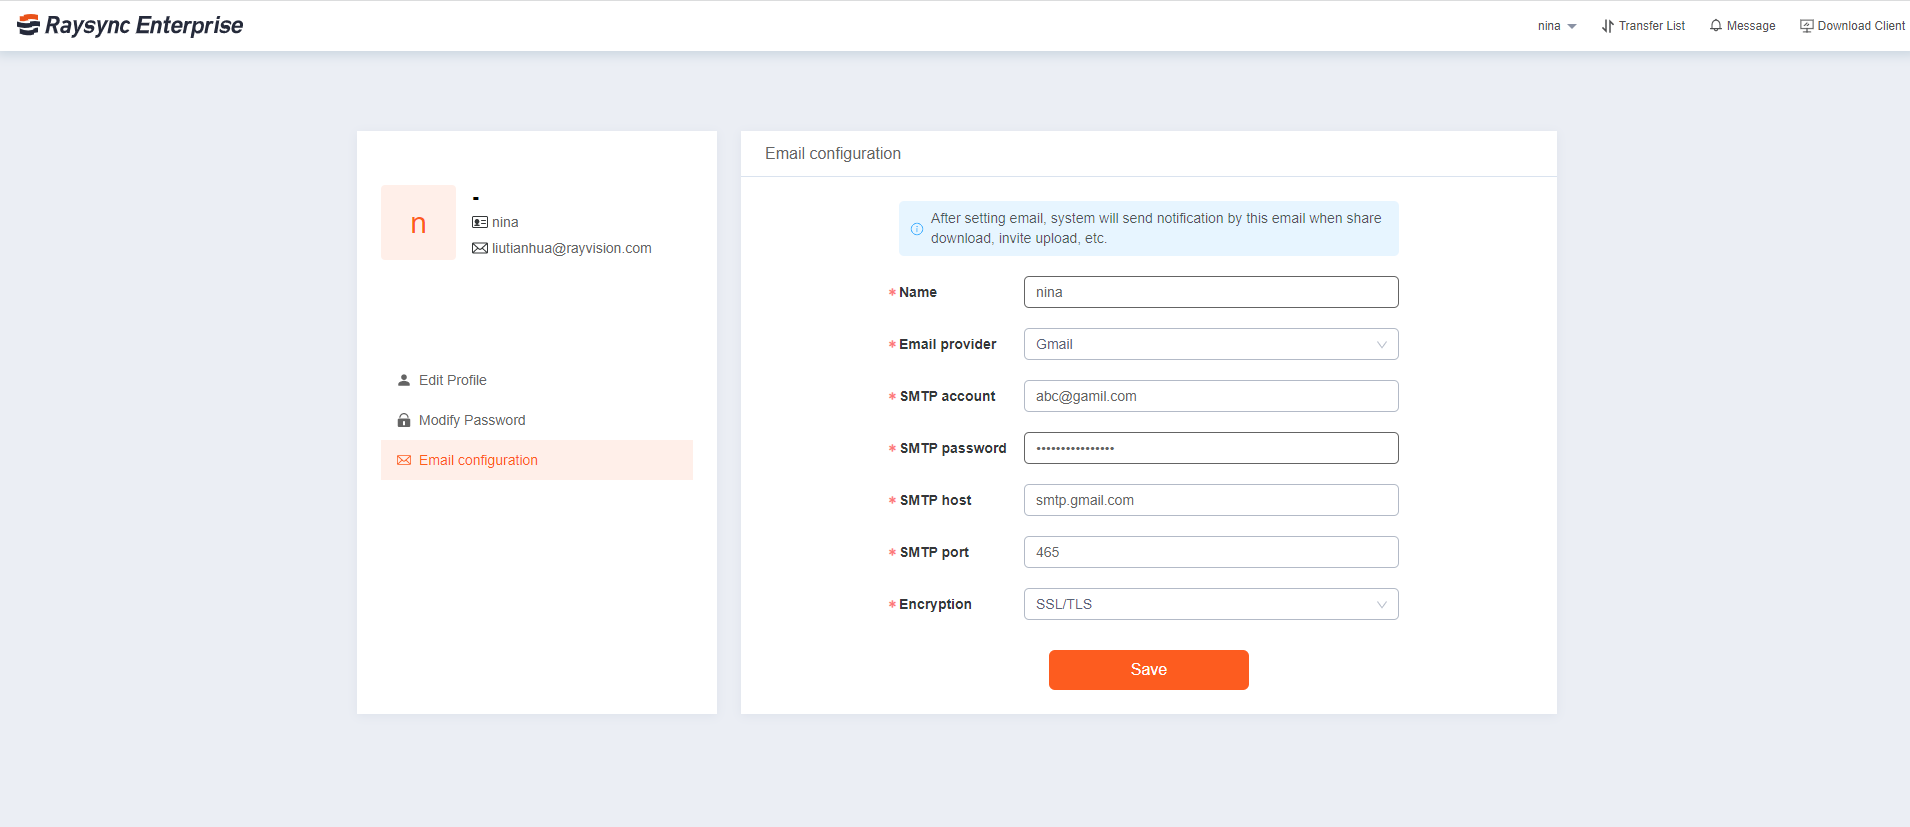
Improve email notification template
-
Users support Email free login verification
-
Share download notification supports batch import mailbox
-
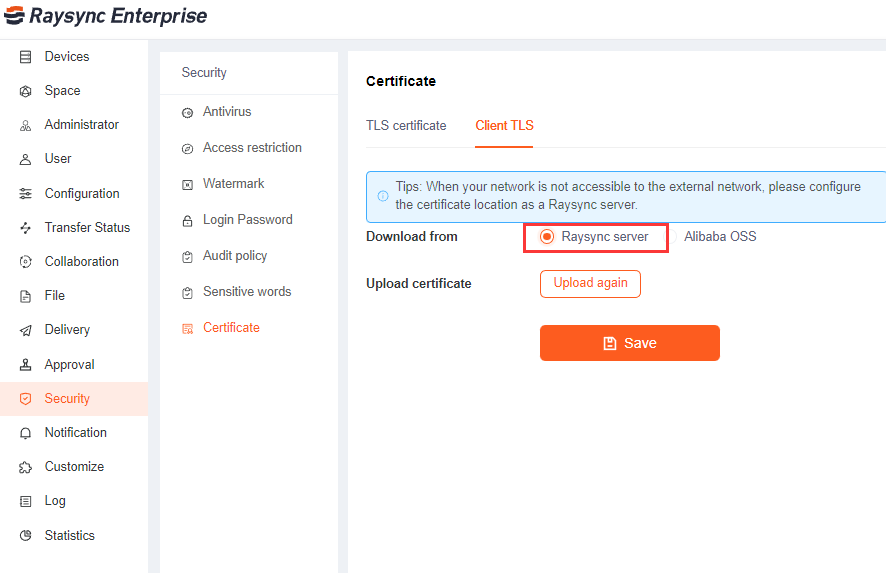
SSL Certificate is changed to upload method
-
Transmission task displays IP belonging place in Admin portal
-
Server Task supports startup and suspension
-
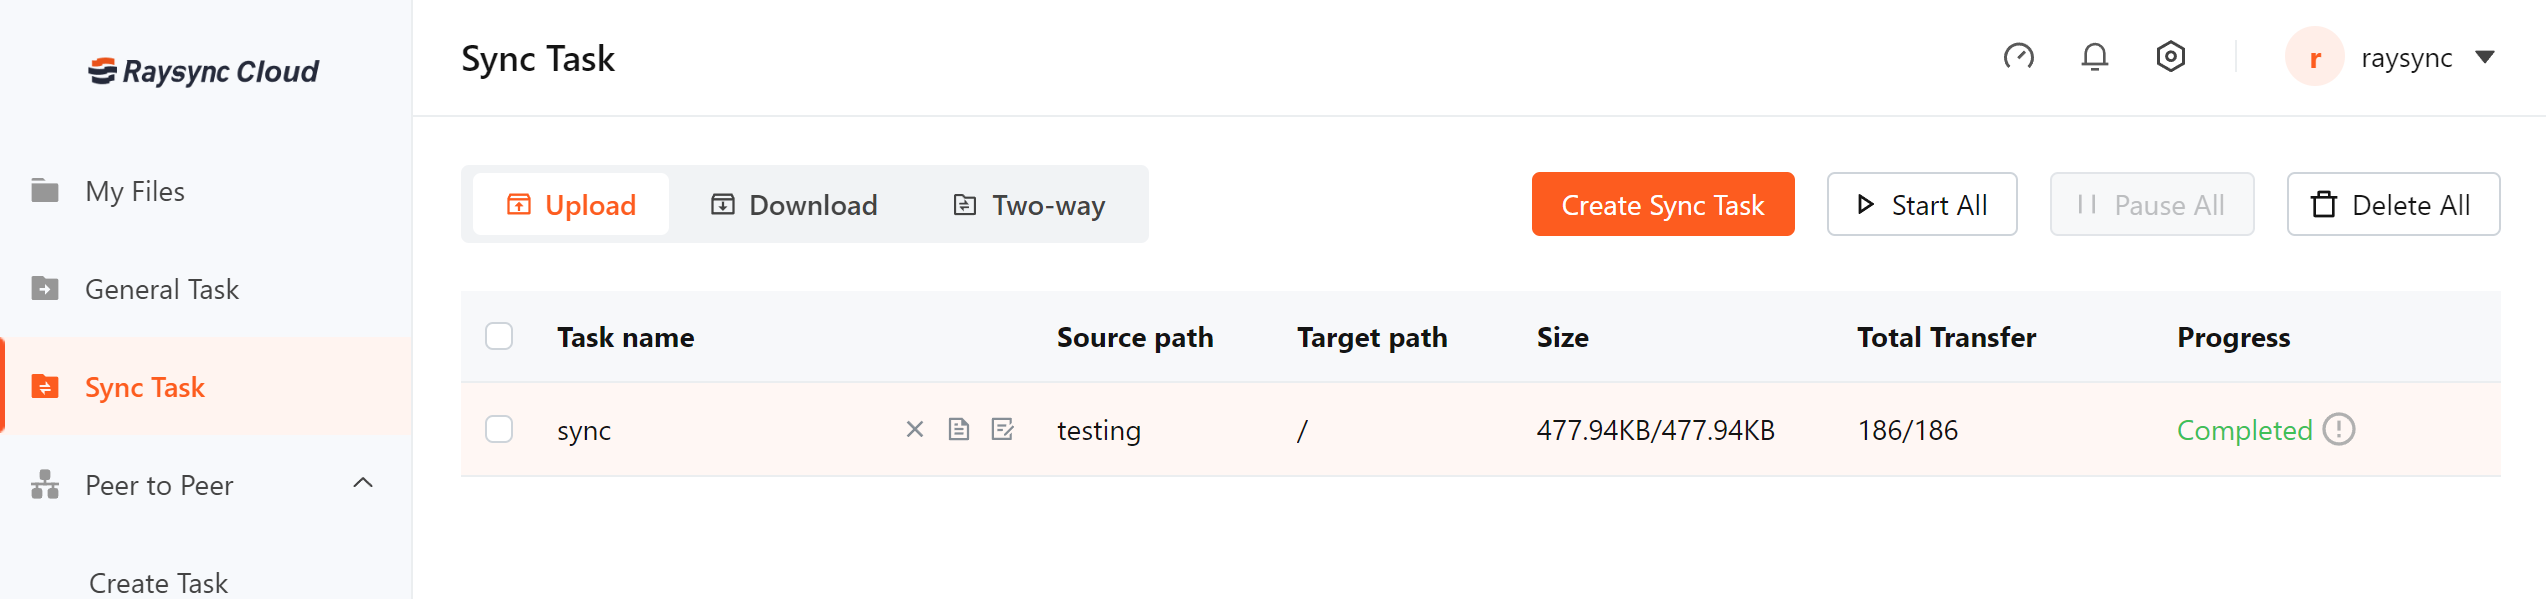
Server Task supports Two-Way sync
- Server Task supports reserve file attributes
-
Command line supports Two -Way sync
-
Command line supports direct input object storage path transmission
- Fix some bugs
V6.4.8.0
Updated: 2022-08-27
-
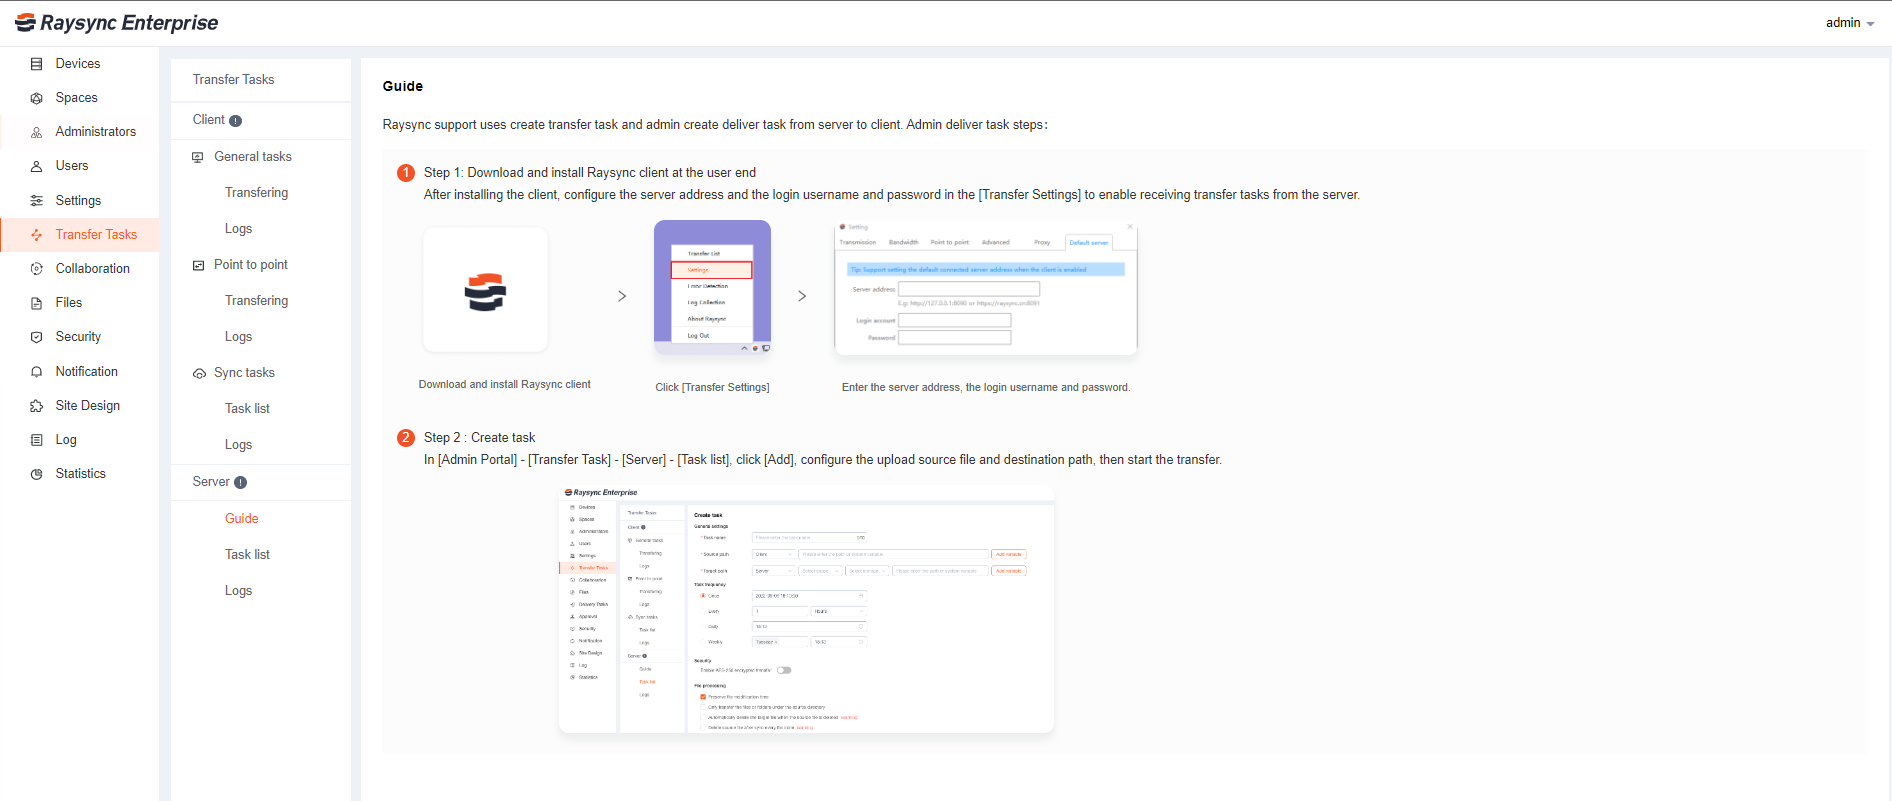
Support Set Up Delivery Task on Admin Portal
-
Add details on the transfer log
-
Support two-factor authentication
-
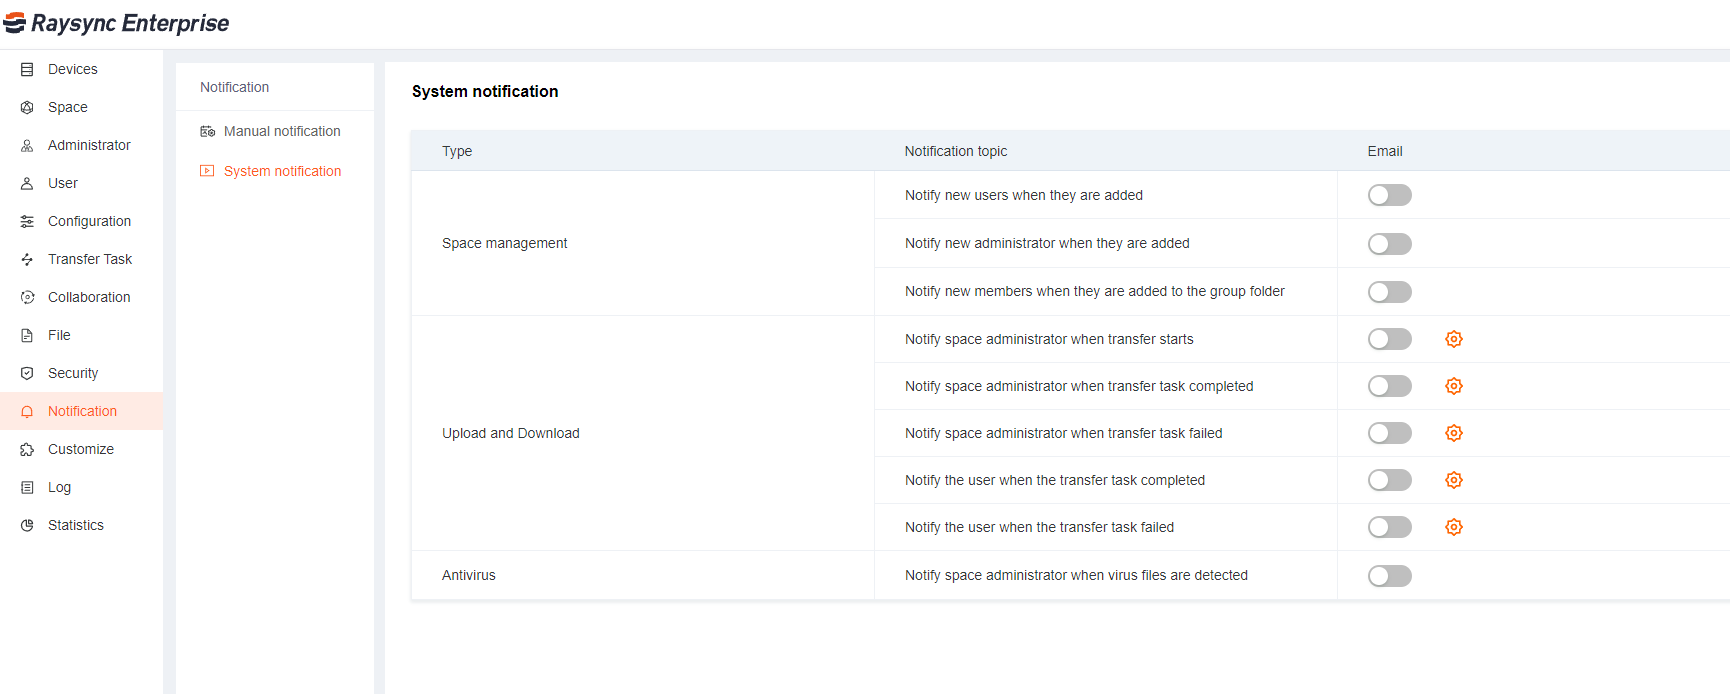
Added system notifications settings
-
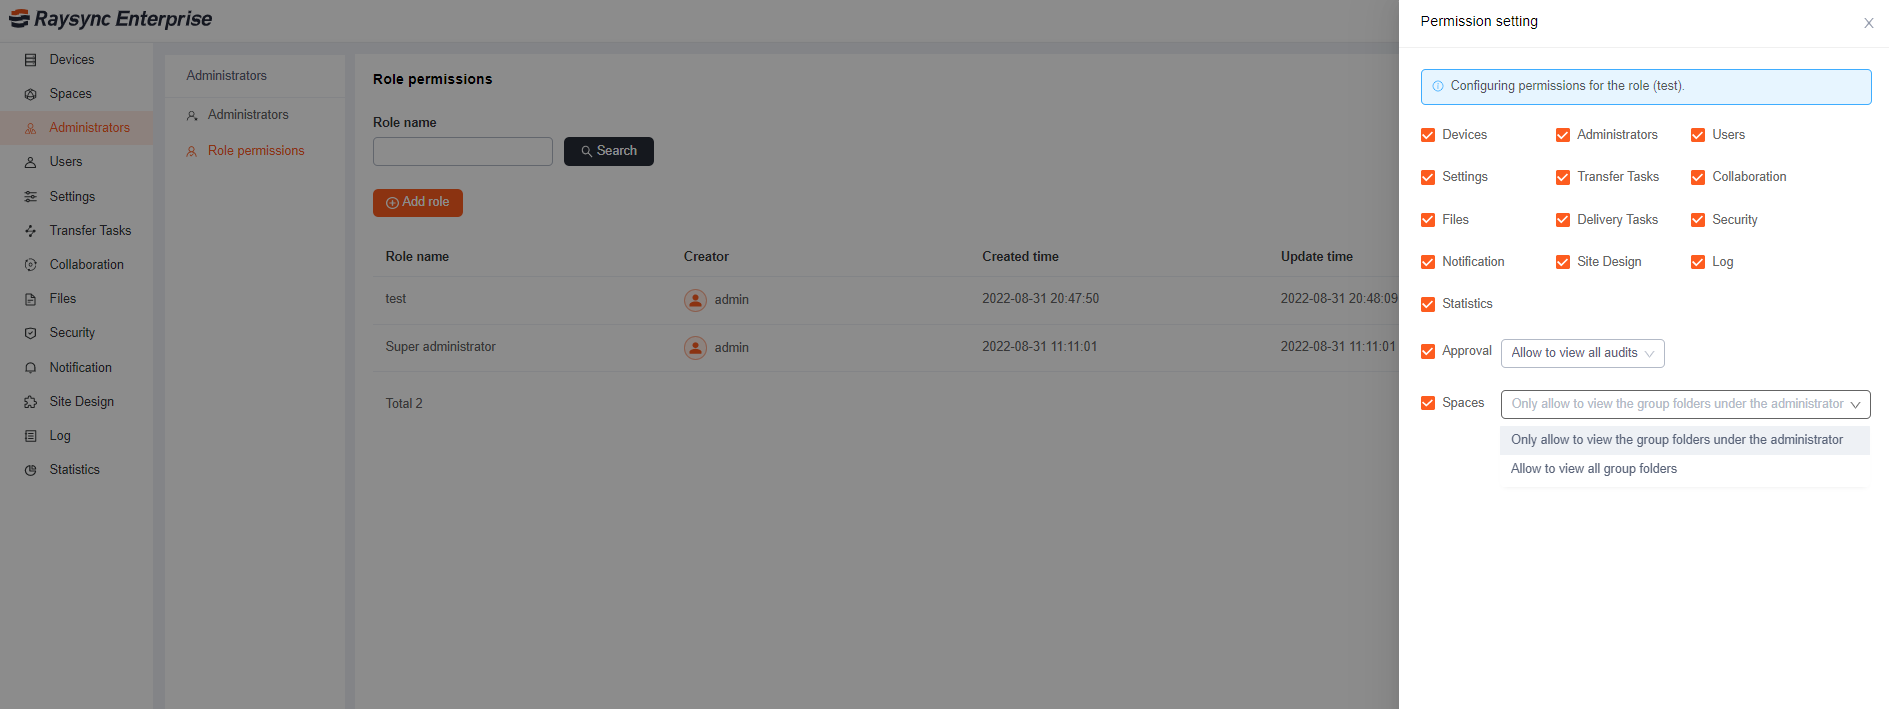
Support group administrator to manage group permission
-
Support speed limitation in Kb on the admin portal
-
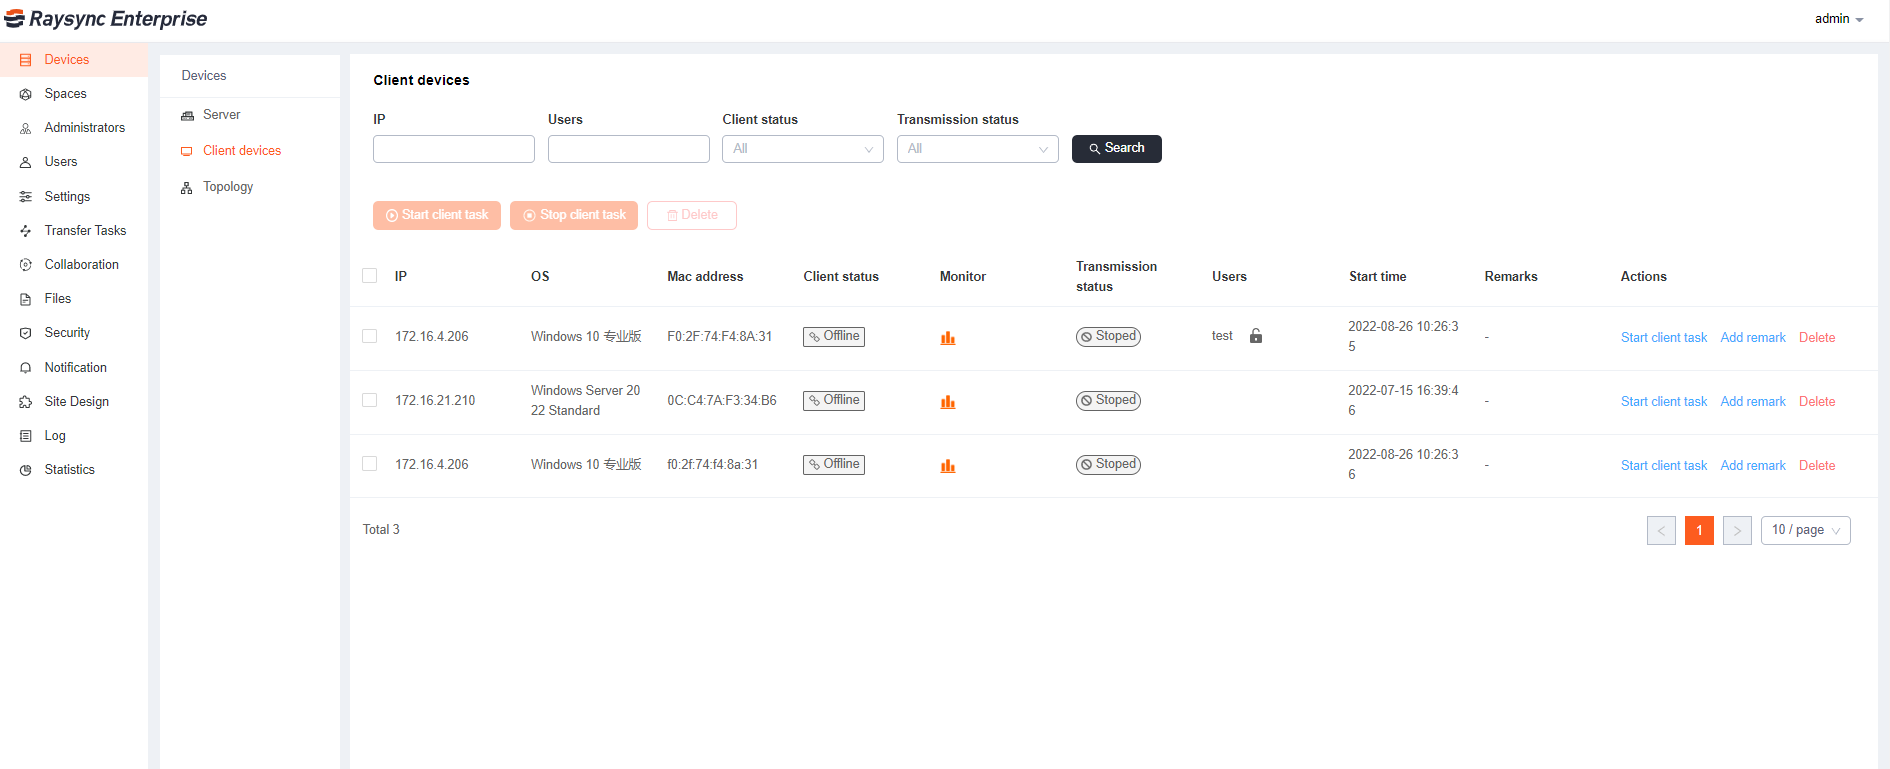
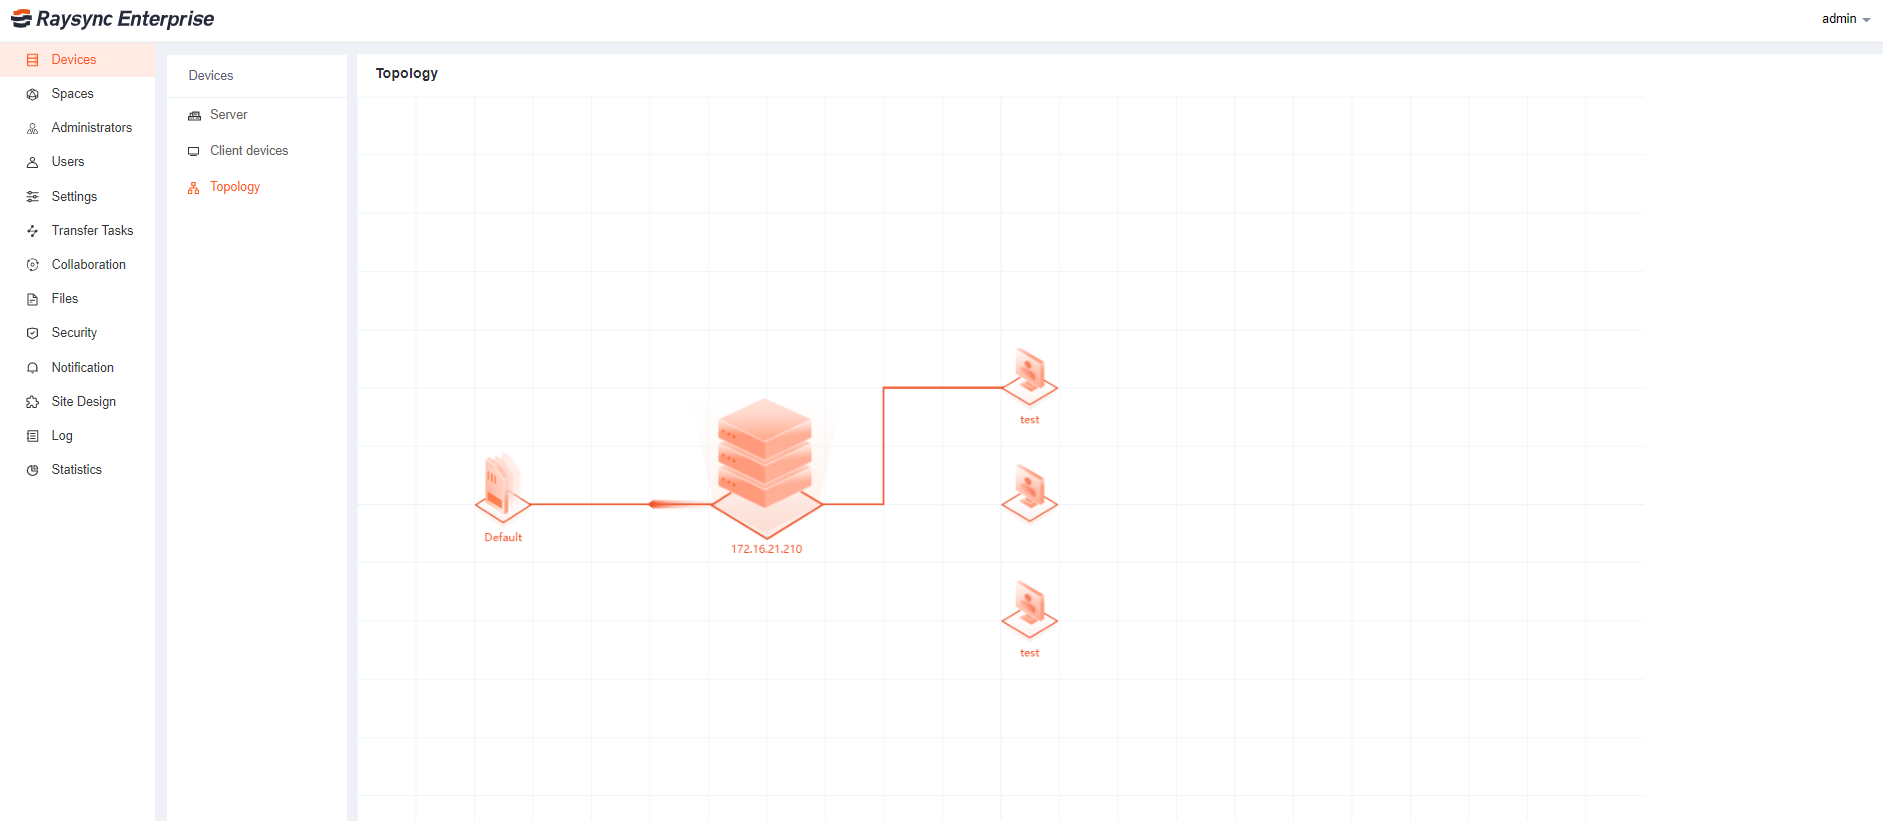
Add network topology on the admin portal
-
Control the function display on the user portal
-
Add QR code for APP download at the front desk
-
Fix some bugs
v6.3.8.0
Updated: 2022-06-03
-
Support webpage http to download (compressed to ZIP format).
-
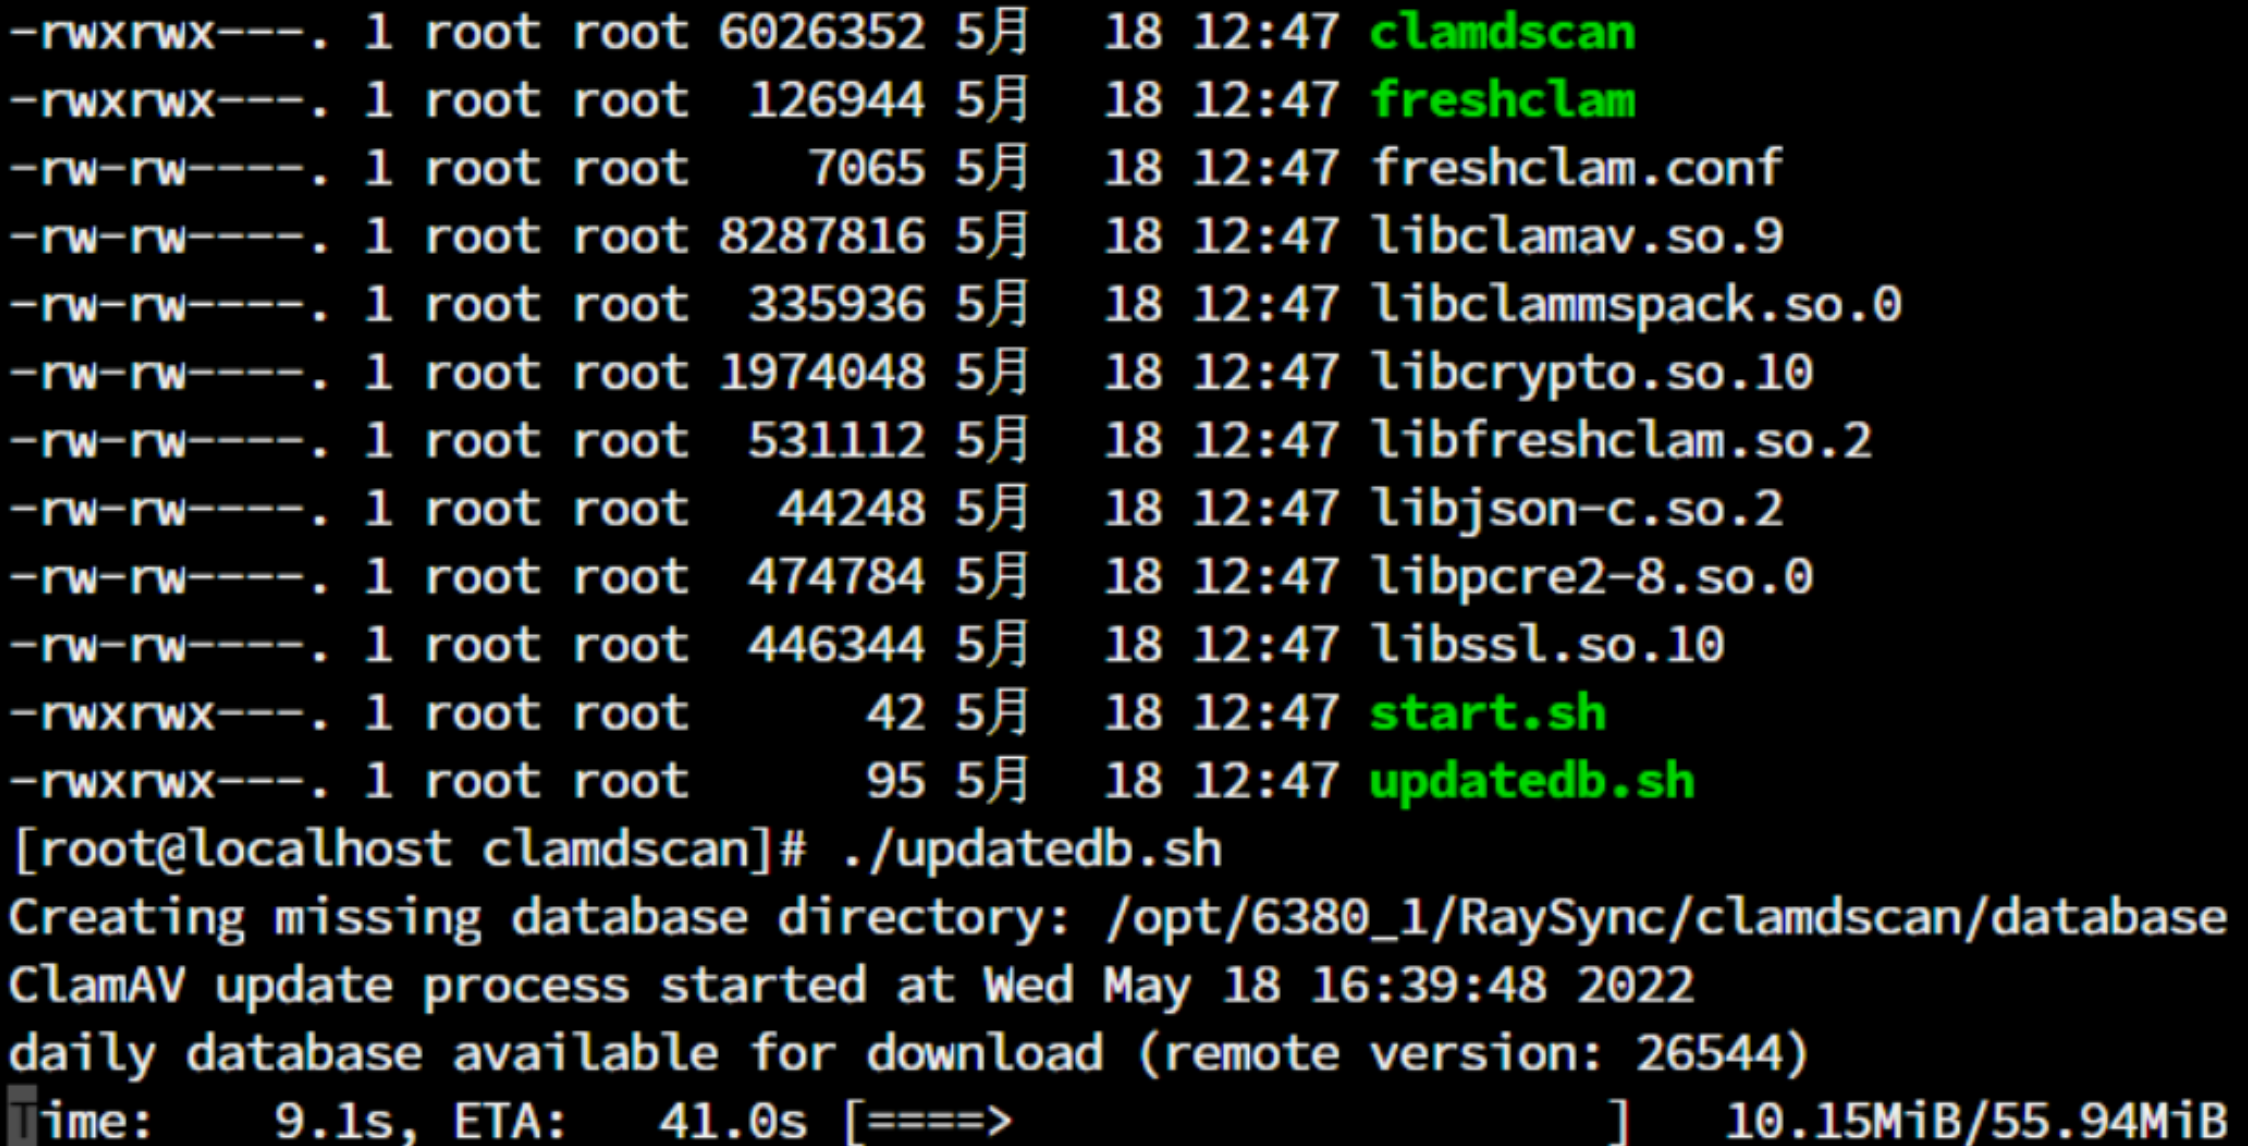
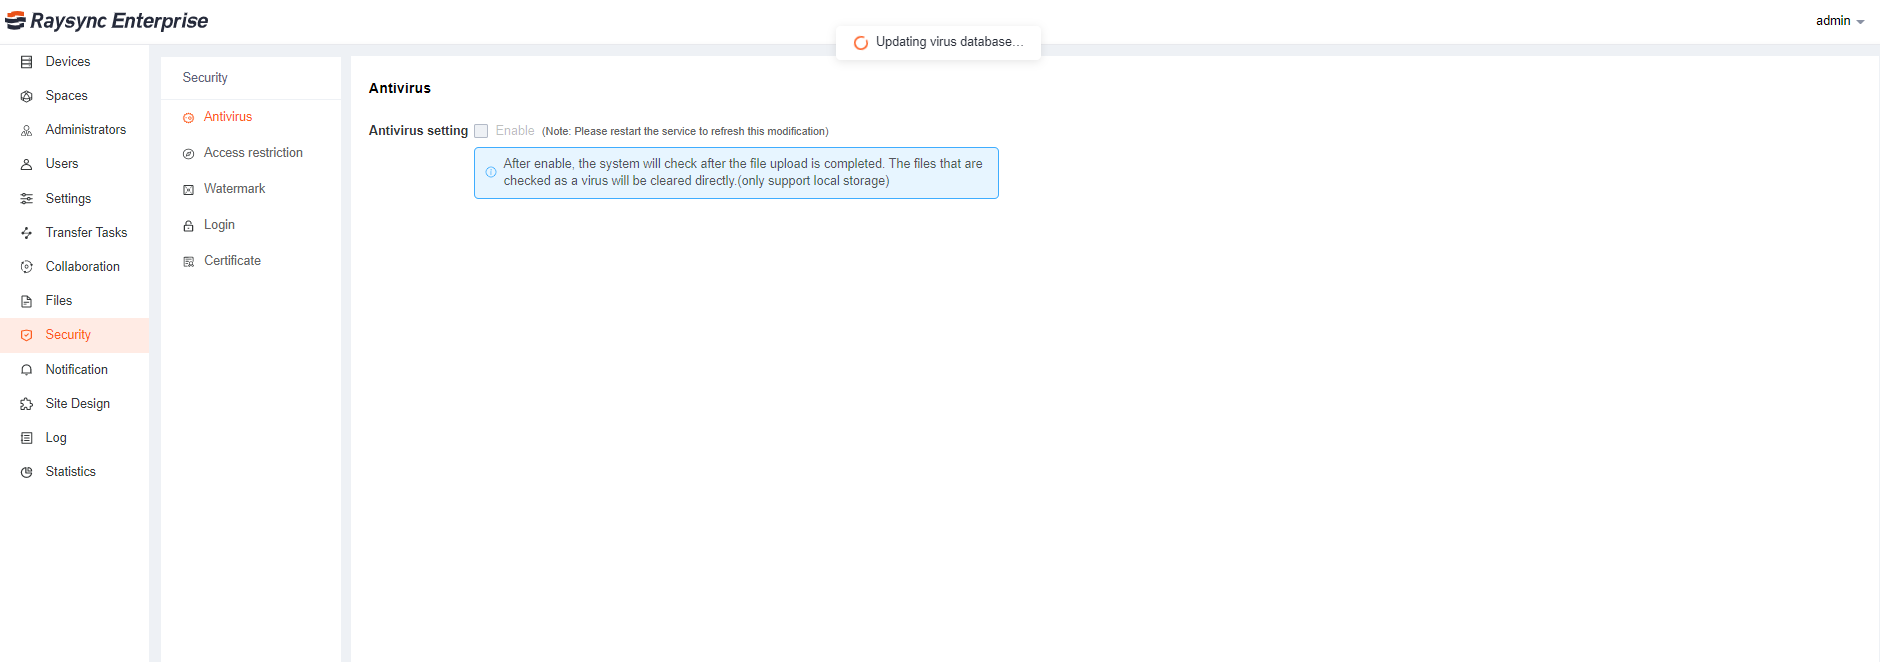
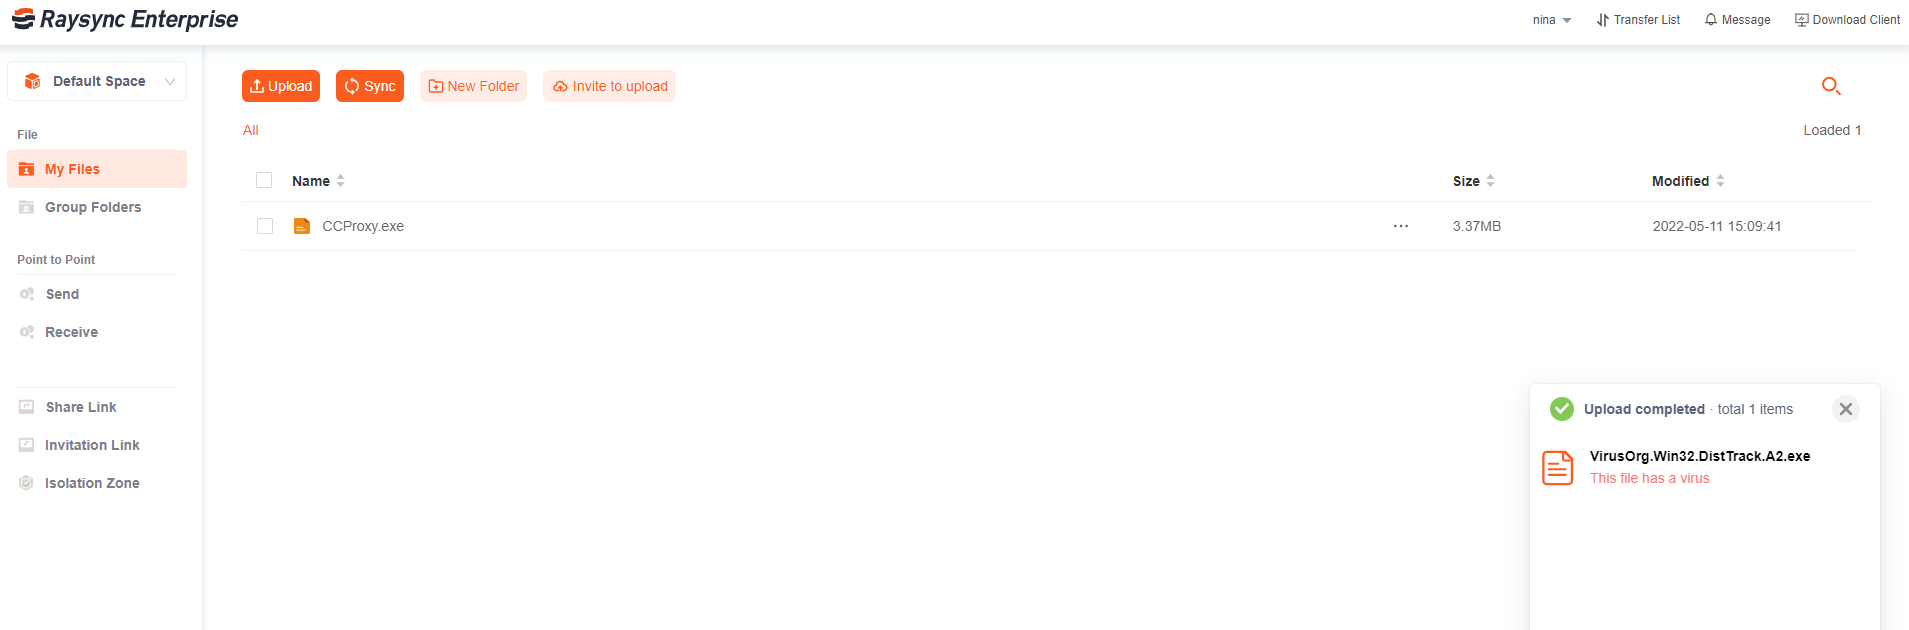
Support anti -virus after file upload.
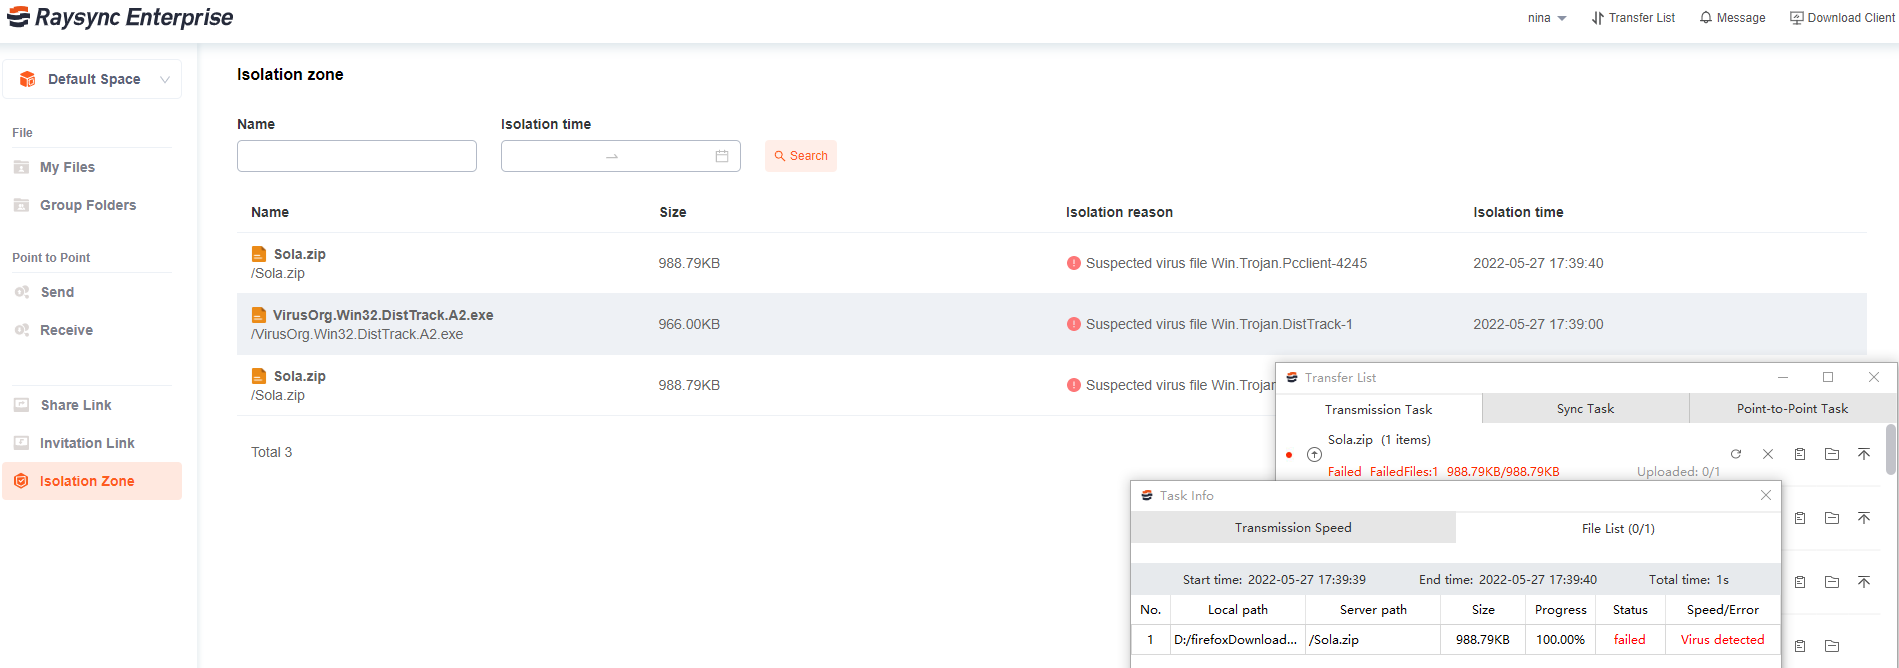
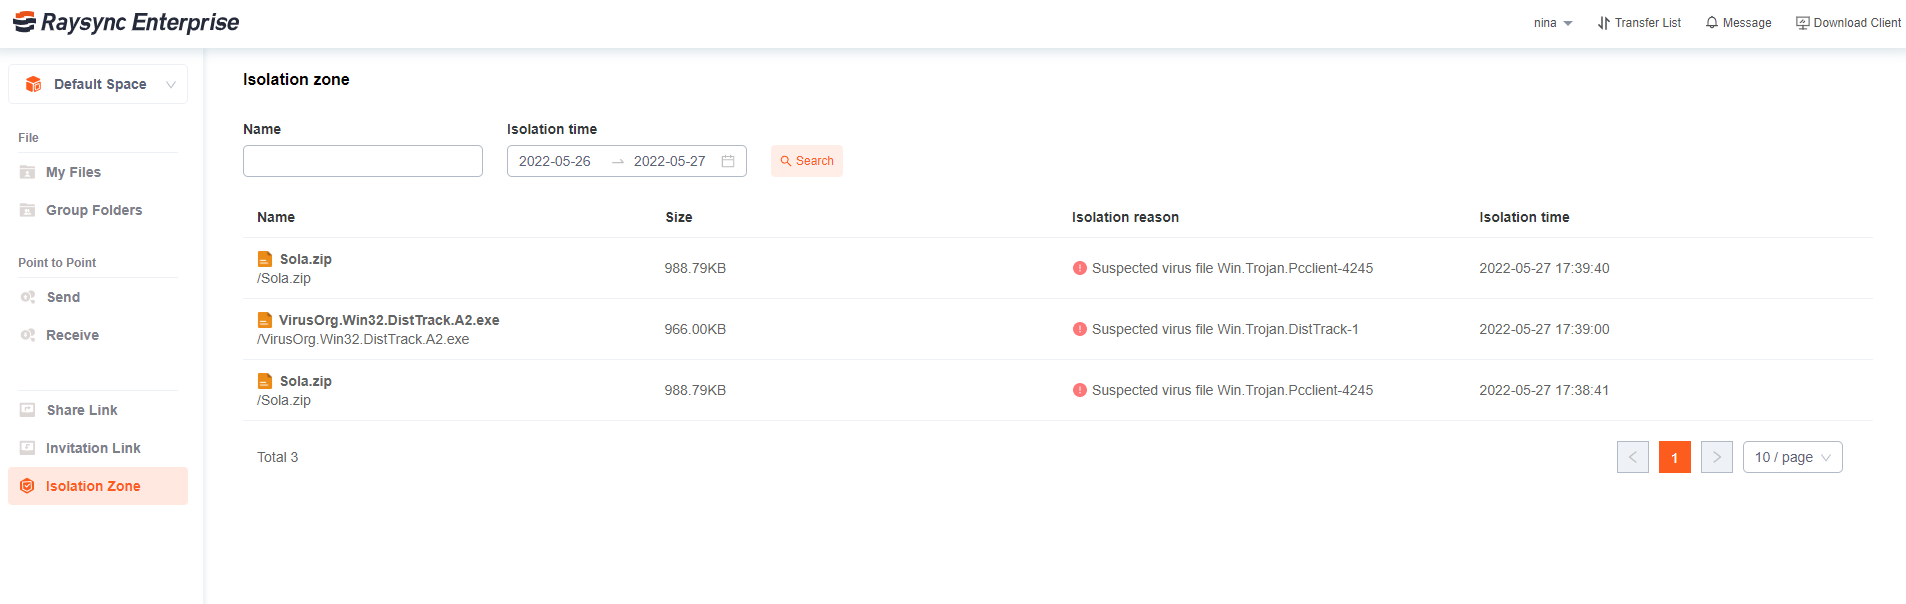
-
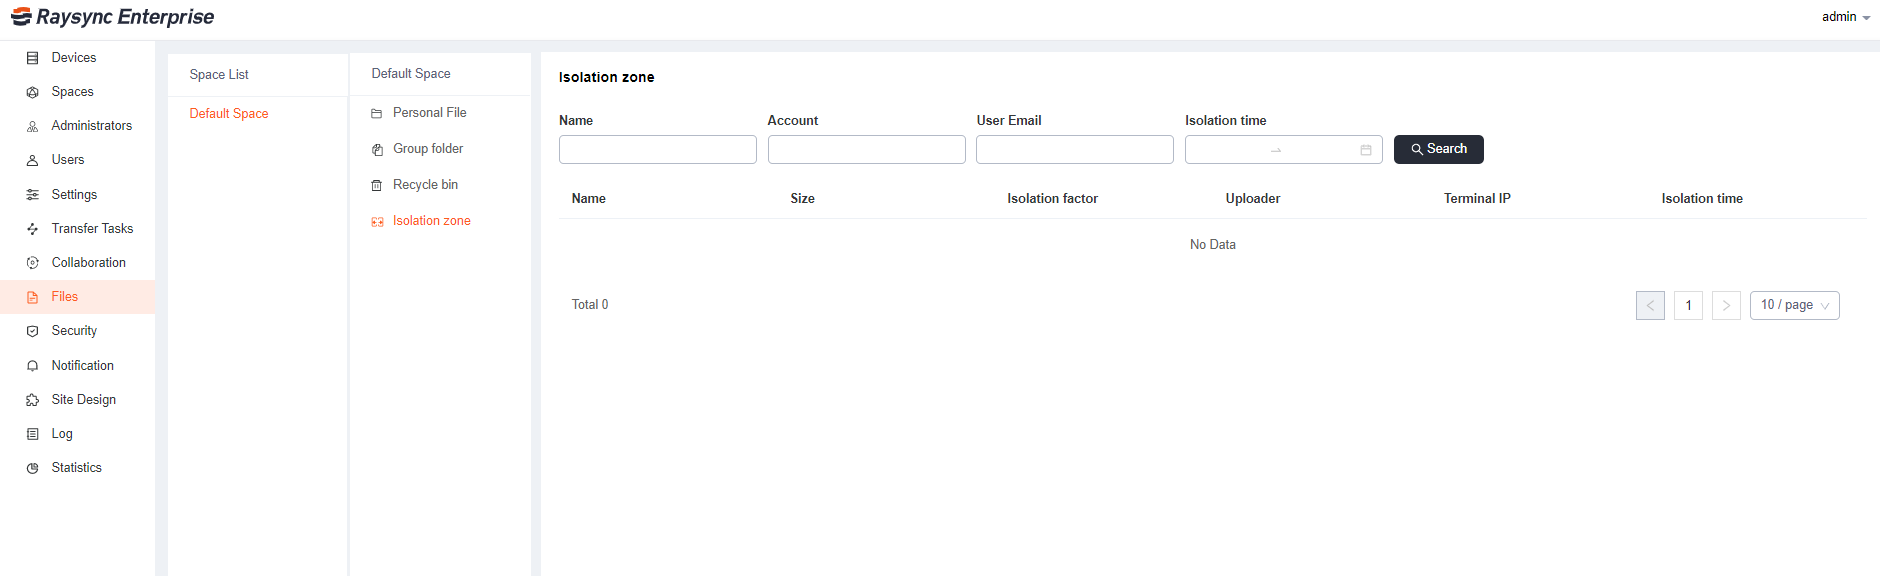
Increase the function of the file isolation area.
-
Increase the function of recycling station restoration and deletion.
-
Raylicense offline activation code integration.
-
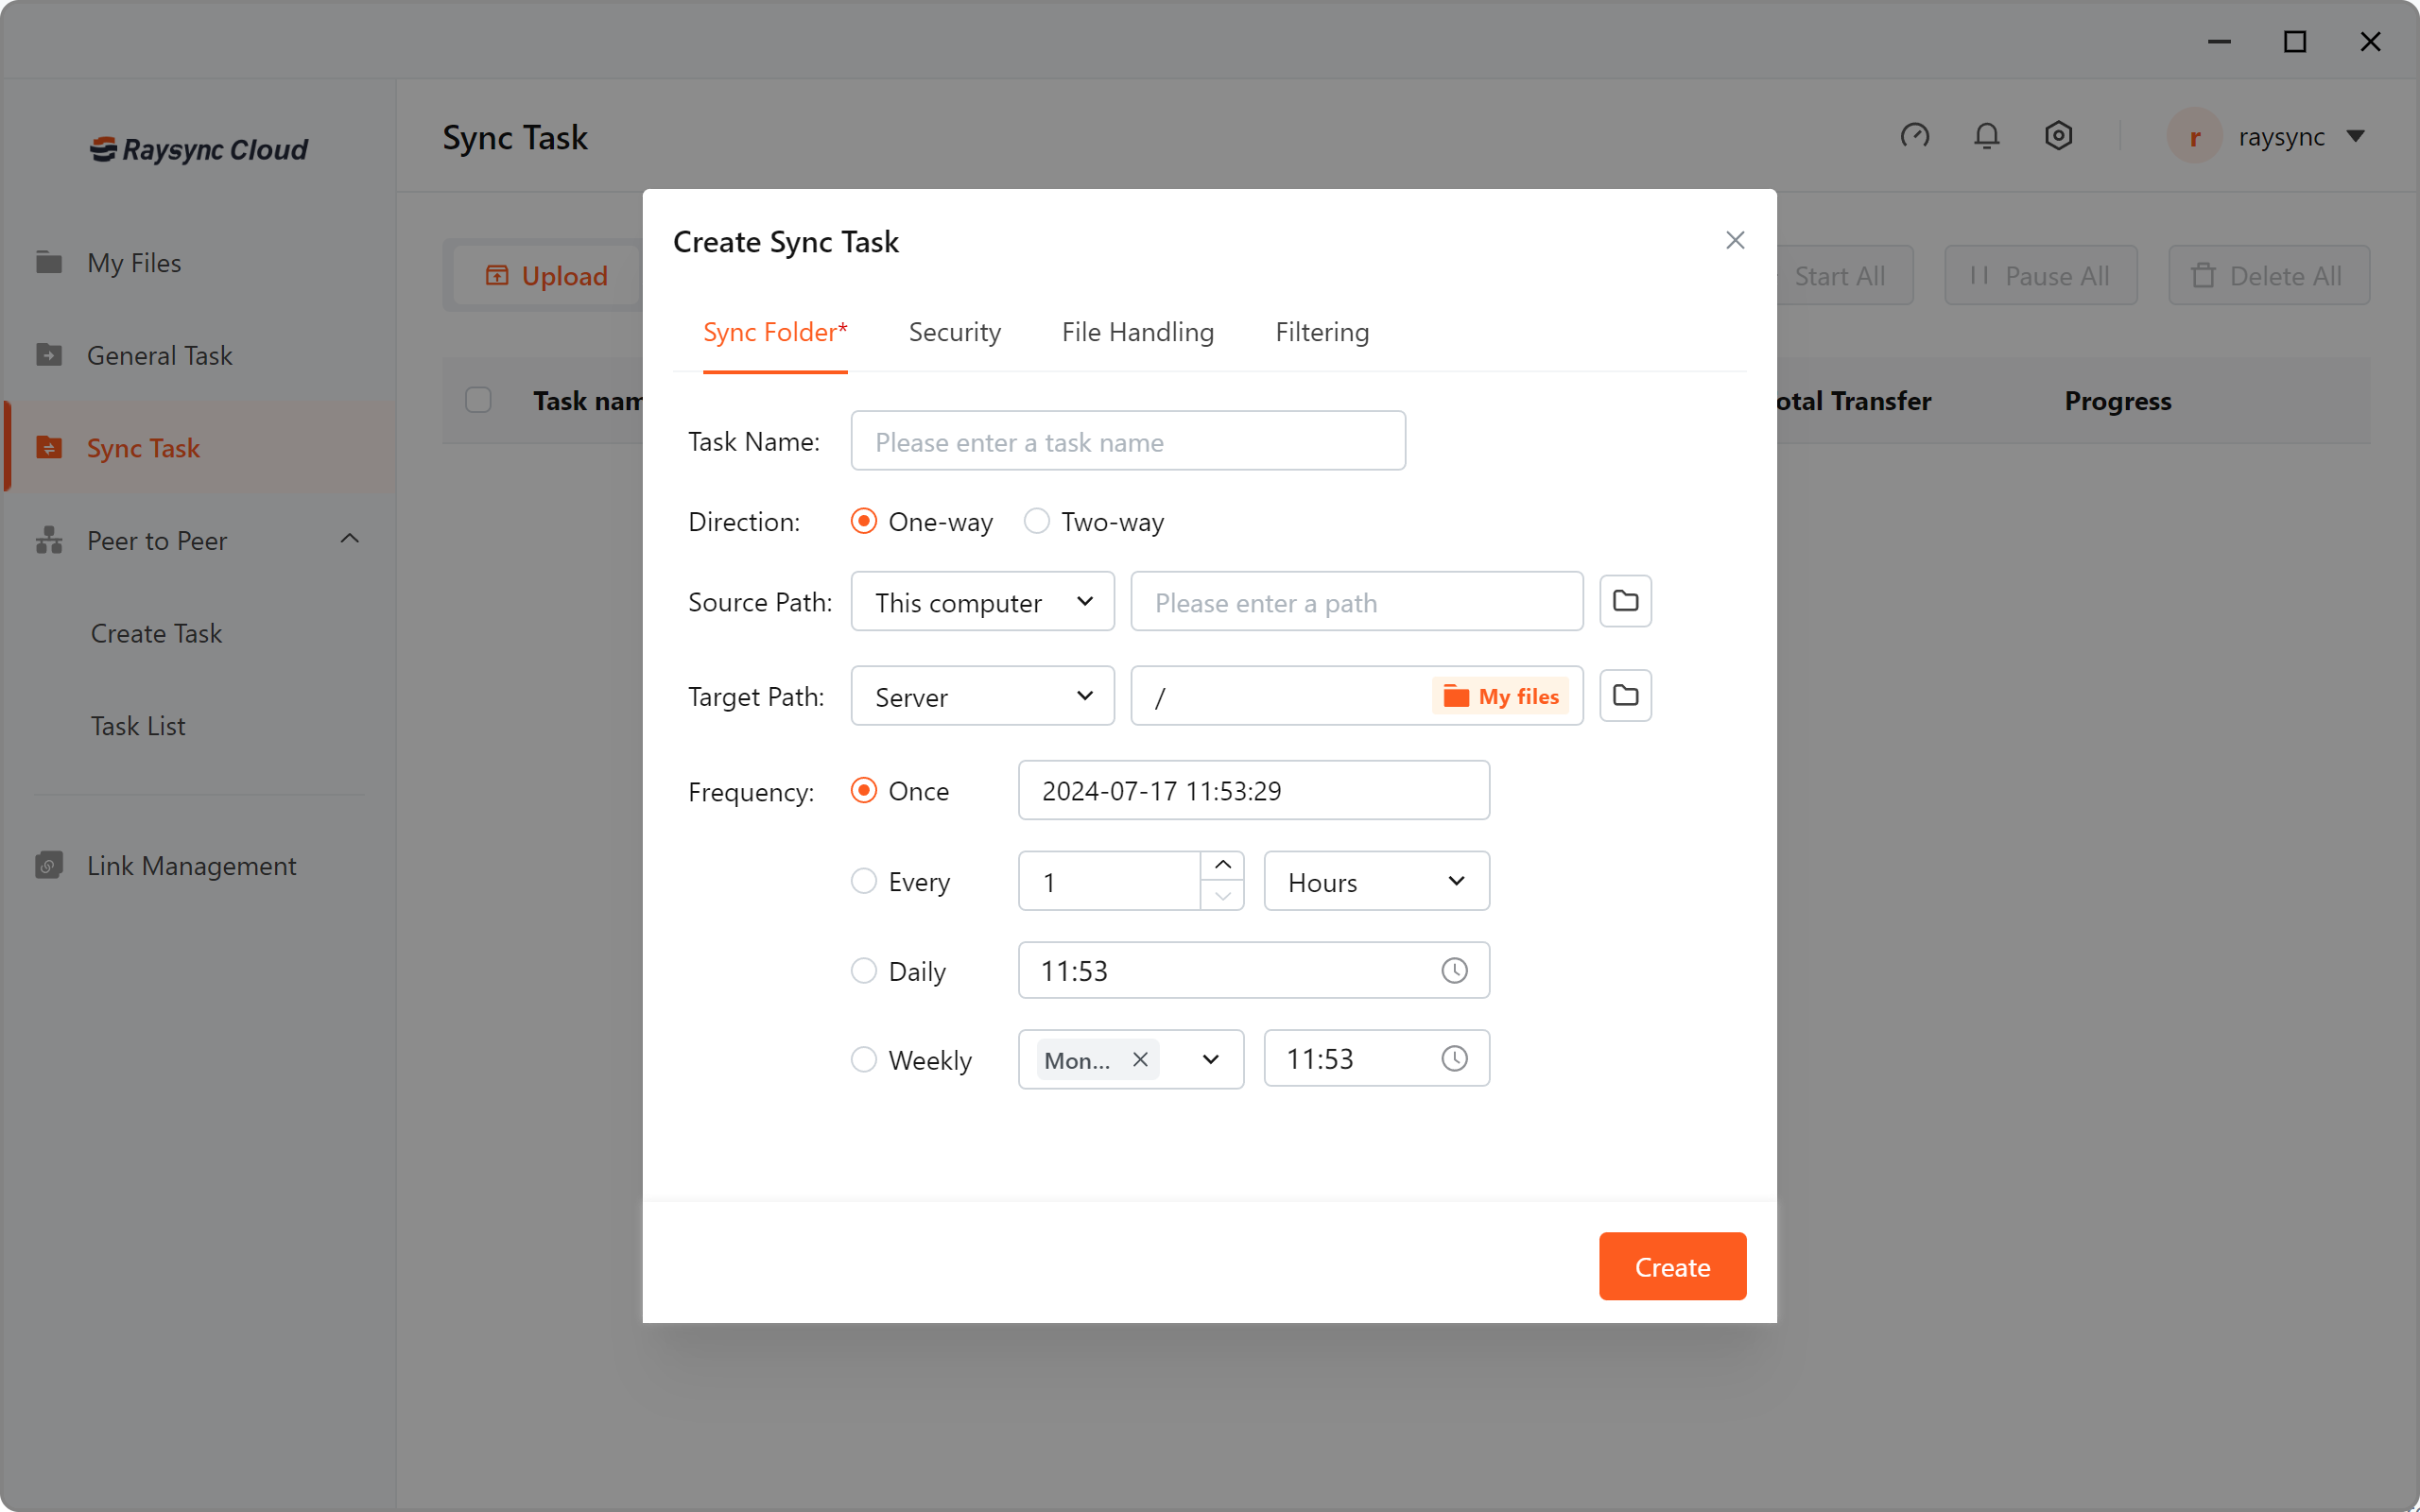
Support according to week synchronization function on Sync Task .
-
Support Task increase the rename function on Sync Task.
-
Support overwriting file if source newer on Sync Task.
-
When selecting files on Mac client, support quickly select the Mount disk.
-
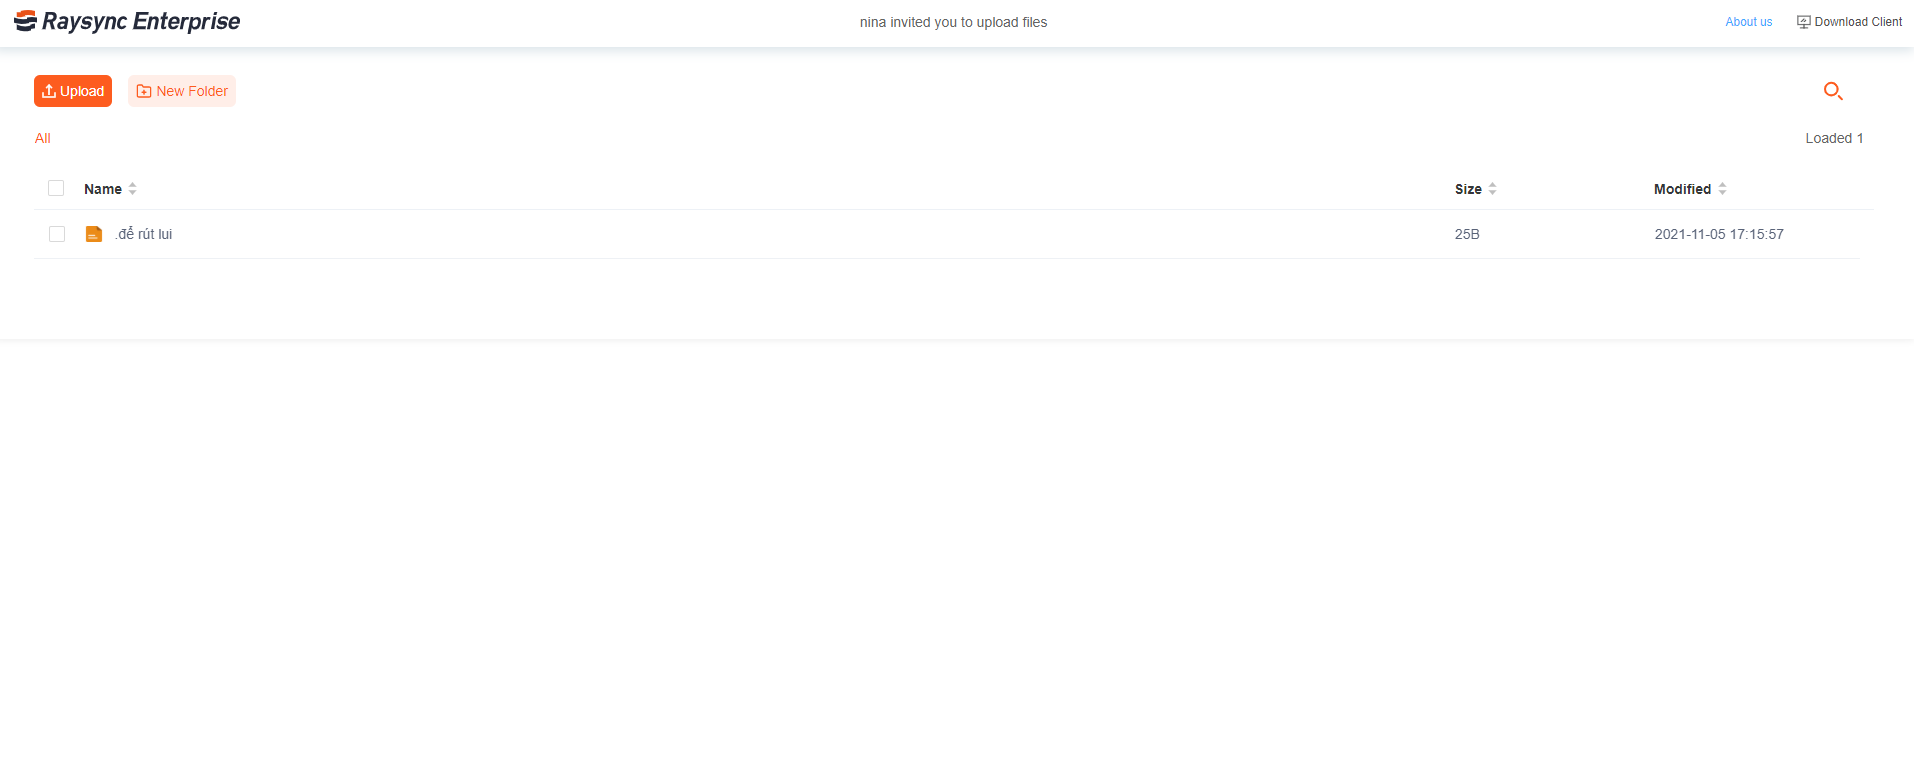
The links of invite upload supporting the creation folder
-
Prohibit access path supporting the Mixer method
-
Support data statistics in the background
-
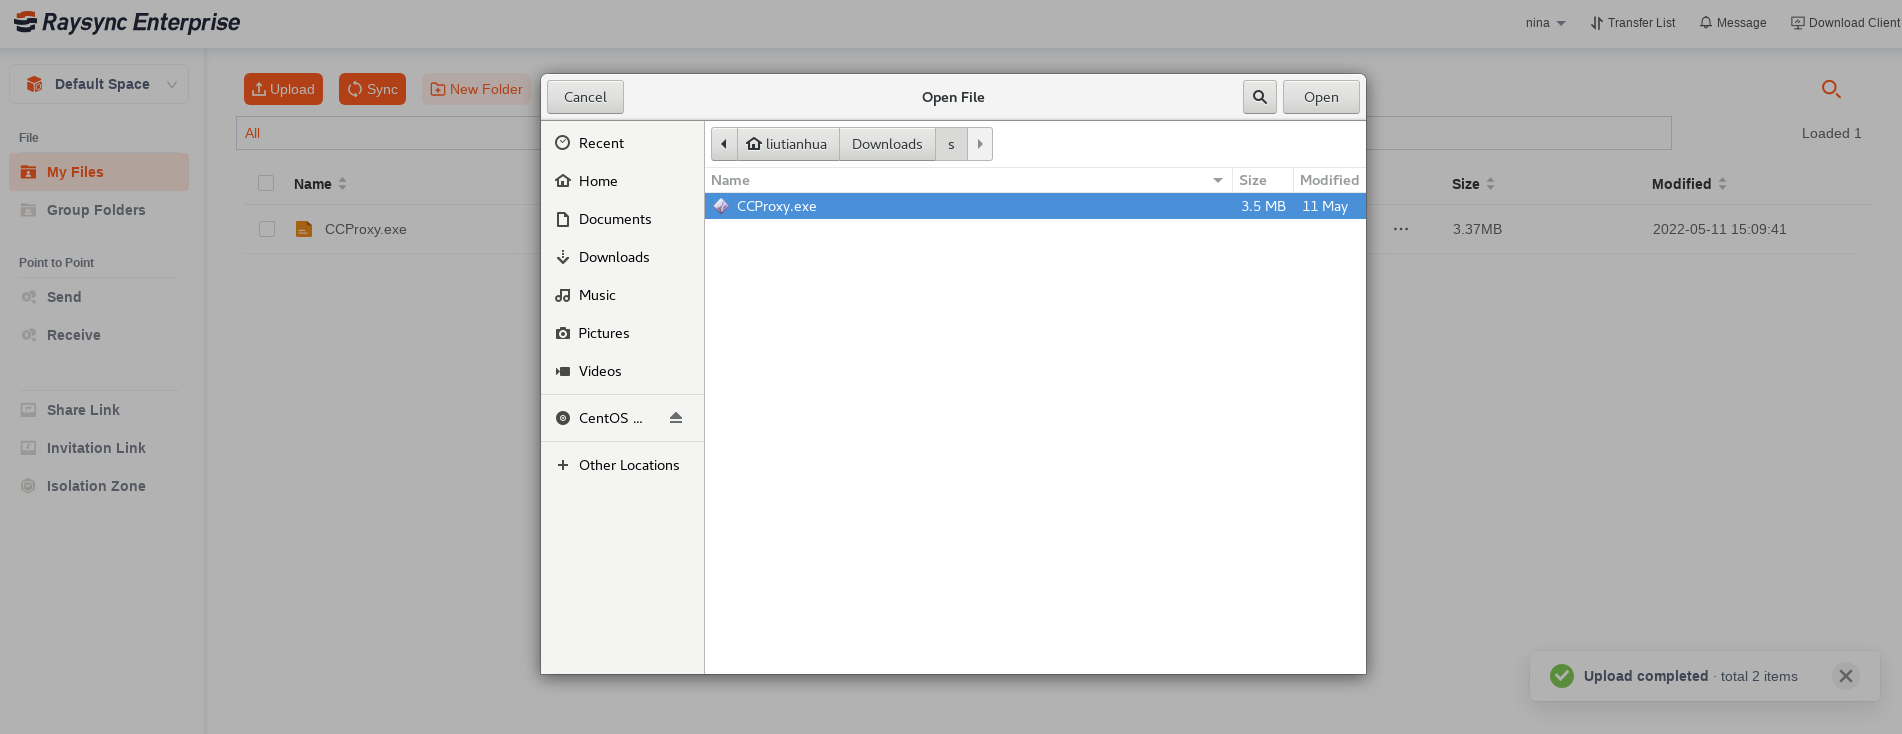
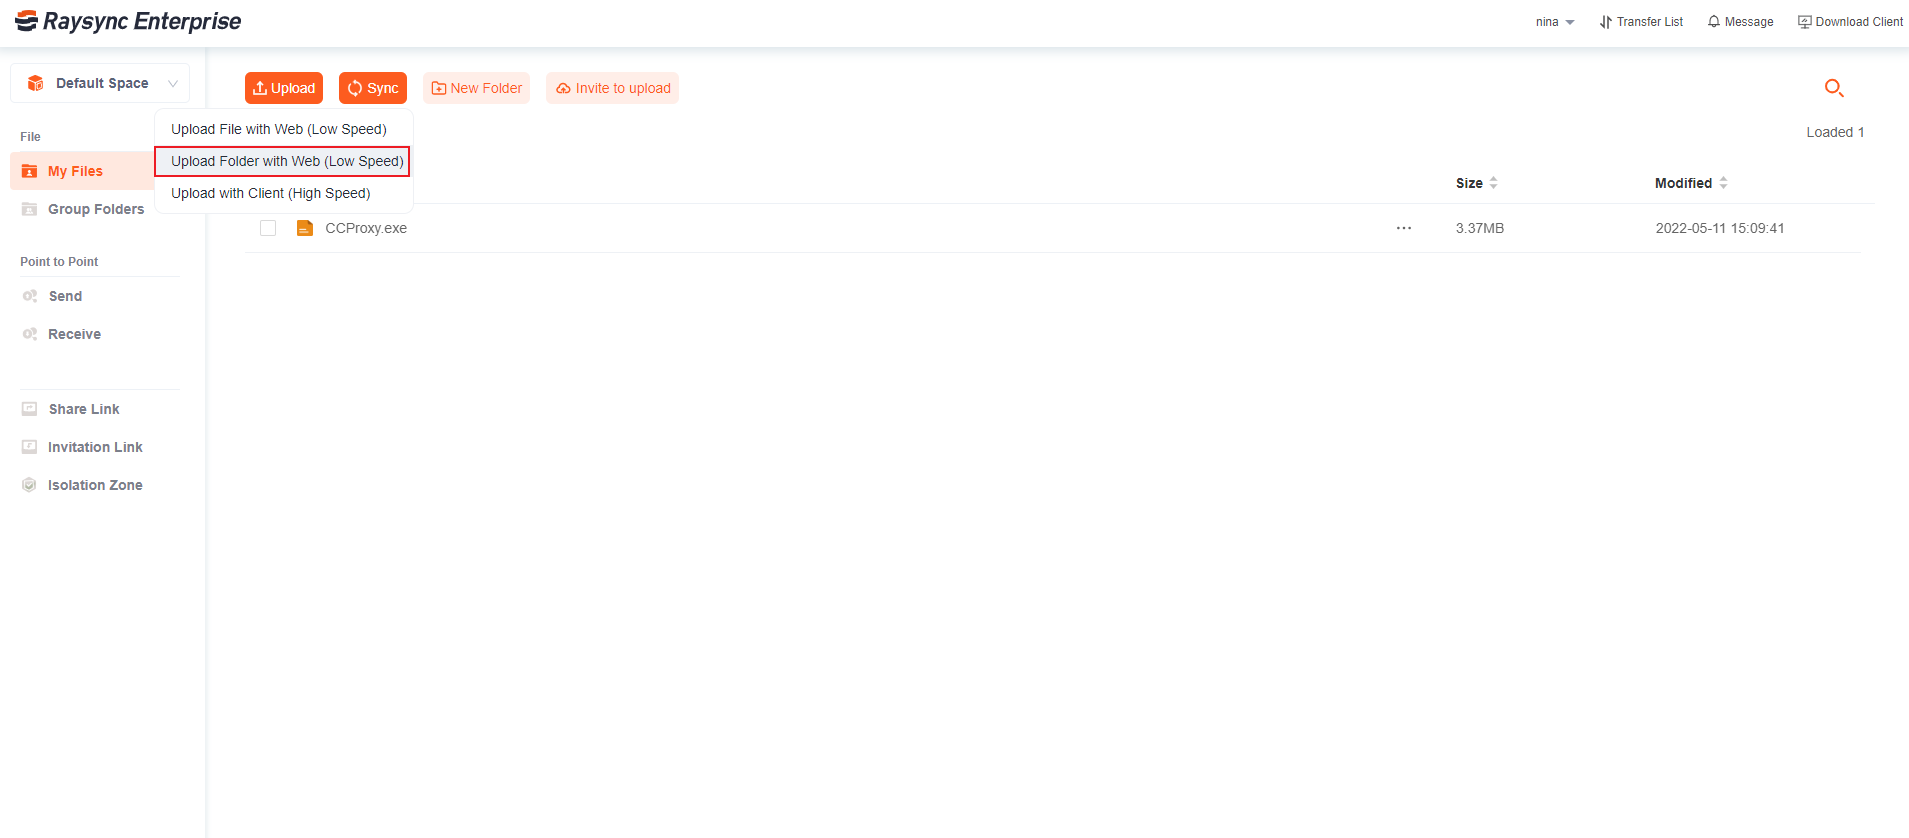
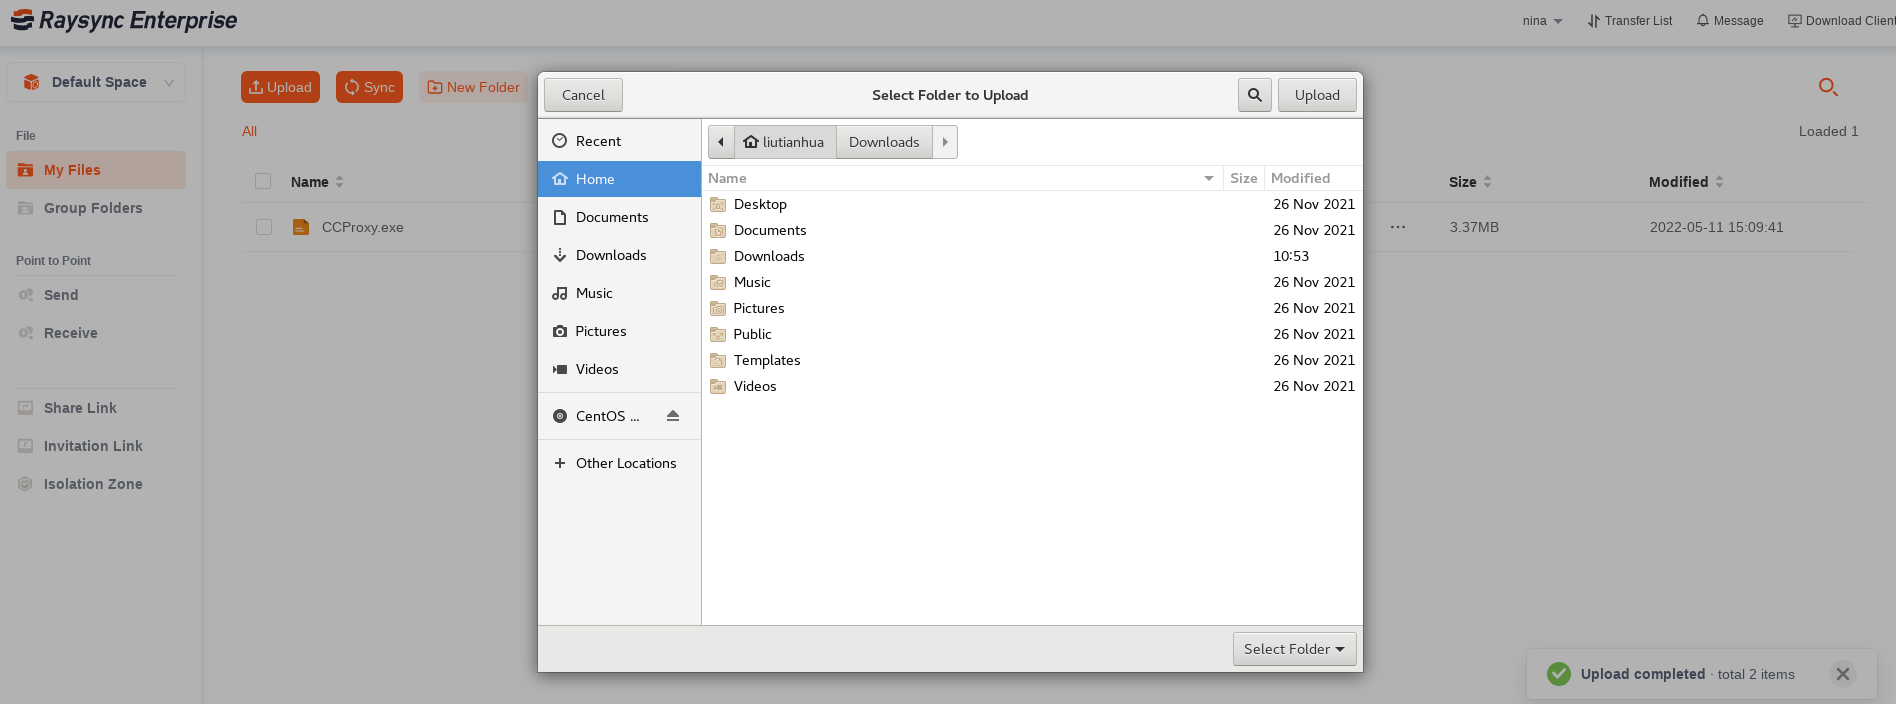
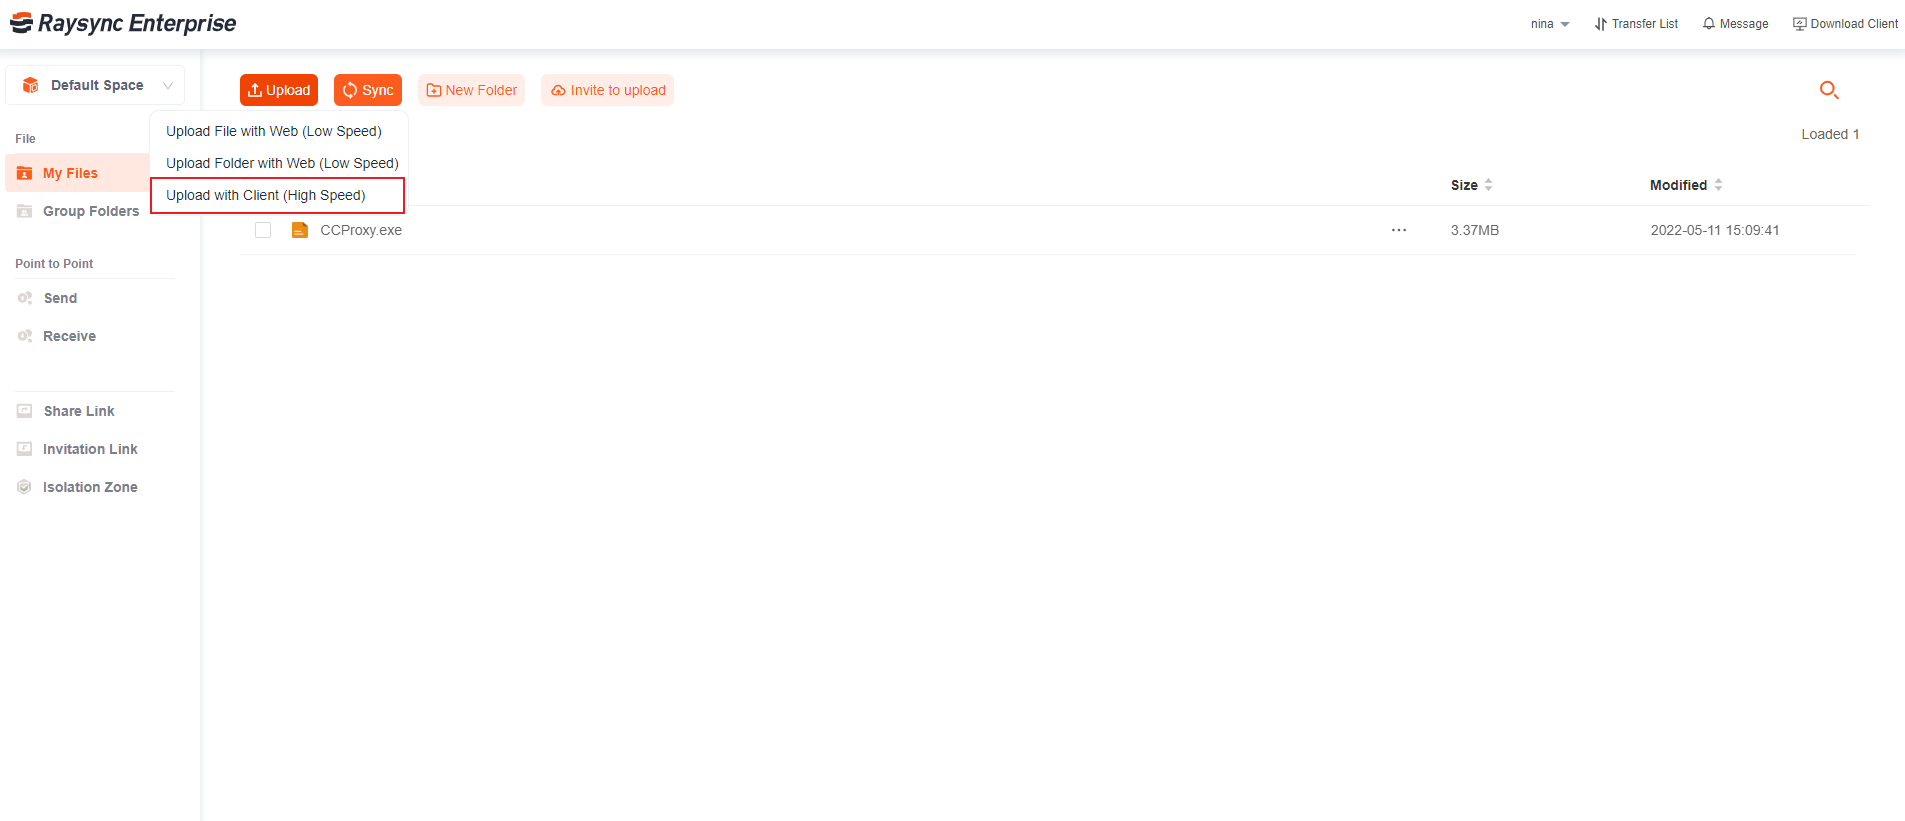
Webpage supports uploading folders
-
Webpage support dragging upload files
-
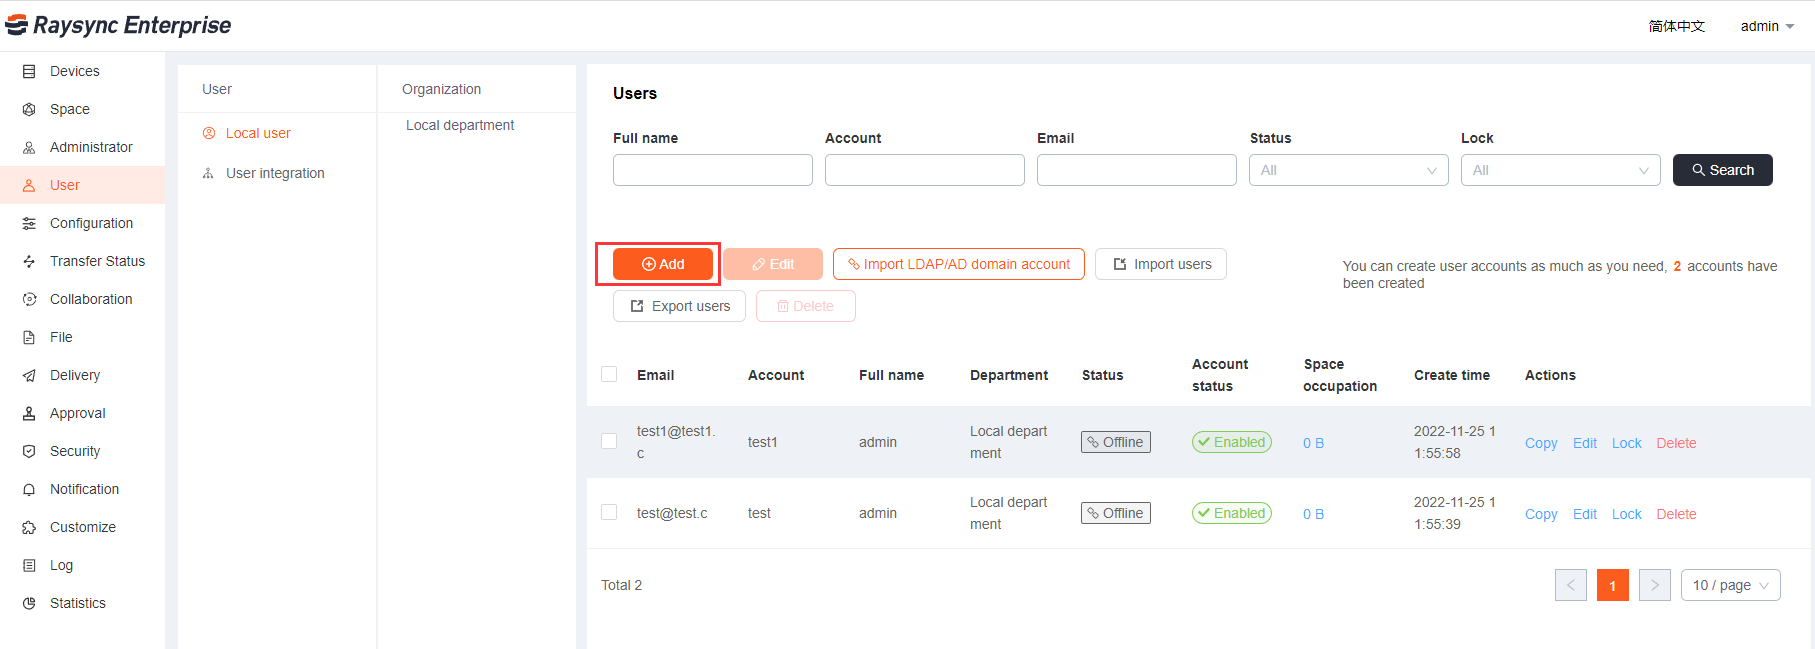
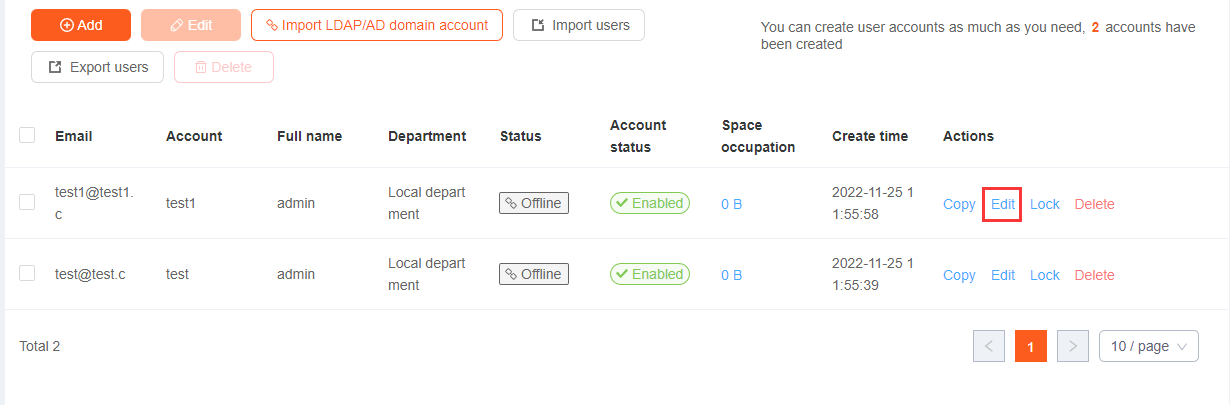
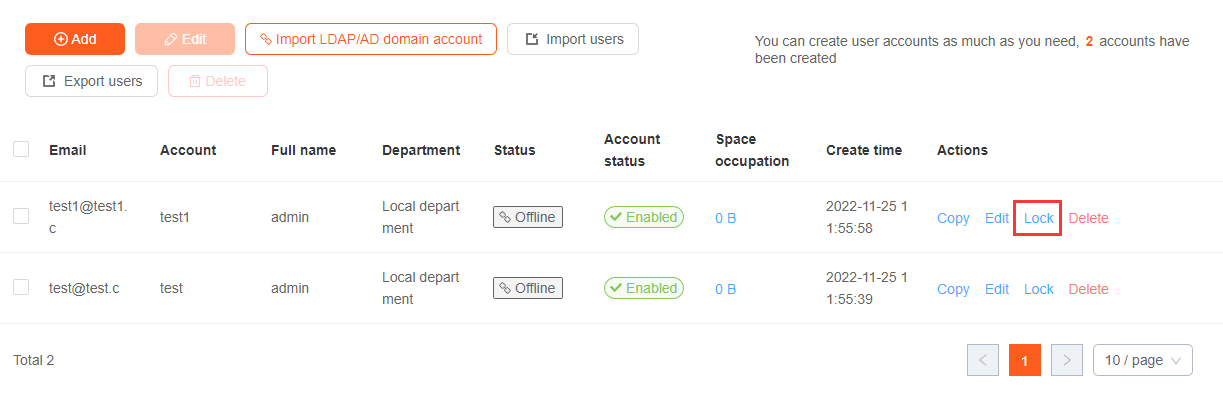
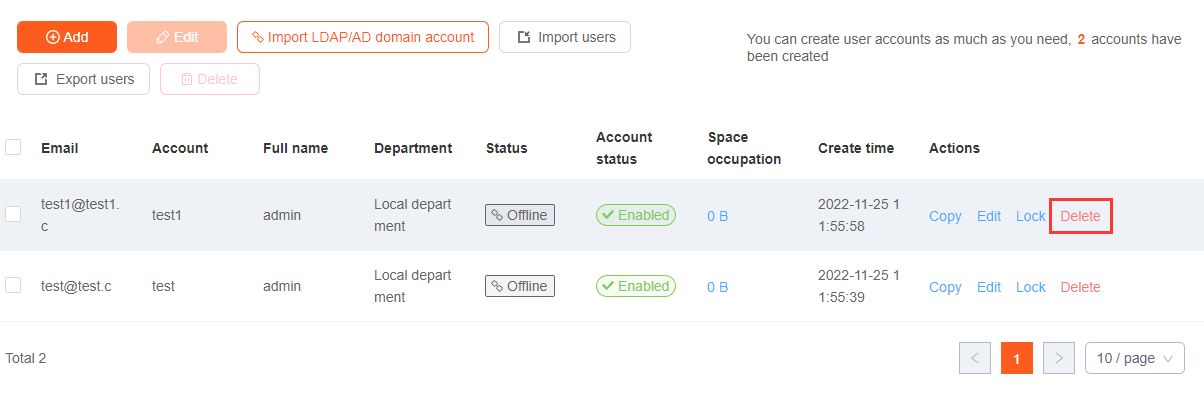
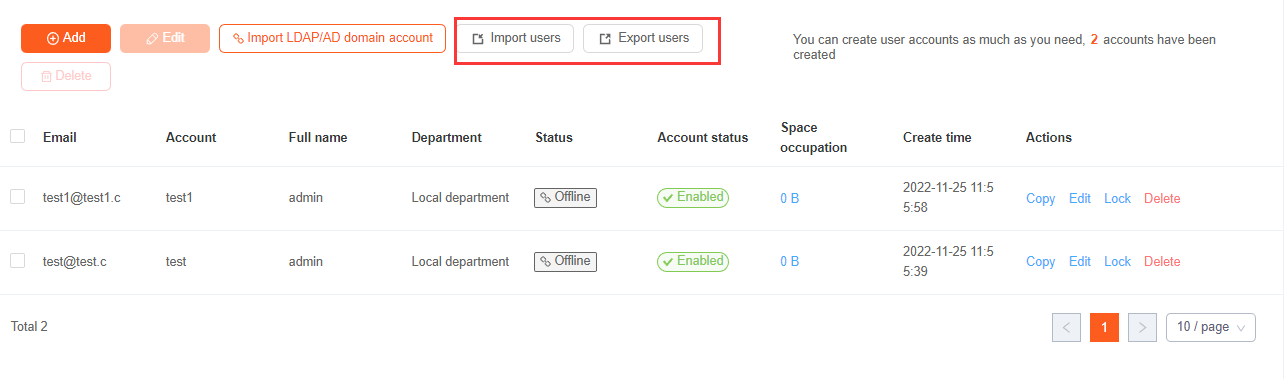
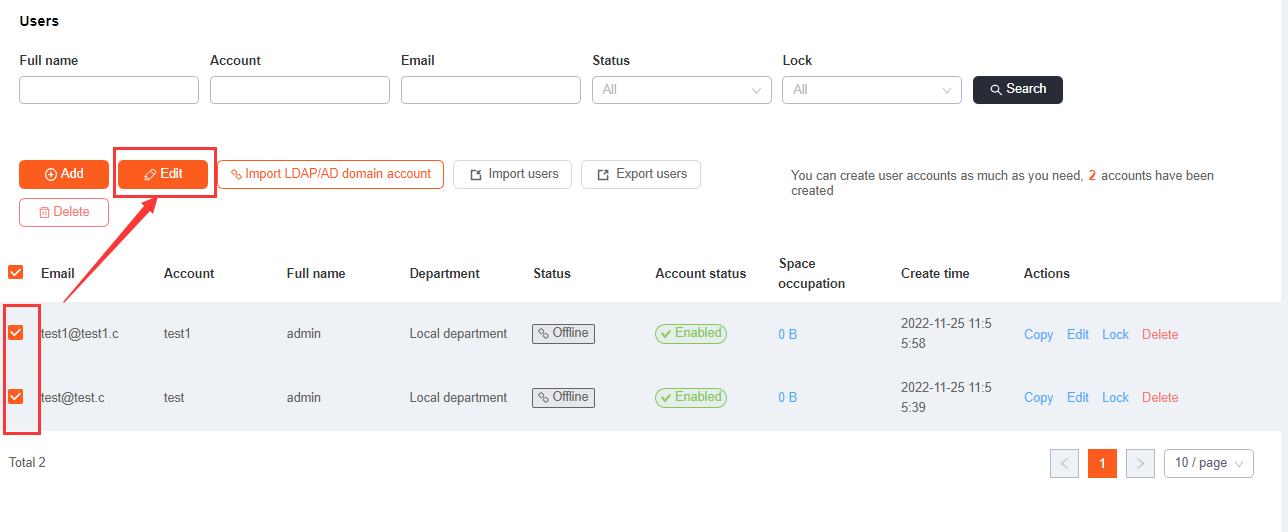
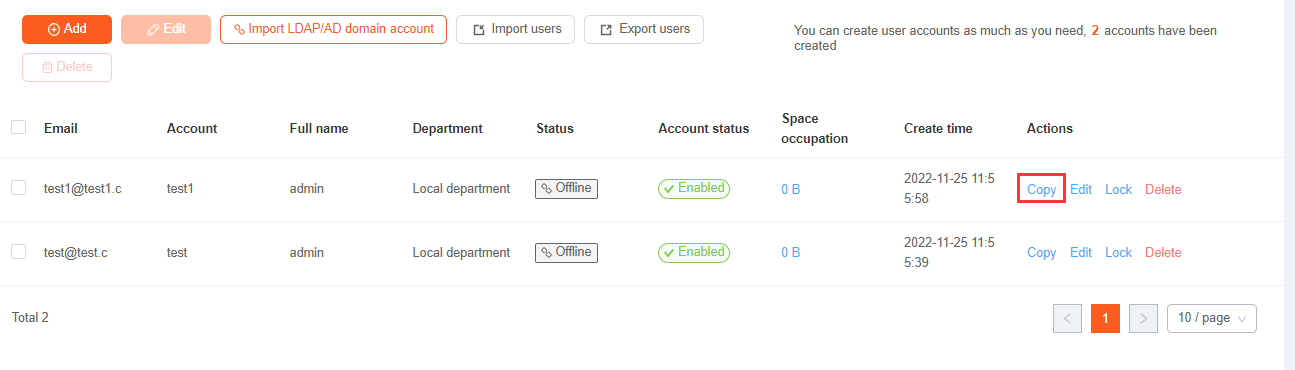
Import and export accounts, batch editing accounts
-
Transfer situation increases progress display
-
Fix some bugs
v6.2.8.0
Updated: 2022-02-17
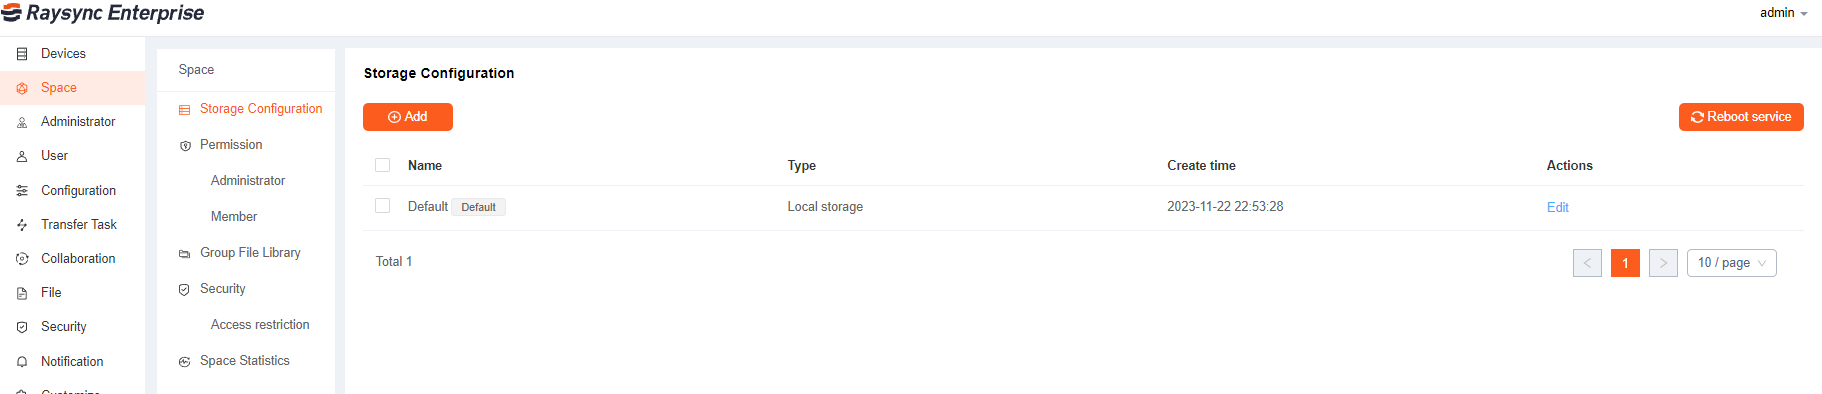
1.Support multiple spaces.
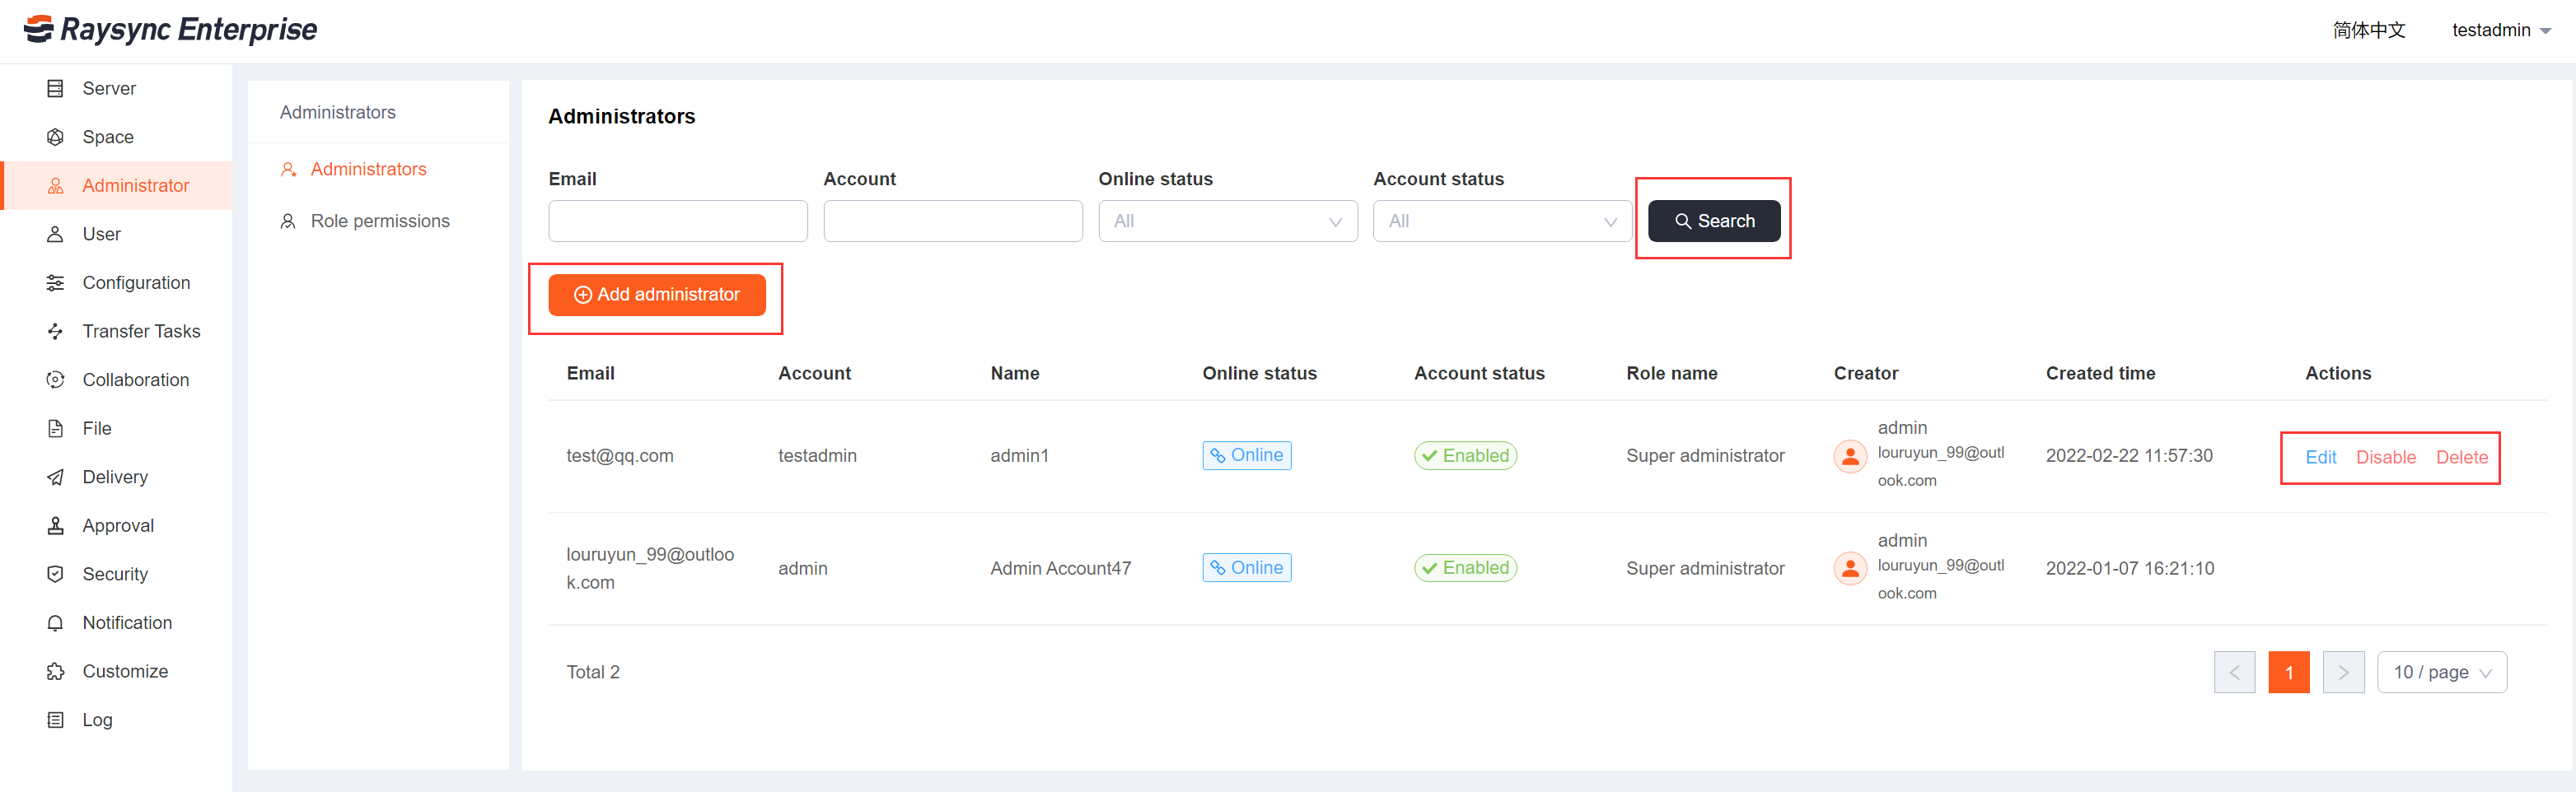
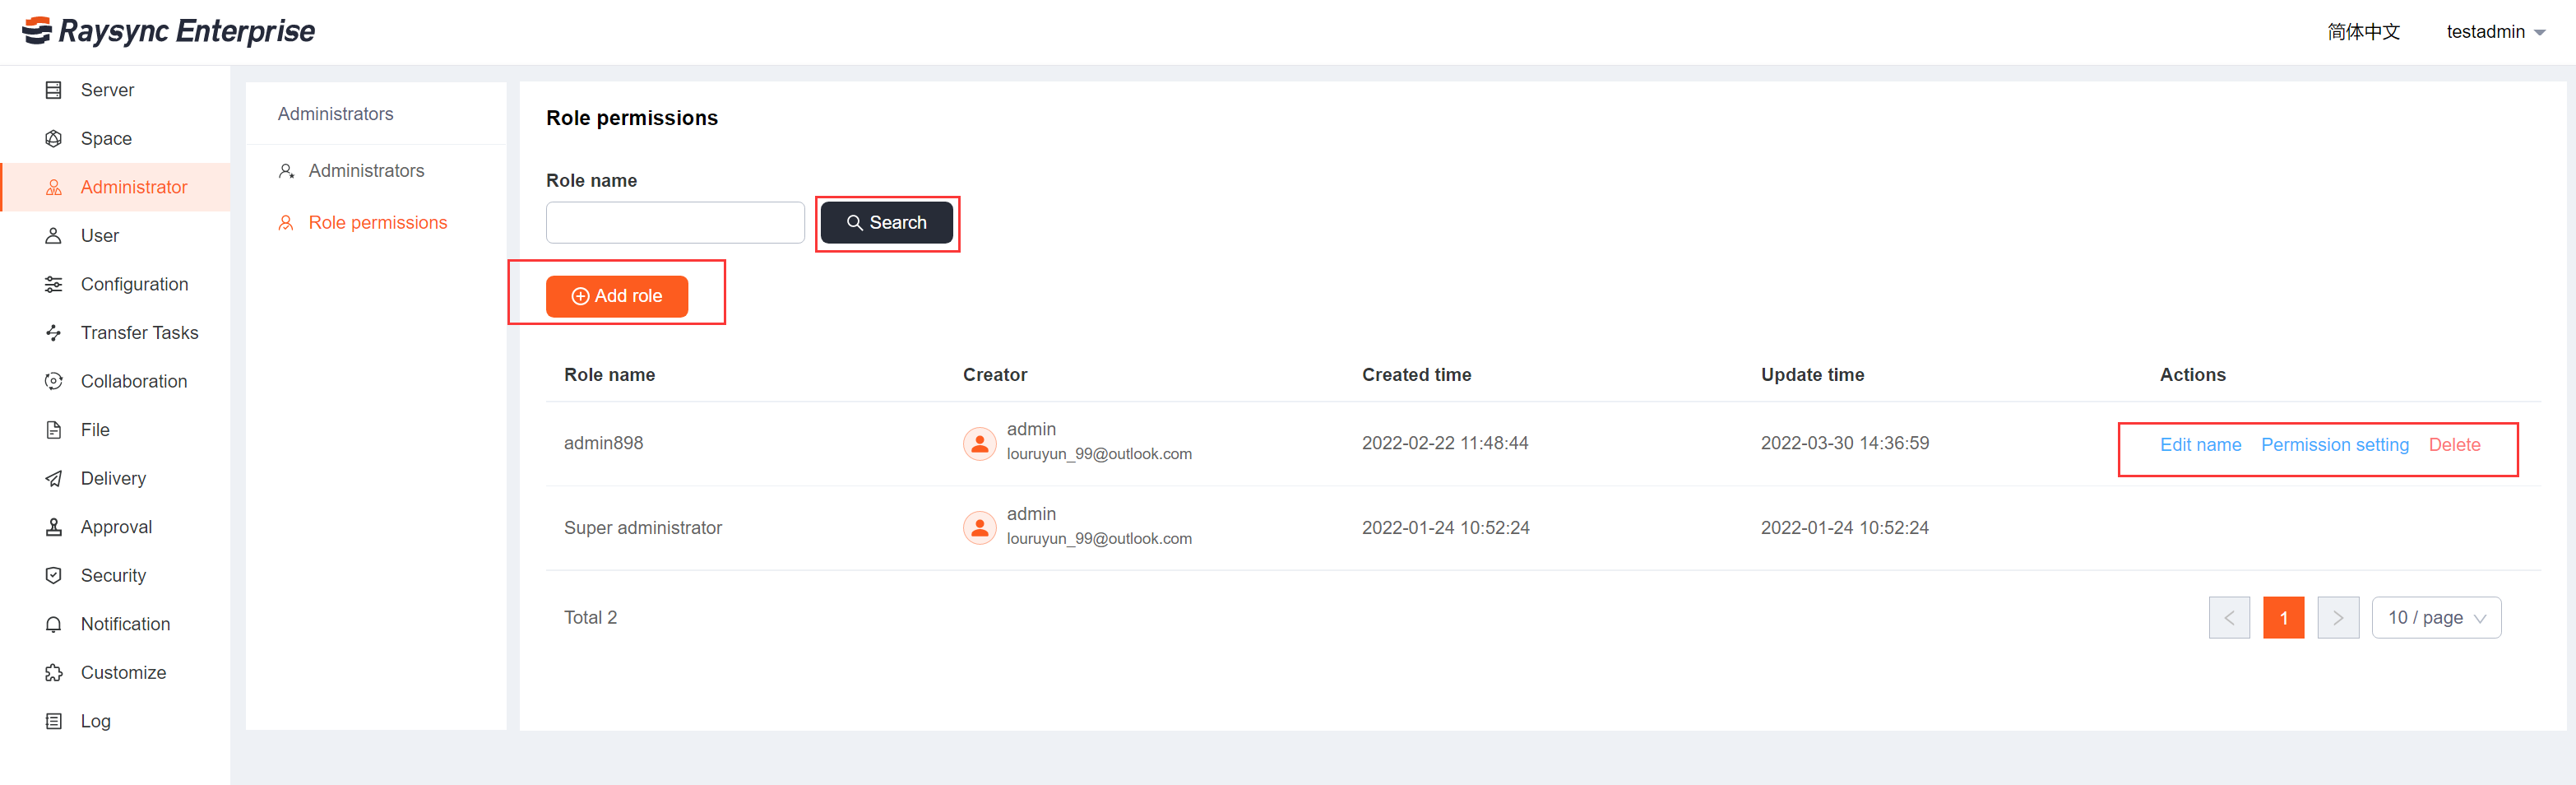
2.Support to create multiple administrators and configure administrator permissions.
3.Support copy account.
4.Add synchronous transmission log.
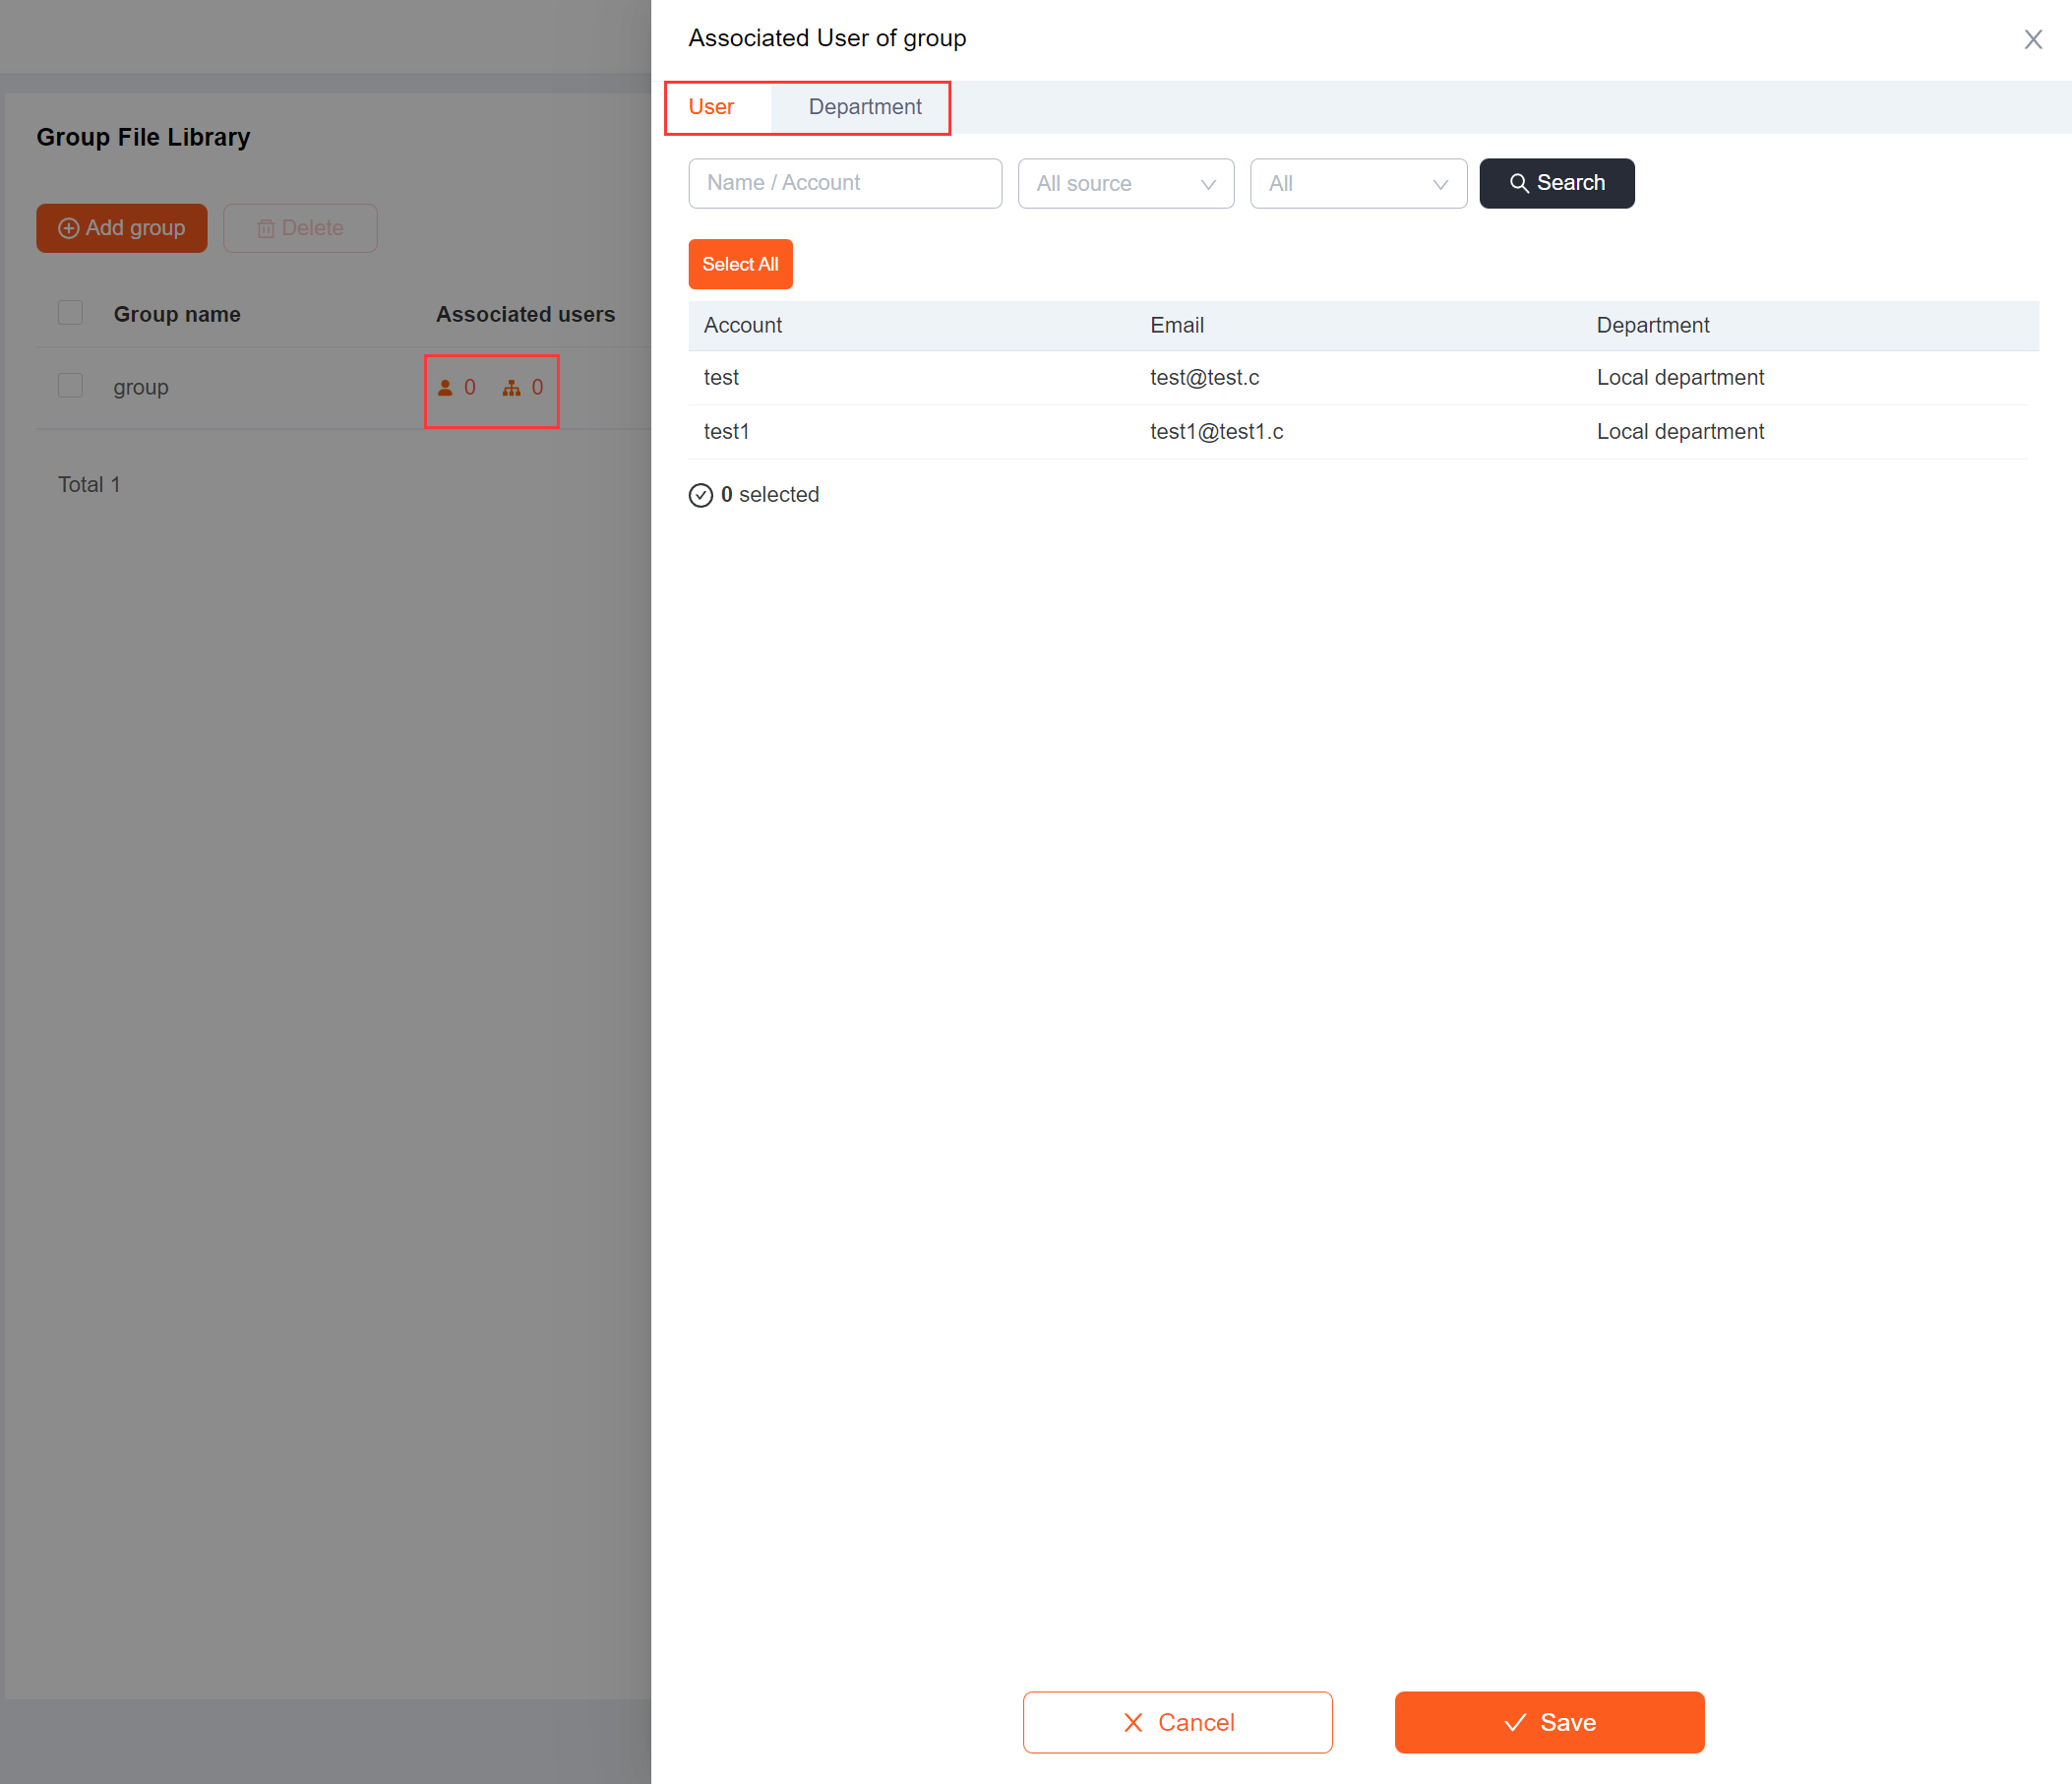
5.Support viewing user and group files in the admin portal.
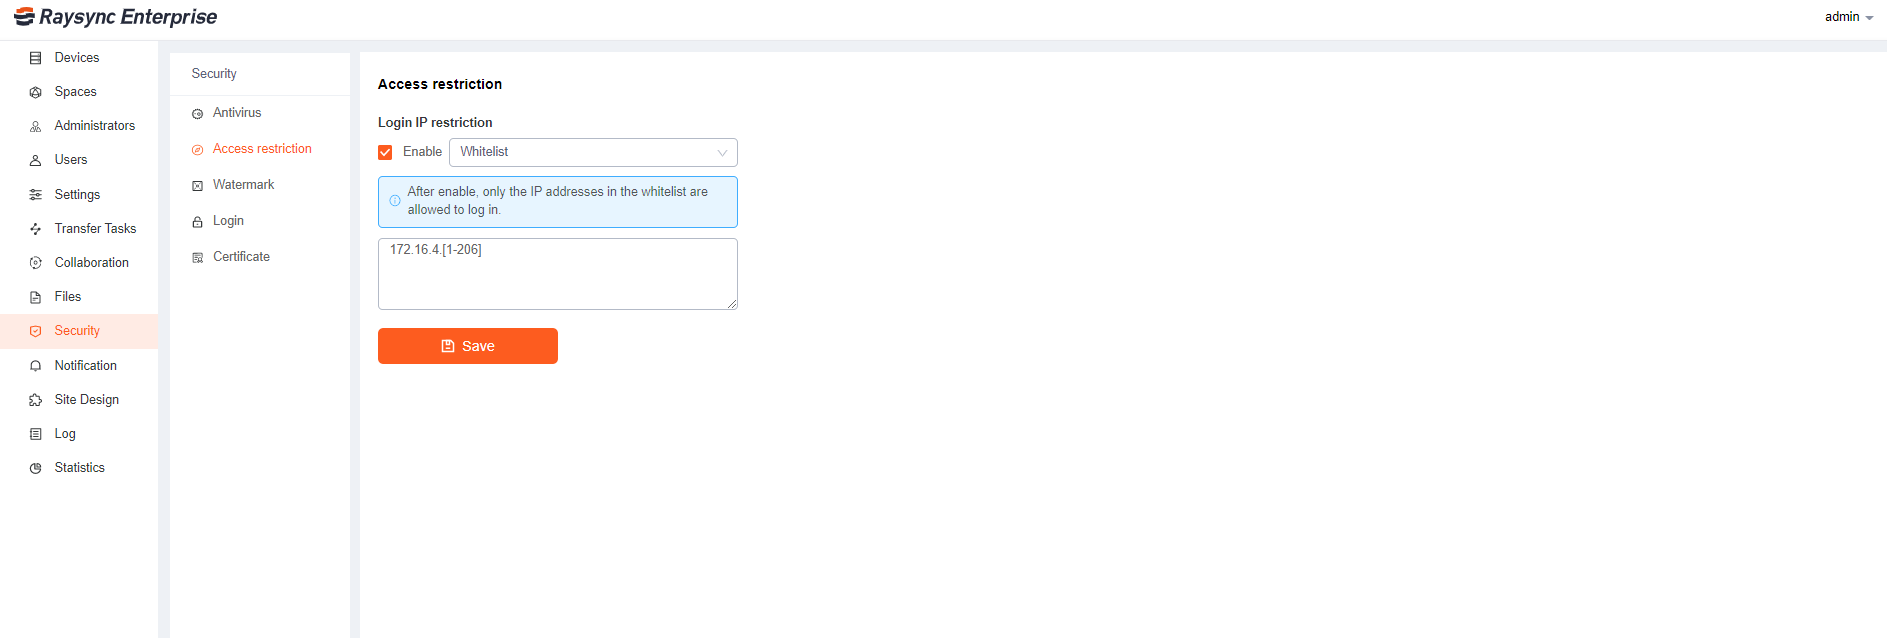
6.Added IP access black and white list.
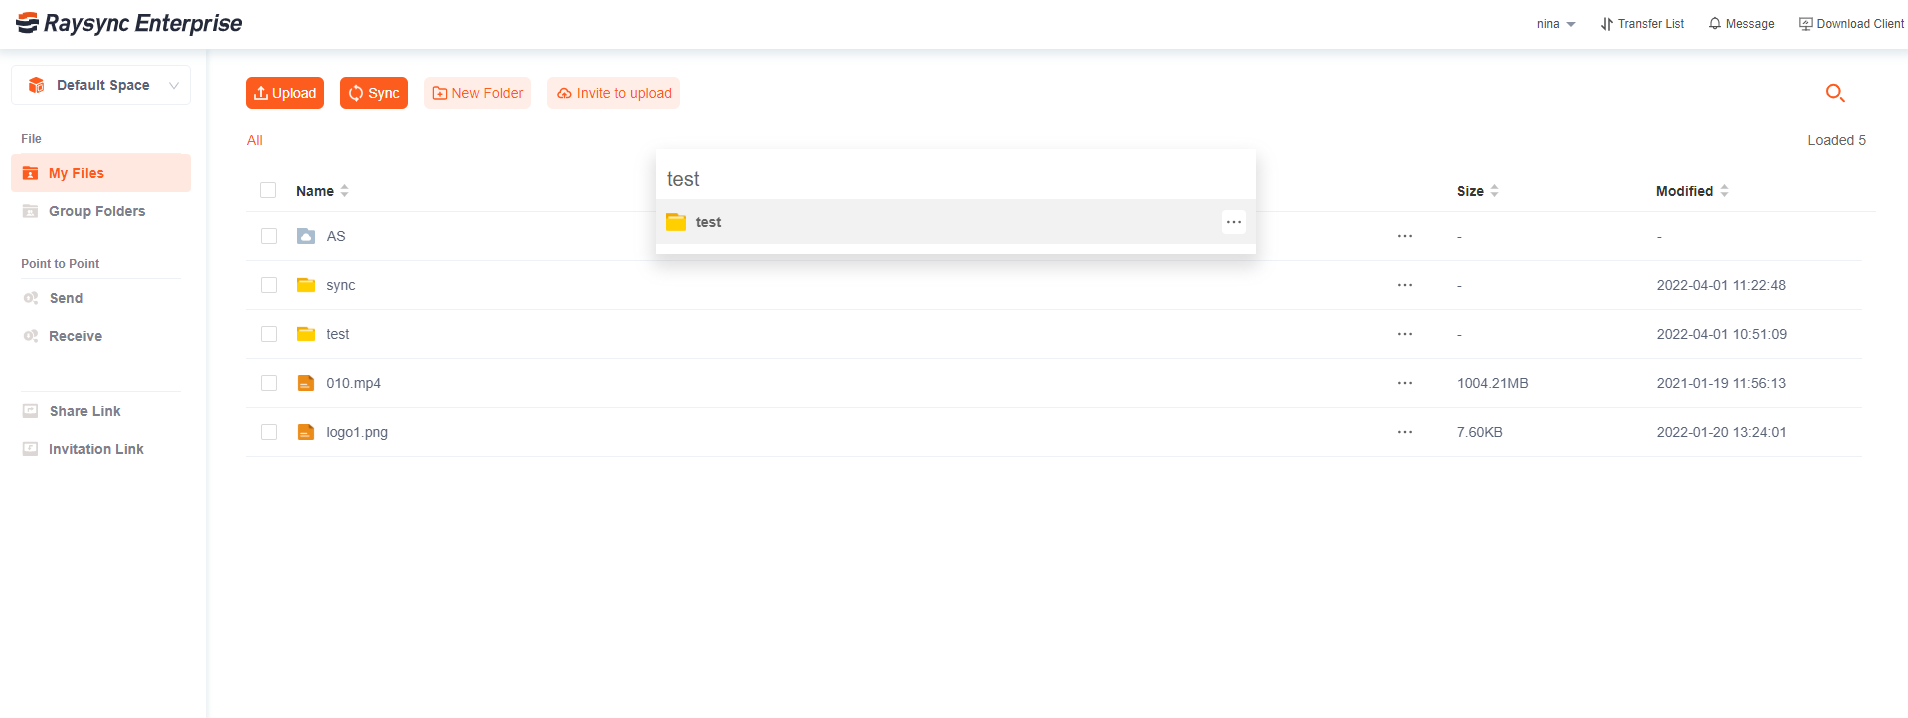
7.Invite upload link supports create new folder.
8.The group file library supports sharing and downloading, and invitation to upload.
9.The group file library supports specifying the permissions of each member individually.
10.Client direct transmission supports UDP connection to the pee.
11.Support user to retrieve password.
12.UI layout adjustment.
13.Fix some bugs.
v6.0.0.8
Updated: 2021-09-27
1.Clients are not required to create new folders, rename, move, copy, delete files, view properties, upload files and resume them at breakpoints.
2.Delete source file after the sync task is done.
3.Add a new synchronization frequency that synchronizes only once.
4.Allow centralized management of synchronous transfer tasks.
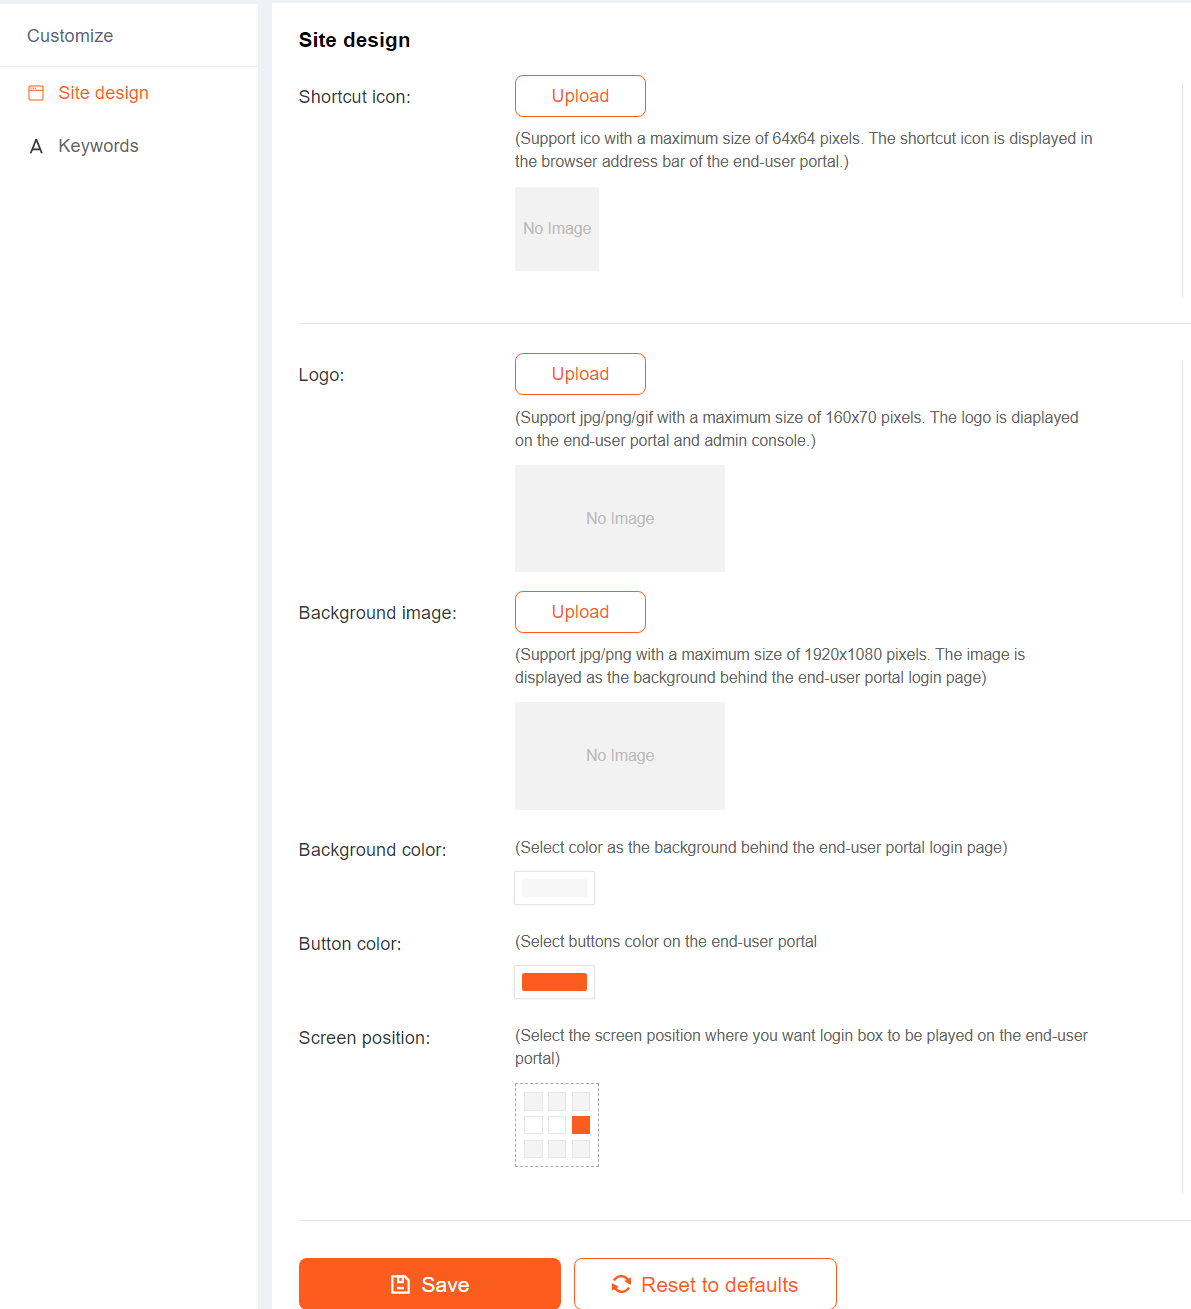
5.Make backdrop color, button color, and login box position customization available.
6.Optimization on point-to-point transfer.
7.Send link-sharing and password-sharing emails in separate.
8.Command line program supports unified management of App nodes.
9.Support office and cad preview.
10.Fix some bugs.
v5.0.8.8
Updated: 2021-06-09
1.Add automatic cleaning files.
2.The client supports sorting task priority.
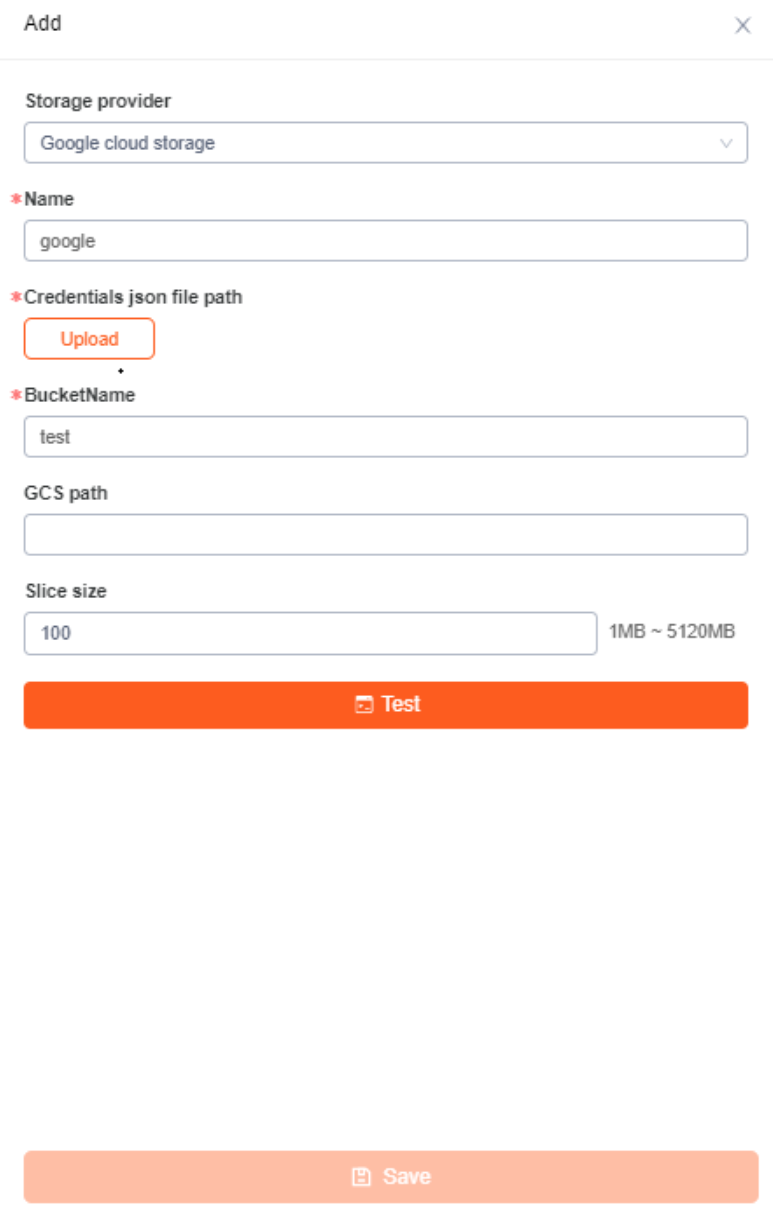
3.Support google cloud storage.
4.Add ctime and atime synchronization to remain file time (only support windows).
5.Support upload soft and hard link.
6.Support copy the full path of files.
7.Synchronous command line supports http mode to manage tasks.
8.Add disclaimer when client automatically updates.
9.The sharing link needs to record the number of downloads and IP address, the transmission log of the sharing link needs to be bound to the account.
10.Add a password setting switch when sharing files.
11.The client adds the number of files in parallel when transfer.
12.Support select files and folders at the same time.
13.The machine can be identified without configuring the client default server.
14.Sharing links is not limited by login whitelist.
15.Fix some bugs.
v5.0.7.8
Updated: 2021-02-07
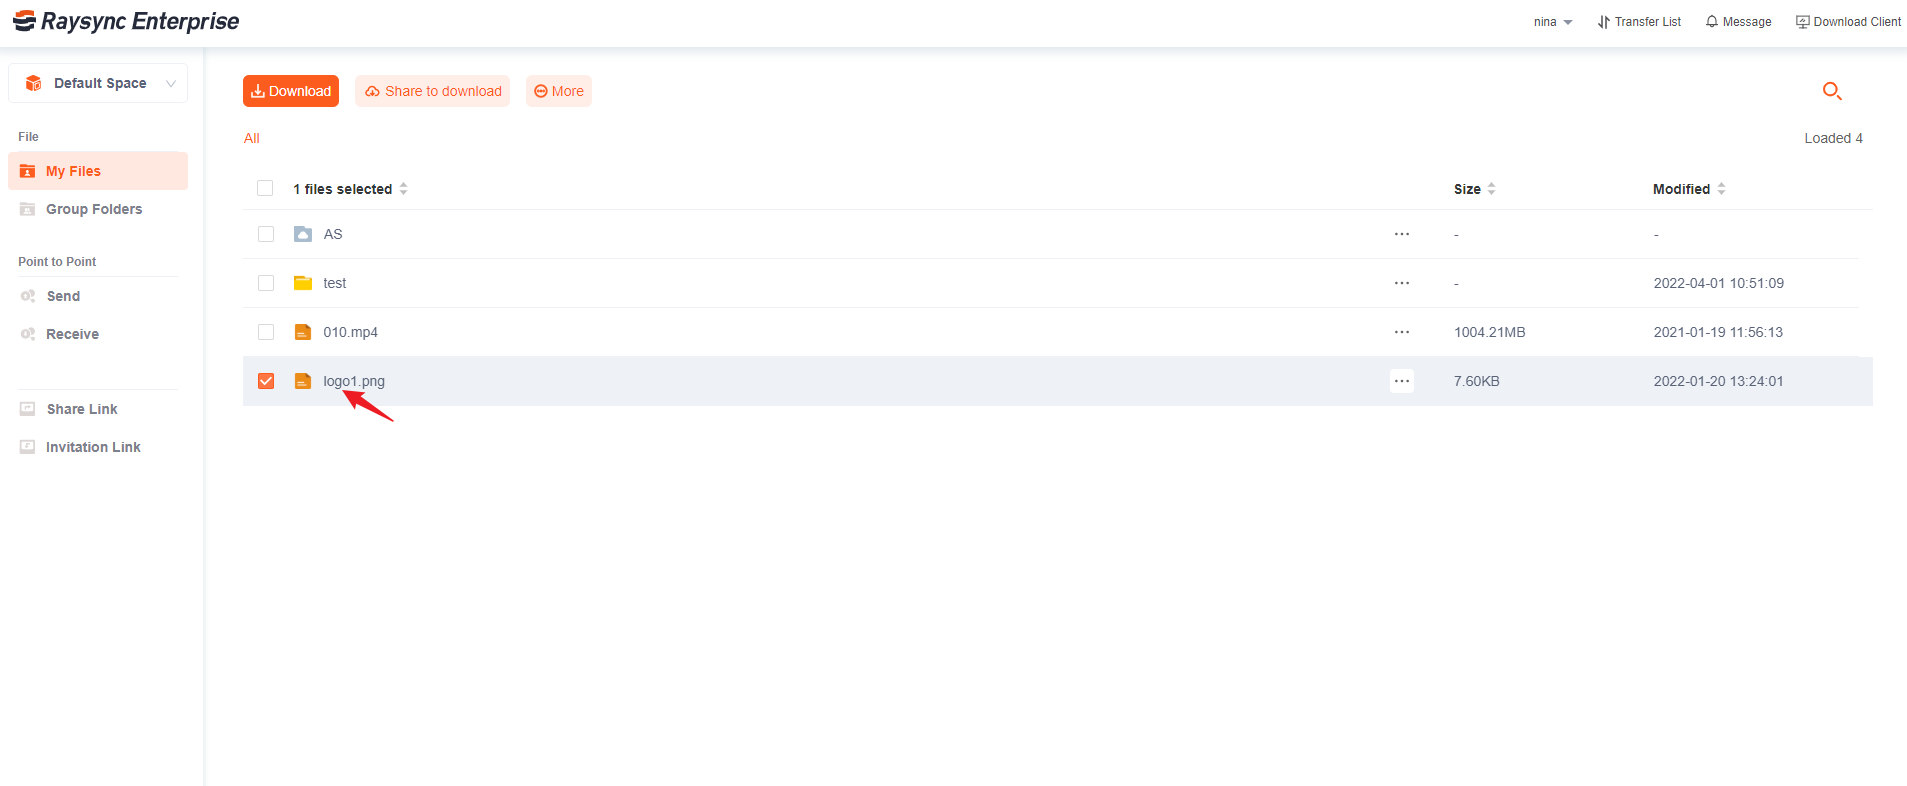
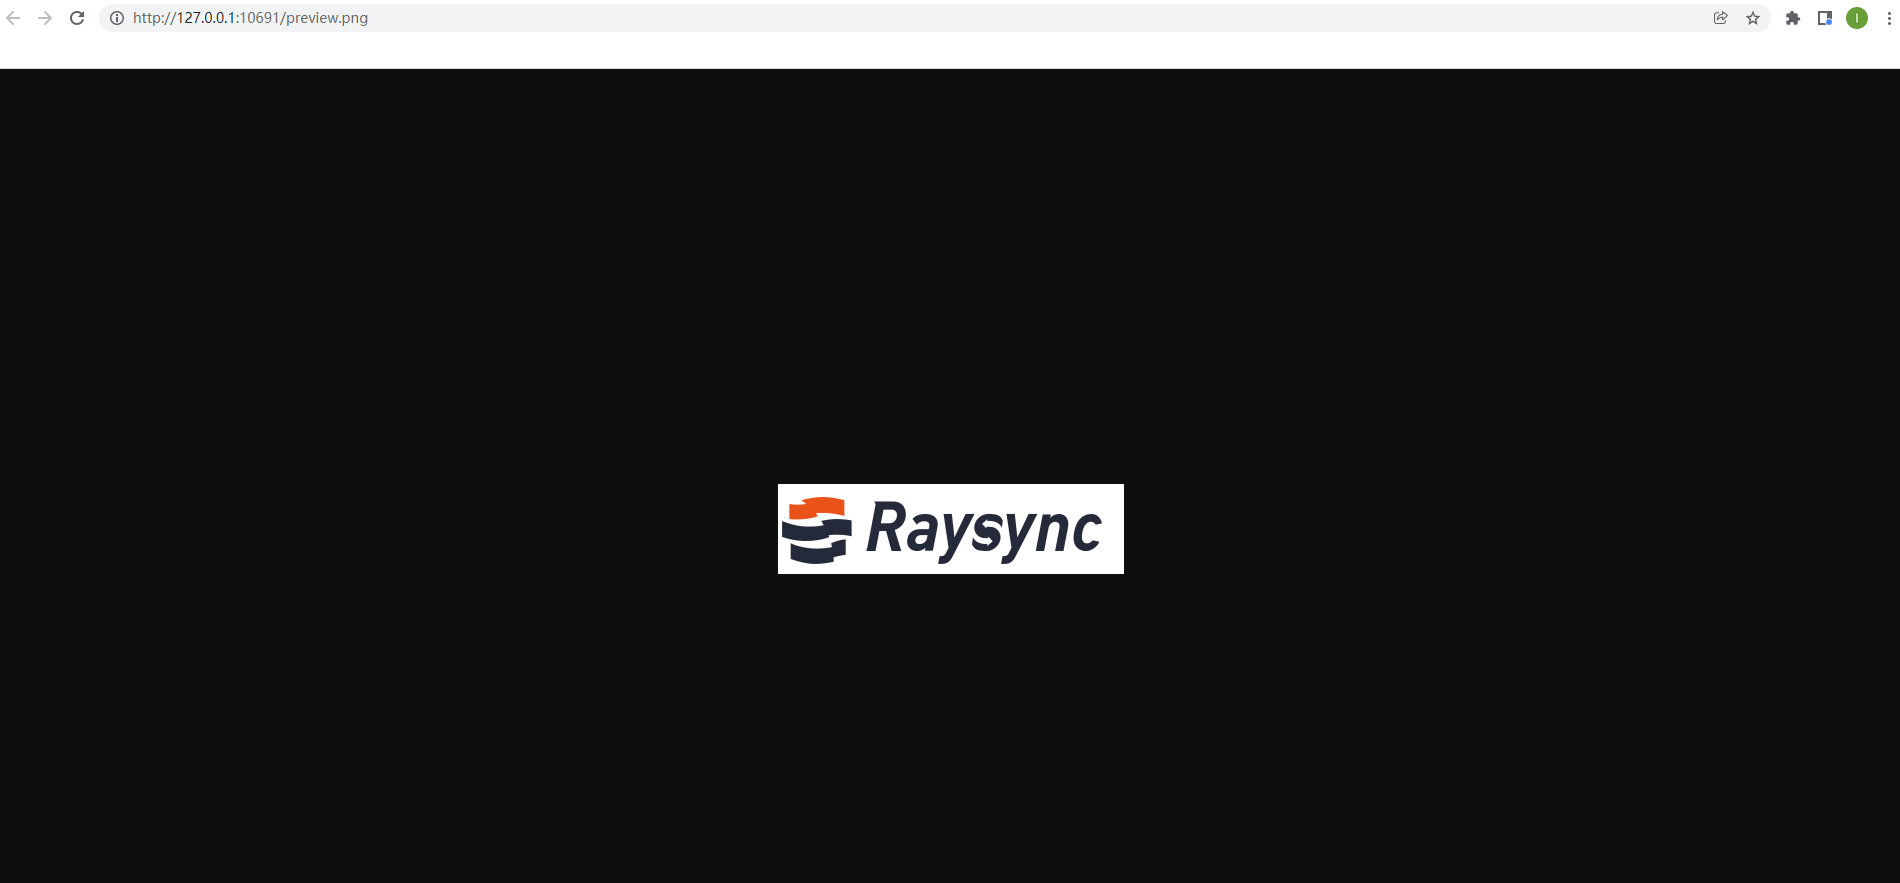
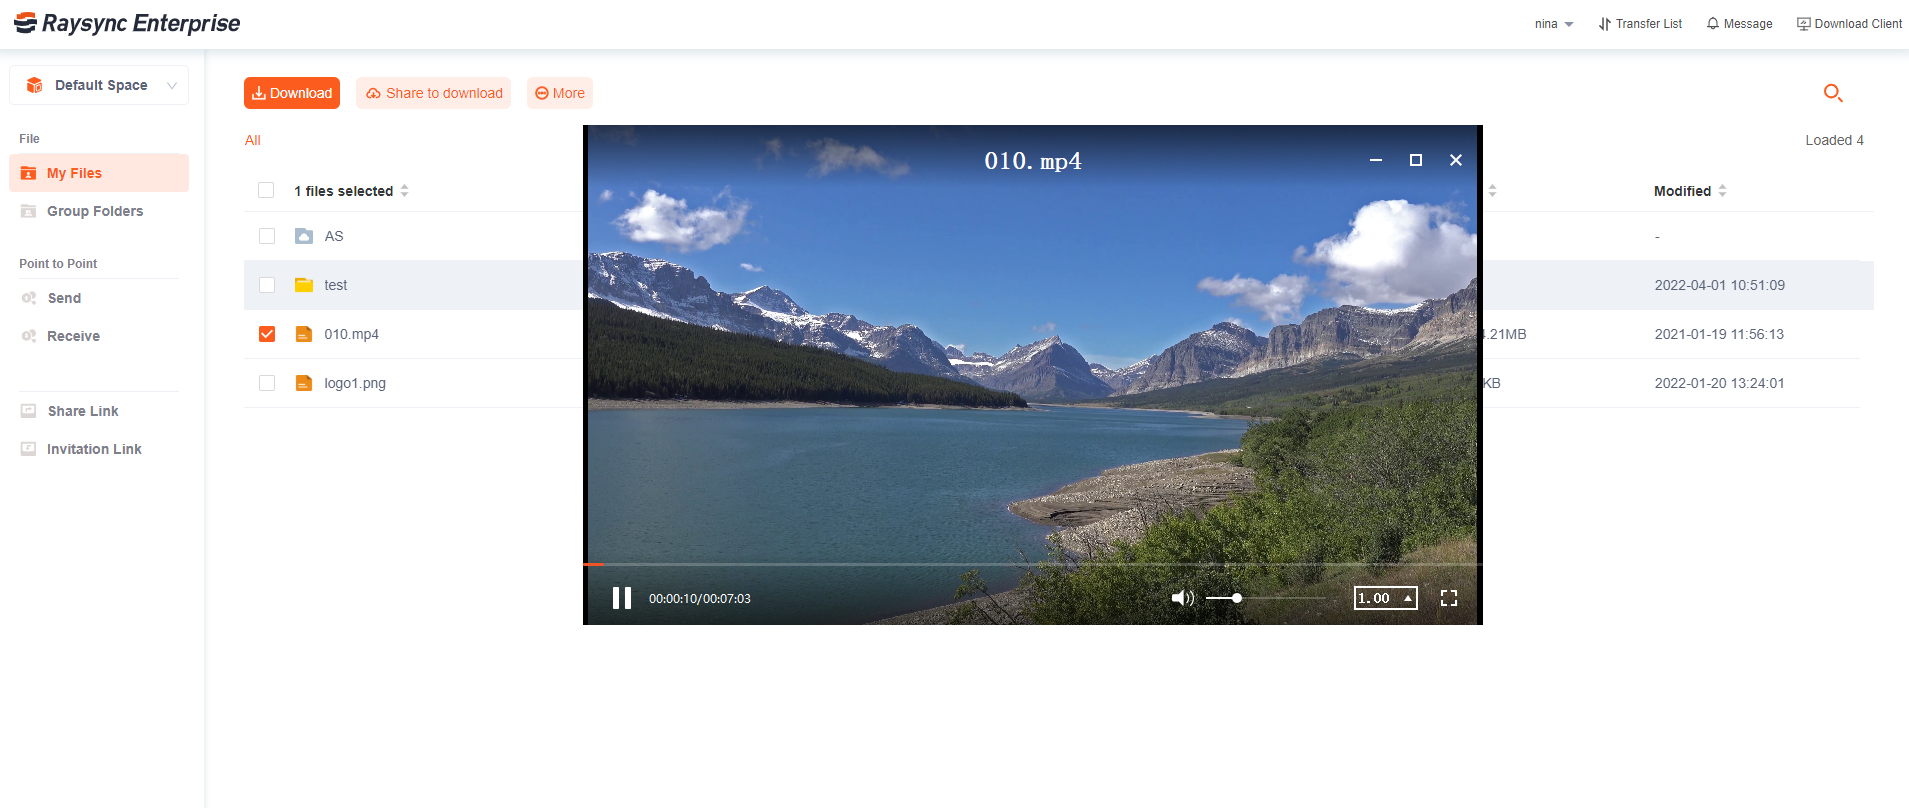
1.Support preview files, pictures and videos online.
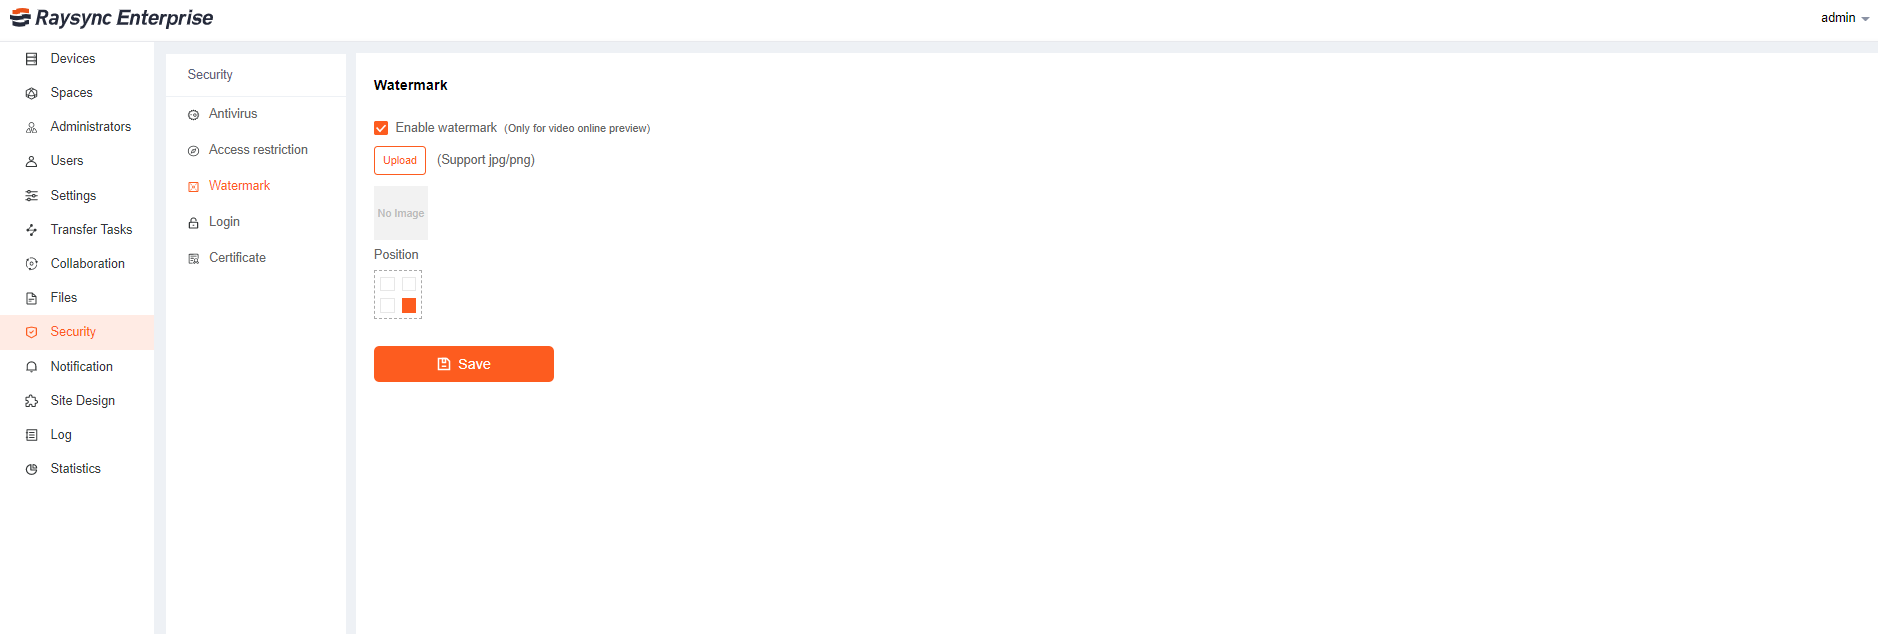
2.Add video preview watermark settings.
3.support the identification of different devices in the external network environment on node management.
4.Add the period setting of the maximum speed.
5.Support national encryption standard.
6.RaySSH supports MacOS client.
7.Add speed unit configuration: Bit/Byte.
8.Add importing accounts by AD domain group.
9.Optimize command line.
10.Fix some bugs.
v5.0.6.8
Updated: 2020-12-28
1.Add client node management.
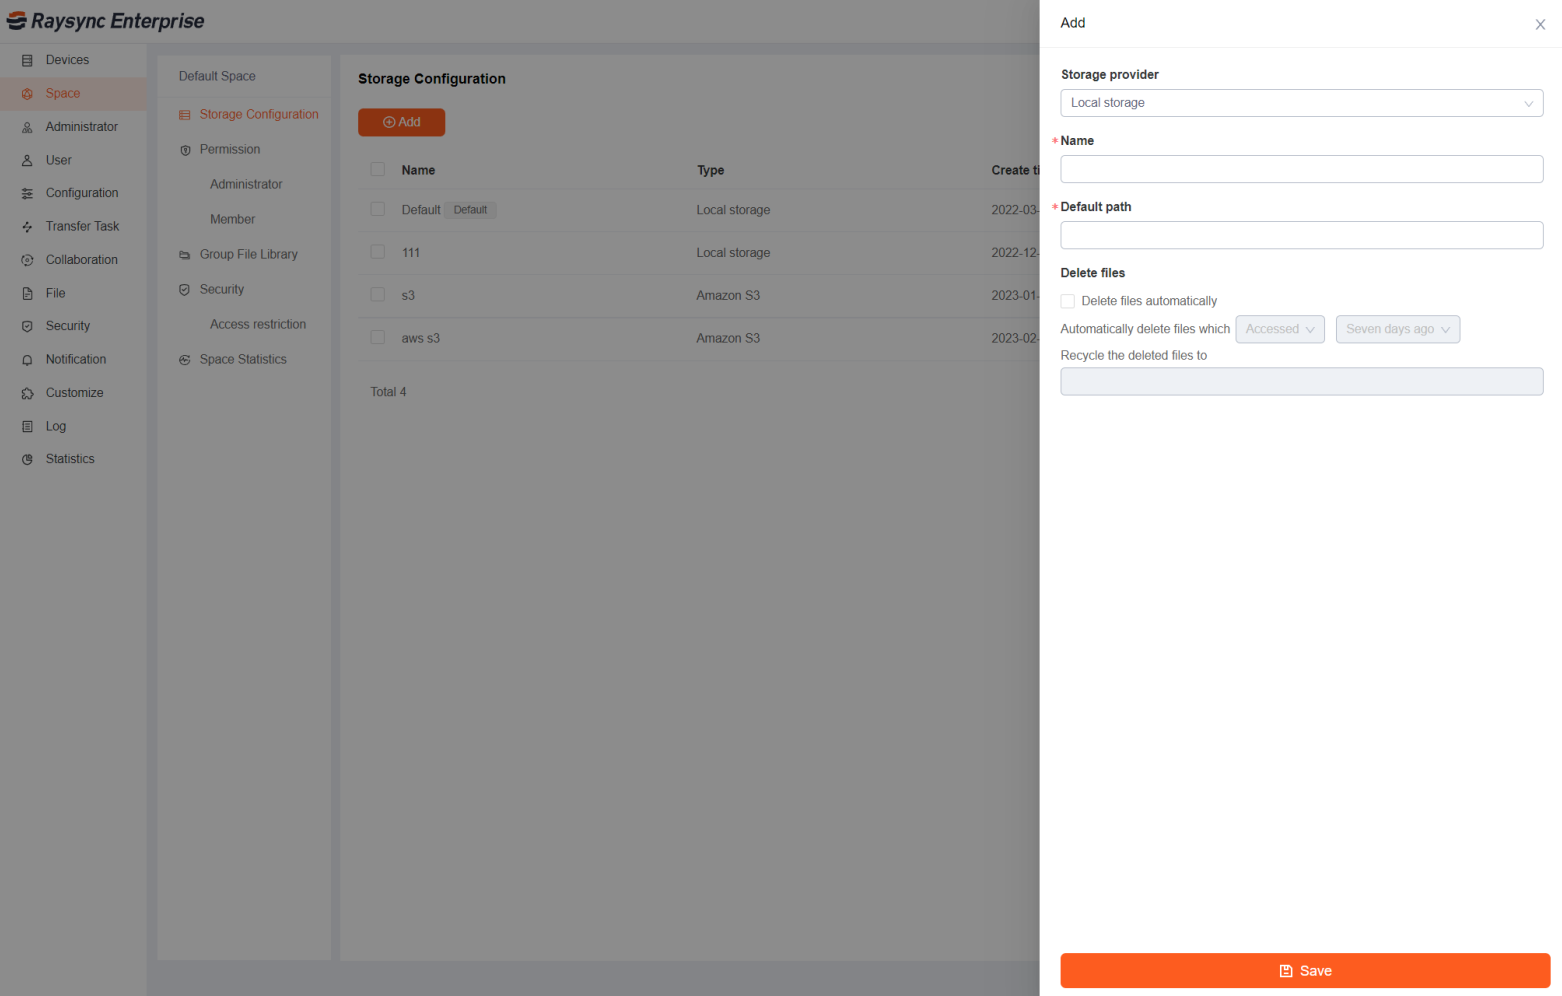
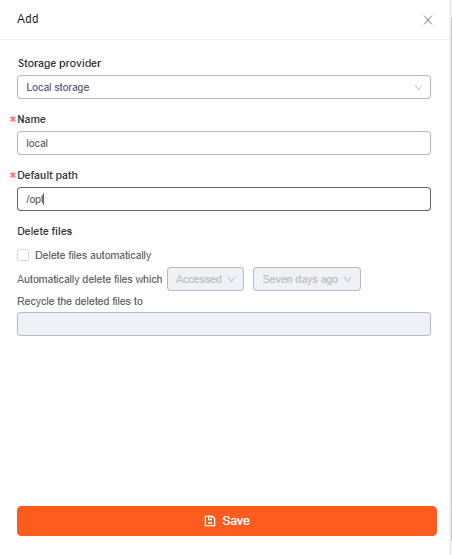
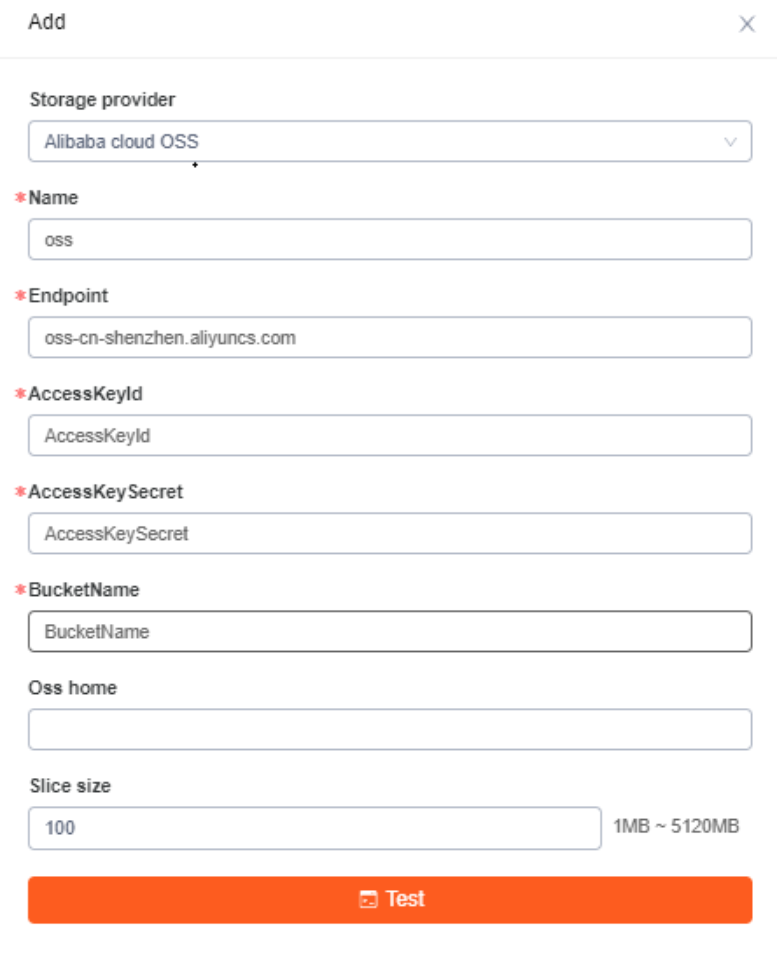
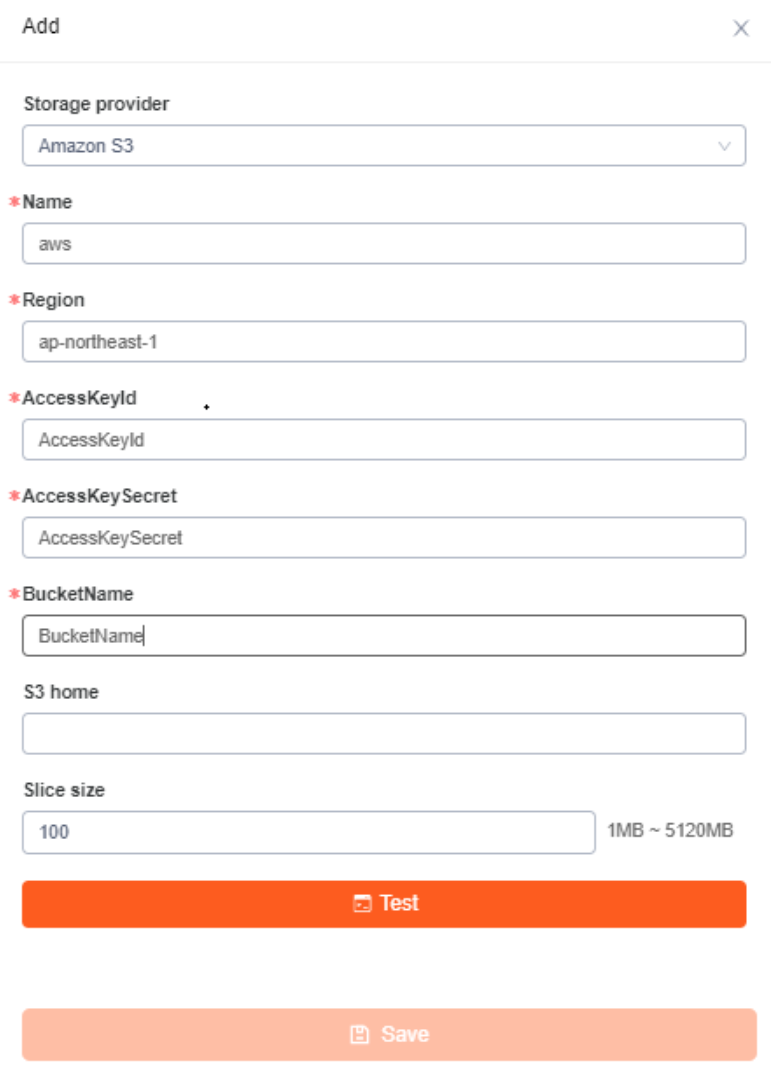
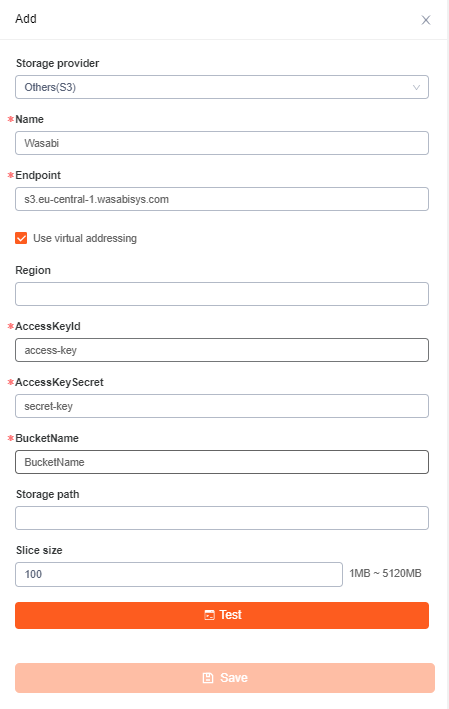
2.Support multiple storage configurations.
3.Supports virtual directories in the user directory.
4.The client supports silent upgrade.
5.Add filter conditions for synchronized files.
6.Add append to the target file for the synchronized files.
7.Add synchronization function in group space.
8.Log-in IP whitelist supports setting continuous IP.
9.Transfer files support blacklist setting.
10.Other bug fixes.
v5.0.5.8
Updated: 2020-11-02
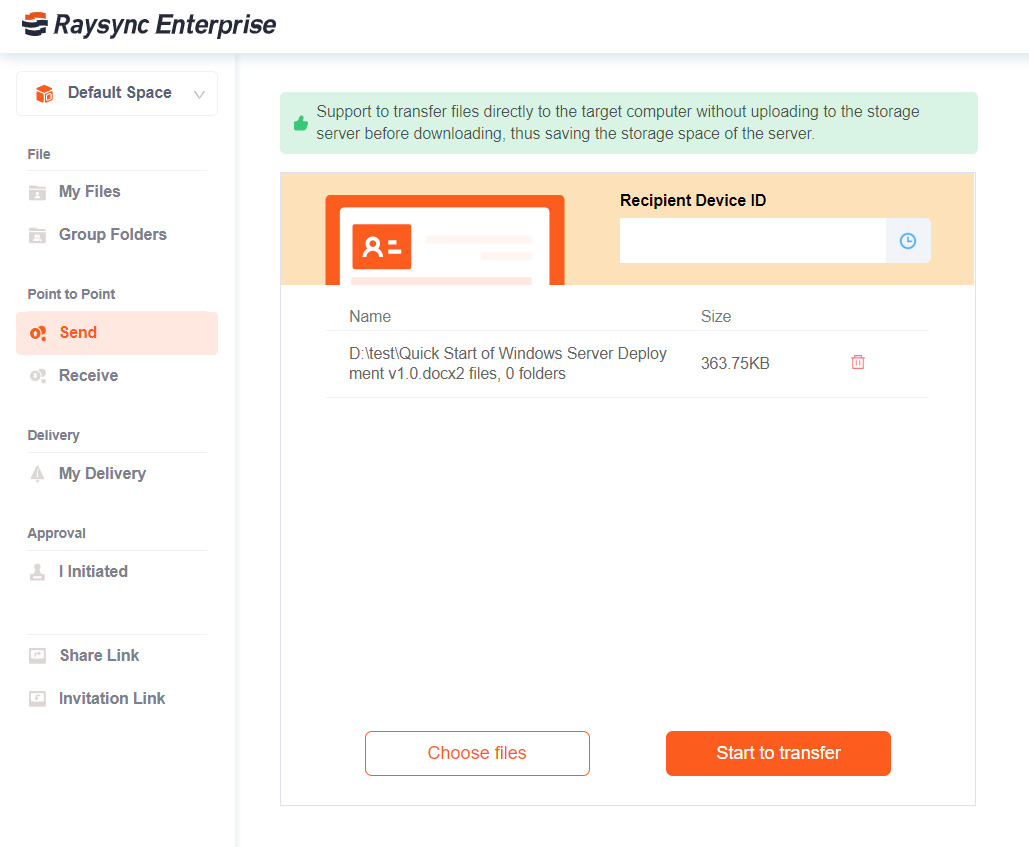
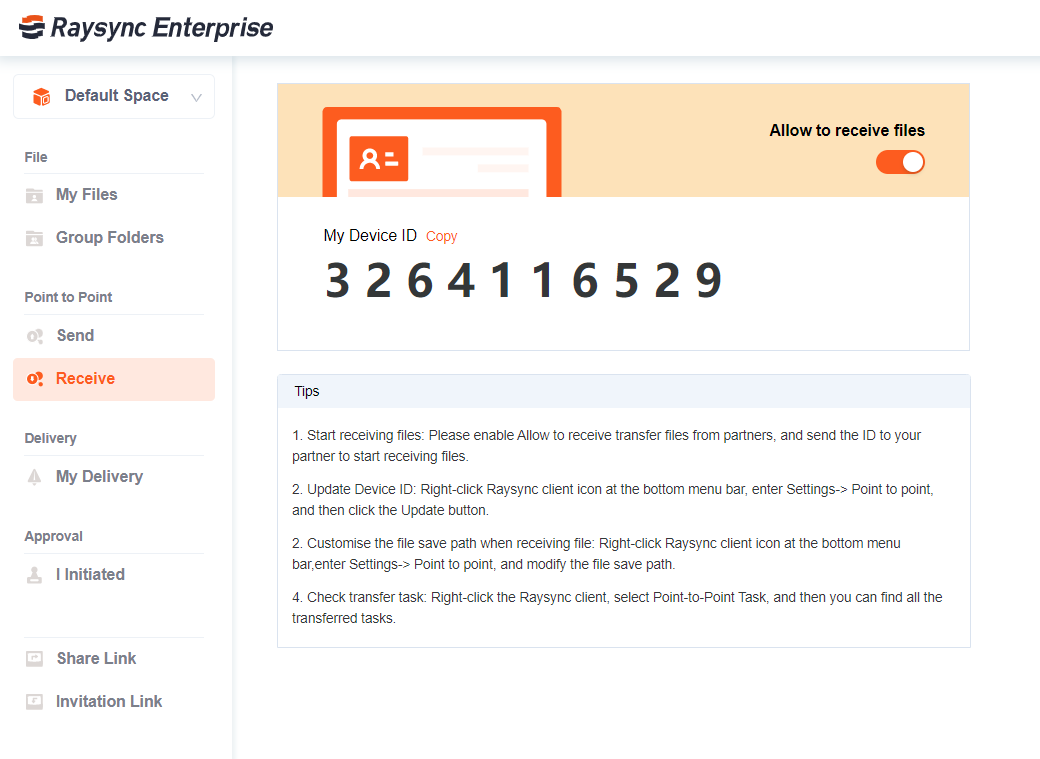
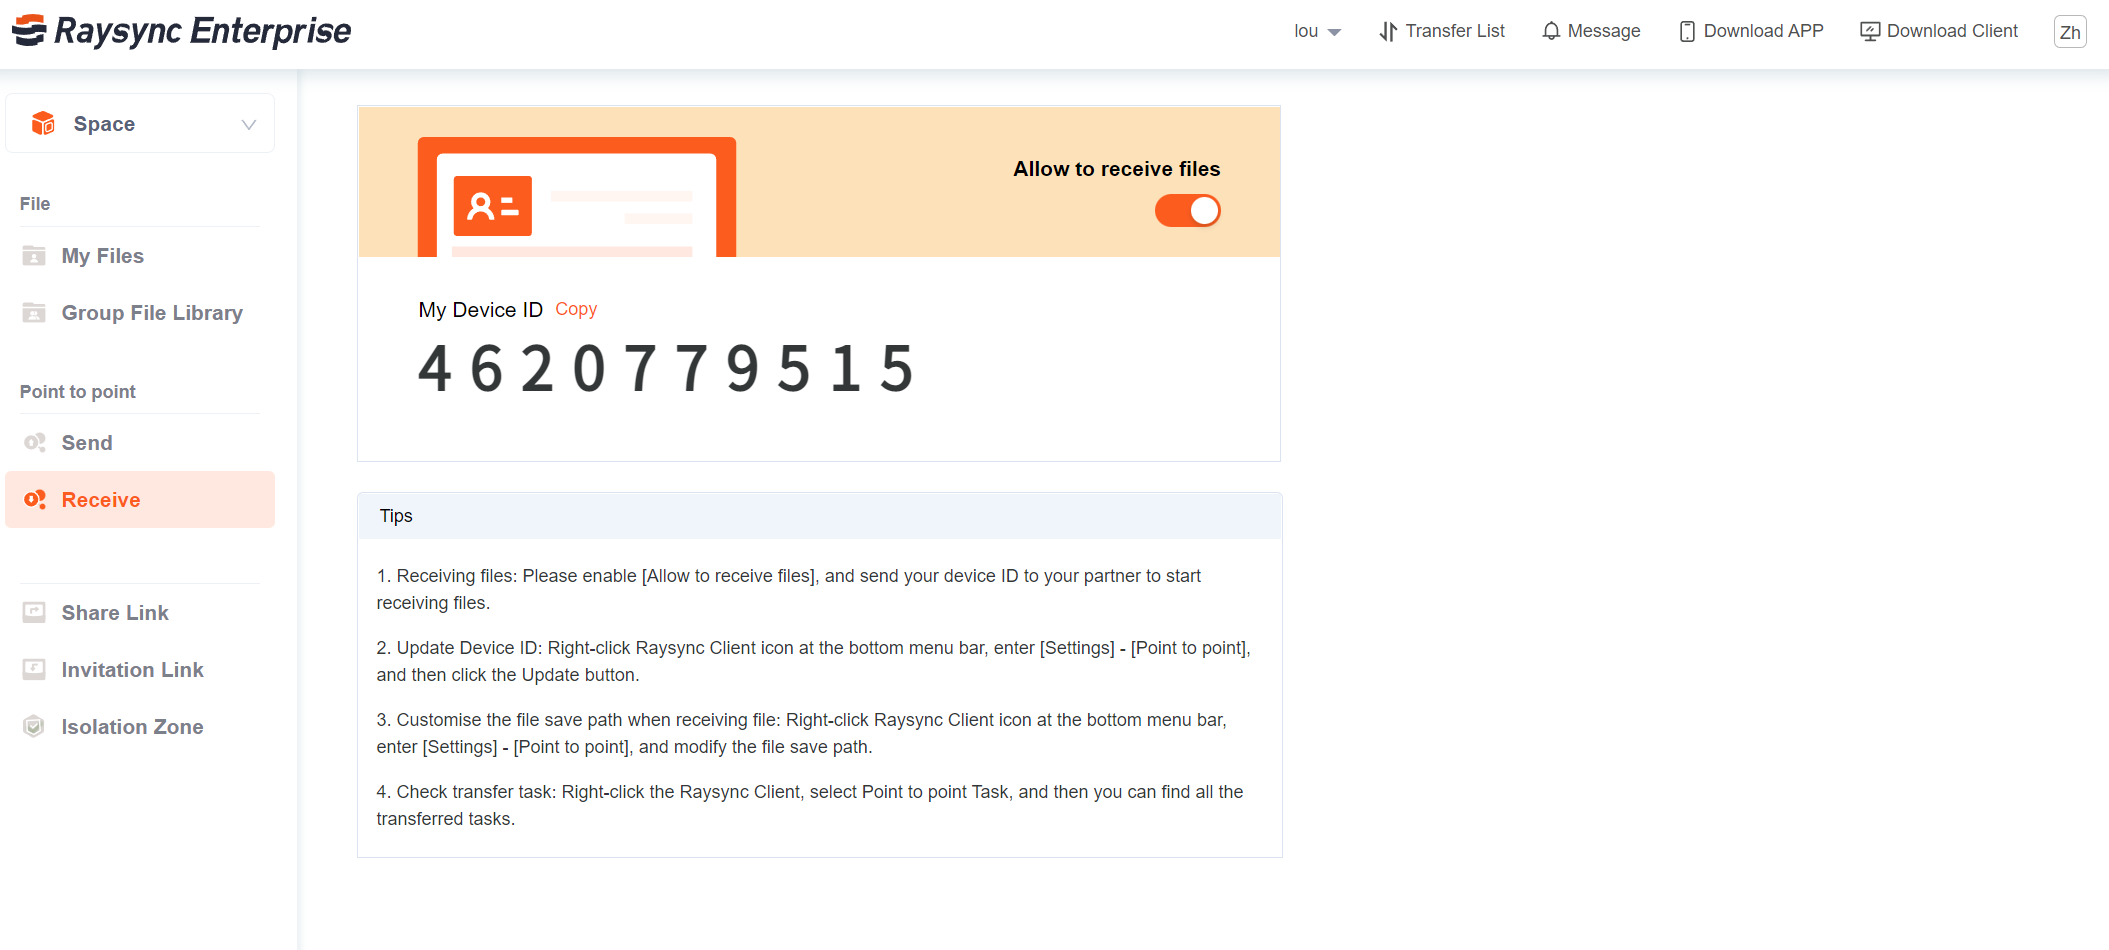
1.Brand new point to point transfer function, files can be transferred between Raysync clients directly without loading on the server, which is only transit data volume.
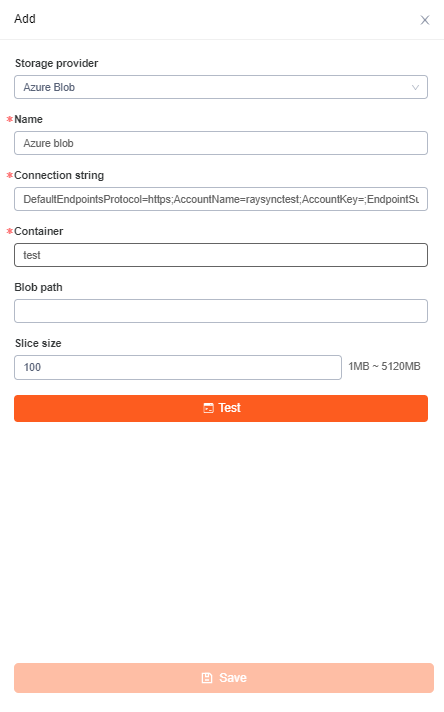
2.Object storage adding support Google Azure blob.
3.Raysync client UI improvement.
4.Support administrator setting batch set default permissions on side third party authentication user.
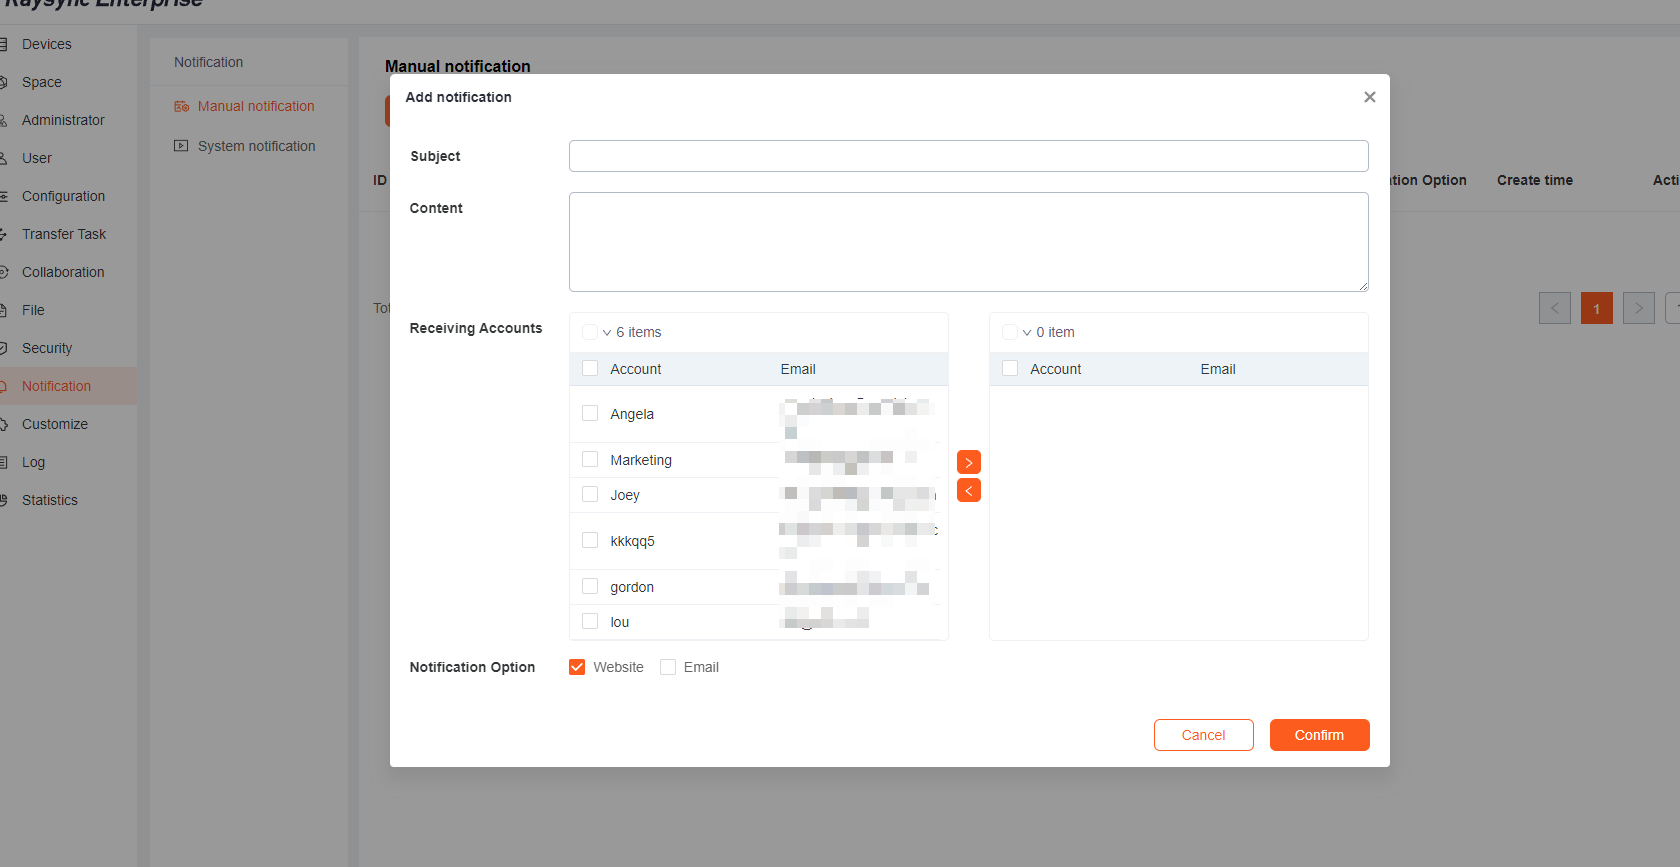
5.New feature on the administrator of sending a notification to users, including: A. Send notifications from the website. B. Send notifications from email.
6.Raysync client stays minimize when start-up.
7.The signature of the mail notification in the admin console can be self-defined according to the company name.
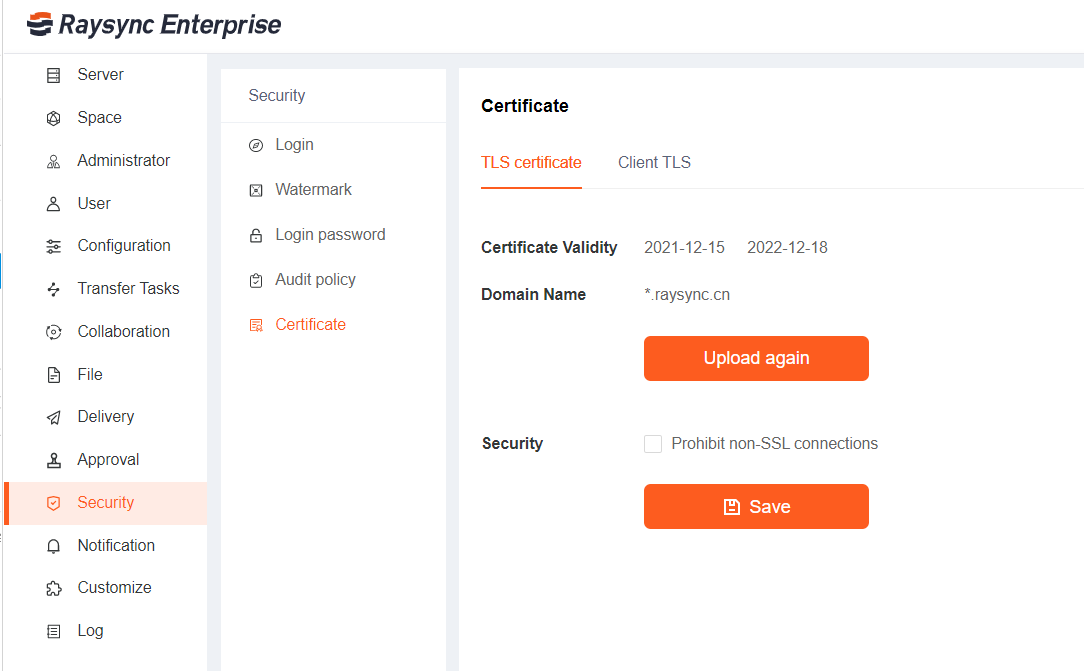
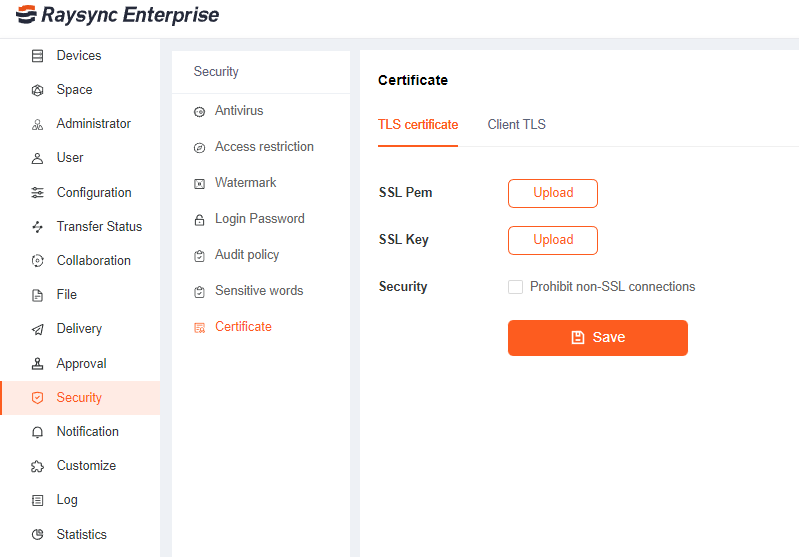
8.Add the validity and invalidity option to the TLS certificate page in the admin console.
9.Change password to optional in Raysync client mailbox configuration.
10.Raysync client supports mailbox login.
11.The online and offline status of the sub-account is visible now on the user management page of the admin console.
12.The IP whitelist in the admin console supports continuous segments. For example, IP from 192.168.0.1 to 192.168.0.100, can be written as 192.168.0.1-100.
v5.0.4.8
Updated: 2020-10-30
1.Add the button of upload file or folder when the client is connected with TCP.
2.Add default enable hash check and default enable encrypted transmission on the administrator.
3.Add the option to prohibit non-SSL connections on the administrator.
4.Default Raysync client automatically run at startup.
5.Change the client to priority TCP transmission.
6.The administrator displays the space capacity and used space of all disks on the Raysync server.
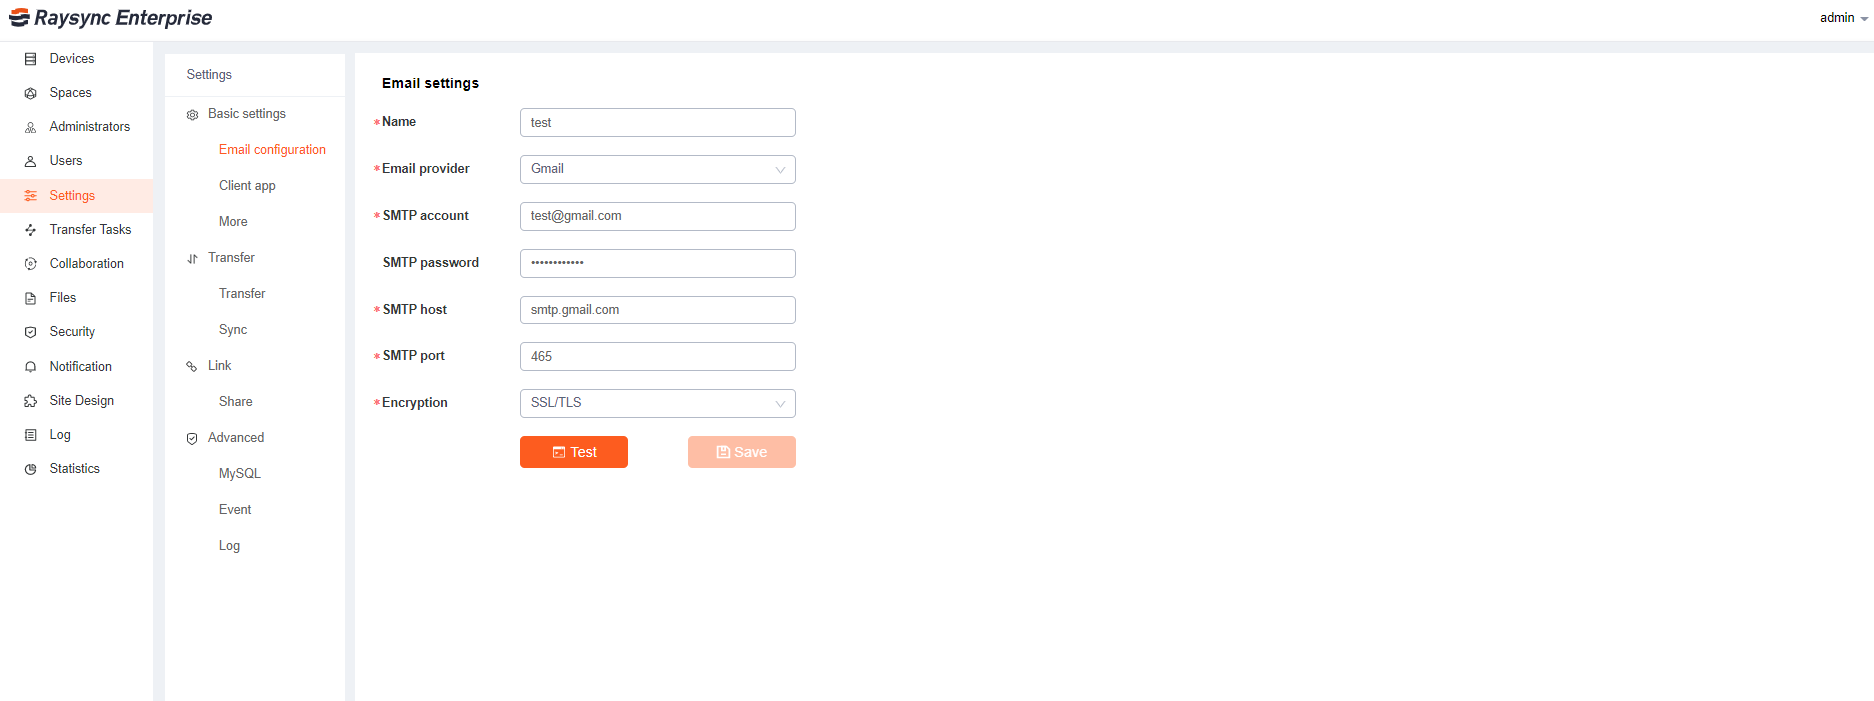
7.Add test button on the administrator in mailbox configuration.
8.Add common mailboxes SMTP to administrator mailbox and three-party authentication mailbox configuration.
9.Support administrator mailbox SMTP and STARTTLS encryption docking.
10.The administrator can control whether the client chooses to send the notification with the mailbox configured by the client.
11.Display users number of License control on the administrator.
12.Add IP white list to the user account on the administrator.
13.Optimize email format verification.
14.Transmission client UI optimization.
15.Administrator control the TCP transfer file size limit.
16.Other bug fixes
v5.0.3.8
Updated: 2020-10-30
1.Adapt to the Dark mode display of MacOS.
2.Update the MacOS logo icon.
3.Add third-party Http(s) authentication to the Raysync management console.
4.Support using wildcards to upload and download files under command line mode 5.Support moving files under command line mode.
6.Support specifying the modification of the target file name under command line mode.
7.Support three transmission protocol configurations in Raysync management console: UDP/TCP automatic selection (how many milliseconds to use TCP), Only UDP transmission, Only TCP transmission, Default.
8.Synchronization tasks support two-way synchronization.
9.Optimize UI for sharing downloads and invitations to upload pages.
10.Optimize UI for Software plugin download prompt window.
11.Optimize UI for management console.
12.Support rsync download verification: when downloading files, if the download directory has a file with the same name, it will be compared with the file on the server, the server only sends different data for download.
13.Add "Import Authentication account" button to LDAP authentication. After user configuration completes LDAP information, the account in LDAP can be actively imported to the Raysync server.
14.Support the home directory set some directories invisible to Raysync users.
15.Fix Other bugs.
v5.0.2.8
Updated: 2020-10-30
1.The web supports uploading and downloading files without starting client Raysync/Pro/Enterprise distinguishes the front-end display according to different licenses.
2.Support the librsync algorithm to check file changes.
3.IOS product development.
4.Raysync software supports license based on traffic comsuption.
5.Online and offline licenses support a specified number of accounts.
6.Internationalization of shared mail.
7.Transmission log display by pages.
8.Fix Other bugs.